You are what you eat. We discuss the double standards of smokehouse processing emphasizing high quality ingredients but less than quality smoking methodology.

You are what you eat. We discuss the double standards of smokehouse processing emphasizing high quality ingredients but less than quality smoking methodology.

Food & Smokehouse Processing Double Standard?

listen to our blog


Self-disclosure here. I work for a USA cooking and smoking wood company that has earned recognition for its commitment to manufacturing quality products specifically suited for many culinary professions, trades and interests. Even though not required to do so, the company treats its entire product line as food additives. This is an important point for my following observations.

I’ve always been especially impressed how reputable food processors and manufacturers accept, follow and even exceed many of the numerous public regulations in place to provide consumers with safe and healthy food products. For the most part our nation’s food industry operates from a philosophy that maximizes consumer protection by prioritizing food safety. Clearly, we’d be in a world of hurt if it didn’t! In relation what I’ve come to understand with food involved with some smokehouse processing operations, I’m really confused.

Smokehouse Processing? Here’s my dilemma- A Double Standard?

Recently, I tuned into a very popular realty television program which showcases “dirty” jobs- I think you know the name. Maybe you’ve even seen it. Like most other episodes, this show highlighted a series of tough job tasks, performed by hardworking employees. This episode dealt with all food processing elements of a very high quality, perishable specialty deli meat item- Lebanon bologna.

It’s impressing that the company, for over 100 years, goes to great heights in sourcing only the best ingredients. Its processing methods seemed to be top notch. Except a few of the techniques shown in the latter stages of the show highlighting smokehouse operations. At first it was disturbing to see that the main source of smoking wood is wood slabs with bark on considered to be “mill waste material.” If that wasn’t enough, I couldn’t believe when a worker demonstrated their process of generating smoke in the smokehouses. Step #1- douse a rag with kerosene, light it and kick it in to the burn pit of the smokehouse. To me, the very defining aspect of this company’s high-quality food product, smoked bologna, has been denigrated with a cheap, uncleaned and potentially harmful fuel source and an ignition process that is archaic and potentially harmful.

For the life of me, I can’t truly understand why a company that has been in business since 1902 and is apparently known in large markets for having the very best ingredients to make its consumable food products would revert to a smoking operation that involves waste wood being ignited with nearly the same petrochemicals that fuel the likes of a diesel locomotive? Given the residuals of burnt petrochemicals, I’m not sure I’d ever want to eat any of their smoked deli meats.

You Are What You Eat

So, I guess the adage of you are what you eat apparently doesn’t have the same meaning with this company. It appears their smoking method hasn’t evolved much beyond the same dirty way done 100 years ago, before health risks came to the forefront. When considering that smoking methods are a big part of their overall food products, I can’t help but think that a double standard is in place with the consumer to suffer.

Purchase Products:

Smoker Logs

More Related reading on "What Wood for Smoking" and other great smoking and grilling tips and techniques

More Related reading on “What Wood for Smoking” and other great smoking and grilling tips and techniques

Additional reading:

-WOOD SUPPLIER- ARE YOU GETTING WHAT YOU PAID FOR?

-BEYOND PRICING: THE TOP THINGS TO CONSIDER WHEN PURCHASING COOKING WOOD

-TO BARK OR NOT

Dr. Smoke- <em>"Consistency is important with food processing and smokehouse operations."</em>

Dr. Smoke- “Consistency is important with food processing and smokehouse operations.”perfect steak!
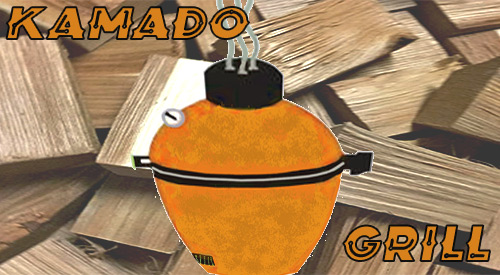

Our Forest Fresh Hardwood is a perfect fit for any ceramic smoker and grill.

Our Forest Fresh Hardwood is a perfect fit for ceramic smokers and grills.

Forest Fresh Hardwood is a perfect fit for ceramic smokers and grills. Share on X

Listen to the audio of this blog


For those that have followed us for years, you know we are proud that almost from the start of our Company, we were committed to providing a guide for equipment to culinary wood product match. We refer to our guide affectionately as Match Your Cooker.

In this article, we are covering our recommendations for ceramic and komado style grilling equipment; these are grills that are made from ceramic, clay, terracotta or crushed lava rock that allow the grill to reach extremely high temperatures – usually at or above 750°F! They are also capable of using charcoal and wood either independently or in combination.

As there are always new equipment lines and models released, our plan is to provide regular updates on this listing. We also encourage you to send us a message when you don’t see a manufacturer or model listed to ensure it is added to the list (email drsmoke@smokinlicious.com).

For now, we introduce you to our wood master’s guide to SmokinLicious® culinary woods for ceramic and komado grills.

Single Filet Wood Chunks for Ceramic Smokers & Grills

The following equipment/models would be suitable for the SmokinLicious® Single Filet Wood Chunks as the charcoal area allows for larger wood pieces:

Big Green Egg models: 2XL, XLarge

Char-Griller Akorn model: ceramic kamado

Grill Dome® models: XL

Kamado Joe Big Joe™ 24”

Komodo Kamado® 32” Big Bad

Louisiana Grills K24

Primo Ceramic Grills models: Jack Daniel’s Edition Oval XL 400, Primo Oval XL 400

Double Filet Wood Chunks for Ceramic Smokers & Grills

The following equipment/models would be suitable for the SmokinLicious® Double Filet Wood Chunks to maximize oxygen flow:

Bayou Classic Ceramic Charcoal Grill

Big Green Egg models: Large, Medium, Small

Blaze 20-inch Cast Aluminum Kamado Grill*

Broil King® Keg models: Keg™ 5000, Keg™ 2000

Cal Flame® Kamado Smoker Grill

Caliber Pro Stainless Steel Kamado Grill*

Char-Griller Akorn: models: Kamado and Kamado Jr.

Char-Broil Kamander® Charcoal Grill

Coyote Asado Ceramic Grill

Gourmet Guru Grill Ceramic Kamado

Grill Dome® models: XL, Large, Small

Hanover® 19-in. Ceramic Kamado Grill

Kamado Joe models: Classic II™ 18”, Big Joe™ 24”, Stand-Alone™, Joe Jr.™

Komodo Kamado® models: 32” Big Bad, 23” Ultimate, 21” Supreme, 19” Hi-Cap Tall, 19” Hi-Cap Table Top, 16” Hi-Cap Table Top

Louisiana Grills models: K13, K18, K22, K24

Monolith Grills BBQ Guru Edition models: Classic, Le Chef

Pit Boss Grills models: K22 Ceramic Charcoal Grill, K24 Ceramic Charcoal Grill

Primo Ceramic Grills models: Primo Oval LG 300, Primo Oval JR 200, Primo Kamado All-In-One

Vision™ Grills models: XL

Grande Sapore® Wood Chips for Ceramic Smokers & Grills

The following equipment/models would be suitable for the SmokinLicious® Grande Sapore® Wood Chips for those who prefer a wood chip product rather than chunks:

Bayou Classic Ceramic Charcoal Grill

Big Green Egg models: MiniMax, Mini

Blaze 20-inch Cast Aluminum Kamado Grill*

Broil King® Keg models: Keg™ 5000, Keg™ 2000

Cal Flame® Kamado Smoker Grill

Caliber Pro Stainless Steel Kamado Grill*

Char-Griller Akorn: models: Kamado and Kamado Jr.

Char-Broil Kamander® Charcoal Grill

Coyote Asado Ceramic Grill

Gourmet Guru Grill Ceramic Kamado

Grill Dome® models: XL, Large, Small

Hanover® 19-in. Ceramic Kamado Grill

Kamado Joe models: Classic II™ 18”, Big Joe™ 24”, Stand-Alone™, Joe Jr.™

Komodo Kamado® models: 32” Big Bad, 23” Ultimate, 21” Supreme, 19” Hi-Cap Tall, 19” Hi-Cap Table Top, 16” Hi-Cap Table Top

Louisiana Grills models: K13, K18, K22, K24

Monolith Grills BBQ Guru Edition models: Classic, Le Chef

Pit Boss Grills models: K22 Ceramic Charcoal Grill, K24 Ceramic Charcoal Grill

Primo Ceramic Grills models: Primo Oval LG 300, Primo Oval JR 200, Primo Kamado All-In-One

Saffire Grill and Smoker**

Vision™ Grills models: XL

Minuto® Wood Chips for Ceramic Smokers & Grills

The following equipment/models would be suitable for the SmokinLicious® Minuto® Wood Chips:

Saffire Grill and Smoker

We hope you view this guide as a helpful resource for selecting the perfect culinary wood for your equipment. As always, our Wood Guide Team is ready to answer your additional questions and further assist you with the perfect grilling and smoking experience!

* Although considered a komado grill, this brand is not made with any ceramic, clay, terracotta, or crushed stone.

** This brand is only designed for use with wood chips and includes a patented smokin’ chip feeder.

SmokinLicious® products used in this blog:

Wood Chunks- Double & Single Filet

Wood Chips- Grande Sapore® & Minuto®

More Related reading on this subject- More Related reading on this subject of cooking & Grilling with wood

Ceramic smokers & grills are very popular. For more reading on how these units can best work with wood as a food flavoring element, check out these articles:

-WOOD BURNING PIZZA OVENS: THE WOOD MASTER’S GUIDE

-TOP TOOLS TO OWN FOR CHARCOAL GRILLING

-THE WATER PAN EXPLAINED FOR GRILLING & SMOKING

Dr. Smoke produces great products for all ceramic smokers and grills.

Dr. Smoke produces great products for all ceramic smokers and grills.


Preliminary Test Kitchen Results

The Smokinlicious® Test Kitchen had an opportunity to use the Technique® Cast Iron Pan and Smoker which many of you purchased via QVC. Here are some preliminary findings by our Culinary Team:

➝Use caution when selecting cuts of meat with this cast iron pan! We had purchased a 10 lb. pork shoulder and struggled to get the cover tightly on the pan. Right now, it appears that cuts less than 8 lbs. would be ideal for cooking/smoking/roasting/grilling.

➝I’m sure we were not the only purchasers to be disappointed to read in the Technique® brochure that you should “not try to smoke in the oven” with this unit. Rest assured, Dr. Smoke will see if there is a means of actually smoking in a conventional oven by using low temperature and Liquid Infused Wood Chips /Smokin’ Dust®.
/Wood Chunks with this smoker unit (more on these findings as they become available).

➝ We cooked both a bone-in pork shoulder and bone-in chicken breast. Both cooks revealed great moisture to the meat. We used the recommended medium heat setting on our gas range but found that the cast iron pan radiates a significant amount of heat. Thus, we recommend reducing the heat setting to a low-medium (“3″ if you have a digital setting) on gas units. We also turned the heat off our cast iron pan approximately 20 minutes prior to completing the cooking time in order to benefit from the pan’s ability to generate further heat on its own. Remember, all meat should rest prior to cutting.

➝ There was considerable “rendering” out of the fat drippings into the drip pan. There is significant staining on the stainless steel drip pan so you may want to consider lining the pan with foil or even parchment paper to reduce metal staining.

Smokin’ Dust® Usage: although the dust will render black in this pan, it did give off a tremendous amount of aroma. We used the Smokin’ Dust® dry, about 2 Tablespoons worth, in the center of the smoking pan. This appears to be the correct amount although we did not feel it produced as much flavor to the meat as a conventional smoker.

Wood Chips: we used Wild Cherry Wood Chips (standard grind) in the smoker pan while cooking a bone-in chicken breast on the gas stovetop. The chips also produced significant aroma in the air but we found that they produce much more flavor to the meat. Keep in mind, our chicken breast was just over 2lbs so it fit easily in the grill pan with the cover tightly on. The fact that more flavor was infused in the chicken could be the result of less air leakage than the pork shoulder and the fact the chicken is much more porous allowing for ease in accepting smoke. We used the Wood Chips pre-soaked for 15 minutes in water, then allowed to drip dry before placing in the smoker pan. We used approximately 1 handful and spread them in the smoking pan to allow the drip pan to fit easily in place. Once our chicken was finished, we noted that the wood chips also blackened during the cooking process, much like the Smokin’ Dust®.

At this stage in our testing of the Technique® Cast Iron Pan and Smoker, we feel it is comparable to other stovetop units that we’ve tested. One important difference is the fact that there is no built in thermometer, so you must check the meat with a handheld or wireless thermometer to ensure you remove the food at the proper cooking temperature. Here are some other points worthy of mention:

➝ this is a heavy cast iron pan and all parts of it become very hot
➝ the pan can use some additional seasoning as there is some food sticking occurring with the grill pan
➝ it does take some effort to clean but if you re-season and continue to use the cast iron pan, I would anticipate this to become less of an issue
➝ there is a significant convection occurrence when cooking which produces a very moist product but as mentioned above, you must time the cooking process to ensure no over-cooking

Stay tuned for additional posting regarding this cookware. Our plans are to try the Smokin’ Dust®.
mixed with liquid as well as to try our Woodscuit ® Flavor-Infused products.

Till then, “Bon-Bar-B-Q!”

Donna G


Dr. Smoke- Technique® Cast Iron Pan & Smoker passes the Smokinlicious® kitchen test!

Dr. Smoke- The Technique® Cast Iron Pan & Smoker passes the Smokinlicious® kitchen test with flying colors when using our sized hardwood smoking chips!

More Related reading on this subject- More Related reading on this subject of cooking & Grilling with wood

For more related reading on stove top smoking, check out these articles:

Stove Top Smoked Riccota Cheese Delight

The Easy Method to Make Cold Smoked Cheese

Yum, Yum! – Infusing Wood Smoke Flavor into Brussels Sprouts


Our recap of Smoking-Grilling Wood Selling Terms

The listing of wood selling terms

WOOD SELLING TERMS DEMYSTIFIED

listen to our blog


Package labeling. It is the key to drawing attention to a product, to reduce interest in other similar products, and to make someone buy a specific product. Let’s be honest. Not everything printed on a label necessarily provides ALL the information. Use certain words and an “implied” thought will occur.

When it comes to packaging wood for smoking and grilling purposes, there are a lot of terms floating out there that certainly can be deceiving. Let’s see if I can provide clarity on what specific terms and wording mean when it comes to purchasing wood for cooking, smoking, and grilling. SMOKING-GRILLING WOOD SELLING TERMS

WOOD SELLING TERMS:

100% Natural

The intended meaning of 100% natural implies that it has not been touched by human hands. As such, with wood, this would refer to the fact that a tree is a plant designed by nature and other than cutting the tree down, it is not modified in any way.

However, we do know that trees, like flowers, can be manipulated when it comes to their genetics. Genetically modified trees are quite common in the growth of orchard woods, especially those seeking to develop dwarf varieties or specific blossom colors or hybrids. Keep in mind, genetically modified trees will have a reduction in the lignin compound which is responsible for the flavor the wood gives when it burns and gives off smoke vapor.

Currently, it is not legal to genetically modify forest trees but there is a lot of allowances when it comes to plantation and orchard/nursery trees, which often have chemicals applied to make up for the weak lignin which makes the wood susceptible to decay and pest infestation.

Kiln-Dried

Wood that is dried in a closed chamber in which the temperature and relative humidity of the circulated air can be controlled is called “kiln drying”. There are three types of Kiln Drying methods: low-temperature drying which is below 130° F, conventional electric dehumidification drying, and conventional steam-heated drying which have temperatures up to 180° F.

For the most part, when a smoking or grilling wood product lists “kiln-dried” on the packaging, it does not state the type of method being employed. Also, many that use this term do so without providing any information on what compliance record keeping is in place to attest that they are doing what they say.

There is one company who states that they adhere to the protocol designed by the United States Department of Agriculture (USDA) but quote a core temperature and length in minutes of the heating process that is not the standard written by the USDA. Their compliance agreement is provided by the state in which the business is located, which may have a different standard in place than the USDA.

Air-Dried

The process of drying green wood by exposure to prevailing natural atmospheric conditions outdoors or in an unheated shed is known as air drying. There are three dominate Air Drying methods: open yard, shed, and forced-air shed. The first is not held in high regard as the wood is exposed to all the elements making it the longest method of depleting moisture content from the wood. The second has the addition of a roof covering to maintain a precipitation-free environment, while the third option is mostly used by traditional lumber companies as it produces quicker results meaning products can be sold quicker.

Here’s the issue when you see “Air-Dried” on package labeling of grilling and smoking woods: you don’t know what method is used and no one is saying how long the wood was air-dried for. You don’t know how old the wood is, what method of air drying was employed, how long it took to “dry” it, and you likely won’t know what moisture content is left in the wood. Remember, dry out a piece of wood too far, and it is simply firewood designed for heat output only.

Naturally Cured

This is another term that floats out on the packaging that implies it is different from air drying techniques. It is not different.

Naturally curing wood means the wood is stacked in a manner that allows air to flow around the wood pieces usually in an outdoor setting. It may be left exposed, covered with a tarp or have a roof structure overhead. Naturally curing wood for fireplace use is recommend for 365 days but there is no benchmark for the timing used to dry the wood for the use of smoking or grilling. Some suppliers will use moisture levels of 20-30% as their benchmark but 10% is a large variable in moisture when it comes to wood.

Here is the biggest challenge with a natural curing method: dry the wood too quickly and you will find cracks, splitting, honeycombing, and/or warping. Dry too slowly and the wood will stain and suffer decay. Remember, decay attracts pests as that is what they feed on. SMOKING-GRILLING WOOD SELLING TERMS

Selecting

I won’t lie to you – there are a lot of choices out there for wood. How do you go about selecting from the limited information on the packaging?

Some decisions you’ll have to make on your own: do you want to cook with bark or do you find that bark indeed fluctuates the temperature of your equipment too much? Do you want to use a kiln-dried product even if you don’t know what temperature and for how long that product was heated? Would you want to use a product that hasn’t had any heat application applied to it meaning there may be pests, larvae, mold, and spores that haven’t been eliminated by a heat process? Do you want to use a product from a supplier that provides no information on the moisture of the wood? Do you want to go with a “natural”, “air dried” product that may have been exposed to anything that could access the wood: animal feces and urine, insects, chemical contaminants from the ground or another source?

In the end, I think the selection can be easy by simply looking at the wood for purity and cleanliness, looking at the packaging for evidence of air exchange meaning its likely not completely dried out and looking at the packaging information for claims that don’t seem to match the product that is packaged inside.

Most of all, you should be able to gain valuable information from any supplier’s website on the wood they are selling to you. If not, be cautious that they may not know anything about the manufacturing process of the wood and/or what is needed in wood to qualify it as cooking ingredient. We hope that our discussion of smoking & Grilling Wood Selling Terms adds clarity to your selection process.


Purchase products:

Wood Chunks- Double & Single Filet

Wood Chips- Grande Sapore®, Minuto®, Piccolo®

More Related reading on "What Wood for Smoking" and other great smoking and grilling tips and techniques

More Related reading on “What Wood for Smoking” and other great smoking and grilling tips and techniques

Additional reading:

-COOKING WITH WOOD YOU SHOULDN’T HAVE TO THINK ABOUT YOUR SAFETY

-Is It Fresh? Here’s Why You Need to Know

-WHAT WOOD TO USE FOR SMOKING: A PRIMER

-HOT TREND MAY NOT BE THE SAFEST BET

SMOKING-GRILLING WOOD SELLING TERMS

Dr. Smoke- SMOKING-GRILLING WOOD SELLING TERMS

Dr. Smoke- SMOKING-GRILLING WOOD SELLING TERMS


DINING FOR SMILES 6 COURSE DINNER EVENT

DINING FOR SMILES 6 COURSE DINNER EVENT

DINING FOR SMILES 6 COURSE DINNER EVENT

Listen to the audio of this blog

Alliance For Smiles began in 2004 with the mission to repair cleft palate and lip deformities in under-served areas of the world. In fact, over the years, various fund-raising concepts were instituted to offset the costs for highly expensive missions. Most missions are easily over the $300,000 level in donated surgical and treatment protocols.

Why Portville, NY

Chef Carl Vahl, Board of Directors member for Alliance For Smiles, brought attention to his local community of the efforts for this organization by presenting the Dining For Smiles event, an event which featured a six course gourmet dinner for 18 privileged guests. SmokinLicious® had the honor of preparing many of the components of the meal over a wood fire.

When hosting an intimate event like the Dining For Smiles dinner, organization and assignment of duties are key. As such, Chef Vahl utilized the full volunteer staff regardless if the members had experience in a kitchen or not. The event featured a wonderful six course dining experience with the following featured:

  • Tuna Crudo- Course One
  • Butternut Squash Soup- Course Two
  • Seasonal Salad- Course Three
  • Handmade Lobster Ravioli with Brown Butter Sage Sauce- Course Four
  • Wood Fired Lamb & Canadian Salmon served with Jasmine Rice and Wood Fired Brussels Sprouts- Course Five
  • Panna Cotta with Fresh Mango- Course Six

Additionally, wine pairings were presented with each course revealing an assortment of sparkling, rosé, red and white wines.

The Courses

The formal table is set for about to be pampered 18 guests!

As the 18 guests arrived and were seated at one of two tables, the first course is served – a Tuna Crudo featuring Sushi-grade tuna nestled in a Wasabi avocado cream, topped with pickled onion and finished with candied lemon peel. This course was served in a martini glass and accompanied by Prosecco, an Italian sparkling wine considered the Italian champagne.

The second course of the Dining For Smiles dinner featured roasted organic butternut squash with the subtle flavor of White Gords was the serving bowl for the Butternut Squash Soup. The chef prepared the soup and the support team cut the tops on the gords. nutmeg and topped with a crisped sage leave and touch of maple syrup. My favorite part of this dish was its serving bowl – a charred mini white gourd. By retaining the top of the gourd, you can ensure that the soup stays hot until its placed in front of the guest. Each gourd was hand cut and charred to ensure no off flavors transferred from the gourd to the soup. Just a perfect vessel for this scrumptious soup.

Following the first two courses of Tuna Crudo and Butternut Squash Soup, the third course was the salad course featuring mixed greens of green and red leaf lettuce, spinach, and frisee; apple slices; candied walnuts; ember cooked red pepper slices; and a fresh vinaigrette. This course helped to balance the stomach in preparation for the upcoming courses that would be richer and more substantial. Paired with our salad course was a full-bodied chardonnay.

Chef prepared homemade lobster ravioli for the fourth course. This was a decadently rich dish featuring a brown butter sage sauce and fresh grated Parmigiano-Reggiano cheese on top. This course was paired with a beautiful Rosé, with both items being well received. As a matter of fact, I don’t recall a plate coming back to the kitchen that wasn’t completely clean!

Main Course for the DINING FOR SMILES 6 COURSE DINNER EVENT

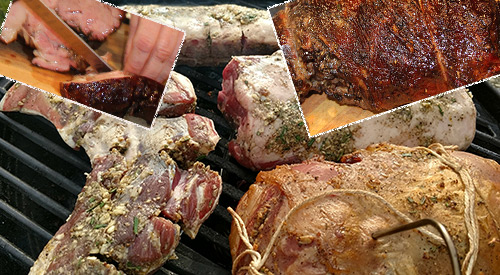
Halal leg of Lamb seasoned with garlic, rosemary, thyme and roasted over cherry wood for 2 hours then rested before slicing. Served medium rare Now, it’s time for the main course – course number five! First came the proteins. We produced a wood-fired leg of lamb and lamb rib loins cooked over charwood, ash, sugar maple, and wild cherry wood chunks. The wood-fired cooking offered a fabulous color to the meat.

Our Canadian salmon enjoyed cooking over charwood and sugar maple and wild cherry wood chunks. A combination of orange butter, olive oil, and smoke vapor produced that beautiful golden skin. After resting a while, the lamb and salmon were sliced in preparation for full plating.

We start with Jasmine rice topped with wood-fired brussels sprouts and carrot. Next to the plate, a slice of wood-fired lamb and a filet of salmon. Served with a custom mixed wine of Sangiovese and Syrah. Simply a perfect course!

Finally, we’ve reached the end of a fabulous meal – the final course – dessert. Panna cotta with fresh mango, served with a German Reisling,Chef Cal lay’ home made Panna Cotta (italian cooked cream) topped with macedoine fresh Mango the perfect end to a fantastic evening.



A Meal that Stays in Memory

Chef Vahl’s vision for a flavorful, entertaining evening proved to be a realty as these 18 guests can attest to. We are so thankful and honored to have been a part of it.

If you want to donate to the Alliance For Smiles mission, visit www.allianceforsmiles.org and view all the lives that have been touched by the commitment of so many. Always remember to help others in need in any way you or your company can, just as SmokinLicious® was able to do with this Dining For Smiles event!

Glad we could share our DINING FOR SMILES 6 COURSE DINNER EVENT!

Purchase products:

Charwood

Wood Chunks- Double & Single Filet

More Related reading on this subject

More Related reading on this subject

Additional reading:

-DINING FOR SMILES EVENT PREPARATIONS

-WELCOME TO OUR BRAT PARTY-BRATWURST IN THE ORION SMOKER COOKER

-JUST BECAUSE YOUR SMOKING (FOOD THAT IS!) DOESN’T MAKE IT ALL BAD!

Dr Smoke- "This charity event was wonderful to do because it's such a great cause and makes a tremendous difference in people's lives around the world."

Dr Smoke- “This charity event was wonderful to do because it’s such a great cause and makes a tremendous difference in people’s lives around the world.”

Smokinlicious is proud to be a F2C company- meaning a manufacuter to Consumer Sales Organization

Smokinlicious is proud to be a F2C company


SMOKINLICIOUS® IS AN F2C

listen to our blog


In today’s age of selling products and services, there are acronyms that are common to marketing and sales strategies. First, there is B2B which refers to business to business relationships. This means that a product or a service is sold from one business to another. An example of each would be windshield wiper fluid being sold to gas stations and attorney services to large corporations.

B2C is shorthand for business to consumer. This is selling a product or service directly to a customer that is not necessarily a business.

Now, you may automatically assume that SmokinLicious® would fall under both these sales types, and you would be right. But there is another acronym you likely aren’t familiar with: F2C.

F2C- Making a Better Connection

F2C refers to factory to consumer or more specifically, manufacturer to consumer. There are many reasons why this is a plus to both businesses and consumers doing business with a specific manufacturer. Let’s examine the major advantages from the perspective of doing business with SmokinLicious®:

Advantage #1 Details

As the manufacturer of all the products sold under the brand SmokinLicious®, we can provide the specifics on where the hardwood comes from, the age of the wood, the handling of the product, the treatment the wood is exposed to, and the details on packaging. You don’t have to wait on answers to your product questions like with a supplier who is simply a re-seller of the wood. We give answers immediately!

Advantage #2 Intimate Knowledge

When you are committed to manufacturing a specific product, you tend to know that product thoroughly. For SmokinLicious®, that equates to us knowing not only about wood fired cooking techniques like hot smoking, ember cooking, and cold smoking but we know the science behind hardwood; molecular biology of the wood as well as for combustion. We know why smoke gives flavor and how to respect and control it.

Advantage #3 Availability

We aren’t simply selling a product to move it out of inventory. As a manufacturer, we are committed to answering questions whether on email, via phone, or social media platforms. No, we don’t operate the phones 24/7. But we do get back to anyone who contacts us, usually within 24 hours. We are available to everyone!

Advantage #4 Passion

Sometimes I feel the word “passion” is overused but that word really does describe the people who make up the SmokinLicious® Team. We are passionate about cooking with fire and the smoke it produces. We simply love to offer our perspective on cooking with wood. Remember, just because someone sells a specific product doesn’t mean it was a dream of theirs. It simply may be the “thing” to do with no real commitment. Who wants to commit to that type of supplier!

Advantage #5 Skilled

We have a test kitchen/patio and we use it – all the time! That’s the only way you can know all the different applications for the product we manufacture and sell. We possess the skills to guide you on what might be causing bitter flavors, poor color, equipment failures, and so much more. Plus, we offer daily postings on recipes, tips, techniques, and the science behind cooking with fire and smoke.

Advantage #6 Global

We can be everywhere because we know our commodity and the regulations that relate to our products. We don’t cut corners because we are as concerned about our environment and forests as the agricultural agencies around the world. You won’t ever need to worry about having your supply cut off because a regulation or law wasn’t followed.

Advantage #7 Exclusivity

You’re purchasing smoking wood to cook with. That means, food is exposed to the wood’s components. Don’t you want assurance that it’s clean? We only sell hardwoods for cooking and culinary use! That’s it! We don’t take waste product from some other wood process and sell it off under a new label or brand. We don’t buy woods from anyone who can’t document on paper where the smoker wood is from and if exposure to chemicals is possible. SmokinLicious® is exclusively a culinary wood product!

These are just some of the advantages to working directly with and purchasing directly from a manufacturer, or F2C. When you want assurances that any question you have can be answered, that any product need can be met, that your equipment will be protected, then seek a direct manufacturer first and eliminate a middle man that may only be in it for dollars and cents. Or one day you could simply find they’re no longer in business or they no longer can ship product throughout North America or other continents, leaving your Company with a big problem.

Purchase products:

Wood Chips- Grande Sapore®

Wood Chunks- Double and Single Filet

Smoker Logs- Full & Quarter Cuty

More Related reading on "What Wood for Smoking" and other great smoking and grilling tips and techniques

More Related reading on “What Wood for Smoking” and other great smoking and grilling tips and techniques

Additional reading:

-SMOKIN’ DUST®: A SPICE FOR YOUR EQUIPMENT

-WHAT’S IN THE SMOKINLICIOUS® WOOD CHUNK BOX?

-WHEN A FLOP COULD HAVE BEEN A SUCCESS!

Our primary focus is on the consumer of our products. Our culinary team provides support to all chefs!

Our primary focus is on the consumer of our products. Our culinary team provides support to all chefs!

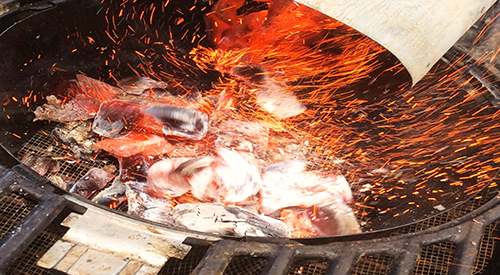
Building the perfect fire for cooking! Our chimney starter full of flaming hot charcoal being poured into our kettle grill.

Building the perfect fire for cooking! Our chimney starter full of flaming hot charcoal being poured into our kettle grill.

Listen to the audio of this blog

In Part I of our series on lighting an outdoor fire for cooking, I addressed fire production for the outdoor fireplace or fire pit cook, known as open fire appliances. In Part II, I’ll address the needs for kettle, drum and box grills’ fire set up.

The Wood-Fired Environment

There are many choices in equipment for working with a wood fire but each has different material components that determines how much work would be involved to cook on the unit. Here is the primary point when you’re selecting equipment for live fire: how will you cook on that equipment?

If your plans are to always do indirect cooking whereby the source of heat (fire, coals) will be on one side and you will cook on the non-heat side (in my opinion, the preferred method for all cooking), then know that most any equipment selected will work. However, the time for the equipment to heat up may play a factor, as the heating time is directly related to the insulation of the grill. Plus the amount of radiant heat it can hold.

If a unit is manufactured from heavy metal, brick, clay, or ceramic housing, then it will perform exceptionally by giving radiant and retained heat. Why is that important? Because producing retained and radiant heat means less fuel consumption and even cooking results.

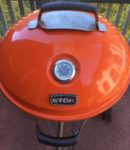
Our orange Stok kettle grill was used for our demonstration.The Kettle Grill

For thinner material grills like the traditional kettle grill which are very popular, low cost, and preferred

by many, you can compensate for the potential heat loss and improve efficiency by adding fire bricks to the walls and floor of the grill. You will simply start your live fire directly on the fire bricks rather than the charcoal grate. Fire bricks will work well in any grill that could improve on its insulation.

Drum/Barrel Grill

The overall cooking space in a drum/barrel grill is larger than that of a kettle grill. However, just like any metal material, there are different grades so quality can be variable. Same rule applies to these grills: if the insulation is not great, add fire brick to improve the performance.

Box Grills

These units are traditionally made of high heat metal with a deep, metal charcoal pan that includes grid and vents. A grilling grate is suspended above and there often is a lid to the unit.

Fire Set Up

As I’ve stressed before, a good fire needs 3 elements: fuel (wood, charcoal), oxygen (air intake vents), and heat. As with any fire cooking, a small, hot fire is ideal.

Our bark free Double Filet smoker wood chunk is the perfect size for the small kettle grill and box grills.

Double Filet Wood Chunk

To start your fire in one of these pieces of equipment, first open the air intake vents at the base of the charcoal firebox area. This will ensure that oxygen can stimulate the start of the fire. Since this is an enclosed firebox area, the size of the wood pieces may need to be adjusted from what you would commonly use in a fireplace or fire pit/fire ring.

I like to use the log cabin method of starting a fire with this equipment. Lay 2 longer pieces of hardwood parallel to each other with about 3 inches of air space between them. Lay 2 more hardwood pieces on top perpendicular to the first pieces. Place the last 2 in position to match the base woods’ alignment. In the center, add a pile of tinder which can be hardwood chips, pine cones, even newspaper if need. Again, I like to use wood in its natural form as much as possible. Pile some kindling size wood pieces on top of the tinder pile. You can drizzle vegetable oil on top of the kindling and tinder to assist with ignition which proves helpful if you plan to light with a long wooden match. I prefer to lite my fire using a MAP torch.

Don’t Rush It

It is imperative that you allow the fire to go through the full stages of combustion before you introduce foods to the cooking grate. Too much flame and smoke will ruin the foods. The ideal is to wait until the fire burns down to glowing embers. If your equipment has the room in the firebox, rake or shovel some of the hot embers to one side and add just a small quantity of additional hardwood to keep the heat steady. The rest of the hot embers are what will be used to cook with.

Position the foods based on the heat needed for the cooking. Meats will require more of the heat while vegetables and one pot dishes will take the medium to low heat. An infrared thermometer will aide with knowing heat levels in your equipment or you can use the hand test: hold your hand over the coals the distance your foods will be. If you can only hold your hand for a count of 2 seconds before you need to pull it away, that is high heat. 3-4 seconds is medium-high, 5-6 seconds is medium and 7-8 seconds is low heat.

Be sure you visit Part I of this series so you can view the list of recommended tools to have when you wood-fire cook.

I hope you gained some new information on lighting a fire. Whether you plan to cook over/in your kettle, barrel or box grill. Leave us a comment and subscribe so you don’t miss anything concerning wood fired cooking, flavors, and the science behind the fire.

Purchase products:

Wood Chunks- Double & Single Filet

Wood Chips- Grande Sapore®

More Related reading on this subject

More Related reading on this subject

Related reading:

-OPEN PIT COOKING FIRE BUILDING: PART I

-EMBER FIRED FRESH ZUCCHINI

-BEYOND PRICING: THE TOP THINGS TO CONSIDER WHEN PURCHASING COOKING WOOD


Dr Smoke says "The key to any success in grilling and smoking outdoors is building the fire with the proper materials and patience to develop the right base before you attempt to cook the food."

Dr Smoke- “The key to any success in grilling and smoking outdoors is building the fire with the proper materials and patience to develop the right base before you attempt to cook the food.”

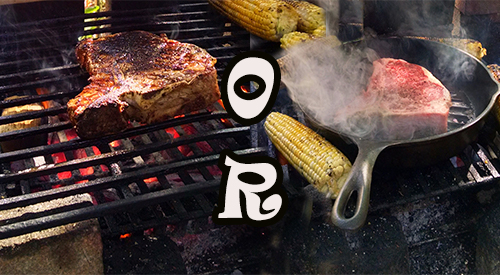
Cooking steak on the grill or in the grill pan is a universal question. Read more below to understand some of the techniques for cooking the perfect steak.

Cooking steak on the grill or in the grill pan is a universal question. Read more below to understand some of the techniques for cooking the perfect steak.

A GUIDE FOR COOKING THE PERFECT STEAK

Being able to successfully cook a steak is a skill that most people aspire to have. Pay attention to these details and you’ll see that it’s not that difficult to pull off.

To begin, you need to understand the basics of the different cuts of beef and how to choose the right one. From there, we’ll get into how to cook it to your desired level of doneness.

Choosing a Steak

Examining the butcher shop cases can be overwhelming. There are so many different cuts available—big steaks, skinny steaks, huge roasts, small roasts, and more. If your goal is to cook a good steak at home, I recommend sticking with the rib-eye, T-bone, New York strip, or Filet Mignon. These are the most expensive cuts, but in steaks, you get what you pay for and these are the most tender when grilled or pan-fried. The differences in tenderness come from the cow having stability muscles (think the lower back), which are less powerful and thus tender, and load-bearing muscles, which are tough. Price is directly correlated to these qualities. A tender steak will cost a lot more than a tough steak (though with the right treatment, you can successfully turn a tough cut like brisket into a tender, flavorful meal).

If the sheer volume of beef cuts still overwhelms you, check out our easy-to-read guide to steaks and their tenderness, price, and ideal preparation.

The seasoning requirements differ based on the cut. A tougher steak requires more seasoning because your eating experience is mostly about tasting the seasoning, rather than enjoying the tenderness of the cut. For example, you can get away with simple salt and pepper on a perfectly cooked filet mignon, while a flank steak used for fajitas should have some sort of spicy rub all over.

Tips for Cooking the Perfect Steak

So, you’ve purchased steaks that fall on the tender side and you’re ready to cook them. First, let them rest at room temperature for about 30 minutes to take the chill off. This results in more even cooking. Pro tip: If you are cooking for someone who likes a well-done steak and you like yours rare, leave yours in the fridge until the absolute last minute; your steak will cook less than your guest’s in a similar amount of time.

If you’ll be cooking on the stovetop, a cast iron or stainless-steel pan will work best. Nonstick coating can’t handle the high heat required for cooking a steak. Before you place the skillet over high heat, lightly season the steaks with a mild rub or just salt and pepper. While the skillet is warming, pour in a few tablespoons of peanut, canola, or other high-smoke-point oil. When the oil is shimmering and the pan is hot, place the steaks in the pan and loosely cover it with foil to prevent oil from splattering. Now is also the time to turn on any kitchen fans, as this will generate some smoke. If your steak is less than 1 inch thick, you can plan on cooking it in the pan the entire time. If your steak is thicker than an inch, do the searing on the stovetop and then move the entire pan to a preheated, 400-degree oven to finish cooking it without overly charring it.

When the steak hits the hot pan, start your timer. In general, 2 to 5 minutes per side is sufficient for medium doneness on a hot skillet. This range is flexible because, among other variables, everyone’s heat is slightly different, as is the steak’s starting temperature (depending, for example, on when you pull it from the fridge). For a thickness of an inch or less, I like to sear for about 3 minutes on each side, after which you should let it rest. If you have a thicker steak, you would put it in the preheated oven after the two 3-minute turns and let it cook for another 2 to 5 minutes until you achieve the desired doneness.

When you are finished cooking the steak, add a tablespoon of salted butter on top and a fresh herb – thyme works well – to get that expensive steakhouse-style flavor pop.

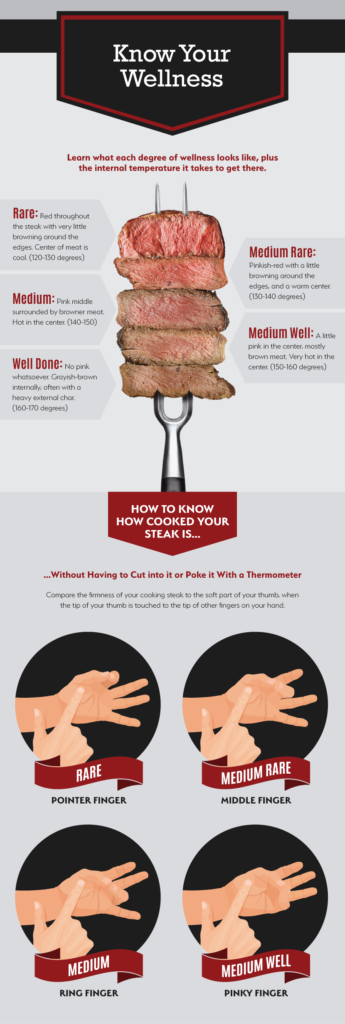
You have two methods for determining doneness. One is to use an accurate digital cooking thermometer. If you are aiming for a rare steak, you’ll need to pull it off the heat when the internal temperature is between 120 and 130 degrees F. On the opposite end of the spectrum, if you want a well-done steak, you should pull it off the heat when the internal temperature is between 160 and 170 degrees. The illustration below shows varying levels of doneness. The steaks will continue to cook slightly while resting, so take that into account as well.

Is this all a bit much to remember? Bookmark our illustrated guide to steak doneness and keep those temperatures in mind next time you’re trying to achieve the perfect level of doneness.

Don’t have a fancy digital cooking thermometer? No problem—you can use your hand! By positioning your thumb and fingers in various ways, you can mimic what a steak should feel like at various levels of doneness. The tenderness of a steak will roughly correlate to the feeling of the thick part of your palm, below the thumb, when your thumb sequentially touches the index, middle, ring, and pinky finger. Touch that part of your hand with the index finger of your other hand while moving your fingers from index to pinky, and you’ll feel that part of your palm getting firmer. If this seems daunting at first, simply use both methods. Get used to using a thermometer and at the same time touch the steak and see what it feels like. Don’t understand what we mean? Check out this guide to using your fingers to check a steak for doneness.

Is this all a bit much to remember? Bookmark our illustrated guide to steak doneness and keep those temperatures in mind next time you’re trying to achieve the perfect level of doneness. Also practice touching the meat, as we show below, and learn to feel your way to the perfect steak using your touch and chef’s intuition.

Grilling Tips for Cooking the Perfect Steak

Would you rather cook your steaks on the grill? You can easily apply most of the above methods to a hot grill, cooking the steaks directly on the grate. The same searing times apply, and if you have a steak that is thicker than 1 inch, simply finish cooking it over indirect heat (so in an area with no charcoal or with the gas burner turned off). You should get the same great results, but with the added bonus of grilled, smoky flavor.

To sum up, successfully preparing a steak is all about cut selection and cooking time. If you stick with a tender cut of beef and cook on high heat, then you can confidently start with the 2 to 5 minutes of sear time on each side and then finish it off in the oven.

Remember to hit it with a little bit of butter and a fresh herb, and you’ll find that you can easily prepare a fancy steakhouse-quality dinner at home.


Author: John Thomas

Source: eReplacementParts Blog


Dr. Smoke- hope you enjoyed our guest blog on cooking the perfect steak!

Dr. Smoke- hope you enjoyed our guest blog on cooking the perfect steak!


The grand ole tree beech hardwood adds a very European flavor to smoked foods, especially sausage style products.

The grand ole tree beech hardwood adds a very European flavor to smoked foods, especially sausage style products.

Listen to the audio of this blog

With 10-13 Beech varieties available throughout the world, this is a hardwood tree that can age to some 300 years. Visually, they are quite impressive often with distinct “root feet” and gray, smooth bark. The scientific name is Fagus Grandifolia but in North America, we know this as American Beech.

(more…)

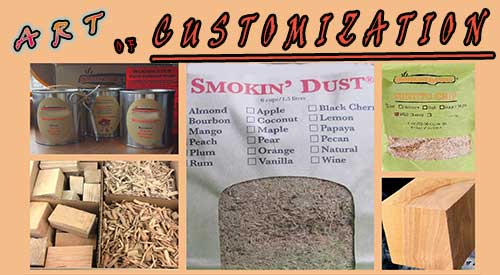
Customizing your cooking experience with our diverse selection of Smokinlicious Smoking Wood Products that Make a Difference with Equipment Efficiency and Taste

Customizing your cooking experience with our diverse selection of Smokinlicious Smoking Wood Products that Make a Difference with Equipment Efficiency and Taste

THE ART OF CUSTOMIZING YOUR COOKING EXPERIENCE

Listen to the audio of this blog

Why Not Build Your Own Wood-fired Ingredient Box?

I remember the days when purchasing a new car was very limited in terms of customizing. You didn’t get the opportunity to choose much more than the exterior color and even those choices were limited to a few! Today, you can go online and literally build your own car from the type of engine and fuel it will use, to the color, texture, and material of your interior and everything in between. This got me thinking about customizing when it comes to the wood-fired cooking experience. Why should cooking woods be any different than the car industry? Why not build your own wood-fired ingredient box when it comes to the smoking wood?

Since SmokinLicious®inception, we have offered a level of customization to the user purchasing our products that has been unmatched by any other company. We provide options that empower the user to combine various products as you would the ingredients to a homemade stew.

Why is this option of value and importance?

There are times that you need different products on hand to simply do specific functions. For instance, Grande Sapore® Wood Chips are a means of bringing the temperature of some equipment up quickly. Smokin’ Dust® provides for a sudden burst of smoke vapor due to its lower moisture level. Double filet smoker wood chunks tend to be the ideal sizing to place on diffusers/flavor bars of LP grills and achieve smoke vapor around foods being cooked.

I think one of the primary reasons that smoking wood should have a level of customer choice is that most of us don’t own just one piece of equipment. I think I’m safe to assume that all of us have a conventional stove top. That gives the opportunity to do stove top smoking. Many of us have newer models of LP grills that allow for the placement of woods chunks and/or wood chips. Then there are those that have the conventional stove top, the LP grill, the charcoal grill, and a dedicated smoker. Wouldn’t it be great to source all the products need for these different types of equipment from one supplier and even get the chance to purchase a combination of products for one price?

And the icing on the cake – Now that’s customization at its best!! That’s SmokinLicious®!

So now it’s time to make your wood-fired cooking experiences uniquely your own by starting with SmokinLicious® and our wide array of species and flavor options just waiting for your hand and imagination to take your wood-fired cooking memories to new heights! We hope you enjoyed the article- Customizing your Cooking Experience

For related reading:

THE TOP 8 MISTAKES TO AVOID WHEN COOKING & GRILLING WITH WOOD

SMOKE SIGNALS: LEARN WHAT THE COLOR MEANS WHEN COOKING WITH WOOD

Purchase products:

Wood Chunks- Double & Single Filet

Smoking Wood Chips- Grande Sapore®

Wood Chips- Minuto® & Piccolo®

Follow us on: Instagram, Twitter, Facebook, Pinterest, YouTube, Flipboard, Google+, Reddit, Medium, Blogger, BuzzFeed, Bloglovin’

Dr Smoke- “Don’t limit your cooking experience to one product; mixing and matching can only enhance your culinary flavoring. That’s why we provide a very diverse product base.”

Attention Women Chefs: The Woman's guide to manning the grill!

Attention Women Chefs: The Woman’s guide to manning the grill!

Listen to the audio of this blog


Part one of the Audio:

Part two of the Audio:

It’s long been the equipment associated with the guys. Perhaps it’s due to the primal start of cooking over the live fire which initially was a man’s skill. Hunt the animal and cook it on fire and hot coals.

Recently, the trend has begun to turn around in favor of more women chefs cooking components of a meal on the grill. In fact, it’s not just the traditional LP/gas grill but charcoal grills as well, as women chefs take their new recipe and technique finds out of the traditional indoor kitchen and to the outdoors.

Just Because It’s Outside Doesn’t Change The Purpose

There is no question that outdoor grilling equipment has evolved into something of a fantasy. We now have choices beyond the standard LP, natural gas, charcoal, and electric grills. Many brands are now featuring dual fuel cooking, meaning they may have gas or electric assist but use wood and/or charcoal for heat and flavor!

What does this mean for the ladies who want to do the more outdoor cooking on the grill?

Versatility! It is so easy to cook an entire meal on the grill without it taking several hours or more.

Accessorize!

The key to ensuring that an entire meal can be cooked on the grill is to have the right tools and that includes some accessory items. Let’s look at each recommended item and answer the question why it’s important to the woman’s full meal grill event.

#1 Grill Grate Accessories:

First up, the grill pan, grill basket or grill topper. These are perfect for vegetables and fruits making it so easy to ensure that the food doesn’t stick to the grill grates and that every piece gets cooked evenly. Plus, since many grills are now sold with a side burner, you can always steam or parboil tougher vegetables first, then transfer to the grill pan/basket/topper. Or, use that side burner to make rice for a healthy starch side. Don’t have a side burner on your grill or are using a charcoal grill? Then buy a butane burner! These are so inexpensive yet give you another cooking option to get everything ready at the same time.

#2 Easy Charcoal Lighting:

If you don’t know what a chimney starter is, time to learn. The charcoal chimney starter is the best way to light a charcoal fire. Although these traditionally use newspaper at the bottom (for ignition) and load charcoal chunks (can be briquettes or lump) into the body of the unit, I take a simple method of lighting my chimney. I load with my favorite charcoal and use a butane torch under the unit to light – no newspaper needed. This allows me to leave the butane on auto fire for a few minutes to ensure the lower coals are lit. Simply pull the torch out, shake the chimney while wearing fire gloves, and return to a heat safe surface until the top coals turn white-gray. Oh, and you can always light the chimney off that side burner too!

#3 Purchase 2 Thermometers

Stop guessing at when things are done! You need to invest in 2 quality thermometers; one for the grill/smoker and one instant-read for the food. Be sure the thermometers you invest in can take a reading in 5 seconds or less, have at least a 4-inch probe for thicker cuts of meat, and have cables that are durable (if you don’t go with a wireless), especially for equipment thermometers that are placed through venting holes or under lids.

#4 Silicone

Anything made from silicone will become a lifesaver at the grill. Silicone pot handles covers, spatulas, heat resistant tongs – you get the idea. This material can handle the high heat of grills so stock up on those items you’ll need and use the most. Suggestions? Tongs, pot handle covers, spatulas, spoons, mat.

Diversify!

Grilling does not necessarily mean you must put all foods on the grill grates. Use high heat cookware to help you out. Think cast iron or high heat clay and enamels meant for the grill. These are perfect for starting one-pot wonders like legumes, pasta dishes, even sauces. With a roomy enough grill, you can fit many different items – grill pan/basket, Dutch oven, and rib racks. Don’t forget most grills come equipped with a lower and upper grill rack so more fragile items that need less heat can go to the top. Here are some tips on food to cooking equipment match:

Tip #1: Cast Iron and Charcoal

Cast iron is, without question, the best material for cooking directly in the coals. Here’s a tip – if you have an outdoor fireplace or even a fire pit that uses wood, you can do this method of cooking by placing your cast iron skillet or Dutch oven directly in the coals. Keep in mind, I said coals, not flame. Coals have a very high BTU rating and can cook foods within cast iron as if they are in the oven. Just be sure to pack the hot coals around the cast iron after placing the pan in the coal bed. Perfect items to try: vegetable medley, roasted potato, curry dishes, au gratin dishes.

Tip #2: Cast Iron and LP/Gas Grill

Just like having the side burner on a grill, cast iron on the grill is like having an extra pot on the stove. Cast iron comes in lots of sizes and cookware type: saucepan, skillet, Dutch oven. Anything you would traditionally make in cookware on the stove can be done on the grill. The key is to ensure that you have this on a section of the grill that isn’t set to “high”, as cast iron holds heat.

Tip #3: The Upper Grill Rack

Though small in overall size, the upper grill rack is designed for those fragile items or for items that require simple warming. Think melting butter for vegetables, heating sauces, warming bread and rolls. Use it! It can be of great value to keep you from needing anything indoors.

Tip #4: The Rotisserie

If you have a grill with a rotisserie, use it! Keep in mind, as that item turns on that rod, the meat or poultry renders some fantastic juices. Catch them! Put a high heat pan under the food item with some great vegetables and use the drippings to add superb flavor to the cooking process.

Women Chefs- “Flavor It Up!”

Now, let’s be clear! Unless you’ve invested in a dual fuel or hybrid grill, one that allows you to use charcoal and/or smoking wood, most standard LP grills are just that: grills not smokers. If you don’t have a hybrid but want to get some smoking woods flavoring to your foods, then start thinking of adding charcoal and wood chunks! Yes, you heard me right. Wood Chunks vs. woodchips which was the product of choice for years with LP grills.

Why Smoking Wood Chunks?

Most grills today are designed with covers for the gas burners to diffuse the heat more evenly. They go by a lot of names: heat distributors, flame tamers, heat plates, burner shields, flavorizer bars. The addition to the traditional LP grill is the reason why you can use smoking wood chunks. Simply place a few small wood chunks under the grill grate right on top of the heat diffuser. Be sure you only put chunks on a burner you will ignite. Replace the grill grate and you’re ready to go! And, yes, you will get real wood smoke vapor to flavor whatever you’re cooking on the grill. I promise!

Final Points Especially for Our Women Chefs

“Manning” the grill is no different than planning a meal in your conventional kitchen. Pick out the components of the meal and decide what needs to cook were on the grill: directly on the grate, on the rotisserie, in cast iron, on the coals. If doing a meat, be sure to marinate 6 hours or best, overnight, to ensure a moist outcome and to reduce cooking time.

Have everything prepped including the grilling tools you will need and this is a walk in the park for all women chefs planning daily meals for the family. The best part, you can enjoy more of those great warm days and not sweat in the confines of the hot summer kitchen!

More Related reading on this subject-

For our women chefs, check out these articles for more reading on grilling and food smoking tips & techniques:

-HOW TO USE CHARCOAL WITH WOOD IN COOKING

-HOW TO TURN YOUR CHARCOAL GRILL INTO A SMOKER

-HOW MUCH WOOD TO ADD WHEN SMOKING

Purchase products:

Wood Chunks- Double & Single Filet


Dr. Smoke- women chefs are grilling and smoking food more and more.

Dr. Smoke- “More and more, women chefs are taking up the art and science of grilling and smoking food! We’ve developed this specially prepared guide to offer helpful tips to the ladies!”


Forest scene of alder wood the perfect wood for a very slight touch of smoke

Alder wood the safe bet for cooking wood- little in flavor!

ALDER WOOD THE SAFE BET!

Alder

I’m often asked if there is any hardwood that is a safe bet to use with any food item and equipment. One that won’t be too strong if over applied or hurt the equipment if too much wood is used. Well, as you’ve heard me mentioned before, we don’t provide descriptors of the woods we manufacture as we believe there are too many variables that affect the overall flavor of the hardwood. Instead, we offer a rating of our woods based on how bold they are. On the low end of that rating scale? Alder wood the safe bet.

Family of Trees- Alder Wood the Safe Bet

First, let me state that Alder is part of the Birch family of hardwood. It is a genus that is a flowering plant. Around the world, there are 35 species of both the tree and shrub form. Yes, that is correct. Alder is not always a tree but can be a tall growing shrub. In New York State, we have roughly 13 varieties with our Alder referred to as Eastern Alder. On the density side, this is a lighter hardwood and thus, it does not hold moisture long. This makes this hardwood ideal for very specific cooking applications.

Alder is very light in its stimulating flavor compounds. I’m sure you’ve read that Alder is ideal for fish but there are missed opportunities if you don’t go beyond the fish category. Given there are so many options to infuse smoke vapor, this can be a great wood choice when using a handheld food smoker or even a stove stop smoker or cold smoke generator. Contemplating chocolate, cheese, or fruits? Alder can be a perfect match.

Caution- Alder Wood the Safe Bet

Here’s my one caution. If you are planning to incorporate bolder ingredients with your food item, then alder may not be the first choice. Lots of bacon, chili or cayenne pepper – these will mask the flavor of the Alder wood. Instead opt for foods that have lighter ingredients like herbs, citrus, dairy components.

As mentioned, Alder or Birch will start with a moisture level that is higher but due to the composition of its cell structures, the water will evaporate faster in the hardwood. Using it on an LP grill or in a charcoal unit may require quicker replenishment than another denser hardwood so extra supply is always recommended.

Blending- Alder Wood the Safe Bet

Don’t forget, blending Alder with another hardwood works well too so if you do want a spicier kick to your ingredients, feel free to add Alder with a bolder wood like hickory, beech or oak.

The best part is always in the experimentation so have fun working with this hardwood that I call the safety net – it won’t let you fall flat if you select it for your smoke infusion.

Dr. Smoke Alder wood the safe bet when it comes to wood smoking with a lite taste

Dr. Smoke Alder wood the safe bet when it comes to wood smoking with a lite taste


See our other wood species blogs:

PUT A CHERRY ON IT!

DON’T PUT CULINARY QUALITY WOOD LAST!

Case Notes: A restaurant is preparing to open in a new location and made the decision to invest in an Italian made pizza oven that has an option for wood-fired cooking. This equipment would take 6 months to manufacture and deliver to the USA, which gave the owners time to complete renovations on their new building in preparation for the free-standing oven’s installation. During that time, menu development and plating options were reviewed and decided upon.

The one planning need that was left to the last minute – locating the supplier for the cooking hardwood and determining appropriate sizing for the new equipment! WHY???

It always surprises me that restaurateurs are willing to spend $50,000 and up for commercial equipment that does a specific function or technique, yet they don’t spend the time before that purchase ensuring they can obtain the quality accessory needs to get every benefit from that investment.

Here’s the best part: often these equipment lines tote that they can do all sorts of functions including wood-fired cooking techniques. The truth – they aren’t really promoting that function of their equipment line! They simply want to sell you the equipment and have you use standard fuel options like electric and gas. How did I come to this conclusion? By the content of the user’s manual.

Many do not reference:

  • size of wood product needed for the equipment
  • how to light the product
  • how much of the product to use
  • where to locate a supplier of the cooking wood
  • pictorials of the steps to do the technique
  • provide a troubleshooting guide.

Do you really want to spend $50,000, $60,000, $100,000 and be left to fend for yourself with that investment?

Take the appropriate steps when considering additions to or replacements in your equipment line. Research not only the equipment but what is needed to do the smoke infusion technique with that equipment. Yes, wood chips are readily available even though there is a high level of variation between products. But other products are not so easy to find like wood pieces larger than wood chips but smaller than split firewood logs.

In addition, wood-fired techniques can also require additional “tools” to be available in the kitchen that may not have been standard inventory before.

Such things as:

  • fire retardant gloves
  • fire grade tools like long-handled tongs and a wood poker
  • a MAP canister/torch for lighting the fire
  • an infrared thermometer for reading temperatures within the cooking chamber
  • an ash receptacle.

Prioritize the needs of a wood-fired equipment addition by first reviewing the best option in equipment for your business’ need and second, assessing all the requirements of the wood to be successful in bringing this technique to your kitchen!


Dr. Smoke- only manufacturers Culinary Quality wood- Nothing else!!

Dr. Smoke- only manufacturers Culinary Quality wood- Nothing else!!


Follow us on Instagram, Twitter, Facebook, Pinterest, YouTube, Flipboard, Google+, Reddit, Medium, Blogger, BuzzFeed

Smoker wood storage summer or as the winter months approach, you should pop some holes in the box to circulated the air!

Smoker wood storage summer or as the winter months approach, you should pop some holes in the box to circulated the air!

Smoker wood storage for chips or chunks Share on X

Listen to the audio of this blog

SmokinLicious® has the luxury of manufacturing every wood product we offer for sale. That means, our moisture rich wood is ready to use immediately. We certainly are not firewood as we work only with the heartwood of the hardwood trees and need proper storage to maintain our clean, fresh state. Plus, we want you to have a pleasant outcome to smoking your foods which is a direct result of the moisture level.

It’s Serious Business- Smoker Wood Storage!

We take wood storage seriously! Which is why when you purchase our products, you’ll receive a card educating you on the best storage containers and conditions. Simply put, any container that encourages air flow is ideal. We have found that some plastic containers can actual cause mold spores which is why materials made from wood, cardboard or metal are preferred. If you should encounter wood that has begun to develop evidence of mold, you may follow these steps to sanitize the wood for cooking:

1. Dilute 1 part white vinegar to 3 parts water (or 1.5 ounces of white vinegar to 3 gallons of water). Be sure the wood is completely submerged in the vinegar mixture.


2. Let the wood soak in the solution for a minimum of 2 minutes.


3. Remove the wood from the vinegar mixture and allow to air dry.


4. Store the wood as recommended above.


Prevent Sunburn

Just like your skin, wood can get too much sun and become sunburned, especially given we are bark-free product. It is best to select a location for storage that is away from direct sunlight. A cool, dry location is ideal. If you select a garage or basement area, be sure you don’t place any cardboard container directly on the cement surface or moisture will be drawn in through the carton to the wood and could result in appearance and aroma changes. If you do see the outside of the wood turn a bit gray, that likely is the result of some sun exposure.

Temperature and Humidity for Smoker Wood Storage

As a last point, keep temperature and humidity in mind when you select a storage location. Since our hardwoods are native to New York State, they are accustom to certain conditions including 4 seasons. Wood can be stressed especially when traveling in a truck to your location. Be sure to follow our directive sticker on the carton advising to get the carton open immediately upon delivery. Air is crucial to your wood remaining in the great condition it is in when we packaged it.

For those wanting to know if refrigeration is an option, our study shows refrigeration certainly doesn’t hurt the wood but you do need to rotate any unused wood periodically to prevent mold potential. Freezing the wood is not suggested. When you plan to use the wood for wood-fired cooking, be sure to remove the wood from a cold location and allow to come to room temperature in order to prevent a lengthy time waiting for combustion to take hold which is what produces smoke vapor.

More Related reading on this subject- More Related reading on this subject of cooking & Grilling with wood

More Related reading on smoker More


Products

Dr. Smoke- Smoker Wood Storage is an important part of your grilling practices! Follow our advice to get the most out of your wood purchase

Dr. Smoke- Smoker Wood Storage is an important part of your grilling practices! Follow our advice to get the most out of your wood purchase


Second Test Kitchen Results

The Smokinlicious®Test Kitchen conducted an additional test using the Technique® Cast Iron Skillet and Smoker which many of you purchased from QVC as the Special of the Day. This time, we used our flavor-infused wood product called the Woodscuit ® on the stovetop.

What We Cooked: Boneless Pork Tenderloin

How We Cooked: on the stovetop using medium-low heat on the gas range

What Wood We Used: Bourbon Flavored Woodscuit ® – 3 pieces

Length of Cook Time: 2-1/2 hours

Findings: Again, as our previous test cooks have demonstrated, the Technique® Cast Iron Skillet and Smoker provides for a very moist product. This time, we lined our drip pan in foil to decrease the amount of elbow-grease needed to clean up. Since our Woodscuit ® product has a moisture content of ~45 percent, these wood pieces did not display the charred look like the woods used in the previous test cooks (both the Wood Chips and Smokin’ Dust® were black by the end of the cooking time). However, once the tenderloin was finished, our panel of tasters did not find any significant smoke flavor to the end product. For those pieces that had been more to the center of the cast iron skillet, the tasters noted slightly more smoke flavor but overall, there was no distinguishable smoke flavor infused in the food.

Currently, our Test Kitchen has found that the Wood Chips used on the stovetop, provide for the greatest flavor infusion of the wood used. As always, we will continue to test this cast iron skillet with a plan to see if adding water to the smoke pan with the wood product, helps to keep the flavor infusion going.

Stay tuned!

Fingerling Potatoes are Next

Dr. Smoke- Cast iron skillet cooking and smoking is easy, affordable & offers great flavor results!

Dr. Smoke- Cast iron skillet cooking and smoking is easy, affordable & offers great flavor results! When using the Technique® Cast Iron Skillet, coupled our quality cooking wood, you can’t go wrong!

More Related reading on stove top smoking featuring a cast iron skillet:

For more reading on the Technique® Cast Iron Skillet & Smoker and how you can do stove top smoking from your own kitchen, check out these articles:

A Guide to Cooking the Perfect Steak

Infusing Wood Flavor to Brussels Sprouts Using a Cast Iron Skillet

The Kitchen Find – Easy, Convenient & Affordable Stove Top Smoking!

« Previous PageNext Page »