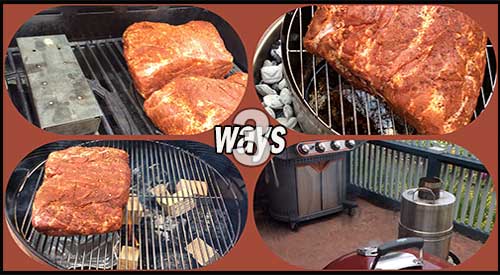
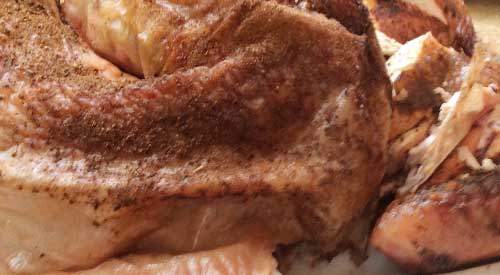
Our three ways of smoking Boston Butt offer great wood smoke flavor!

Our three ways of smoking Boston Butt offers great wood smoke flavor!

3 METHODS OF SMOKING BOSTON BUTT Share on X

Listen to the audio of this blog
This certainly is a clear example of how anyone can produce authentic barbecue on the equipment they have even if it’s not a traditional smoker.

3 Methods of Smoking Boston Butt-

It should come as no surprise that majority of grill owners invest in a gas grill for their outdoor cooking with over 80% of these owners investing in multiple accessories for that grill. Often, many of these grill owners will venture to make an additional purchase of a second type of grill like a charcoal or pellet grill/smoker, in order to be able to cook more barbecue or smoked food options.

My intent is to demonstrate to you that you can produce authentic flavors, colors, textures, and aromas of favorite barbecue proteins with a variety of equipment, all outfitted with hardwood for the authentic wood flavoring.

I’ll be taking Boston butt to a traditional gas grill, a kettle charcoal grill, and a convection-style grill to demonstrate just how easy it is to cook this popular animal protein while giving you a bit of education on how these units are different when hardwood is incorporated.

Set Up Similarities and Differences for Smoking Boston Butt

When it comes to setting up the grills for smoking, there are some obvious differences. First, let me name the equipment brands I’ve included and the intended set up of each for cooking and smoking the Boston Butt cuts, all of which approximate 8 lbs.
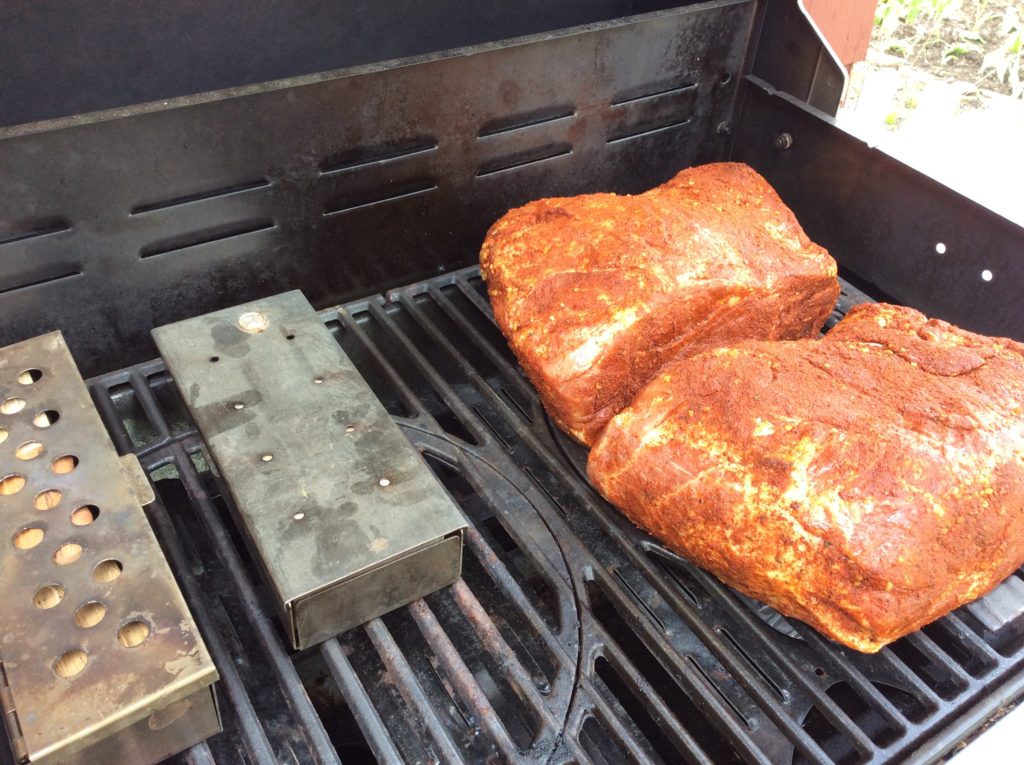
Our Boston Butt (s) on the Stok Gas Grill with accompanying Smoker boxes

The Stôk Quattro 4-Burner Grill:

If you are not familiar with this grill, it is equipped with an insert system to allow you to use a standard grilling grate, a griddle, grill basket, vegetable tray, pizza stone, Dutch oven, Wok, and other inserts that easily pop in and out of the cast iron grates. Despite this feature, you can do traditional smoking using wood chunks without the need for the smoker/infuser insert.

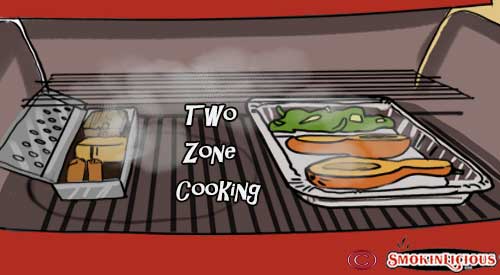
Whenever I smoke on a traditional gas grill, I always set up a two-zone cooking method. This means, on my 4-burner Stôk, I will ignite just two of the burners on one side. You can either place wood chunks directly on the heat shields of the unit or use a metal smoker box. My Boston butt will cook on the unlit side of the grill with a metal smoker box containing 3 wood chunks on the hot side. I’ve also included a second smoker box to make it easier to swap out the first when the wood becomes completed charred. My temperature is 225°F for the actual cooking.
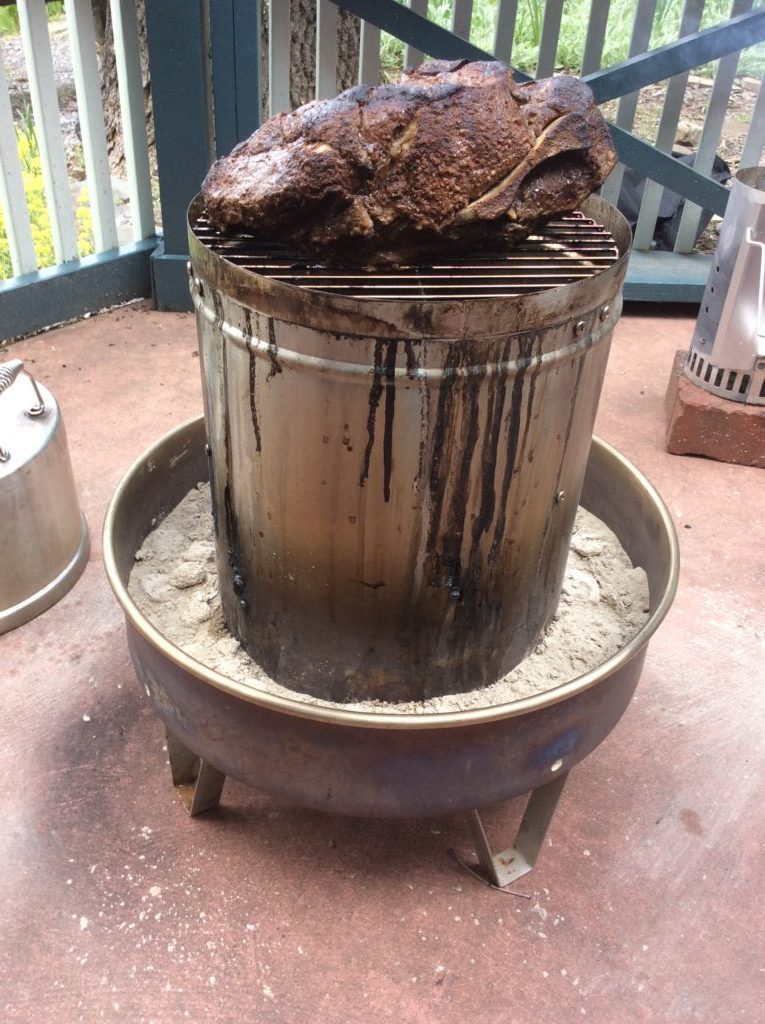
Our Boston Butt on the Orion Cooker with Minuto® wood chips in the inner ring

Orion Cooker:

This is an outdoor convection unit that uses briquets for the heat and Minuto® Wood Chips placed around the drip/water pan for the wood flavoring. This unit will be the fastest to cook the Boston Butt, with an anticipated timing of 4-1/2 hours total. This is a direct cooking method that uses the radiated heat of the stainless-steel body to trap and circulate the heat for faster cooking time.

There is no ability to replenish the wood chips with this unit due to the high heat level. About 15 lbs. of briquet and 4 ounces of Orion Custom Wood Chips is all that is needed to smoke, plus some water in the water/drip pan for a moist outcome.
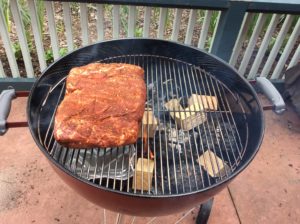
Our Boston Butt on the Weber® kettle Grill with double filet wood chunks

Weber® Kettle 22” Charcoal Grill:

Likely one of the most popular charcoal grills, the Weber® kettle provides for the opportunity to cook with charcoal and hardwood. I’ll be setting up my grill using a two-zone method; charcoal/wood on half the fire area and the meat placed on the indirect side.

Due to the length of time Boston butt takes to cook, you likely will need to replenish the charcoal for maintenance of heat level. I prefer to maintain a temperature around 250° F.

For similarities: both the Weber® and the Stôk grill were set up with a two-zone cooking method. Both included use of the SmokinLicious® double filet wood chunk. The length of cooking time between the charcoal unit and the gas unit are very similar, taking close to 10 hours.

For differences: temperature maintenance is easier with the gas and convection units. The charcoal unit requires much more supervision to ensure that the fuel (charcoal) is replenished prior to the temperature of the grill decreasing significantly. You are also able to check on the meat’s coloring and evenness of cooking with the charcoal and gas units while the convection unit is generally left alone until closer to the recommended cooking times. Though you can check on the doneness of the meat at any point with the convection unit, generally there is no need to do anything but wait.

Regarding cooking variations, let’s discuss color, bark formation, moisture of the meat.

Barbecue By All Methods

With all four of the Boston Butt (s) prepared in the same manner – excess fat trimmed to ¼-inch or less, a dry rub applied on all sides, and marinated for 24 hours – this is a fair comparison of how each grilling and smoking method produces the barbecue results commonly looked for.

Bark:

Without question, bark or the outer crust that develops from exposure to a lower temperature, long cook time, and smoke vapor infusion was greatest on the Boston butt cooked on the Weber® Kettle 22” Charcoal Grill. The gas grill produces the least amount of bark which is dominate on the outer edges and top surface.

Color:

The darkest coloring to the bark and the most obvious smoke ring was on the meat cooked on the charcoal grill. The Orion Cooker produced a brown hue to the meat’s exterior while the meat cooked on the gas grill retained a red hue that was indicative of the dry rub color. Charcoal grills will produce a black hued coloring due to two combustible materials: charcoal or charred wood and hardwood.

Moisture:

The meat that produced the greatest amount of rendered juice was from the charcoal cooking method. Second, the convection grill method followed by the gas grill. However, the greatest internal moisture level was obtained from the indirect cooking method on the gas grill, followed by the charcoal method and lastly the convection method.

Final Notes:

What we’ve set out to accomplish with this multi cook segment is to prove that no matter what equipment you have, you can produce authentic flavor, aroma and texture to Boston butt. This can be invaluable for those times when you may not have a lot of time to supervise the smoker or grill but still want authentic barbecue. Or, when you must make a lot of meat meaning you must use all the equipment options you have available.
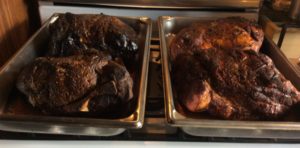
All four Boston Butt (s) one done on charcoal with the Weber, another in the Orion with wood chips and two on the gas grill with wood chunks- the coloring is not much different!

From a taste perspective, our sampling group indicated that the strongest smoked flavor was from the charcoal unit, followed by the convection grill and lastly, the gas grill. Keep this information in mind when you’re cooking for others, as boldness of the smoke flavor can be controlled not only by the amount of time exposed to the smoke vapor, but also with the equipment used for the cooking and the amount and type of hardwood used in the process.

This certainly is a clear example of how anyone can produce authentic barbecue on the equipment they have even if it’s not a traditional smoker.

Making you an informed consumer through valuable articles like this one. Leave us a comment and follow us or subscribe for more great recipes, techniques, tips, and the science behind the flavor. That’s SmokinLicious®.

SmokinLicious® Products used in these techniques:

Wood Chunks- Double & Single Filet

Wood Chips- Minuto®

More related reading on how Smokinlicious® reduces the risks of Microbial bacteria in our wood products
More related reading on smoking Boston Butt & other Grilling tips and technique see our directory on previous blogs!

More blogs you may enjoy:

-Charwood Grilled Salmon Fillets for a Hint of Smoky Flavor

-GRILLED LAMB

-GIVE ME THAT BEEF BRISKET!

-ROSEMARY INFUSED SMOKED BEEF SHANKS FROM THE GRILL

Dr. Smoke- We used three different methods for smoking Boston Butt! All turned out fabulous & tasty!
Dr. Smoke- We used three different methods for smoking Boston Butt! All turned out fabulous & tasty!
BBQ Box Smoker should be used as much as your tongs on the gas grill!

BBQ Box Smoker should be used as much as your tongs on the gas grill!

Learn how to use the BBQ box smoker Share on X

Listen to the audio of this blog

Bert and Tom discuss when the weather is cold use your BBQ box smoker year round!

We have all been in Tom’s position. We love grilling and smoking but prefer the warmer weather. For those of us in 4 season climates with below zero temperatures in winter and lots of snow, it seems too hard to continuing grilling! But just as Bert remarks, you do not have to give up cooking outdoors just because of the weather.

(more…)

During stay at home or Quarantine doesn't mean you should place your taste buds on hold!

During stay at home or Quarantine doesn’t mean you should place your taste buds on hold!

Listen to the audio of this blog

Stay at Home

You’ve committed to a stay at home or in today’s lingo- stay-cation. Lists of games to play, tasks to complete, books to read, and movies and shows to see have been compiled. Now its time to give some thought to the food that will sustain you during this time.

Don’t compromise taste because your afraid to make too much work out of cooking. Using the grill is a super easy way to keep your foods and meals highly flavorful. Let’s give you some ideas that will provide options for everyone to feel satisfied and pleasantly full.

The Breakdown

I think the easiest way to view meal preparation when you focus on the grill as your primary method of cooking is to breakdown foods by categories.

Fruits:

This group of food can make some of the best grilled items. Already sweet in flavor, grilling them produces more vibrant flavor as the heat caramelizes the natural sugars and produces a char to the outside of the fruit. When selecting fruits for the grill, be sure they are ripe but not over-ripened to where they present as soft, or they will have tendency to break apart on the grill. Keep the pieces of fruit large when placing on the grill to maintain as much cell structure as possible. Brush the fruit pieces lightly with a high heat oil like coconut, avocado, or grape seed. The key is to leave the pieces untouched for at least 3 minutes before flipping to get great char and flavor infusion. Perfect fruits for the grill: banana, avocado, apple, mango, peach, papaya, pineapple, peach, pear, plum, grapes, cranberry, eggplant, kiwi, raspberry, blackberry, blueberry, tomato.

Vegetables:

You likely are already aware of popular vegetables to grill like corn on the cob, peppers, and onions, but there are so many more that pair perfectly with the grill. In fact, I would go as far as saying ANY vegetable is appropriate for the grill, you just need to control those that should be exposed to direct heat versus indirect. The easy method of determining heat level is the thicker the skin on the veggie, the more tolerant to direct heat. All vegetables can cook on the grill in less than 10 minutes so time really isn’t a factor. Always remember to avoid moving the vegetables on the grill until they have cooked for at least 3-4 minutes. For preparation to the vegetables, most require just quartering or slicing in half, with some going on whole like tomatoes and smaller mushrooms. Basting with high heat tolerant oils is also recommended.

Nuts and Seeds:

These are foods that react with a super boost in flavor when exposed to the heat of a grill and flavor of wood on the grill. Any seed or nut can be grilled by using a disposable foil pan or griddle pan designed for grilling. These items take about 15-20 minutes and should be stirred every 5-8 minutes to prevent scorching.

(more…)

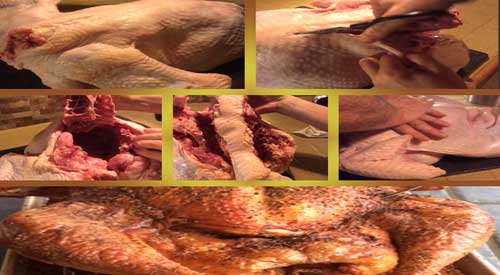
Our collage for makeing Spatchcock Smoked Turkey showing the breast bone removal

Spatchcock Smoked Turkey is perfect for even cooking! Moist and smokey what a delectable combination

Try this Spatchock Smoked Turkey Share on X

Listen to the audio of this blog

Smoked Spatchcock Turkey

Often when faced with cooking a whole turkey, you find the challenge of ensuring every part of the bird is cooked to temperature. This can result in some extra work in ensuring that certain parts that cook faster don’t dry out or burn on the exterior. Think the wings and drumsticks. It’s a lot of work!

I’m going to introduce you to a method of cooking a turkey that will ensure every part cooks at the same rate and to the same doneness level without having to cover specific parts with foil. Spatchcocking a whole turkey meets that goal and by doing the cooking process on the gas grill with hardwood, you get the added benefit of a smoke flavor and oven room for preparing other dishes.

Order up a whole turkey, preferably under 24 lbs., and let’s meet in the kitchen to prepare the bird for smoking.

Does Fresh Make a Difference?

Our Fresh Turkey out of the box ready for us to do Spatchcock Smoked Turkey

#freshturkey

There is no question that I prefer a fresh turkey over frozen as the flavor is simply cleaner and the bird produces super moist meat compared to a frozen turkey. We are fortunate to have within 10 miles of our location, a fresh turkey farm that harvests turkeys once a year, just a couple of days ahead of Thanksgiving. My bird weighed in just under 22lbs. The organs and neck are removed from the cavity and the bird flipped breast side down to expose the backbone. This is where we start our spatchcock process. Get sharp cutting shears ready as we prepare to remove the backbone of our turkey.

Tasting Notes: If fresh whole turkey is not available, you may substitute frozen whole turkey. Just be sure it is completely defrosted and pat dried before starting this recipe.

Flatten and Rub for a Perfect Spatchcock Smoked Turkey

I won’t lie to you. Removing the backbone of a fresh turkey can be a bit of work, but it is so worth it. Start on one side of the backbone, insert sharp kitchen shears, and start to snip away. You’ll draw the shears along the edge of the backbone, releasing the bone from the meat. Done correctly, the spine will come out in one piece.

We have cut and completely removed the breast bone, which will allow us to press down and flatten the turkey

#spatchock

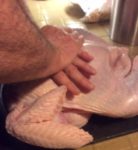
With the backbone removed it’s time for the final preparation to the turkey. Flip the turkey back so the breast is facing up. Time to break the breastbone so the turkey will lay flat on the cooking sheet pan. This will take both hands and a lot of force. Position your hands across the breast and push down with all your force until you hear the breast plate break. Now the turkey should be able to lay flat on a sheet pan equipped with a rack for rendering all the juice and allowing even heat distribution around the entire bird. The rack is key to use so heat distributes evenly. The turkey is now ready for a rub with your favorite seasonings, herbs, and spices.

Using your hands to push down and flatten the Turkey on the cooking sheet allows for an even cook!

#spatchocking

I’m using a simple herb rub that includes fresh sage, oregano, thyme, crushed red pepper, black pepper, marjoram, basil and cumin. I place my ground rub all over the skin of the bird and on the exposed meat side, reaching under the breast skin as well. Now cover with plastic wrap and refrigerate overnight. All this work can be done the night prior to grilling ensuring all that is left to do, is the simple two-zone cooking. Remember, two-zone cooking involves turning only half the burners on and placing a metal smoker box of wood chunks on the hot grate or directly on the heat shield of the hot burners. Be sure you have the box and hardwood at the ready for this step.

With our prepared spatchcock turkey readied, the sheet pan is added to the grill on the no heat side and the lid is closed. I leave this to cook on its own for about two hours before returning to rotate the pan, checking the smoker box of wood chunks I’m using on the lit side of the grill for the great smoke flavor. Remember, the heat from the burners that are lit will radiate throughout the entire grill, grill-roasting the turkey while the heat stimulates the release of the smoke vapor from the wood.

We use our smoker box with Double Filet Wood chunks to add the smoke while doing a two zone cooking method!

#twozonecooking #woodchunks#smokerbox

Tasting Notes: If you prefer, you can cook the turkey directly on the grill grate. Just be sure to place a water pan under the grate to collect all the juices.

Ready in No Time

My nearly 22 lb. fresh turkey takes about 3-3/4 hours to reach a 165°F internal temperature. In total, I use about 8 double filet wood chunks for the entire process. The best part, I can do other things while the turkey cooks, then rest it for about 20 minutes before carving. Don’t forget about all the beautiful juice it produces in the pan as well. Make gravy, use it as au jus, or save it for producing stock. Spatchcock fresh turkey – the easiest method of no-fuss grilling and smoking of a turkey!

What’s your favorite spatchcock turkey recipe? Leave us a comment to opine and subscribe to get all our postings on tips, techniques and recipes. Bringing innovation to wood fired cooking with recipes, techniques and the science behind the fire, smoke, and flavor. That’s SmokinLicious®.

Nice golden brown color to the bird, just cut into it for the best moist meat!

#spatchcocksmokedturkey


Love this article? Then please, share it!

SmokinLicious® Products used in this technique:

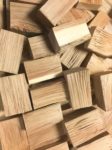
Our hand split double filet smoker wood chunks

#woodchunks

Wood Chunks- Double Filet

More related reading on Spatchcock Smoked Turkey and other Sptachcocking itmes see our smoking & Grilling tips and technique see our directory on previous blogs!

More related reading on Spatchcock Smoked Turkey and other Sptachcocking itmes see our smoking & Grilling tips and technique see our directory on previous blogs!

More blog topics you might enjoy:

-SPATCHCOCK CHICKEN IS THE WAY TO MOISTURE & HARDWOOD FOR FLAVOR

-SMOKE A TURKEY- LEARN HOW

-THE NOT-SO-SMOKEY SMOKED TURKEY

-WHY TWO-ZONE COOKING METHOD LET’S YOU WALK AWAY FROM THE GRILL

Dr. Smoke- Great moist smokey meat from our Spatchcock Smoked Turkey- awesome way to cook the "bird"

Dr. Smoke- Great moist smokey meat from our Spatchcock Smoked Turkey- awesome way to cook the “bird”

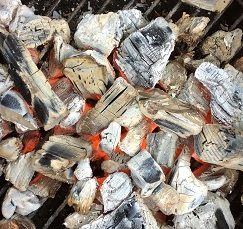
Our coals showing their hot glow and ready for direct wood ember cooking!

Our coals showing their hot glow and ready for direct wood ember cooking!

THE GLOW OF WOOD EMBER COOKING!

So what exactly is wood ember cooking and why is it suddenly gaining attention as a method of cooking? Well, first, it’s most certainly not a new cooking concept. Cooking over a fire and hot coals have been around for thousands of years. Recently, some Chefs and well-known restaurants have taken to returning to this method of cooking because they know where great flavor can come from and they know how to manage the heat from hot wood embers.

An ember is a glowing, hot coal made of greatly heated wood, coal or other carbon-based material that remain after a fire. The heat radiated from hot embers can be as hot as the fire which created them. You can see this first hand, by placing new wood pieces on hot embers and watching a full fire develop. An ember is usually formed when a fire has only partially burnt a piece of fuel and there is still usable chemical energy in that piece of fuel. It continues to stay hot and does not lose its thermal energy quickly because combustion is still happening at a low level. The small yellow, orange, and red lights are often seen among the embers are actually combustions. There just is not enough combustion happening at one time to create a flame. Once the embers are completely ‘burned through’, they are not carbon as is commonly believed (carbon burns, and is not normally left behind), but rather various other oxidized minerals like calcium and phosphorus. At that point, they are commonly called ashes. But why cook on the embers versus over a live fire? Because embers radiate a more constant form of heat, as opposed to an open fire which is constantly changing along with the heat it radiates (think water trapped within the wood and you’ll understand why there is heat fluctuation).

Ember cooking techniques include placing thickly skinned food items directly into the embers (i.e. garlic, onion, peppers, eggplant, steaks, etc.), placing a cast iron skillet into the embers that can hold any food items from vegetables, meats, poultry, fish – really anything. The results produced from this method are super moist, super flavorful, and the aromas are exceptional.

Peppers being cooked over wood embers

Sweet Peppers over direct wood ember cooking


Dr. Smoke- You don't need a flashy grill, a simple fireplace with enough room, just like Asado, you can do direct wood ember cooking.

Dr. Smoke- You don’t need a flashy grill, a simple fireplace with enough room, just like Asado, you can do direct wood ember cooking


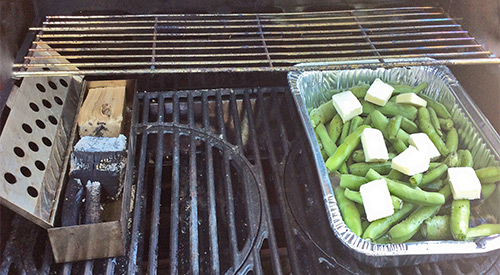
The SmokinLicious® culinary crew's two-zone cooking method set up to smoke Fava Beans on the Gas grill with Wood chunks!

The SmokinLicious® culinary crew’s two-zone cooking method set up to smoke Fava Beans on the Gas grill with Wood chunks!

WHY TWO-ZONE COOKING METHOD LET’S YOU WALK AWAY FROM THE GRILL

listen to our blog

listen to our blog


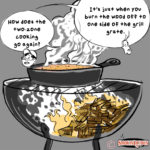
We all know that the key to easy and successful outdoor cooking is to control the temperature. I also believe that outdoor cooking should not hold you hostage at the grill. That’s why everyone should learn the two-zone cooking method for grilling.

Let’s cover what type of cooking you can do by this method, why it’s so successful, and how to set up the zones.

Two Zone Cooking Method- Why it is Best

 smoker box and single filet wood chunks


Two-zone cooking can be done on any type of grill no matter the fuel source. What is two-zone cooking? Using the fuel source on only half the grill while the other half holds the food. Although you may use the unlit side of the grill for most of the cooking, you have the benefit of finishing crispy skins of items or quick cooking thinner cuts of meats on the direct heat side.

Two-zone cooking is also called direct and indirect cooking. The indirect side uses indirect convection heat to cook the food which means the heat generated by the lit side radiates into the material of the equipment and produces heat (convection heat) on the unlit side. The direct side produces the heat within the unit and can be used when quick cooking is needed or when a food that has been cooked on the indirect side needs crisping, additional coloring, or some char.

Two Zone Cooking Method- The Set Up

setting up the smoker box on the grill

The primary reason you want to set up two-zone cooking is most of the grill cooking does not require direct heat. When you consistently cook foods, especially meats, over direct heat, you easily can have dried, stiff, flavorless results. This is due to the components of meat reacting at different temperatures that with direct cooking occur too fast to react.

I will tell you that you need a grilling area that is large enough to establish two zones. I judge the space needed with a rectangular, disposable foil pan. If the pan can fit on half the grill area without issue, then you have plenty of room for a two-zone setup. When using a gas grill, this means lighting the burners on one half of the grill. If you don’t have an even number of burners, then decide how many are to be turned on and how many left off. With a charcoal grill, placing the hot coals on only half the charcoal area. On an electric unit, if you can manipulate the heating element, isolate the element to one side of the unit. The temperature that works ideally for two-zone cooking is 225°F. Of course, I always add wood chunks to give a smoky flavor to the foods. Remember, the hardwood goes on the direct side of the grill or lit burner or hot coals.

Chef Bert & Tom explaining the two zone cooking method

#chefbertandtom

Note that you can also use a water pan using two zones. This can be placed on either side of the grill depending on when you need the direct heat side. Keep in mind, when doing meats, it’s great to place a pan under the meat with vegetables (onions, potatoes, celery, peppers, etc.) and a small amount of liquid that can collect the meat renderings. You can also place pans of beans to catch those drippings. Anything is fair game.

For those times when you don’t want to add any additional foods, you can simply lay a thin foil pan under the grill grate of the indirect side or a sheet of foil. That will collect any fat drippings.

Cook Anything!

Smoking Tomatoes on the gas grill with the two-zone cooking method


Since radiant heat is what you are cooking with when foods are placed on the indirect side, you can cook anything. I love doing tarts and cakes via this method, especially during the hot months when you don’t want to lite your indoor oven. In fact, those are the times that I cook an entire meal using a two-zone setup.

You can also cook multiple items using both direct and indirect heat. A long cooking meat goes on the indirect side, is cooked to temperature and held there, while a side dish is cooked on direct heat. Don’t forget, if the cookware you use is high heat tolerant, you can use cookware as well. This is how I can make cakes, tarts, and bread on the grill. You need to view this equipment like an oven as that is essentially what it is!

Two Zone Cooking Method- Use Like an Oven & Walk Away

I’m going, to be honest. Although it’s true that you can produce more moist foods using a two-zone method the real reason I love this method of cooking is I can walk away from the grill. This is particularly true when using a gas grill which holds the temperature steady, which for me, is 250°F for long cook meats and regular baking temperatures for all my cookies, cakes, tarts, bread. Remember, charcoal grills will still require you to refuel so the temperature can fluctuate more if you’re not careful. Keeping an extra chimney starter of charcoal going will solve that issue.

What is a two zone fire? You may ask…

A two zone fire is also called two-zone cooking method can be used to grill or smoke any type of food on any grill (smoker, gas, charcoal, wood-fired or electric)! Setting up a two-zone cooking method is very easy- have a hotter side on one half of the grill and a lower or no setting on the other half. A two zone fire gives the cook or chef “a stylized or finessed” way to grill without ruining great food flavors by over cooking. It is especially the best way to cook meats and vegetables. Keep in mind that grills radiate and transfer heat, so it’s really not necessary to crank up every burner or heat source to a temp equivalent to the Sun! It’s as simple as that!

As a final note, even though two-zone cooking allows you more time away from the grill, you still need a good digital thermometer to monitor the temperature of the food. Invest in an easy read one and you’ll really enjoy this new way of grilling and smoking.

SmokinLicious products used in this blog:

Wood Chunks- Double & Single FiletVisit our store to buy products

More Related reading on great smoking and grilling tips and techniques

More Related reading on #twozonecooking method and other food items to prepare

Additional reading:

-EASY GRILL ROASTED TOMATOES

-ODE TO THE GRILLED FAVA BEAN

-WOOD ROASTED ONIONS TO DIE FOR!


Dr. Smoke- The two-zone cooking method on the gas grill is a great time saver for the busy Chef trying to prepare other parts of the meal menu!

Dr. Smoke- The two-zone cooking method on the gas grill is a great time saver for the busy Chef trying to prepare other parts of the meal menu!

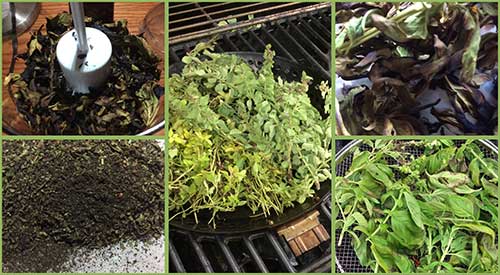
Our preparation of smoked herbs, from picking, smoking and grinding to make smoked herb dust. Adding great flavor to dishes.

Our preparation of smoked herbs, from picking, smoking and grinding to make smoked herb dust. Adding great flavor to dishes.

SMOKED HERBS FLAVORS WITH SMOKED HERB DUST

Listen to the audio of this blog

Don’t make the mistake of thinking fresh herbs are to be used in dishes as, well, fresh only. Although you may have dried your fresh herb harvest before, we are bringing another alternative to you, smoked herbs.

We hot smoke the fresh herbs on the grill then turn them into a dust for use in all types of dishes. The smoking process will bring a depth of flavor that you’ve likely never experienced before. Go to the herb garden and pick your favorite varieties and let’s get making smoked herb dust!

Smoke Vapor Infusion

Fresh herbs on the grill using a grilling cage

One thing about this smoked herb technique is you can do the smoke infusion by a variety of equipment methods.

For those with a gas grill, add wood chunks either directly to the heat shields on one side of the grill or add wood chunks to a metal smoker box that can be placed on the heat shields or the grill grate. For charcoal grill owners, light your charcoal and allow to reduce to hot coals only. Add a piece or two of hardwood chunks or a handful of hardwood chips to the hot coals. If possible, push the hot coals to one side of the grill. For both grill types, you want to use a two-zone cooking method so the herbs don’t catch fire.

For those that don’t own grilling equipment or who simply don’t want to bother lighting up the grill, you can use a handheld food smoker. Simply place micro wood chips in the bowl of the unit, place the herbs in a storage bag with the tubing of the smoker unit, cinch the end of the bag around the tubing, and light the chips. I like to leave the smoke in the bag for maximum smoke vapor infusion.

I used both my gas grill and charcoal grill for the smoke process by placing my herbs in a vegetable basket and grilling with the herbs on the unlit side of the grill. Within the first 5 minutes, you’ll see how the herbs lose moisture and begin the drying stage.

Tasting Notes: I find the handheld food smoker will produce the boldest smoke flavor to the herbs. The intensity of flavor rated from lightest to boldest based on equipment would be a gas grill, electric smoker, pellet smoker, charcoal grill, handheld food smoker.

Grinding Process

smoked herbs in the food processor for reduction into smoked herbs dust

Once the herbs have charred and dried, it’s time to remove them from the grill and bring them to the food processor. I have a mini processor that only has two settings: chop and grind. I prefer to use this appliance to bring the smoked herbs to dust level but a spice grinder works just as well.

First, remove all the herb leaves from the stems and place a small quantity in the food processor bowl. You can remove the leaves by placing the entire herb sprig in a colander and pressing the leaves through to parchment paper. Secure the lid and grind until you get as fine a dust as the appliance will allow. Both the appliance and the herb will determine how fine the herb dust will get. As you will see, basil dust becomes finer than oregano. This technique will work for just about any herb you can grow or locate at the market. Store the herb dust in glass or metal jars for up to a year.

Tasting Notes: Smoked herbs are much stronger in flavor than the standard dried herb. Adjust the amount used in recipes as needed. It is often best to start with less, taste, and then add more as needed.

So Many Uses

finished herb bottles of smoked Basil and Smoked oregano

Experimentation is key when it comes to #herbdust. Most often, herbs will be applied to meats and poultry, perhaps rice and pasta dishes, but there are so many more foods that are good pairings for herb dust. Let’s take parsley as an example. Commonly used with fish and beef, parsley is a great pairing for sweet items as well. This includes banana and cream. It’s important that you look beyond the traditional side dishes and entrees and explore the sweet side of what herbs can offer. By doing so, you’re sure to find endless combinations that will tickle your palate and give you more pleasing menu experiences.

The Culinary Crew wants you to know …

… that the two-zone method is certainly a practice that you will want to master and prioritize in your wood cooking toolkit, especially when grilling and smoking delicate fresh consumables like herbs. Not only will two-zone cooking avoid those acrid tastes associated with flare ups, it will infuse your food items with a nice balance of wood smoke flavoring.

SmokinLicious® products used in this blog:

Wood Chunks- Double & Single Filet

Wood Chips- Minuto & Piccolo

More Related reading on smoked herbs and other great grillable flavoring ideas

More Related reading on smoked #herbs and other great grillable flavoring idea

Additional reading:

-WHY TWO-ZONE COOKING METHOD LET’S YOU WALK AWAY FROM THE GRILL

-STOVE TOP SMOKED CHIVES

-PAN COOK ZUCCHINI ON THE GRILL WITH WOOD FLAVOR

Dr. Smoke- Our process to prepare the smoked herbs is easily done on our gas grill with our double or single filet wood chunks!

Dr. Smoke- Our process to prepare the smoked herbs is easily done on our gas grill with our double or single filet wood chunks!

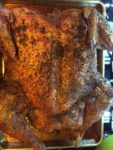
Our not so smokey Smoked Turkey is from cooking this on the gas grill, not on a smoker. We selected this photo because of the great color- not dark like a traditional smoker can impart!

Our not so smokey Smoked Turkey is from cooking this on the gas grill, not on a smoker. We selected this photo because of the great color- not dark like a traditional smoker can impart!

THE NOT-SO-SMOKEY SMOKED TURKEY Share on X

Listen to the audio of this blog

Listen to our blog #smokinlicious- smoked turkey

Turkey is one of those items that is generally made for a special event – Thanksgiving, Christmas, New Year – and not associated with everyday cooking. I’m here to tell you that it’s easy to enjoy turkey any time of year when you use a gas grill for the cooking and smoke infusion. All you need is a turkey (preferably one under 15 lbs.), 6 wood chunks, a water pan with hot water, and your favorite gas grill.

Smoked Turkey- Turkey 101 Prep

Preparing the Turkey

#freshturkey

I’m fortunate to have a local fresh turkey farm, Sprague’s Turkey Farm in Portville, NY, close by so I’ve ordered one that is under 14 lbs. Before preparing the turkey for marinating overnight, I first need to remove the parts that are commonly found inside the turkey. This includes the neck, heart, liver, and gizzard which is part of the turkey’s digestive tract. These parts do make for great stock so if you can, save them to add to a stockpot down the road.

Once the organs and neck are removed, it’s important to wash the entire turkey under running water. After a thorough wash, pat dry with some paper towels and place in a shallow pan for the rub application.

Herb and Spice Rub

Gently placing the rub on the outside of the Turkey

#turkeyrub

After washing and patting dry the turkey, I trim the excess skin from the neck area and then begin applying the rub. I’ve combined an assortment of herbs and spices for my rub as I tend to like a potent mix of ingredients to balance the fresh meat and smoke. My rub includes: allspice, clove, basil, cumin, cardamom, coriander, cinnamon, celery salt, garlic and onion powder, oregano, orange and lemon peel, paprika, and ancho chili powder. I make sure to cover the entire surface of the bird. I add a few drops of avocado oil and then apply additional rub. This will be refrigerated overnight to allow the flavors to marry and penetrate to the meat.

Tasting Notes: Feel free to incorporate different herbs and spices in your rub as there are no rules when it comes to combinations.

Smoked Turkey- Smoking on the Gas Grill

Placing the Turkey on the grill

#twozonecooking

As you can see in some of the photos, this was a cold day at the grill, with a temperature below 25°F. I prepare my LP/Gas grill by first removing one of the grill grates, exposing two of my burner shields. To one of the shields I place 3 double filet wood chunks from SmokinLicious®. Now I lite only two burners; the one with the wood chunks and the one directly next to that. I set these burners to medium heat to start. Just before I’m ready to grill, I check the temperature readout and adjust my heat setting until I hit my target temperature of 325°F.

Time to add the rubbed turkey to the unlit side of the grill and my water pan right next to the bird. I insert a thermometer and close the lid. Basically, for the next couple of hours, I just need to monitor that the water pan has enough hot water in it and the bird gets spritz with water to keep the skin moist.

Tasting Notes: Although I’ve placed my water pan to the side of my turkey, between the lit and unlit sides of the grill, you can use this as a drip pan and place this directly under the turkey. I elected not to do this today due to my low outdoor temperature.

Time to Serve Your Smoked Turkey!

Our not so smokey smoked turkey on the table for all the guests to enjoy

#turkey

If you’ve maintained the steady temperature of 325°F and hot water in the drip pan, you won’t need to stay with the grill during most of the turkey’s cooking time. My skin has crisped up thanks to maintaining moisture both on the bird’s skin and in the cooker with my water pan. I remove the turkey and take it to the kitchen where I cover it for about 30 minutes prior to carving. It’s super tender, moist, with a crunch to the skin. The best part is that the smoke is subtle and does not over power the fresh meat.

That’s why the two-zone method of smoking is perfect when your feeding a variety of tastes. Those that tend to avoid smoked foods will find this full of flavor that is well balanced due to our rub and consistent cooking temperature. My turkey of 13-1/2 pounds took just about 4 hours to finish with very little effort on my part, even with a 22°F outdoor temperature and wind chill. The best part is my oven was free to cook a bunch of side dishes so everything was timed perfectly for the table.

What’s your favorite preparation for turkey? Bringing innovation to wood fired cooking with recipes, techniques and the science behind the fire, smoke, and flavor. That’s SmokinLicious®.

SmokinLicious® products used in this blog:

Wood Chunks- Double Filet

More Related reading

More related reading on Smoked Turkey and the different methods of preparation1

Additional reading:

-WHY TWO-ZONE COOKING METHOD LET’S YOU WALK AWAY FROM THE GRILL

-SMOKE A TURKEY- LEARN HOW

-SMOKED HAM ON THE GAS GRILL

-CORNISH GAME HEN MEETS SMOKE IN THE ORION COOKER

Dr. Smoke- Everyone forgets about the extra oven almost everyone has- the lp/gas grill! So this year we prepared smoked turkey using the gas grill with wood chunks providing the smoke!

Dr. Smoke- Everyone forgets about the extra oven almost everyone has- the lp/gas grill! So this year we prepared smoked turkey using the gas grill with wood chunks providing the smoke!