Let's explore the primary heat sources for Grilling!

Let’s explore the primary heat sources for Grilling!

Exploring the primary heat sources for Grilling Share on X

Listen to the audio of this blog

PRIMARY HEAT SOURCES FOR GRILLING-

We grill outdoors frequently yet I bet not many of you know the science behind grilling. What happens to food when we grill? How does food cook to a safe level on a grill?

Let’s cover the types of heat sources that cook grilled meats and help you decide the ideal method for cooking your favorite animal proteins.

What Is Meat?

Before I get into the types of heat sources to do the actual grilling, let’s talk about what meat really is. Meat is muscle from various animals. It is made up of 75% water, 20% protein, and 5% carbohydrates and fat. Each cell of a muscle is made of two proteins: actin and myosin.

Now breaking down the proteins of meat, these are made of amino acids which react nicely when salt ions are added. Thus, when salt ions are added, the water-retaining capability of meat increases which results in production of a juicy piece of grilled meat.

Now these proteins in meat are coiled when the meat is raw. Add heat, and these proteins uncoil as the protein molecule bonds are broken.

Note – heat shrinks the muscle fibers which will then squeeze out water allowing the molecules to recombine. Brining or marinating meat will reduce this shrinkage of the fibers.

Primary Heat Sources for Grilling

There are three heat sources for cooking foods: conduction, radiation, and convection. Let’s get an understanding of each one.

Conduction primary heat sources for grilling:

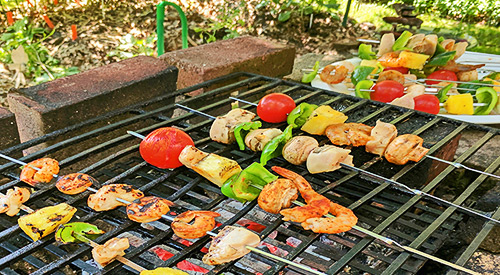
The best example of conductive heat is when meats are placed directly on the grill grates over direct heat. The transfer of the heat energy to the grill grate brands the food item with grill marks. Heat is transferred from the source (burner, lit charcoal or wood, electric element, ceramic plate) to the food which then engages the cooking process. The meat cooks from the outside to the inside due to heat transfer. The surface of the meat gets hotter and transfers to the center which is why people who rely on the meat’s outside coloring will under-cook the meat inside.

Convection primary heat sources for grilling:

Convection heat is transferred with a fluid which can include water (think boiling a food item like potato), oil (think French fries), and air (think your oven or two-zone cooking on a grill). Now, convection cooking only occurs on the exterior of the food while conduction heat cooks the interior.

Radiation primary heat sources for grilling:

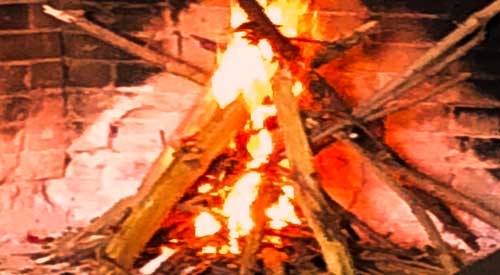
My favorite example of radiation heat is cooking marshmallows on a stick held near a campfire. Essentially, this is how charcoal/wood grills cook. You elevate the food over the heat source.

What influences grilling is the length of time and the type of heat. Add in difference between temperature and heat as materials also play a part in the transfer of the heat energy. Water transfers slower than metal.

Radiation produces more heat than convection. You can easily increase the radiation heat on a charcoal grill by increasing the number of charcoal pieces. Gas and pellet grills produce convection heat. Convection heat dissipates easily by air currents. Infrared units known as intense infrared (IR) have marketed that they produce a better sear on meats. What is happening is heat energy is delivered faster than convection heat units but slower than conduction units. You also have the risks that the delivery of this energy via IR could be uneven resulting in black/burnt areas while other areas of the meat are light in color.

Primary Heat Sources for Grilling- Types of Heat on Different Equipment

Let’s look at the heat types for specific equipment so you know how the energy used cooks your meat.

Gas Grills:

Burner produces radiant heat that in turn heats the heat shields above the burners producing radiant and convection heat (note gas grills have permanent vents built in the unit). The grill grates then heat and produce conduction heat to the exterior of the meat which converts all this heat energy to conduction to cook the meat thru the interior.

Note gas grills can be set up with direct cooking (all burners on) and indirect cooking (only half the burners lit). If you cook with the lid up on a gas grill, you allow radiant heat to escape which will cool the top of the meat.

Charcoal/Wood Units:

Radiant heat is produced at the bottom of these units with the grilling grates absorbing the heat energy that produces conduction heat. Heat from below the meat is absorbed and converted to conduction heat to cook the interior. The lids on these units will produce convection heat due to the built-in vent that has a control setting.

Like gas units, charcoal/wood units can be set up direct or indirect cooking method with the foods absorbing indirect convection heat from all sides which then converts to conduction heat to cook the meat’s interior.

Flat Tops/Plancha/Griddles:

Whether gas or charcoal fed, the fuel source produces radiant heat while the solid cooking surface produces conduction heat to the meat. Due to direct contact of the meat to the solid cooking surface, the direct contact side of the meat will brown easily while this no lid unit allows radiant heat to escape causing the top of the meat to cool and not brown.

Infrared Units:

Burners on these units produce radiant heat which then heat energize the ceramic, glass or metal plate. Grilling grates absorb the heat and produce conduction heat where the surface of the meat contacts the grate.

Always remember, on any unit regardless of heat source, thickness of the meat and not poundage will determine cooking time as you must remember that conduction cooking progresses to the interior. You must use a digital thermometer to ensure meat is cooked properly before consuming. Never rely on the outer coloring of the meat or recommended time per pound in a recipe. A digital thermometer is the only way to know.

Making you an informed consumer through valuable articles like this one. Leave us a comment and follow us or subscribe for more great recipes, techniques, tips, and the science behind the flavor and fire. That’s SmokinLicious®

SmokinLicious® Products:

Wood Chunks- Double & Single Filet

Wood Chips- Minuto®

Smoker Logs- Full & Quarter Cut

Charwood

More related reading on the primary heat sources for Grilling & Smoking tips and technique see our directory on previous blogs!

More related reading on the primary heat sources for Grilling & Smoking tips and techniques see our directory on previous blogs!

Other blogs you may like:

-3 METHODS OF SMOKING BOSTON BUTT FOR AUTHENTIC BARBECUE FLAVOR

-TEMPERATURE, MATERIAL AND TIME DETERMINE WHEN ITS CALLED BARBECUE

-PICKING YOUR IDEAL FIRE SETUP FOR COOKING

-WHY TWO-ZONE COOKING METHOD LET’S YOU WALK AWAY FROM THE GRILL

Dr. Smoke- Let's become better chef's and explore the primary heat sources for Grilling!

Dr. Smoke- Let’s become better chefs and explore the primary heat sources for grilling!

We do a summer favorite WOOD FIRED GRILLED WATERMELON!

We do a summer favorite WOOD FIRED GRILLED WATERMELON!

WOOD FIRED GRILLED WATERMELON BECOMES A STAR

listen to our blog


You may have seen segments on grilling watermelon before which show slices of watermelon on a standard gas grill. Although I agree that the heat generated from the grill will produce a sweet outcome, there is no comparison to doing a grilling technique that incorporates wood for added flavor.

In this segment, I’ll show you how to grill watermelon on a grill of your choice with wood chunks for the unique combination of sweet and char flavors that only comes from grilling with wood.

Grilled Watermelon- Easy Prep

I think this is by far, the easiest preparation for the grill. All you need is a watermelon of your choosing and a grill; gas, electric or charcoal. Just 2-3 wood chunks from SmokinLicious® and about 20 minutes once you have a lit grill, and this method of bringing flavor to the standard watermelon will be complete.

As watermelon contains a lot of water, it is essential that you work with a medium heat setting on your gas grill and hot coals with a moderate flame for the charcoal grill. If using a gas grill, be sure to set up the wood chunks on just one side of the grill and allow the chunks to smolder first so there is plenty of smoke vapor. Since watermelon grills in no time at all, you want to have enough smoke vapor produced to give a great tasty outcome for both a gas grill or charcoal grill method. Electric smokers are self-contained allowing for simple dialing in about 15 minutes worth of smoking time.

our slices ready to be wood fired!

For the watermelon, cut lengthwise in half and cut each half into individual slices about 1-1/2 to 2” thick. Or, you can remove all the rind and grill just the watermelon meat. Keep fire safe tongs at the ready so you can turn the watermelon slices just once as they evaporate some water and sweeten up. DO NOT leave the grill! This fruit requires a careful watch so stay put and you’ll have every piece cooked to perfection.

So Many Uses for Grilled Watermelon

You’ll see how the watermelon darkens in color, get bits of char coloring to the skin, and is less water soluble. That’s the perfect outcome. Now it’s time to think about how to use your wood flavored melon.

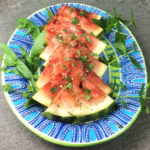
Our finished wood fired grilled watermelon

First, you can enjoy it as is. When I serve this naked, I just give one additional flavor such as fresh, chopped mint. But if you’re looking for a lunch or lite dinner entrée, think salad by including some baby arugula, goat cheese and a splash of balsamic vinegar. For a spicy version, sprinkle the wedges with red pepper flakes, a bit of granulated sugar, and lime zest. Wood fired watermelon also works great with other summer favorites like grape and cherry tomato, pepper slices, sugar snow peas, and cucumber. No matter how you choose to serve it, grilled watermelon with wood flavoring is going to top your list of grilled favorites.


Proving that there’s more to wood-fired cooking than just animal proteins, SmokinLicious® brings you great ideas for recipes featuring a wood-fired ingredient. Bringing you tips, techniques, recipes and the science behind the fire and smoke.

Purchase products:

Wood Chunks- Double & Single Filet

More Related reading on "What Wood for Smoking" and other great smoking and grilling tips and techniques

More Related reading on “What Wood for Smoking” and other great smoking and grilling tips and techniques

Additional reading:

-WOOD-FIRED APPLES MAKE THE BEST CAKE

-PEACHES WOOD FIRED FOR A SMOKY FLAVORFUL GAZPACHO

-Smoked Snow Peas With Cucumber Salad


 Dr. Smoke- Wood fired grilled watermelon is my favorite summertime dessert!


Dr. Smoke- Wood fired grilled watermelon is my favorite summertime dessert!

Barbecue basics- charcoal, wood, cooking temperature and fun time

Barbecue basics- charcoal, wood, cooking temperature and fun time

Barbecue basics is what you need Share on X

Listen to the audio of this blog

It’s time I go there. I’ve fielded way too many questions to ignore it. Now is the perfect time for me to opine on this highly controversial topic: when it’s called barbecue.

How do you define “true” barbecue?

I have three parameters to cooking that I’d like to address that should help explain my justification for what qualifies as barbecue basics.

(more…)

The sign is the entrance to the precious forest- allegheny national forest which includes 513,175 acres or 801.8 square acres and includes the allegheny reservoir natural habitat

The precious forest, source of forest grown hardwoods, covers 513,175 acres (801.8 square miles) and includes the Allegheny Reservoir Natural Habitat.

FOREST GROWN HARDWOODS

Listen to the precious forest blog

It is likely when you have your heart set on some wood-fired cooked foods that you give little attention to the wood that will be required for that cooking event. You may have seen wood smoker chips or chunks available in your local box store and decided that you can always pick those up last minute, to be assured your plans aren’t foiled. Or, you simply plan to go with charcoal chips without considering that this product is made from wood as well. Is the product made from something less than forest grown hardwoods? Smokinlicious® uses only forest grown hardwoods in the production of our entire line of cooking and smoking woods!

STOP and ponder this for a moment – Do you realize where exactly those wood products come from?

Unless you are in a direct county of involvement, you likely have not realized the invasions that are occurring readily to our forests, woodlots, and home landscapes.

To date, here are some of the diseases and infestations we are battling in the USA’s Precious Forest regions:

  • Emerald Ash Borer
  • Hemlock Woolly Adelgid
  • Whitebark Pine Beatle
  • Beech Bark Disease
  • Dutch Elm Disease
  • Butternut Canker
  • Asian Longhorn Beetle
  • Dogwood Anthracnose
  • Gypsy Moth
  • Balsam Woolly Adelgid
  • Laurel Wilt disease
  • Sirex Wood Wasp
  • Sudden Oak Death
  • Polyphagous & Kuroshio Shot Hole Borer affecting sycamores, willows, oaks, maples (including Boxelder), and commercial avocado trees.

EVERY state in the US has battled imported forest pests with the hardest hit being New York State followed closely by MA, WI, IL, VA, MI, NJ, OH, and CA. Every decade, 25 new insect pests are established in the US which can lead for potential decimate of an entire tree species in just decades.

So why if you are a lover of BBQ smoking chips or BBQ wood chunks (smoking using wood chunks or woodchips) or other wood-fired foods, should issues with bugs be of concern? Because cooking by fire is the oldest known cooking method for humankind. Right now, you may simply enjoy 3 benefits of trees: for shade, for beauty (viewing), and for a flavor to foods cooked on your grill/smoker.

But there are many other benefits to forest grown hardwoods:

  • Decrease atmospheric carbon by capturing and storing CO2
  • Improve air quality by filtering pollutants and releasing oxygen
  • Reduce stormwater runoff and pollutants entering local water bodies
  • Increase property values by 3-7%

The pollutant removal alone that trees are responsible for provides a human health benefit worth $6.8 billion per year! Trees keep us alive!

As of December 2016, NYS DEC has detected an increased prevalence of Oak Wilt in the state which has no known treatment to contain and kill this fungus. Oak is one of the most popular hardwoods for wood-fired cooking methods.

Please, take the time to source wood for cooking from reputable sources and follow the laws in place in your specific state to ensure we can limit the spread of these pests and diseases, and continue to enjoy the oldest method of cooking: by fire!

related reading on this subject

related reading on this subject!

Additional reading:

-ARE FRUITWOOD TREES LIKE THE APPLE “SNOW WHITE” BIT INTO?

-TO BARK OR NOT

-SHOULD YOU GRILL WITH MOLDY WOODS?

Purchase Products:

Wood Chips-Grande Sapore®

Wood Chunks- Double & Single Filet


Dr.Smoke- "Appreciate the precious forest as our renewable resource and source for forest grown hardwoods for cooking and smoking."

Dr.Smoke- “Appreciate the precious forest as our renewable resource and source for forest grown hardwoods for cooking and smoking.”

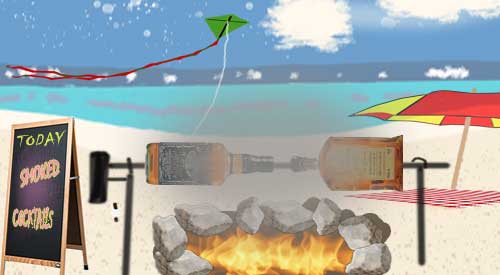
Smoked Whiskey Cocktails are great libations for drinking!

Smoked Whiskey Cocktails are great libations for drinking!

Guest blog- Kylee Harris, an events planner and writer.

Let's Smoke the Whiskey for our cocktails Share on X

There are over 550 annual barbeque competition events in the United States. Originally constrained to the Southern states, barbeque is now ubiquitous in most parts of the country. Thanks to the popularity of all things vintage, craft cocktails have made a huge comeback, and although it may not seem so at first glance, these two are a match made in heaven. As creative as barbeque pitmasters can get with their rubs and sauces, so, too, can you with specialty cocktails featuring smoked whiskey to pair with smoked meats.

Smoked Whiskey Manhattan- A Classic Match

You don’t need a pull-behind trailer rigged with the latest smoking equipment to make your own delicious smoked meats. As long as your kitchen is equipped with a stove, you can get in on this delicious food preparation. While you can purchase stovetop smokers, it’s fairly easy to DIY a smoker yourself with household products you probably already own. No matter what you’re serving, a Manhattan will pair beautifully with your meat.

Classic Manhattan

Classic Manhattan- for our smoked whiskey cocktails
Classic Manhattan (up)

Ingredients:

  • Ice
  • 2 oz. whiskey
  • ½ oz. sweet vermouth
  • dash of Angostura bitters
  • orange peel
  • Maraschino cherry

Shake whiskey, vermouth, and bitters with ice; strain into lowball glass. Rub the rim of your glass with the orange peel and garnish with cherry. Substitute vermouth with 1 oz. of agave nectar and use chocolate bitters and Jim Beam Devil’s Cut (barrel aged whiskey) for an alternate take on this classic.

A Smoked Whiskey Summer Treat

Take this simple, two-ingredient cocktail and kick it up a notch by infusing it with a smokey flavor that matches your menu. With a smoking gun (available for around $100, or you can make your own with some inexpensive tubing and a small-mouthed container), you can “rinse” your chilled glasses with smoke, or even smoke your entire concoction, using the same wood you use for your meat. The tartness of the grapefruit juice will cut the richness of the meat and is perfect for a backyard, al fresco dinner.

Jack Honey

Jack honey cocktail
Jack Honey cocktail

Ingredients:

  • 2 oz. Jack Daniels Tennessee Honey
  • 3 oz. fresh-squeezed grapefruit juice

Pour over ice into collins glass.

Something Truly Special

If your skills as a pitmaster aren’t the only thing you want to show off, here is a very special cocktail that will wow your guests. The smokey flavor and touch of cinnamon gives the classic whiskey sour a brand new twist that will leave your guests in awe. You’ll need to plan ahead for this one, as it requires two different, homemade syrups, but if you’re looking to win for best bartender, this one can’t lose.

Smokey Sour

classic whiskey sour
Classic whiskey sour

Ingredients:

  • Ice
  • 2 oz. whiskey
  • ¾ oz. fresh lemon juice
  • ½ oz. cinnamon bark syrup (.3 oz cinnamon bark, 1 cup Turbinado sugar, 1 cup water; bring ingredients to a boil and simmer over low heat for 2 minutes, let sit for 2 hours, strain and keep refrigerated)
  • ¼ oz. Lapsang souchong tea syrup (3-4 tea bags, 1 cup Turbinado sugar, 1 cup water; bring ingredients to a boil and simmer over low heat for 2 minutes, let sit for 2 hours, strain and keep refrigerated)
  • 1 egg white

Add all ingredients to a shaker and shake until frothy. Strain into a coupe glass.

The bold, rich flavor of whiskey is the perfect complement to a rich, smoked meat dish; both American traditions trace their roots back to the South. If you are looking to skip the same old beer next time you smoke meat for your guests, you can’t go wrong with whiskey cocktails, either made-to-order or batched for a larger group. Let the elements of barbequing guide you to experiment with new techniques and flavors and take your pairings to a new level.

SmokinLicious® products:

Wood Chips- Minuto® & Piccolo®

More related reading on how Smokinlicious® reduces the risks of Microbial bacteria in our wood products
More related reading on smoked Whiskey Cocktails & Grilling tips and technique see our directory on previous blogs

More related blogs:

-How To Maintain A Safe Kitchen Environment

-HOW TO MAKE THE BEST SMOKY COCKTAILS

-SMOKY BOURBON CRANBERRY COCKTAIL

Dr. Smoke- Thank you Kaylee for another very informative article!
Dr. Smoke- Thank you Kylee for another very informative article!

Our Cherry smoking wood gives a wonderful favor for Smoking, Grilling or Ember cooking. Adds a distinctive reddish-pink hue!

Our Cherry smoking wood adds a wonderful favor for Smoking, Grilling or Ember cooking. Adds a distinctive reddish-pink hue!

Our Cherry wood smoke is a wonderful flavor for Smoking, Grilling or Ember cooking! Share on X

Listen to the audio of this blog


We introduced you first to the details on the ever-popular Sugar Maple hardwood but now let’s talk fruit wood, specifically, the forest grown cherry hardwood.

(more…)


This bucolic photo can be yours if you follow our 6 TIPS FOR A HEALTHY OUTDOOR COOKING SEASON

Follow our 6 tips for a healthy outdoor cooking season in 2018!

Tips for Safe Outdoor Cooking- “6 TIPS FOR A HEALTHY SEASON”

listen to our blog


Everyone seems to be so much happier during the seasons that allow for outdoor cooking and entertaining. Whether it’s a planned cooking event or spur of the moment decision, these cooking events turn into an opportunity to relax, kick back and truly enjoy life.

There are steps you should take to ensure that the foods you enjoy outdoors remain safe. What follows are the top tips for safe outdoor cooking that will make for the best outdoor cooking season ever, no matter what you elect to cook.

Tips for Safe Outdoor Cooking

Tip #1

There are times when you want to marinate meats and poultry before cooking on your grill or smoker. Know that foods will only remain safe if you marinate in the refrigerator in a covered container, not with the marinated foods laying out on the kitchen counter. Also, if you plan to incorporate some of the marinades into a sauce, be sure to reserve some before it is applied to the raw foods. If there is marinade leftover from the raw food marination, be sure you boil it before using as anything that has contact with the raw food can carry bacteria.

Tip #2

You can grill a variety of foods on the same equipment but to know when everything is cooked, you will need to have thermometers. It’s best to use a different thermometer, marked by color, for each type of food: beef, pork, chicken, fish. The thermometer should be placed in the thickest part of the meat or poultry to get an accurate internal temperature reading. Here is a guide on temperatures:

  • Beef, Pork, Lamb, & Veal (steaks, roasts, and chops): 145°F/62°C
  • Ground meats & sausage: 160°F/71°C
  • Whole poultry, poultry breasts, & ground poultry: 165°F/74°C
  • Hot dogs: Cook until steaming hot

Remember, thicker cut meats and poultry will need to be placed closer to the fire or heat. Utilize the upper grill grate for those items that are more fragile like thinner fillets of fish, vegetables, fruit, or for heating sauces.

Tip #3

You cannot partially cook meats and poultry by parboiling or microwaving and then placing in the refrigerator for grilling the next day. Although you may think this will lessen the cooking time on the grill, what you’re doing is introducing the potential for everyone to become sick. The reason? Partial cooking does not eliminate all bacteria growth. The reality is, you would be allowing bacteria to continue to grow.

Tip #4

Take the time to properly clean your grill or smoker at the start of the outdoor cooking season. It’s common to close vents on the grill or smoker when you cover it up for the winter season but these aides in stimulating mold growth on the grill grate and/or inside cover and walls. For that reason, it’s important to scrub down the interior of the grill or smoker using a cleaning mixture; 1 part vinegar to 3 parts water or a bleach to water blend if you’re not opposed to the more toxic bleach.

Tip #5

Be sure you start with a hot grill or to cooking temperature smoker. That means, preheat. Preheat your grill 15 to 25 minutes before you start cooking to make sure it reaches the right temperature to ensure all bacteria is killed. Your grill should be 400-450°F for high, 350-400°F for medium-high, 300-350°F for medium and 250-300°F for low heat. By having a properly heated grill, you will guarantee a moist outcome for your meat and poultry.

Tip #6

There are many of us we prefer a good charcoal grill versus gas. It is important that you understand that there are many more influencers to altering the flavor of what you’re cooking when you cook over charcoal. Be sure to use an additive-free lump charcoal, which is charred wood. Conventional briquettes, which are easy to find, may contain wood scraps and sawdust as well as coal dust, sodium nitrate, borax and additives like paraffin or lighter fluid. As for lighter fluid, NO! Lighter fluid can release volatile organic compounds (VOCs) into the air, leave an unpleasant flavor to foods, and pose a serious danger if used improperly. Skip it altogether.

Without question, our 6 TIPS FOR A HEALTHY OUTDOOR COOKING SEASON should help you on your way to a healthy, memorable outdoor cooking season. Likely, the best ever!

Purchase products:

Wood Chips: Grande Sapore®, Minuto® & Piccolo®

Wood Chunks: Double & Single Filet

More Related reading on "What Wood for Smoking" and other great smoking and grilling tips and techniques

More Related reading on “What Wood for Smoking” and other great smoking and grilling tips and techniques

Additional reading:

-10 THINGS TO CONSIDER BEFORE PURCHASING WOOD FOR COOKING, GRILLING & SMOKING

-HOW TO TURN YOUR CHARCOAL GRILL INTO A SMOKER

-THINGS YOU DIDN’T KNOW YOU COULD SMOKE

-WHAT WOOD TO USE FOR SMOKING: A PRIMER

Dr. Smoke- please follow our blog 6 TIPS FOR A HEALTHY OUTDOOR COOKING SEASON!

Dr. Smoke- Food labeling is important for health and food safety. It should apply to all smoked foods!

Picking the ideal fire set up for cooking depends on circumstances- this is the cabin Style

Picking the ideal fire set up for cooking depends on circumstances- this is the cabin Style

YOUR IDEAL FIRE SETUP FOR COOKING Share on X


We are so lucky to have so many options for cooking our foods, not to mention the option to not cook at all! This got me thinking about the fact that we do rely on our outdoor equipment and cookware when it comes to outdoor cooking. Even if you’re a person who has experience campfire cooking, you likely do this style of cooking with one type of fire setup .

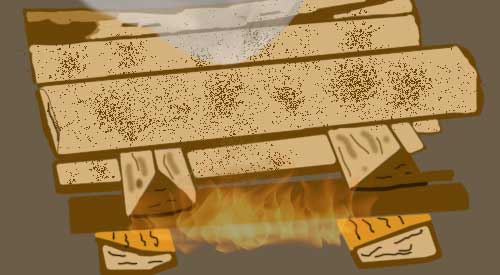
Let’s look at some of the options for setting up an outdoor fire that don’t include purchased equipment, just the natural elements found outdoors – rock, tinder, kindling, and logs/wood. As I always like to remind you, though you may not use this information immediately, you should read it and keep a reference handy for when a situation may arise that you need it, such as a natural disaster, power grid emergency or other such catastrophic event.

Fire Setup #1: Trench Fire

(more…)

The simple campfire has many uses!

The simple campfire provides more uses beyond just fire cooking!


fire cooking and beyond! Share on X

Listen to the audio of this blog

You’ve likely heard this phrase before whether as a child, adult or at intervals of both. “Fire is meant to be respected.” I’m going to go one step further. Fire should not only be respected, it should be honored and appreciated for all it can offer. I’m going to point out to you just what other uses fire can present to you. Perhaps next time you light a fire whether in your charcoal chimney starter, charcoal grill, fireplace, or even outdoor fire pit, you’ll give some pause to the other uses to keep in your knowledge arsenal for times you may need this information. As I age, I am always in tune with my environment and how I can use it not only for fire cooking but to survive if a situation I can’t control should call for it.

Fire Cooking Use #1: Heat

If you are fortunate as I am to have an outdoor source of fire other than your traditional grill, then you’ve likely found yourself enjoying this first benefit of fire. Heat. But you likely don’t know about the radiant heat quality of fire. With a single fire, only the surfaces facing it are warmed. When it comes to surviving outdoors with heat from a fire, this is when you will want to learn about reflective ability of the fire.

If you have a choice in fire building location when you need it for survival, elect to build one near a large rock or tree stump but add a reflector component on the other side of the fire. This will allow the rock or tree stump to absorb the heat from the fire and then reflect it back. By adding a reflector on the other side of the fire, you will enjoy heat both on your back and front, the ideal for surviving if you must rely on fire for body temperature. Plus, the two reflecting points will force the smoke to go upward allowing you to avoid smoke in the eyes.

Fire Cooking Use #2: Signaling

We all know that fire makes smoke and that smoke acts as a signal. When you want to be found, this is the perfect means for attracting attention. What you need to know is that the terrain plays a part in being seen. If you want to use smoke to signal for help, then seek high points for making one.

Fire Cooking Use #3: Water Sterilization

If you are in a dire situation where you’ve been unable to bring many supplies with you, know that fire can aid your ability to stay alive. You can only survive 3 days without water so finding water is a priority. You can sterilize water found from any source for consumption by boiling it which is a temperature of 212°F. Essentially, 1 liter of water per person will get you through survival of 3-4 days.

Fire Cooking Use #4: Preserving Foods

We tend to rely on someone else in the food production chain to preserve food but you may find a time where you either want to do this for your own family or you have to. Drying, smoking, pickling, and salting are methods of preserving foods from micro-organisms that spoil food. When you smoke meat you dehydrate it and produce a protective coating on the outside that prevents bacteria and condensation from penetrating. This is a means of ensuring you have a food supply that can keep you alive for quite a long time.

Fire Cooking Use #5: Protection

If you’ve ever been camping or glamping in a forest area, then you know that you are never alone. Wildlife dominates in these areas. Fire can be a protector when it comes to keeping these visitors at bay. Always be sure to have a portable fire set up such as a rag tied to the end of stick or similar tool to use as a portable weapon should a forest resident elect to come close to you.

Do you have another survival use for fire? Leave us a comment to share your views. Bringing you informative recipes, techniques, and the science beyond the fire, smoke, and flavor. That’s SmokinLicious®!

SmokinLicious® products recommended:

Wood Chunks- Double & Single Filet

Wood Chips- Grande Sapore®, Minuto® & Piccolo®

Charwood

More related reading on how Smokinlicious® reduces the risks of Microbial bacteria in our wood products
More related reading on fire cooking, smoking & Grilling tips and technique see our directory on previous blogs!

Other blogs like this one:

THE HISTORY OF FIRE COOKING PART I

-OPEN PIT COOKING FIRE BUILDING: PART I

-HOW TO TURN YOUR CHARCOAL GRILL INTO A SMOKER


Dr. Smoke-fire is for more than just cooking!
Dr. Smoke- fire cooking and beyond!
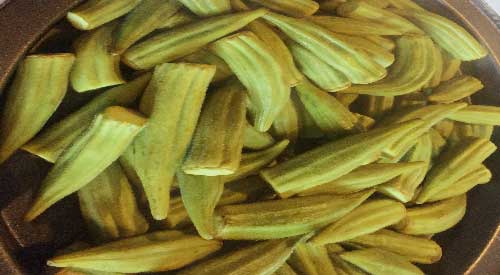
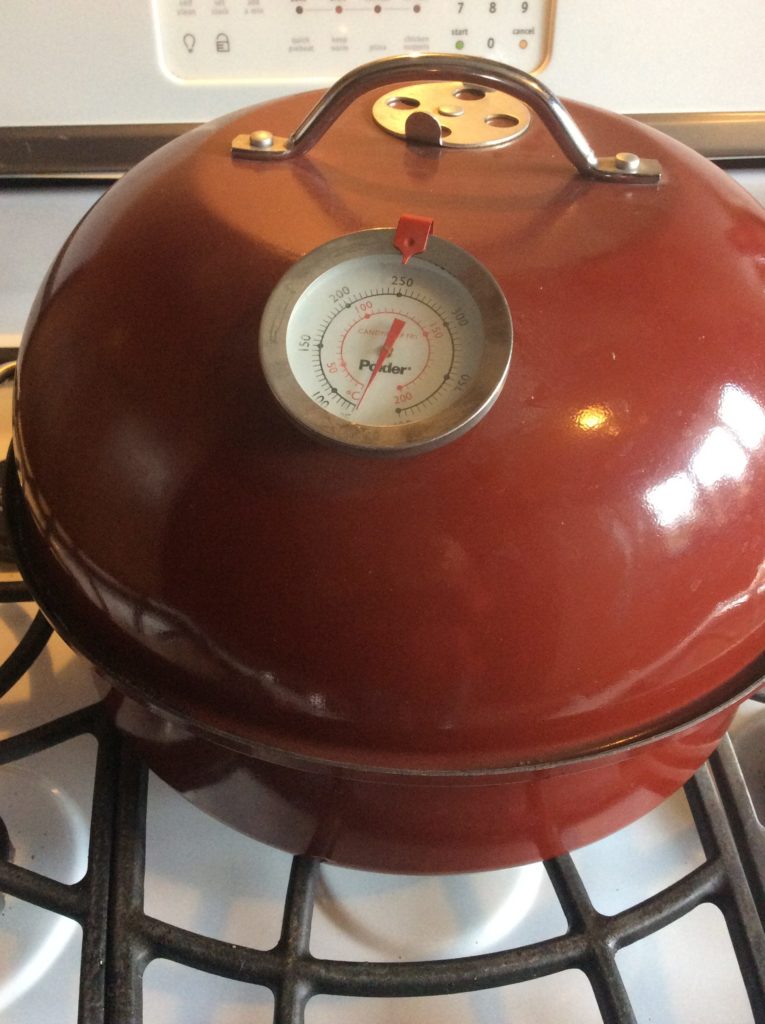
Our Fresh Okra ready and on the stove top smoker pan to become our Smoked Okra

Our Fresh Okra ready and on the stove top smoker pan to become our Smoked Okra

Smoked Okra- Veggies like a Smoky flavor Too! Share on X

Listen to the audio of this blog

It’s time to bring a smoky flavor to one of my favorite though limited in availability, vegetables – smoked okra! Known as a super healthy food but one that sometimes confuses people on how to cook and eat it, I’m going to bring you an easy method of tenderizing and infusing okra with a pleasant smoky flavor that doesn’t stimulate the sticky juice known to lurk inside.

Though I’m going to use a stove top smoker for my infusion, you can easily adapt this method to the gas grill, charcoal grill or electric smoker using a vegetable basket or tray. Seek out some vibrant green, firm okra and let’s get started on a new way to cook and flavor this healthy vegetable.

Smoker Set Up for Smoked Okra

The nordic ware stove top smoker we used
#smokedokra

I’m using my Nordic Ware Stove Top Kettle Smoker for this hot smoking method. To start, I place the smoker base on the unlit burner and add about ¼ cup of Minuto® Wood Chips – I’m using a #6 in Sugar Maple – from SmokinLicious®. I place the drip pan on top of the wood chips and then ensure the food insert pan is clean and dry. For vegetables, I usually use a medium heat setting on my stove – I have a gas stove top. This will register between 200-250°F on the kettle smoker’s temperature gauge. Next, I’ll do a simple preparation to the okra and we’ll be ready to turn on the heat to the stove top unit.

Tasting Notes: For the charcoal grill set up, use a two-zone cooking method – charcoal and wood lit on one half of the grill while the vegetable tray or basket containing the okra will go on the unlit side of the grill. Do the same set up on the gas grill. For the electric smoker, be sure to use a lower heat setting – around 180°F.

Smoked Okra- Trim and Smoke

Nothing could be simpler than the preparation for okra. You’ll want to ensure that the outside is clean and dry so a simple water wash is good with a pat dry. I like to remove the stem top to allow penetration of the smoke vapor into the center of the pod.

our prepared fresh okra on the smoker pan
#okra

Place about one pound of fresh okra with the stem tops trimmed into the smoker’s food tray. Try making an even layer of pods so the smoke vapor can flavor the pods evenly. Cover the kettle smoker with the lid and turn the burner on to a medium setting. I use my stove’s vent on high to keep the aroma down somewhat.

Allow the okra pods to tenderize and smoke for about 20 minutes before checking. You just want them to be tender (not falling apart), to where a knife can still cut them into pieces. Once done, remove the pods to a bowl and use these in recipes calling for okra or you can serve as is with a favorite sauce.

(more…)

Our not so smokey Smoked Turkey is from cooking this on the gas grill, not on a smoker. We selected this photo because of the great color- not dark like a traditional smoker can impart!

Our not so smokey Smoked Turkey is from cooking this on the gas grill, not on a smoker. We selected this photo because of the great color- not dark like a traditional smoker can impart!

THE NOT-SO-SMOKEY SMOKED TURKEY Share on X

Listen to the audio of this blog

Listen to our blog #smokinlicious- smoked turkey

Turkey is one of those items that is generally made for a special event – Thanksgiving, Christmas, New Year – and not associated with everyday cooking. I’m here to tell you that it’s easy to enjoy turkey any time of year when you use a gas grill for the cooking and smoke infusion. All you need is a turkey (preferably one under 15 lbs.), 6 wood chunks, a water pan with hot water, and your favorite gas grill.

Smoked Turkey- Turkey 101 Prep

Preparing the Turkey

#freshturkey

I’m fortunate to have a local fresh turkey farm, Sprague’s Turkey Farm in Portville, NY, close by so I’ve ordered one that is under 14 lbs. Before preparing the turkey for marinating overnight, I first need to remove the parts that are commonly found inside the turkey. This includes the neck, heart, liver, and gizzard which is part of the turkey’s digestive tract. These parts do make for great stock so if you can, save them to add to a stockpot down the road.

Once the organs and neck are removed, it’s important to wash the entire turkey under running water. After a thorough wash, pat dry with some paper towels and place in a shallow pan for the rub application.

Herb and Spice Rub

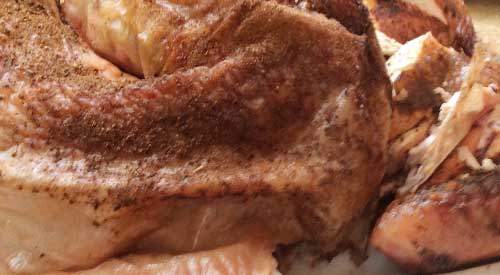
Gently placing the rub on the outside of the Turkey

#turkeyrub

After washing and patting dry the turkey, I trim the excess skin from the neck area and then begin applying the rub. I’ve combined an assortment of herbs and spices for my rub as I tend to like a potent mix of ingredients to balance the fresh meat and smoke. My rub includes: allspice, clove, basil, cumin, cardamom, coriander, cinnamon, celery salt, garlic and onion powder, oregano, orange and lemon peel, paprika, and ancho chili powder. I make sure to cover the entire surface of the bird. I add a few drops of avocado oil and then apply additional rub. This will be refrigerated overnight to allow the flavors to marry and penetrate to the meat.

Tasting Notes: Feel free to incorporate different herbs and spices in your rub as there are no rules when it comes to combinations.

Smoked Turkey- Smoking on the Gas Grill

Placing the Turkey on the grill

#twozonecooking

As you can see in some of the photos, this was a cold day at the grill, with a temperature below 25°F. I prepare my LP/Gas grill by first removing one of the grill grates, exposing two of my burner shields. To one of the shields I place 3 double filet wood chunks from SmokinLicious®. Now I lite only two burners; the one with the wood chunks and the one directly next to that. I set these burners to medium heat to start. Just before I’m ready to grill, I check the temperature readout and adjust my heat setting until I hit my target temperature of 325°F.

Time to add the rubbed turkey to the unlit side of the grill and my water pan right next to the bird. I insert a thermometer and close the lid. Basically, for the next couple of hours, I just need to monitor that the water pan has enough hot water in it and the bird gets spritz with water to keep the skin moist.

Tasting Notes: Although I’ve placed my water pan to the side of my turkey, between the lit and unlit sides of the grill, you can use this as a drip pan and place this directly under the turkey. I elected not to do this today due to my low outdoor temperature.

Time to Serve Your Smoked Turkey!

Our not so smokey smoked turkey on the table for all the guests to enjoy

#turkey

If you’ve maintained the steady temperature of 325°F and hot water in the drip pan, you won’t need to stay with the grill during most of the turkey’s cooking time. My skin has crisped up thanks to maintaining moisture both on the bird’s skin and in the cooker with my water pan. I remove the turkey and take it to the kitchen where I cover it for about 30 minutes prior to carving. It’s super tender, moist, with a crunch to the skin. The best part is that the smoke is subtle and does not over power the fresh meat.

That’s why the two-zone method of smoking is perfect when your feeding a variety of tastes. Those that tend to avoid smoked foods will find this full of flavor that is well balanced due to our rub and consistent cooking temperature. My turkey of 13-1/2 pounds took just about 4 hours to finish with very little effort on my part, even with a 22°F outdoor temperature and wind chill. The best part is my oven was free to cook a bunch of side dishes so everything was timed perfectly for the table.

What’s your favorite preparation for turkey? Bringing innovation to wood fired cooking with recipes, techniques and the science behind the fire, smoke, and flavor. That’s SmokinLicious®.

SmokinLicious® products used in this blog:

Wood Chunks- Double Filet

More Related reading

More related reading on Smoked Turkey and the different methods of preparation1

Additional reading:

-WHY TWO-ZONE COOKING METHOD LET’S YOU WALK AWAY FROM THE GRILL

-SMOKE A TURKEY- LEARN HOW

-SMOKED HAM ON THE GAS GRILL

-CORNISH GAME HEN MEETS SMOKE IN THE ORION COOKER

Dr. Smoke- Everyone forgets about the extra oven almost everyone has- the lp/gas grill! So this year we prepared smoked turkey using the gas grill with wood chunks providing the smoke!

Dr. Smoke- Everyone forgets about the extra oven almost everyone has- the lp/gas grill! So this year we prepared smoked turkey using the gas grill with wood chunks providing the smoke!


Our Forest Fresh Hardwood is a perfect fit for any ceramic smoker and grill.

Our Forest Fresh Hardwood is a perfect fit for ceramic smokers and grills.

Forest Fresh Hardwood is a perfect fit for ceramic smokers and grills. Share on X

Listen to the audio of this blog


For those that have followed us for years, you know we are proud that almost from the start of our Company, we were committed to providing a guide for equipment to culinary wood product match. We refer to our guide affectionately as Match Your Cooker.

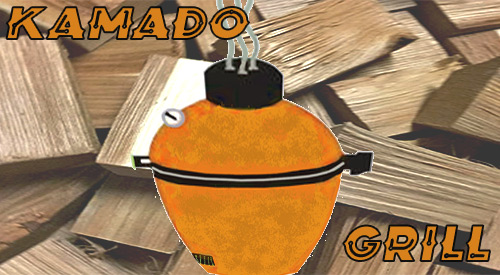
In this article, we are covering our recommendations for ceramic and komado style grilling equipment; these are grills that are made from ceramic, clay, terracotta or crushed lava rock that allow the grill to reach extremely high temperatures – usually at or above 750°F! They are also capable of using charcoal and wood either independently or in combination.

As there are always new equipment lines and models released, our plan is to provide regular updates on this listing. We also encourage you to send us a message when you don’t see a manufacturer or model listed to ensure it is added to the list (email drsmoke@smokinlicious.com).

For now, we introduce you to our wood master’s guide to SmokinLicious® culinary woods for ceramic and komado grills.

Single Filet Wood Chunks for Ceramic Smokers & Grills

The following equipment/models would be suitable for the SmokinLicious® Single Filet Wood Chunks as the charcoal area allows for larger wood pieces:

Big Green Egg models: 2XL, XLarge

Char-Griller Akorn model: ceramic kamado

Grill Dome® models: XL

Kamado Joe Big Joe™ 24”

Komodo Kamado® 32” Big Bad

Louisiana Grills K24

Primo Ceramic Grills models: Jack Daniel’s Edition Oval XL 400, Primo Oval XL 400

Double Filet Wood Chunks for Ceramic Smokers & Grills

The following equipment/models would be suitable for the SmokinLicious® Double Filet Wood Chunks to maximize oxygen flow:

Bayou Classic Ceramic Charcoal Grill

Big Green Egg models: Large, Medium, Small

Blaze 20-inch Cast Aluminum Kamado Grill*

Broil King® Keg models: Keg™ 5000, Keg™ 2000

Cal Flame® Kamado Smoker Grill

Caliber Pro Stainless Steel Kamado Grill*

Char-Griller Akorn: models: Kamado and Kamado Jr.

Char-Broil Kamander® Charcoal Grill

Coyote Asado Ceramic Grill

Gourmet Guru Grill Ceramic Kamado

Grill Dome® models: XL, Large, Small

Hanover® 19-in. Ceramic Kamado Grill

Kamado Joe models: Classic II™ 18”, Big Joe™ 24”, Stand-Alone™, Joe Jr.™

Komodo Kamado® models: 32” Big Bad, 23” Ultimate, 21” Supreme, 19” Hi-Cap Tall, 19” Hi-Cap Table Top, 16” Hi-Cap Table Top

Louisiana Grills models: K13, K18, K22, K24

Monolith Grills BBQ Guru Edition models: Classic, Le Chef

Pit Boss Grills models: K22 Ceramic Charcoal Grill, K24 Ceramic Charcoal Grill

Primo Ceramic Grills models: Primo Oval LG 300, Primo Oval JR 200, Primo Kamado All-In-One

Vision™ Grills models: XL

Grande Sapore® Wood Chips for Ceramic Smokers & Grills

The following equipment/models would be suitable for the SmokinLicious® Grande Sapore® Wood Chips for those who prefer a wood chip product rather than chunks:

Bayou Classic Ceramic Charcoal Grill

Big Green Egg models: MiniMax, Mini

Blaze 20-inch Cast Aluminum Kamado Grill*

Broil King® Keg models: Keg™ 5000, Keg™ 2000

Cal Flame® Kamado Smoker Grill

Caliber Pro Stainless Steel Kamado Grill*

Char-Griller Akorn: models: Kamado and Kamado Jr.

Char-Broil Kamander® Charcoal Grill

Coyote Asado Ceramic Grill

Gourmet Guru Grill Ceramic Kamado

Grill Dome® models: XL, Large, Small

Hanover® 19-in. Ceramic Kamado Grill

Kamado Joe models: Classic II™ 18”, Big Joe™ 24”, Stand-Alone™, Joe Jr.™

Komodo Kamado® models: 32” Big Bad, 23” Ultimate, 21” Supreme, 19” Hi-Cap Tall, 19” Hi-Cap Table Top, 16” Hi-Cap Table Top

Louisiana Grills models: K13, K18, K22, K24

Monolith Grills BBQ Guru Edition models: Classic, Le Chef

Pit Boss Grills models: K22 Ceramic Charcoal Grill, K24 Ceramic Charcoal Grill

Primo Ceramic Grills models: Primo Oval LG 300, Primo Oval JR 200, Primo Kamado All-In-One

Saffire Grill and Smoker**

Vision™ Grills models: XL

Minuto® Wood Chips for Ceramic Smokers & Grills

The following equipment/models would be suitable for the SmokinLicious® Minuto® Wood Chips:

Saffire Grill and Smoker

We hope you view this guide as a helpful resource for selecting the perfect culinary wood for your equipment. As always, our Wood Guide Team is ready to answer your additional questions and further assist you with the perfect grilling and smoking experience!

* Although considered a komado grill, this brand is not made with any ceramic, clay, terracotta, or crushed stone.

** This brand is only designed for use with wood chips and includes a patented smokin’ chip feeder.

SmokinLicious® products used in this blog:

Wood Chunks- Double & Single Filet

Wood Chips- Grande Sapore® & Minuto®

More Related reading on this subject- More Related reading on this subject of cooking & Grilling with wood

Ceramic smokers & grills are very popular. For more reading on how these units can best work with wood as a food flavoring element, check out these articles:

-WOOD BURNING PIZZA OVENS: THE WOOD MASTER’S GUIDE

-TOP TOOLS TO OWN FOR CHARCOAL GRILLING

-THE WATER PAN EXPLAINED FOR GRILLING & SMOKING

Dr. Smoke produces great products for all ceramic smokers and grills.

Dr. Smoke produces great products for all ceramic smokers and grills.


Smokinlicious® recommends "must have" gas grill tools

Smokinlicious® recommends “must have” gas grill tools


GAS GRILL TOOLS

Listen to the audio of this blog


There is no question that LP/Gas grills have changed tremendously over the past 10 years and now include some features standard that for many years, were options. Then there is the development of dual or multi-fuel options on a grill so you can have one unit that performs as a gas grill, charcoal grill, wood grill, and even electric or pellet grill, all in one unit.

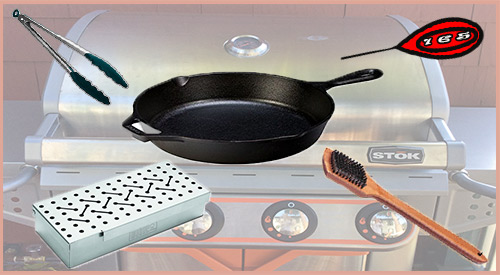
Today, I’m focusing on the standard LP/Gas grill, independent of any other fuel source. This guide will focus on the basic tools that will provide for a better grilling experience and make you more efficient at the grill.

GAS GRILL TOOLS THAT YOU MUST HAVE:

Tool #1

I’m starting with a grill brush since most of us have the habit of thinking about cleaning off the grill grates when we start the grill for cooking, not when we finish. This tool is to ensure clean up the residual food bits and grease left from your previous grilled foods.

Now I’m aware of the controversy over the use of metal bristles but most of these brushes are made well. Simple inspection of the brush bristles each time you use it will allow you to identify if the bristles have come loose and have the potential to be transported to your foods. I prefer a brush with metal bristles, with a long handle to keep my arm away from the heat, as often you want to clean the grill when it’s hot. Remember, most of these brushes are under $10 so think about purchasing one a couple times per season to ensure the bristles stay put.

Tool #2

There are times when the grill grates and lid will become super coated in grease and pieces of food. You’ll need to break out the cleaning agents to ensure these surfaces are ready to go for the next grilling event. Two of my favorites are CLR BBQ Grill Cleaner and Mr. Clean MagicEraser. As a non-toxic, non-flammable, biodegradable product, CLR BBQ Grill Cleaner is not something you have to leave on for hours at a time. It quickly breaks through the issues and allows you to wipe clean to an almost new state. Keep in mind, the CLR brand also makes a stainless steel cleaner for the outside as well.

Tool #3

Long-handled tongs. Your standard tong length for the traditional kitchen just won’t work at the grill, as you need to keep some arm distance from the hot grill surfaces. I like the 20-inch length with silicone grips as well as silicone tips, as silicone can tolerate extremely high heat. If you grill multiple food items at the same time, think about purchasing tongs with different colored tips and/or handles as that will ensure use of one color for a specific food so there’s no transfer of flavors.

Tool #4

Like the tongs, a must have is long-handled spatula for those food items that need to be flipped. I prefer one that is made of solid steel and has a bit of a beveling to the edge. Again, the longer the handle the better for keeping away from high heat.

Tool #5

An easy to read, digital thermometer. It is a must when you grill or smoke. Look for one that has a longer probe for when your grilling larger roasts and thicker cuts of meats and poultry. Be sure the readout is easy to see and if you grill a lot at night, get one that has a back-lite to see more clearly. If you cook a lot of different animal proteins at the same time, try to have a thermometer dedicated to each food so you don’t cross-contaminate while bacteria may still be an issue. There are assorted colors available making it easy to dedicate one to red meat, pork, poultry, and fish. Most of the digital thermometers on the market today are under $18 with even more under $10.

Tool #6

If you’ve always been a person that cooks directly on the grill grates and only does the standard fare – hamburgers, sausage, chicken, perhaps ribs – you need to get out of that rut and learn to do more with your grill. Start by investing in one piece of quality cast iron. Able to withstand intense heat, cast iron can take you from the average griller to someone with skill. Now, you can enjoy recipes normally done on the indoor stove outside in the fresh air, with your cast iron skillet. Remember, there’s a whole line of cast iron cookware so as you expand your skills, you can add to your outdoor cookware.

Tool #7

Although I am a fan of the standard steam table disposable foil pan, any size, shape foil pan will do. These are perfect for use as a drip pan to prevent render juices from spiking flames and as water pans for a two-zone cooking set up. I won’t deny, that I also use these to cook in especially fragile items like fruit and specific vegetables. You certainly can invest in a grill pan but clean up becomes a snap with the disposable pan.

Tool #8

Although the smoker box was originally intended for use with wood chips on the grill, I always use small wood chunks in mine. I prefer a box made from high-grade stainless steel and one that has a hinged lid. My smoker box holds three Double Filet Wood Chunks from SmokinLicious® perfectly and provides for extended smoke vapor as compared with wood chips. Used directly on the grill grate or set under the grill grate on the heat shield, it produces smoke for hours. Although you can place wood chunks directly on the heat shields, as I’m known to do myself sometimes, they will become permanently marked from the wood ash and eventually need replacing. The smoker box allows you to avoid this.

There you have it! My TOP TOOLS NEEDED FOR GAS GRILLING for better results and help in extending the life of your investment!

SmokinLicious® products used in this blog:

Wood Chips

Wood Chunks- Double Filet

Charwood

More Related reading on this subject

More Related reading on this subject

Additional reading:

-HOW TO TURN YOUR LP/GAS GRILL INTO A SMOKER

-TOP TOOLS TO OWN FOR CHARCOAL GRILLING

-TOP 10 TIPS FOR GRILLING SAFETY

-WHY IS MY BARBECUE MEAT DRY??

Dr. Smoke recommends gas grill tools that are a must!

Dr. Smoke- Here’s our recommendations for “must have” gas grill tools.

TOP 10 TIPS FOR GRILLING SAFETY

Listen to the audio of this blog

We all love the time of year when we can abandon the indoor kitchen and head out to the grill for open air breathing, relaxing, and some great food. For those of you who are new to outdoor grilling or who may need a refresher, we are giving you our top TIPS FOR GRILLING SAFETY so there’s no chance your summer grilling season is remembered for another reason.

Tip #1

You probably wondered why about 15 years ago, outdoor kitchens became all the rage. The real purpose in having an area designated for outdoor cooking took hold when people realized these structures were highly durable and allowed for measures to be in place to ensure rogue hot coals from charcoal fires or excessive heat from gas grills didn’t ignite the surrounding structures like the house and garage. If you can’t afford a full outdoor kitchen layout, at least follow some of the basic ideas: set the cooking area a distance away from any building and preferably on a fire-proof surface like concrete, that is safely away from trees and grass.

Tip #2

Keep your grill clean. Whether it’s propane, natural gas, electric or charcoal, all grills need periodic cleaning to keep them performing optimally as well as to prevent those surprise grease fires. Any grill can have a grease fire! Clean the drip pan, grease pan, lid, walls and grilling grates. In addition to the safety need, this will give you the longest life out of the grills parts. If you grill a lot in a single season, then clean the equipment more than just at the start and end of the season.

Tip #3

Don’t use lighter fluid. This is a chemical designed to give quick life to briquets, charcoal, and wood. Don’t use it! It adds a prominent chemical taste to your foods and can result in a fire that goes wild. Learn what a chimney starter is, buy one, and use it. It is the safest and easiest method of lighting a fire for a charcoal/wood grill.

Tip #4

Take note of the clothing you choose to wear when you know you’re going to be in control of the grill. No dangling sleeves, strings, or flammable materials should be near the grill. Aprons are a great way to keep clean as well as to keep flowing clothing under control. Just be sure the ties to said apron don’t become a fire starter.

Tip #5

Outdoor cooking is an adult activity. Don’t assign a youngster to watch the grill. Grease fires account for most of the damaging fires resulting from grilling. Plus, it is so easy for youngsters to receive burns from brushing or directly touching the hot grill surfaces. Animals, too, should be kept away.

Tip #6

Always prepare for catastrophic events! That means keep a fire extinguisher handy, sand, or baking soda at the ready. Never attempt to put out a grease fire with water. Remember, when using a fire extinguisher, spray ahead of the fire and then move toward it.

Tip #7

Understand how your grill works. With multi-fuel options in one piece of equipment, you need to know how to close vents, valves to gas, and output drafts. Firing up the grill and having something uncontrollable occur is not the time to learn what those knobs, slides, and dials are for.

Tip #8

If nuts, bolts, or screws loosen up, take the time to secure them back in place, especially if they are on lids, wheels, or fuel areas. Grills need to be sturdy to withstand the constant opening and closing of the lid. Protect the surface the grill is on by investing in a grill mat that is fire retardant. Not only can it prevent the start of a fire, but it will protect your deck or patio material from needing replacement.

Tip #9

When lighting a gas grill, be sure to keep the lid open. Lighting when the lid is down can result in the gas pooling and exploding. This will result in the lid becoming a weapon of its own when it is blown off the grill!

Tip #10

Never move a grill indoors including to a garage! I know. Space is always an issue when you entertain and a grill can take a lot of that valuable space. But there is no way around the fact that these pieces of equipment require outdoor air to prevent accumulation of volatile gases that can make you and everyone around ill or worse. Plus, these units radiate a lot of heat and that heat can spread quickly to other surfaces like the garage door, walls, siding, canopies, lawn chairs – you name it. Always maintain a 3- foot barrier around the grill including above it to ensure no issues.

Have you experienced a disaster while grilling? Tell us what safety tip you wish you had known about before disaster struck. Get tips, techniques, recipes, and the science behind the flame and fire to improve your skills with wood-fired cooking! Follow our TIPS FOR GRILLING SAFETY for a wonderful safe grilling season!

Purchase products:

Wood Chunks- Double & Single Filet

Wood Chips- Grande Sapore®, Minuto®, Piccolo®

More Related reading on this subject

More Related reading on this subject

Additional reading:

-6 TIPS FOR A HEALTHY OUTDOOR COOKING SEASON

-WHY WON’T MY WOOD CHIPS SMOKE??

-WHAT WOOD TO USE FOR SMOKING: A PRIMER

-HOW MUCH WOOD TO ADD WHEN SMOKING


The top Ten TIPS FOR GRILLING SAFETY we hope will make your grilling season safe and tasteful!

The top Ten TIPS FOR GRILLING SAFETY we hope will make your grilling season safe and tasteful!

Outdoor kitchen location tips

Wonderful article on Outdoor kitchen location tips

Wonderful article on Outdoor kitchen location tips

Guest Blog – Brown Jordan Outdoor Kitchens

Outdoor Kitchen Location Tips

by Phil Zaleon

When you are going through the steps of installing an outdoor kitchen, you’ll quickly find that deciding where to set it up is one of the most difficult and impactful decisions of the process. Since you have multiple options, it can be hard to figure out exactly where to put it. We’ve come up with a list of things to consider to help you decide!

Be Conscious of Sun and Shade

Summer is prime time for outdoor kitchen use. So, when planning your outdoor kitchen, bank on warm temperatures and lots of sun, and take reactive measures. Placing your outdoor kitchen under existing shade, or planning to add new sources of shade will provide you and your guest’s comfort year-round.

Natural shade from trees and vines is best because they ventilate easily. As an added bonus vines and trees “transpire,” evaporate moisture to cool themselves, creating their own natural misting system.

There are plenty of man-made shade options as well, such as pergolas, or trellises. The growing popularity of transition rooms provides an even more permanent and durable option for your outdoor kitchen.

Leverage Your Natural Space

Do you have a pool or hot tub in your yard? A beautiful garden? When choosing where to add your outdoor kitchen, take note of any existing structures or features that you want to complement. Also be wary of design overlap. The last thing you want is for your outdoor kitchen covering to inadvertently shade your vegetable garden.

In addition, when planning the placement of your outdoor kitchen, it’s important to consider the relationship between the indoor and outdoor versions, and how they will be used together when cooking or entertaining. If you have a large outdoor space to work with, it may prove prudent to place your outdoor kitchen in closer proximity to your indoor kitchen to create a seamless transition between indoors and outdoors.

Consider the View

Another crucial element to consider when you’re placing your outdoor kitchen is your views and sight lines. You can have the most beautiful outdoor kitchen in the world, but when your guests sit down to eat at the table, if they’re facing a brick wall or the old shed in your backyard, that’s what they’re going to remember. So, be sure to consider the view when you’re trying to find the perfect location for your stainless steel outdoor kitchen.

Another key consideration is the location that will provide the most privacy from neighbors. Screening views with trees and shrubbery will provide privacy while also providing a noise buffer for your close neighbors.

Don’t Forget Utilities

When planning your outdoor kitchen layouts, keep in mind the best practical placement or installation of the necessary gas, water, and electrical supply. Note where your water, gas and electric lines are, and design your kitchen accordingly.

Furthermore, when placing your grill or smoker, think about the natural flow of wind – make sure that smoke from the grill will be carried away from dining and living areas. You should also think about making sure the kitchen area is located a safe distance from doors and entryways to keep foot traffic away from potential hazards.

Additionally, make sure to place all outdoor cooking appliances away from areas where children play or where people play sports. You’ll want to avoid basketballs or soccer balls bouncing over onto a hot grill.

Don’t Shy Away From the Roof

When one thinks “outdoor kitchen,” the tendency is to think of backyards – but that doesn’t have to always be the case. Especially if you have a small or nonexistent lawn space, building your stainless outdoor kitchen on the roof can prove a very viable design option.

If you are choosing this option though, pay special attention to restrictions and codes. They vary by municipality, so check with your town’s building department to find out rules about setbacks, fire safety, and what kind of permits you’ll need to file. We recommend working with a general contractor so you are up to code and all safety requirements are included.

Fit Your Needs

The right spot to place an outdoor kitchen will vary from homeowner to homeowner. You may like the idea of an outdoor cooking area just outside the back door of your house or a freestanding pavilion near your pool area.

At the end of the day, there’s no one “right” spot for your outdoor kitchen. But by using these outdoor kitchen location tips, you’ll ensure you make an excellent choice.

Are you ready to build your dream luxury outdoor kitchen?


Call Brown Jordan Outdoor Kitchens on 203-871-3804 today to get started!

Related Reading:

-Electric Smoker Guy-HOW TO CHOOSE THE BEST ELECTRIC SMOKER

-Does Outdoor Kitchen Stainless Steel Rust

Dr. Smoke- things you should consider on Outdoor kitchen location tips

Dr. Smoke- things you should consider on Outdoor kitchen location tips

« Previous PageNext Page »