Our outdoor kitchen guest blog is authored by Mike Cahill

Our outdoor kitchen guest blog is authored by Mike Cahil

Listen to the audio of this blog

Mike is part of the Content Marketing team and enjoys applying market insights to provide valuable content on all things real estate. Mike’s dream home would be mid-century modern style near the water.

As days get warmer and summer approaches we’re all looking for more ways to spend time outside. Whether it be biking, running, hiking, or walking we can all agree that being outside is one of the best ways to spend time during the summer. So why not cook outside too? Having an inviting outdoor space that can double as a beautiful kitchen is a great way to be outside and create memories to be cherished for years to come. For that, we reached out to the experts from Yolo to Palm City to provide our readers with a few tips for creating the Ultimate Outdoor Kitchen.

Make it your own Outdoor Kitchen

The trend of outdoor design is experiencing a dramatic shift today. Landscape designers are moving away from traditional masonry-built structures to waterproof cabinets equipped with storage, trash receptacles and even vegetable and herb potting areas providing a whole new experience. Moya Living and Urban Bonfire offer two creative and functional products that bring color and extreme functionality into the design and provide the structure with every ability to create the perfect outdoor kitchen. Whether the homeowner desires a smoker from Kalamazoo, a pizza oven from Lynx, or Versa Powder Cooker from Alfresco, the options are endless in the design creation. Outdoor kitchen design now takes front and center focus when planning a remodeled home and now is simply an extension from the indoor to the outdoor so that every space of the home is utilized. – Annette Reeves

Find a proper grill

The focus of any outdoor kitchen is the grill. At Chicago Outdoor Living we believe a grill’s value shouldn’t be based solely on price. Features such as design, quality of materials, and functionality, combined with price, play an important role in choosing the grill that is right for you. It is also important to be aware of the manufacturer’s warranty. Chicago Outdoor Living carries a variety of high-quality grills to fit everyone’s grilling needs and budget – Chicago Outdoor Living

Grilling burgers on the grill

Our Authors image of cooking burgers

Choose complimentary finishes

Leather finish granite countertops are my go-to countertop surface for outdoor kitchens. It looks matte enough to feel like it belongs outdoors but is cleanable and ages well. – Attainable Form

Utilize misting systems

During sweltering summer days that are hot enough to have you fantasizing about moving to Antarctica, it can be difficult to enjoy your outdoor kitchen while you are feeling sweaty and scorched. With our misting systems that cool the air by up to 30 degrees without getting anyone drenched, you’ll be able to elevate your lifestyle and enjoy your outdoor kitchen in comfort all you want. – Advanced Misting Systems

Incorporate patio heaters

Enjoying your outdoor kitchen can be extremely difficult during winter days that are so cold it feels like you could chip a tooth from shivering. With our outdoor patio heaters that emit radiant heat to keep an area warm, you’ll have your own patio encased in a bubble of warmth, allowing you to enjoy your patio and outdoor kitchen while the neighbors are stuck indoors. – Gas Outdoor Patio Heaters

Storage is key in your Outdoor Kitchen

You can never have enough storage outside. The key is drawers: paper plates, utensils, corn on the cob holders, grill grates…. Keep them at your fingertips and you will be much happier. Drawer cabinets have to be fully enclosed to avoid creatures from crawling in for a vacation. – Cowgirl Q

If you love wood-fired flavors to foods cooked outdoors then be sure to consider wood storage when designing your outdoor kitchen. Pizza ovens, ceramic or clay ovens/smokers, traditional smokers and gas/hybrid grills all allow for the addition of charcoal, charwood, and/or hardwood to bring flavor essence to favorite cuts of protein, vegetables and fruit. Include in your design wood storage that allows for good air circulation to the wood as well as storage placed close to the equipment. Mesh bins or small wood crates work well for smaller pieces of wood that can fit on shelving under the counter or design open shelving in metal, stucco or concrete material that allow larger pieces of wood to remain dry, nonreactive and at the ready. – Smokinlicious

Don’t forget about the island

The best way to start creating your own Ultimate outdoor Kitchen is by getting ideas of different types of islands and kitchens. Researching will help you brainstorm an idea of your own (shape, size, color, components, etc). The next step is to find out where your Island will be placed. After finding a perfect fit, take a few measurements to see how the unit will be laid out. Over the years, KoKoMo has created various Outdoor Kitchen models with all kinds of different designs. A good example is our custom sports bar. This unit is fully stocked with all of our most popular components and accessories. This kitchen has a beautiful white-looking stone that covers the base, with a nice steel-looking tile to go with it. We used a large 15×15 aluminum shade cover with two giant TVs to entertain both sides of the island. – KoKoMo Grills

Keep it comfortable

Outdoor kitchens draw people in, whether it’s your guests gathering to offer help or little ones looking for a snack before the big meal. Make everyone comfortable with our thick, high-density cushions. Bonus tip: all our cushions are covered in water-resistant fabric, making rain and spills the least of your worries. And at the end of the party, if you need a special type of cover for your furniture or grill, we’ve got you covered with custom-made covers! – Classic Accessories

Get a personalized rub kit

Whether you’re grilling or smoking, when you’re cooking outdoors, having your own personalized “rub kit” at the ready is critical. A rub kit should include staples like lemon pepper, garlic pepper, and all-purpose seasoning salt. Round out your kit with your favorite rubs for the big four – beef, chicken, pork and seafood. – Savory Spice Shop

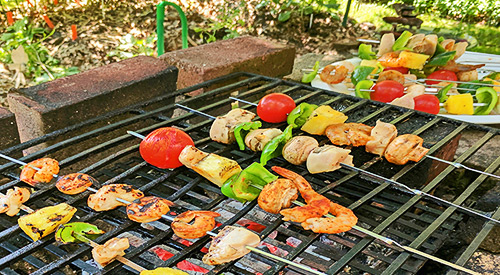
Picture of all the fixings being cut for the grill

We love this image from the author!

Consult with a pro for the Ultimate Outdoor Kitchen

For homeowners who want to build a fully functional outdoor kitchen area in their homes, I always recommend consulting with a designer, in addition to the outdoor kitchen company themselves. One thing I have learned with my experience in the business, is one layout for a kitchen does not necessarily work for every future buyer of the home — so the key is: versatility and simplicity. Most buyers these days are not so focused on decking, they want to see more grass. So artificial grass is a great alternative to decking, plus easy to maintain. Keep your dining area separate, and not built-in, should someone in the future want to change it, or if you entertain and need a different layout for a specific event. – Jenny Okhovat Homes

Originally published on Redfin

More Related reading on smoker More Related reading on Outdoor Kitchen essentials and other design ideas.

More Related reading on smoker More Related reading on Outdoor Kitchen essentials and other design ideas.

Related reading:

-Outdoor kitchen location tips

-Does Outdoor Kitchen Stainless Steel Rust

-6 TIPS FOR A HEALTHY OUTDOOR COOKING SEASON


Dr. Smoke- has an Outdoor Kitchen for grilling, smoking and entertainment, follow these great tips from our guest blogger!
Dr. Smoke- has an Outdoor Kitchen for grilling, smoking and entertainment, follow these great tips from our guest blogger!
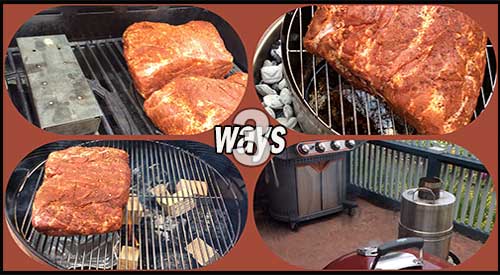
Our three ways of smoking Boston Butt offer great wood smoke flavor!

Our three ways of smoking Boston Butt offers great wood smoke flavor!

3 METHODS OF SMOKING BOSTON BUTT Share on X

Listen to the audio of this blog
This certainly is a clear example of how anyone can produce authentic barbecue on the equipment they have even if it’s not a traditional smoker.

3 Methods of Smoking Boston Butt-

It should come as no surprise that majority of grill owners invest in a gas grill for their outdoor cooking with over 80% of these owners investing in multiple accessories for that grill. Often, many of these grill owners will venture to make an additional purchase of a second type of grill like a charcoal or pellet grill/smoker, in order to be able to cook more barbecue or smoked food options.

My intent is to demonstrate to you that you can produce authentic flavors, colors, textures, and aromas of favorite barbecue proteins with a variety of equipment, all outfitted with hardwood for the authentic wood flavoring.

I’ll be taking Boston butt to a traditional gas grill, a kettle charcoal grill, and a convection-style grill to demonstrate just how easy it is to cook this popular animal protein while giving you a bit of education on how these units are different when hardwood is incorporated.

Set Up Similarities and Differences for Smoking Boston Butt

When it comes to setting up the grills for smoking, there are some obvious differences. First, let me name the equipment brands I’ve included and the intended set up of each for cooking and smoking the Boston Butt cuts, all of which approximate 8 lbs.

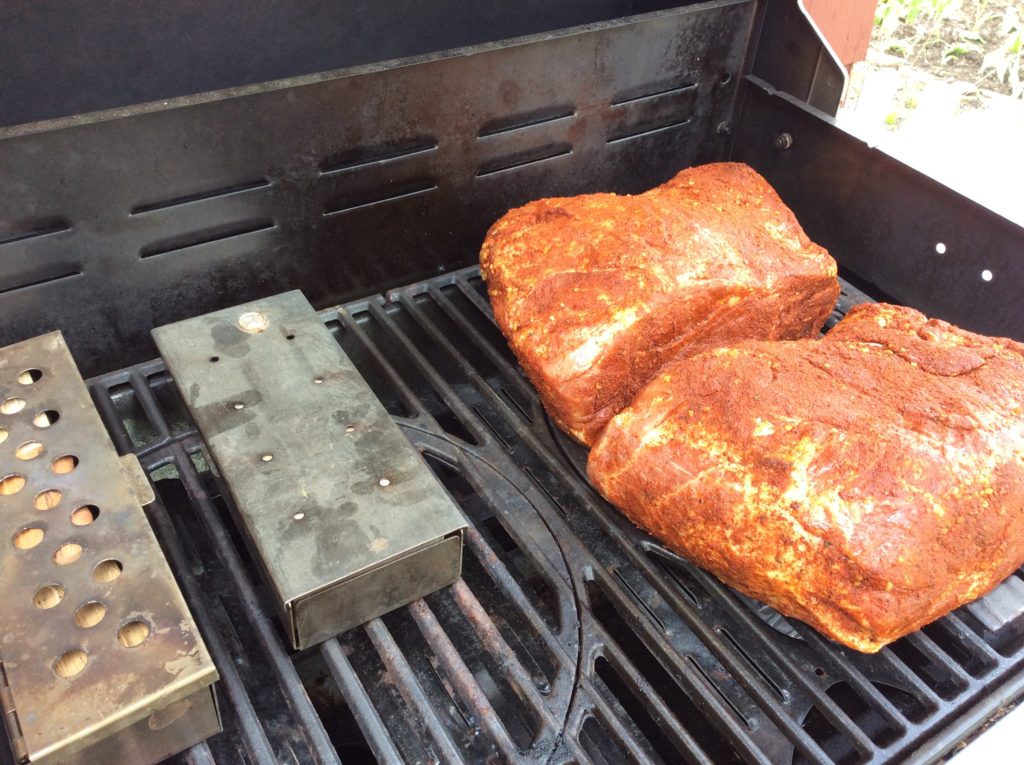
Our Boston Butt (s) on the Stok Gas Grill with accompanying Smoker boxes

The Stôk Quattro 4-Burner Grill:

If you are not familiar with this grill, it is equipped with an insert system to allow you to use a standard grilling grate, a griddle, grill basket, vegetable tray, pizza stone, Dutch oven, Wok, and other inserts that easily pop in and out of the cast iron grates. Despite this feature, you can do traditional smoking using wood chunks without the need for the smoker/infuser insert.

Whenever I smoke on a traditional gas grill, I always set up a two-zone cooking method. This means, on my 4-burner Stôk, I will ignite just two of the burners on one side. You can either place wood chunks directly on the heat shields of the unit or use a metal smoker box. My Boston butt will cook on the unlit side of the grill with a metal smoker box containing 3 wood chunks on the hot side. I’ve also included a second smoker box to make it easier to swap out the first when the wood becomes completed charred. My temperature is 225°F for the actual cooking.

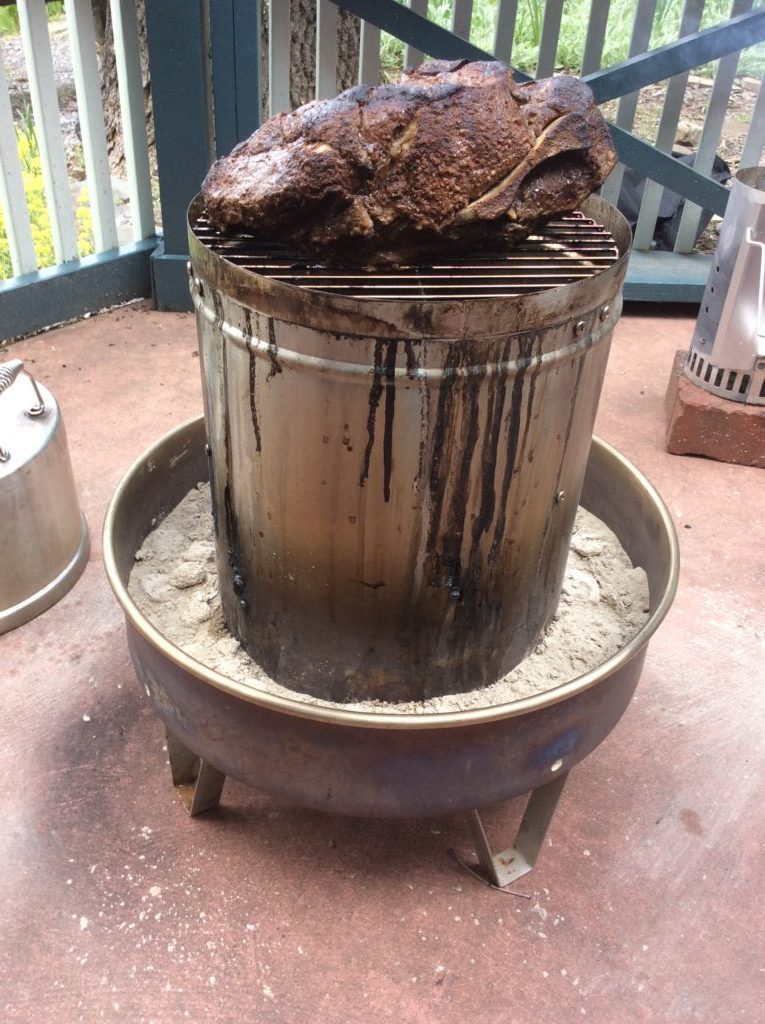
Our Boston Butt on the Orion Cooker with Minuto® wood chips in the inner ring

Orion Cooker:

This is an outdoor convection unit that uses briquets for the heat and Minuto® Wood Chips placed around the drip/water pan for the wood flavoring. This unit will be the fastest to cook the Boston Butt, with an anticipated timing of 4-1/2 hours total. This is a direct cooking method that uses the radiated heat of the stainless-steel body to trap and circulate the heat for faster cooking time.

There is no ability to replenish the wood chips with this unit due to the high heat level. About 15 lbs. of briquet and 4 ounces of Orion Custom Wood Chips is all that is needed to smoke, plus some water in the water/drip pan for a moist outcome.

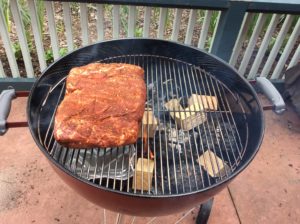
Our Boston Butt on the Weber® kettle Grill with double filet wood chunks

Weber® Kettle 22” Charcoal Grill:

Likely one of the most popular charcoal grills, the Weber® kettle provides for the opportunity to cook with charcoal and hardwood. I’ll be setting up my grill using a two-zone method; charcoal/wood on half the fire area and the meat placed on the indirect side.

Due to the length of time Boston butt takes to cook, you likely will need to replenish the charcoal for maintenance of heat level. I prefer to maintain a temperature around 250° F.

For similarities: both the Weber® and the Stôk grill were set up with a two-zone cooking method. Both included use of the SmokinLicious® double filet wood chunk. The length of cooking time between the charcoal unit and the gas unit are very similar, taking close to 10 hours.

For differences: temperature maintenance is easier with the gas and convection units. The charcoal unit requires much more supervision to ensure that the fuel (charcoal) is replenished prior to the temperature of the grill decreasing significantly. You are also able to check on the meat’s coloring and evenness of cooking with the charcoal and gas units while the convection unit is generally left alone until closer to the recommended cooking times. Though you can check on the doneness of the meat at any point with the convection unit, generally there is no need to do anything but wait.

Regarding cooking variations, let’s discuss color, bark formation, moisture of the meat.

Barbecue By All Methods

With all four of the Boston Butt (s) prepared in the same manner – excess fat trimmed to ¼-inch or less, a dry rub applied on all sides, and marinated for 24 hours – this is a fair comparison of how each grilling and smoking method produces the barbecue results commonly looked for.

Bark:

Without question, bark or the outer crust that develops from exposure to a lower temperature, long cook time, and smoke vapor infusion was greatest on the Boston butt cooked on the Weber® Kettle 22” Charcoal Grill. The gas grill produces the least amount of bark which is dominate on the outer edges and top surface.

Color:

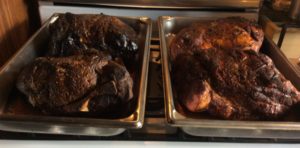
The darkest coloring to the bark and the most obvious smoke ring was on the meat cooked on the charcoal grill. The Orion Cooker produced a brown hue to the meat’s exterior while the meat cooked on the gas grill retained a red hue that was indicative of the dry rub color. Charcoal grills will produce a black hued coloring due to two combustible materials: charcoal or charred wood and hardwood.

Moisture:

The meat that produced the greatest amount of rendered juice was from the charcoal cooking method. Second, the convection grill method followed by the gas grill. However, the greatest internal moisture level was obtained from the indirect cooking method on the gas grill, followed by the charcoal method and lastly the convection method.

Final Notes:

What we’ve set out to accomplish with this multi cook segment is to prove that no matter what equipment you have, you can produce authentic flavor, aroma and texture to Boston butt. This can be invaluable for those times when you may not have a lot of time to supervise the smoker or grill but still want authentic barbecue. Or, when you must make a lot of meat meaning you must use all the equipment options you have available.

All four Boston Butt (s) one done on charcoal with the Weber, another in the Orion with wood chips and two on the gas grill with wood chunks- the coloring is not much different!

From a taste perspective, our sampling group indicated that the strongest smoked flavor was from the charcoal unit, followed by the convection grill and lastly, the gas grill. Keep this information in mind when you’re cooking for others, as boldness of the smoke flavor can be controlled not only by the amount of time exposed to the smoke vapor, but also with the equipment used for the cooking and the amount and type of hardwood used in the process.

This certainly is a clear example of how anyone can produce authentic barbecue on the equipment they have even if it’s not a traditional smoker.

Making you an informed consumer through valuable articles like this one. Leave us a comment and follow us or subscribe for more great recipes, techniques, tips, and the science behind the flavor. That’s SmokinLicious®.

SmokinLicious® Products used in these techniques:

Wood Chunks- Double & Single Filet

Wood Chips- Minuto®

More related reading on how Smokinlicious® reduces the risks of Microbial bacteria in our wood products
More related reading on smoking Boston Butt & other Grilling tips and technique see our directory on previous blogs!

More blogs you may enjoy:

-Charwood Grilled Salmon Fillets for a Hint of Smoky Flavor

-GRILLED LAMB

-GIVE ME THAT BEEF BRISKET!

-ROSEMARY INFUSED SMOKED BEEF SHANKS FROM THE GRILL

Dr. Smoke- We used three different methods for smoking Boston Butt! All turned out fabulous & tasty!

Dr. Smoke- We used three different methods for smoking Boston Butt! All turned out fabulous & tasty!

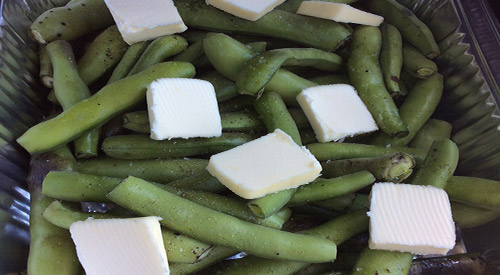
Fresh Fava Beans with Butter ready to become Grilled Fava Bean with a smoky flare!

Fresh Fava Beans with Butter ready to become Grilled Fava Bean with a smoky flare!

ODE TO GRILLED FAVA BEANS

listen to our blog


I love when the ideal weather comes around when at the same time there are so many options for fresh produce either at the Farmer’s Market or local grocery store. I tend to lean toward my grill and smoker for most of my cooking when the weather turns hot and steamy.

Beans are one of those vegetables that are spectacular on the grill but they get even better when you add a few wood chunks. I’ll show you how to prepare Fava Beans for the grill and give you my easy, fool-proof technique for incorporating wood chunks for flavor.

Grilled Fava Beans- The Grill Set Up

Before preparing the Fava beans, get the gas grill heated by turning on only half the grills’ burners which will be the side that radiates out the heat and holds the smoker box. For the smoker box, I’m using a stainless-steel model that has a hinged lid. I place 3 double filet wood chunks from SmokinLicious® in the box in a combination of woods. I’m using hickory, white oak and sugar maple to give me a great smoke balance to the beans. This will ensure I don’t overpower with the smoke vapor. By placing the smoker box with chunks on the grill grate as it preheats, it will be smoking by the time you have the beans ready.

Simple Bean Prep for Grilled Fava Beans

There is little to do with the Fava beans before they go on the grill. Wash them to start to make sure all the dirt and debris is removed. Pat dry with a paper towel and then move them to the cutting board. Remove any leaves and cut just the stem end to remove the stem. Place in a disposable foil pan, spread out evenly, and add roughly 6 tablespoons of butter to the beans, as well as salt and fresh ground pepper. That’s it. Leave the bean pods intact as they are going to act like a miniature steamer to cook the beans and ensure they don’t become over smoked.

The Grill Act

With the grill heated and the wood chunks smoking in the smoker box, place the pan of beans on the unlit side of the grill and close the cover. Check that your grill temperature steadies out at about 375°F. If lower, simply increase the heat setting on the active burners. Too high, decrease the heat setting. Leave the beans untouched for about 30 minutes. Return to the grill, stir the beans and check the wood chunks. If the chunks are still emitting smoke, close the grill lid and leave for an additional 10 minutes or so, or until fork tender. Remove the pan from the grill and allow to cool for about 10 minutes.

Grilled Fava Beans- Buttery, Smoky Finish

finished Fava beans with the smoky appearance to the outside podsAfter the beans have cooled enough to be handled, take each pod and push the beans out one end into a bowl. You may keep the empty pods to use for making broth or for puree in a sauce or smoothie. These Fava beans are now ready for you to enjoy as is or use in your favorite recipe. Now, I’m taking my Fava beans and making a dip with goat cheese, lemon and tarragon.


Purchase products:

Wood Chunks- Double Filet

More Related reading on "What Wood for Smoking" and other great smoking and grilling tips and techniques

More Related reading on “What Wood for Smoking” and other great smoking and grilling tips and techniques

Additional reading:

-STEPPING UP RADISH SALAD WITH A WOOD-FIRED FLARE

-WOOD GRILLING AVOCADO

-INFUSING WOOD SMOKE INTO BRUSSELS SPROUTS

You Can take your fresh Fava Beans and put them on the Grill with wood chunks to do a "Grilled Fava Beans" for your favorite dip or condiment!

You Can take your fresh Fava Beans and put them on the Grill with wood chunks to do a “Grilled Fava Beans” for your favorite dip or condiment!

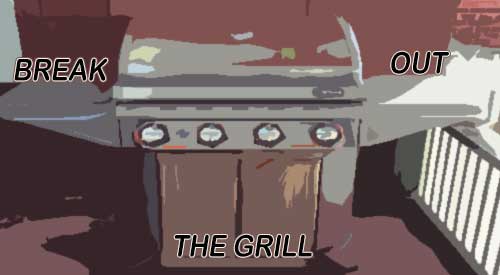
Our Grill drawing for breaking out on your staycation

Including the grill in staycation plans is a flavor rich must this year!

Listen to the audio of this blog

Including the Grill in Staycation Plans:

The Grill

The reports are in and all point to one common theory: people are likely to cancel previous plans to vacation away, especially those considering foreign travel, and instead opt for a staycation.

What does this mean for the economy? Of course, there will be negatives with this decision not to travel but one potential positive is the soar in potential grill sales as people begin to ponder ways to keep home cooking interesting.

Options of Including the Grill in Staycation Plans

Likely the first assessment for most considering a staycation is what do we do for food. People often have dining out plans built into their weekly schedule but due to concerns with visiting populated locations like a restaurant, food truck, or even street vendor, these locales will likely be one of the first voluntary bans. That means, cooking at home just moved to the front of the line. Cooking on the stove top or in the oven are certainly options, but given you want to keep your body from getting bored you’ll likely want to branch out to the outdoors and start grilling, especially if the weather makes that enticing.

Here’s where the lesson needs to be learned. Don’t just settle for cooking direct heat method like you do with hamburgers, hot dogs and sausages. Learn how to grill with indirect heat and you’ll be in great position to put a variety of foods including vegetables, animal proteins, and even fruits and nuts on the grill.

The starting point, however, is to assess your current outdoor cooking equipment and decide the following:

► Is the equipment in good working order to be used frequently?

► Are there any components of the grill that need replacing? For example, the grill grates, heat shields, ignitors, wheels on a portable unit, charcoal pan, water pan, etc.

► Is the current equipment of adequate size to feed your family all at once?

► Is the equipment easy to operate meaning it won’t burdened you with constant supervision?

► Does the equipment have an option for a dedicated fuel set up like LP gas conversion to natural gas which will allow you full use without having to worry about filling LP tanks?

► If you want to up the flavor of your grill foods, can you easily add wood to the unit?

If you’re in the market for a new grilling unit, assess the frequency of its use and what you want to be able to cook on it before making the purchase. The more frequent use the higher quality the materials that make up the grill need to be, to keep the grill functional for a very long time.

In the end, you not only will have piece of mind in knowing you can feed your family great tasting foods, but you’ll likely have a great opportunity to bond in a great outdoor environment.

Do you plan to take a staycation? Leave us a comment and subscribe to get our latest tips, techniques, recipes and the science behind the fire and smoke, for all live fire cooking methods. That’s SmokinLicious!

SmokinLicious® Products:

Charwood

Wood Chunks- Double & Single Filet

Wood Chips- Grande Sapore®, Minuto® & Piccolo®


More related reading on including the grill in staycation plans and for more smoking & Grilling tips and technique see our directory on previous blogs!

More related reading on including the grill in staycation plans and for more smoking & Grilling tips and technique see our directory on previous blogs!

Related reading:


-HOW TO KEEP FOOD INTERESTING, PRESERVED & SAFE DURING QUARANTINE

-Thermal Heating Process is Why You Shouldn’t Be Concerned About Receiving a SmokinLicious® Package

-OUR AIR HANDLING PROCESSES PAY OFF IN THE BATTLE WITH COVID-19

Dr. Smoke-

Dr. Smoke- don’t let your staycation this year affect your meals. Break out the Grill for great tasting meals

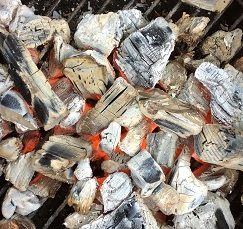
Our coals showing their hot glow and ready for direct wood ember cooking!

Our coals showing their hot glow and ready for direct wood ember cooking!

THE GLOW OF WOOD EMBER COOKING!

So what exactly is wood ember cooking and why is it suddenly gaining attention as a method of cooking? Well, first, it’s most certainly not a new cooking concept. Cooking over a fire and hot coals have been around for thousands of years. Recently, some Chefs and well-known restaurants have taken to returning to this method of cooking because they know where great flavor can come from and they know how to manage the heat from hot wood embers.

An ember is a glowing, hot coal made of greatly heated wood, coal or other carbon-based material that remain after a fire. The heat radiated from hot embers can be as hot as the fire which created them. You can see this first hand, by placing new wood pieces on hot embers and watching a full fire develop. An ember is usually formed when a fire has only partially burnt a piece of fuel and there is still usable chemical energy in that piece of fuel. It continues to stay hot and does not lose its thermal energy quickly because combustion is still happening at a low level. The small yellow, orange, and red lights are often seen among the embers are actually combustions. There just is not enough combustion happening at one time to create a flame. Once the embers are completely ‘burned through’, they are not carbon as is commonly believed (carbon burns, and is not normally left behind), but rather various other oxidized minerals like calcium and phosphorus. At that point, they are commonly called ashes. But why cook on the embers versus over a live fire? Because embers radiate a more constant form of heat, as opposed to an open fire which is constantly changing along with the heat it radiates (think water trapped within the wood and you’ll understand why there is heat fluctuation).

Ember cooking techniques include placing thickly skinned food items directly into the embers (i.e. garlic, onion, peppers, eggplant, steaks, etc.), placing a cast iron skillet into the embers that can hold any food items from vegetables, meats, poultry, fish – really anything. The results produced from this method are super moist, super flavorful, and the aromas are exceptional.

Peppers being cooked over wood embers

Sweet Peppers over direct wood ember cooking


Dr. Smoke- You don't need a flashy grill, a simple fireplace with enough room, just like Asado, you can do direct wood ember cooking.

Dr. Smoke- You don’t need a flashy grill, a simple fireplace with enough room, just like Asado, you can do direct wood ember cooking


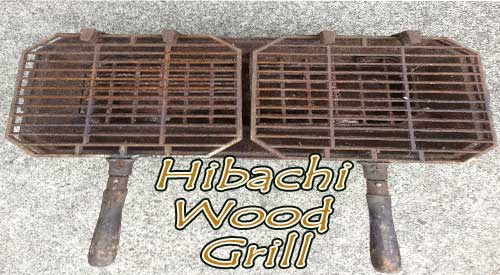
Our Old Hibachi Wood Grill after the spring cleaning

Our Old Hibachi Wood Grill after the spring cleaning

DOING THE HIBACHI WOOD GRILL WAY! Share on X

Everyone starts their grilling career on this convenient, inexpensive, small piece of equipment. But do we do it correctly? Let’s review the basics.


First, this is for grilling over an open fire; it needs high heat to cook. It has a low (height) fire pan and generally no hood or lid. Great high heat cooker/grill – not a smoker.

Lesson #1 Hibachi Wood Grill:-plan what you cook properly!

Now, let’s review how to set up the fire. The region that gave the hibachi its popularity is the Far East which has access to a type of charcoal called “bichiton”. This is a very dense, heavy charcoal made from oak that is direct fired to a high carbonization level. This charcoal produces an extremely high heat; 3-4 times the heat level of an American charcoal!

Can’t locate “bichiton” charcoal or don’t want the expense if you find it? Well, you can use SmokinLious® products to get close to the results. Let’s begin with charcoal – North America produces lump charcoal pieces that are too large for the small Hibachi. So take 2-3 pieces(depending on size), put them in a small paper bag (lunch bag size) and press with your hands to break them into smaller “thumb” size pieces (or you can use a meat mallet). Then pour into the firebox. If the firebox is not full –repeat until you fill it. If you don’t have a small torch available, put some paper under the charcoal, then ignite. Or, you can place the original charcoal pieces in small paper bags, then break the pieces apart, and place the bag in the firebox for lighting.

SmokinLicious® wood chips are crushed from the center of hardwood

Once the charcoal burns down (gray in color), start adding Grande Sapore® wood chips as this will provide for immediate heat and eventually, some flavoring to the food. Once the charcoal/chip combo’s flames settle down, you can begin cooking! Remember, hibachis are traditionally used for thin meats so adjust your cook time to what you’re cooking.

What I like about hibachi cooking is the ease of adding more wood chips when more fuel is needed!

Once you master the fire set up, you will enjoy some wonderful food and some really fun cooking the Hibachi way. Think Korean BBQ! Yum!

(more…)

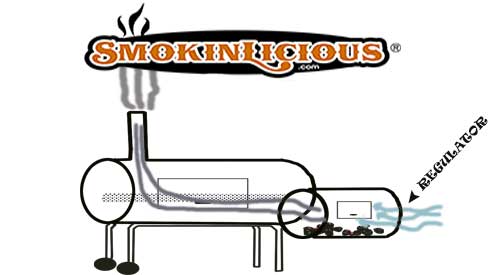
Diagram showing the importance of smoker air flow.

Diagram showing the importance of smoker air flow.

smoker air flow is your temperature control Share on X

Listen to the audio of this blog

SMOKER AIR FLOW IS YOUR TEMPERATURE CONTROL

How do you keep a charcoal grill at 200°F? How do you cool down a charcoal grill? Do you keep the vents open all the time?

When it comes to smoker air flow, here are a few common questions posed for learning all about the importance of air flow in controlling the temperature of a grill or smoker. This can be a challenge specifically for charcoal/wood units as they rely on the human hand to determine when to add fuel as opposed to a gas/LP unit that has continual, regulated flow.

You might assume that the only combustible material used in these units is charcoal or wood but there is another one. Oxygen.

I’m going to provide my top tips on gaining control of temperature by instructing you on smoker air flow or oxygen regulation in specific styles of charcoal/wood burning equipment.

Intake and Outtake of smoker air flow

For many of the charcoal/wood using units, they are built with an intake and an outtake vent. Let’s make sure you understand what these vents are and what the purpose of each is.

Intake Vent: It has one job – bring in oxygen to control the heat of the fire. If you need to raise the temperature of your unit, open the intake vent. Too much heat, close the intake vent which starves the fire for oxygen. Note: if you close the intake vent entirely while keeping the outtake open, you will still starve the fire and put it out.

Here’s the trick – each unit will have a “sweet spot” for the perfect balance of oxygen flow. Find that spot, and you can maintain a temperature easily in your equipment. But, I’m getting a little ahead of myself. Let’s discuss the opposing vent.

Outtake Vent: This goes by different names (chimney, flue, outtake, vent) but has the same purpose regardless of what you call it; vent out the gases from the combustible material and pull in oxygen from the intake vent which is commonly know as draft. Remember a charcoal/wood fire produces gases which need to be vented. If they aren’t properly vented, they will smother the fire.

When learning how to regulate your equipment for the desired temperature setting, always start with the outtake vent fully open. This allows you to manipulate only the intake vent until you reach the desired temperature. That will help you learn where the sweet spot is on your equipment.

When You Never Find the Sweet Spot for Smoker Air Flow

There are times when no matter how you play with the intake vent, you never seem to get the temperature to hold. What now?

Time to look for leaks in your equipment. If an access door or lid are bleeding smoke, then you know where the extra oxygen is coming from. That will affect the draft between the intake and outtake vent and result in fluctuating temperature that cannot be controlled. Best course of action is to try to seal the leaks with food grade silicone or other materials suitable for high heat appliances.

The Shape of the Equipment

In my opinion, the vertical-style equipment models tend to be much easier to get airflow/temperature control. Horizontal units also referred to as off-set smokers and grills, specifically the inexpensive models, tend to have poor design in the vent placements as well as poor insulation that results in heavy leakage.

If you insist on purchasing a horizontal unit, read reviews and ask questions about how the unit is insulated. Get specific with the materials used, quality of the metal parts, etc.

Chef Bert and Tom using a chimney starter for their grilling needs.

Other Tips for Smoker Air Flow & Temperature Control

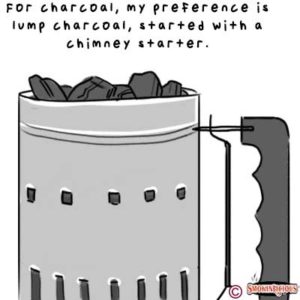
Always try to light your initial fuel product, whether briquets, lump hardwood charcoal, or charcoal in a chimney starter so you can control the quantity with every cook. Use the chimney to add hot coals to the unit when you need to increase temperature. Although you can have unlit charcoal in your charcoal area so it will ignite as the lit produce makes contact, this isn’t always a guarantee that you won’t produce some temperature variance. The best chance of getting the temperature regulated is by adding hot coals as needed, even if this may be every hour or so.


To summarize, learn to control temperature by using the same quantity and type of material for the fuel, lit it with a chimney starter, only add hot coals to increase the temperature, and always have the exhaust vent open at least ½ way when cooking. Remember the number one thing is Temperature control is all in the air flow and you will have tasty grilling results!

Our Readers Are Asking..

When should I add more wood to my smoker to prevent a bitter flavor?

There are a few possible causes for bitter smoked food outcome and easy to fix:

#1 Outtake vent is to tight – open it a bit more;

#2 Wood chunks are too wet. Don’t pre-soak the chunks. Put them on the charcoal dry;

#3 Using too much wood at a time. It only takes 3–4 chunks to infuse smoke flavor;

#4 Not using an ideal hardwood. Stick to common hardwoods like cherry, maple, oak hickory, pecan, ash, alder, beech. Never use softwoods like pine, spruce, cedar, etc;

#5 Use a water pan to keep a good balance of heat, vapor, and moisture.

SmokinLicious® Products Used in this Blog:

Charwood

Wood Chunks- Double & Single Filet

Wood Chips- Grande Sapore®, Minuto® & Piccolo®

More Related reading about smoker air flow is your temperature control an other cooking subjects.

More Related reading about smoker air flow is your temperature control an other cooking subjects.


Related readings

WHAT YOU SHOULD KNOW ABOUT THE WATER PAN IN GRILLING & SMOKING

-HOW TO PREVENT BARBECUE MEAT FROM BEING TOO DRY??

-WHAT TO DO IF MY WOOD CHIPS WON’T SMOKE??

-WHY CHAR-WOOD IS THE BETTER OPTION OVER CHARCOAL

Dr. Smoke for best results in your grilling and smoking enjoyment follow smoker air flow is your temperature control guide.

Dr. Smoke for best results in your grilling and smoking enjoyment follow smoker air flow is your temperature control guide.

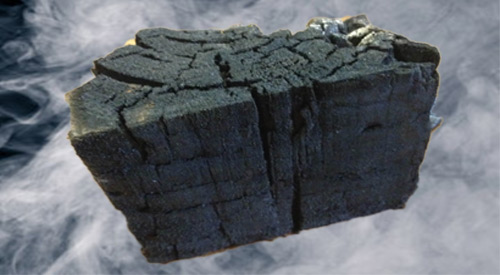
Our Char-wood is produced by Direct firing our North American hardwood blocks until the right amount of Carbonization is achieved!

Our Char-wood is produced by Direct firing our North American hardwood blocks until the right amount of Carbonization is achieved!

WHY CHAR-WOOD IS THE BETTER OPTION OVER CHARCOAL

SUMMARY:

Binchotan charcoal is made from the Japanese direct fire method of making charcoal with Kiln! Japanese charcoal making has been around for centuries and burns longer than lump hardwood charcoal! We have replicated their process and make our Char-wood from our North American hardwood blocks! Carbonization is key to Char!

listen to our blog

listen to our blog


Frankly, the term “charwood” may be a new one for you. Although its function is like charcoal, the benefits clearly outweigh those of charcoal. Let’s examine the key reasons why charwood may be the better option for outdoor cooking over standard charcoal.

Char-wood- Carbonization

Hopefully, if you’ve been engaging in outdoor grilling and/or smoking for some time. You’ve understood the need for a fuel material that burns evenly and hot. You’ve likely also heard the controversy that’s brewed for years about what is the best product to use for the fuel. Products range from briquets, lump hardwood charcoal, specialty wood charcoal, and compressed woods like pellets and compressed wood blocks. The key is to understand that some of these products could contain binding agents as well as accelerants to make for easy lighting.

Carbonization is the conversion of an organic matter into carbon. Carbon is an element that forms when the organic matter is heated to a high level without oxygen, burning off the volatile gases, leaving the pure carbon behind. Although commercial material production, whether briquet, hardwood charcoal, or standard charcoal have different percentages of carbonization in the outcome, most are above 90%. That high level of carbonization is what allows for heat to be produced for outdoor cooking.

Flavor

When you use straight charcoal briquets, you are getting heat only with no flavor as that is a fully carbonized or charred product. Many prefer to use briquets because they are uniform in size and give the same outcome every time they are used. Fill a chimney starter with briquets, and you’ll have the same number of briquets fit in the chimney every time.

When you use lump hardwood charcoal, you will get variation in sizing from small, chip-like pieces to half-log size pieces. Here’s information you need to know. Although the label may read “hardwood”, there is no information on where that hardwood derived from. Often, manufacturers of lump hardwood charcoal produce their product from recycled materials such as old pallets, lumber scraps from flooring, cabinet, and furniture makers. They may take in scraps from lumber mills. When this material is carbonized, it will do so at various levels due to the variation in material sizing.

That means when you cook with it or for that matter when you lite it, expect great variation from use to use due to all the inconsistency in sizing. The inconsistency will produce a lower percentage of carbonized material than briquets. So know you may get some minimal flavor from lump hardwood due to poorly carbonized larger pieces of product. This is the reason there is more ash production with lump hardwood charcoals.

Specialty charcoals, generally made in other countries, are a particularly hard substance, light in weight product, that can be a challenge to lite. Once they are ignited, however, they produce a lot of heat – often more than the standard briquet. Very little ash is produced and there is no flavor from this product.

Char-wood- Benefits

When SmokinLicious® made the decision to manufacture a charwood product, we researched extensively why the Japanese binchotan charcoal, also called white charcoal, was so popular and expensive. We found that though it could be a challenge to lite, it burned extremely hot, clean, leaving little to no ash, produced no smoke and no flavor. We produced a similar set up to the Japanese direct-fire method with our charwood production. Instead of using miniature branches, we use consistently sized wood blocks. Unlike the binchotan, we do not do a complete carbonization. The result is you get the ease of lighting like a lump hardwood charcoal, the flavor of premium hardwood. Plus, the reduced ash production of a briquet, and reduced smoke output than burning wood alone. We see this as the best of all the options out there.

Now, instead of viewing your charcoal as just a heat generator, when you use SmokinLicious® charwood you have one product that can be used as fuel for temperature while the reduced carbonized center portion produces the flavor. A premium product that gives premium results!

What is Japanese charcoal?

Binchotan charcoal is made from the Japanese direct fire method of making charcoal with a kiln that has been around for centuries. Japanese charcoal is very expensive and burns longer than lump hardwood charcoal!

Is charcoal made from wood?

Charcoal briquets and lump charcoal are made from recycled materials such as old pallets, lumber scraps from flooring, cabinet, and furniture makers. Some charcoal products may contain binding agents as well as accelerants to make for easy lighting.

Is wood better than charcoal?

Cooking wood can offer an ease of lighting and flavor to your foods while its fuel performance is more consistent than that of many carbonized charcoal products. Plus, wood produces less ash than lump charcoal or briquettes.

SmokinLicious® products:

Char-Wood

More Related reading on this subject

More Related reading on this subject

Additional reading:

-WHY CHARCOAL IS NOT AN INGREDIENT

-WOOD-FIRED APPLES MAKE THE BEST CAKE

-6 TIPS FOR A HEALTHY OUTDOOR COOKING SEASON

Dr. Smoke- Your will love using our Char-wood!

Dr. Smoke- Your will love using our Char-wood!

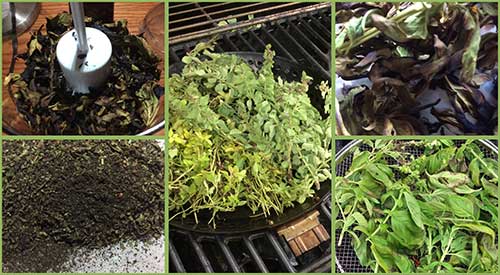
Our preparation of smoked herbs, from picking, smoking and grinding to make smoked herb dust. Adding great flavor to dishes.

Our preparation of smoked herbs, from picking, smoking and grinding to make smoked herb dust. Adding great flavor to dishes.

SMOKED HERBS FLAVORS WITH SMOKED HERB DUST

Listen to the audio of this blog

Don’t make the mistake of thinking fresh herbs are to be used in dishes as, well, fresh only. Although you may have dried your fresh herb harvest before, we are bringing another alternative to you, smoked herbs.

We hot smoke the fresh herbs on the grill then turn them into a dust for use in all types of dishes. The smoking process will bring a depth of flavor that you’ve likely never experienced before. Go to the herb garden and pick your favorite varieties and let’s get making smoked herb dust!

Smoke Vapor Infusion

Fresh herbs on the grill using a grilling cage

One thing about this smoked herb technique is you can do the smoke infusion by a variety of equipment methods.

For those with a gas grill, add wood chunks either directly to the heat shields on one side of the grill or add wood chunks to a metal smoker box that can be placed on the heat shields or the grill grate. For charcoal grill owners, light your charcoal and allow to reduce to hot coals only. Add a piece or two of hardwood chunks or a handful of hardwood chips to the hot coals. If possible, push the hot coals to one side of the grill. For both grill types, you want to use a two-zone cooking method so the herbs don’t catch fire.

For those that don’t own grilling equipment or who simply don’t want to bother lighting up the grill, you can use a handheld food smoker. Simply place micro wood chips in the bowl of the unit, place the herbs in a storage bag with the tubing of the smoker unit, cinch the end of the bag around the tubing, and light the chips. I like to leave the smoke in the bag for maximum smoke vapor infusion.

I used both my gas grill and charcoal grill for the smoke process by placing my herbs in a vegetable basket and grilling with the herbs on the unlit side of the grill. Within the first 5 minutes, you’ll see how the herbs lose moisture and begin the drying stage.

Tasting Notes: I find the handheld food smoker will produce the boldest smoke flavor to the herbs. The intensity of flavor rated from lightest to boldest based on equipment would be a gas grill, electric smoker, pellet smoker, charcoal grill, handheld food smoker.

Grinding Process

smoked herbs in the food processor for reduction into smoked herbs dust

Once the herbs have charred and dried, it’s time to remove them from the grill and bring them to the food processor. I have a mini processor that only has two settings: chop and grind. I prefer to use this appliance to bring the smoked herbs to dust level but a spice grinder works just as well.

First, remove all the herb leaves from the stems and place a small quantity in the food processor bowl. You can remove the leaves by placing the entire herb sprig in a colander and pressing the leaves through to parchment paper. Secure the lid and grind until you get as fine a dust as the appliance will allow. Both the appliance and the herb will determine how fine the herb dust will get. As you will see, basil dust becomes finer than oregano. This technique will work for just about any herb you can grow or locate at the market. Store the herb dust in glass or metal jars for up to a year.

Tasting Notes: Smoked herbs are much stronger in flavor than the standard dried herb. Adjust the amount used in recipes as needed. It is often best to start with less, taste, and then add more as needed.

So Many Uses

finished herb bottles of smoked Basil and Smoked oregano

Experimentation is key when it comes to #herbdust. Most often, herbs will be applied to meats and poultry, perhaps rice and pasta dishes, but there are so many more foods that are good pairings for herb dust. Let’s take parsley as an example. Commonly used with fish and beef, parsley is a great pairing for sweet items as well. This includes banana and cream. It’s important that you look beyond the traditional side dishes and entrees and explore the sweet side of what herbs can offer. By doing so, you’re sure to find endless combinations that will tickle your palate and give you more pleasing menu experiences.

The Culinary Crew wants you to know …

… that the two-zone method is certainly a practice that you will want to master and prioritize in your wood cooking toolkit, especially when grilling and smoking delicate fresh consumables like herbs. Not only will two-zone cooking avoid those acrid tastes associated with flare ups, it will infuse your food items with a nice balance of wood smoke flavoring.

SmokinLicious® products used in this blog:

Wood Chunks- Double & Single Filet

Wood Chips- Minuto & Piccolo

More Related reading on smoked herbs and other great grillable flavoring ideas

More Related reading on smoked #herbs and other great grillable flavoring idea

Additional reading:

-WHY TWO-ZONE COOKING METHOD LET’S YOU WALK AWAY FROM THE GRILL

-STOVE TOP SMOKED CHIVES

-PAN COOK ZUCCHINI ON THE GRILL WITH WOOD FLAVOR

Dr. Smoke- Our process to prepare the smoked herbs is easily done on our gas grill with our double or single filet wood chunks!

Dr. Smoke- Our process to prepare the smoked herbs is easily done on our gas grill with our double or single filet wood chunks!

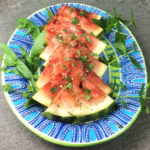
We do a summer favorite WOOD FIRED GRILLED WATERMELON!

We do a summer favorite WOOD FIRED GRILLED WATERMELON!

WOOD FIRED GRILLED WATERMELON BECOMES A STAR

listen to our blog


You may have seen segments on grilling watermelon before which show slices of watermelon on a standard gas grill. Although I agree that the heat generated from the grill will produce a sweet outcome, there is no comparison to doing a grilling technique that incorporates wood for added flavor.

In this segment, I’ll show you how to grill watermelon on a grill of your choice with wood chunks for the unique combination of sweet and char flavors that only comes from grilling with wood.

Grilled Watermelon- Easy Prep

I think this is by far, the easiest preparation for the grill. All you need is a watermelon of your choosing and a grill; gas, electric or charcoal. Just 2-3 wood chunks from SmokinLicious® and about 20 minutes once you have a lit grill, and this method of bringing flavor to the standard watermelon will be complete.

As watermelon contains a lot of water, it is essential that you work with a medium heat setting on your gas grill and hot coals with a moderate flame for the charcoal grill. If using a gas grill, be sure to set up the wood chunks on just one side of the grill and allow the chunks to smolder first so there is plenty of smoke vapor. Since watermelon grills in no time at all, you want to have enough smoke vapor produced to give a great tasty outcome for both a gas grill or charcoal grill method. Electric smokers are self-contained allowing for simple dialing in about 15 minutes worth of smoking time.

our slices ready to be wood fired!

For the watermelon, cut lengthwise in half and cut each half into individual slices about 1-1/2 to 2” thick. Or, you can remove all the rind and grill just the watermelon meat. Keep fire safe tongs at the ready so you can turn the watermelon slices just once as they evaporate some water and sweeten up. DO NOT leave the grill! This fruit requires a careful watch so stay put and you’ll have every piece cooked to perfection.

So Many Uses for Grilled Watermelon

You’ll see how the watermelon darkens in color, get bits of char coloring to the skin, and is less water soluble. That’s the perfect outcome. Now it’s time to think about how to use your wood flavored melon.

Our finished wood fired grilled watermelon

First, you can enjoy it as is. When I serve this naked, I just give one additional flavor such as fresh, chopped mint. But if you’re looking for a lunch or lite dinner entrée, think salad by including some baby arugula, goat cheese and a splash of balsamic vinegar. For a spicy version, sprinkle the wedges with red pepper flakes, a bit of granulated sugar, and lime zest. Wood fired watermelon also works great with other summer favorites like grape and cherry tomato, pepper slices, sugar snow peas, and cucumber. No matter how you choose to serve it, grilled watermelon with wood flavoring is going to top your list of grilled favorites.


Proving that there’s more to wood-fired cooking than just animal proteins, SmokinLicious® brings you great ideas for recipes featuring a wood-fired ingredient. Bringing you tips, techniques, recipes and the science behind the fire and smoke.

Purchase products:

Wood Chunks- Double & Single Filet

More Related reading on "What Wood for Smoking" and other great smoking and grilling tips and techniques

More Related reading on “What Wood for Smoking” and other great smoking and grilling tips and techniques

Additional reading:

-WOOD-FIRED APPLES MAKE THE BEST CAKE

-PEACHES WOOD FIRED FOR A SMOKY FLAVORFUL GAZPACHO

-Smoked Snow Peas With Cucumber Salad


 Dr. Smoke- Wood fired grilled watermelon is my favorite summertime dessert!


Dr. Smoke- Wood fired grilled watermelon is my favorite summertime dessert!

Barbecue basics- charcoal, wood, cooking temperature and fun time

Barbecue basics- charcoal, wood, cooking temperature and fun time

Barbecue basics is what you need Share on X

Listen to the audio of this blog

It’s time I go there. I’ve fielded way too many questions to ignore it. Now is the perfect time for me to opine on this highly controversial topic: when it’s called barbecue.

How do you define “true” barbecue?

I have three parameters to cooking that I’d like to address that should help explain my justification for what qualifies as barbecue basics.

(more…)


This bucolic photo can be yours if you follow our 6 TIPS FOR A HEALTHY OUTDOOR COOKING SEASON

Follow our 6 tips for a healthy outdoor cooking season in 2018!

Tips for Safe Outdoor Cooking- “6 TIPS FOR A HEALTHY SEASON”

listen to our blog


Everyone seems to be so much happier during the seasons that allow for outdoor cooking and entertaining. Whether it’s a planned cooking event or spur of the moment decision, these cooking events turn into an opportunity to relax, kick back and truly enjoy life.

There are steps you should take to ensure that the foods you enjoy outdoors remain safe. What follows are the top tips for safe outdoor cooking that will make for the best outdoor cooking season ever, no matter what you elect to cook.

Tips for Safe Outdoor Cooking

Tip #1

There are times when you want to marinate meats and poultry before cooking on your grill or smoker. Know that foods will only remain safe if you marinate in the refrigerator in a covered container, not with the marinated foods laying out on the kitchen counter. Also, if you plan to incorporate some of the marinades into a sauce, be sure to reserve some before it is applied to the raw foods. If there is marinade leftover from the raw food marination, be sure you boil it before using as anything that has contact with the raw food can carry bacteria.

Tip #2

You can grill a variety of foods on the same equipment but to know when everything is cooked, you will need to have thermometers. It’s best to use a different thermometer, marked by color, for each type of food: beef, pork, chicken, fish. The thermometer should be placed in the thickest part of the meat or poultry to get an accurate internal temperature reading. Here is a guide on temperatures:

  • Beef, Pork, Lamb, & Veal (steaks, roasts, and chops): 145°F/62°C
  • Ground meats & sausage: 160°F/71°C
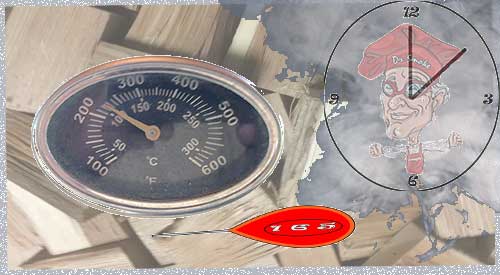
  • Whole poultry, poultry breasts, & ground poultry: 165°F/74°C
  • Hot dogs: Cook until steaming hot

Remember, thicker cut meats and poultry will need to be placed closer to the fire or heat. Utilize the upper grill grate for those items that are more fragile like thinner fillets of fish, vegetables, fruit, or for heating sauces.

Tip #3

You cannot partially cook meats and poultry by parboiling or microwaving and then placing in the refrigerator for grilling the next day. Although you may think this will lessen the cooking time on the grill, what you’re doing is introducing the potential for everyone to become sick. The reason? Partial cooking does not eliminate all bacteria growth. The reality is, you would be allowing bacteria to continue to grow.

Tip #4

Take the time to properly clean your grill or smoker at the start of the outdoor cooking season. It’s common to close vents on the grill or smoker when you cover it up for the winter season but these aides in stimulating mold growth on the grill grate and/or inside cover and walls. For that reason, it’s important to scrub down the interior of the grill or smoker using a cleaning mixture; 1 part vinegar to 3 parts water or a bleach to water blend if you’re not opposed to the more toxic bleach.

Tip #5

Be sure you start with a hot grill or to cooking temperature smoker. That means, preheat. Preheat your grill 15 to 25 minutes before you start cooking to make sure it reaches the right temperature to ensure all bacteria is killed. Your grill should be 400-450°F for high, 350-400°F for medium-high, 300-350°F for medium and 250-300°F for low heat. By having a properly heated grill, you will guarantee a moist outcome for your meat and poultry.

Tip #6

There are many of us we prefer a good charcoal grill versus gas. It is important that you understand that there are many more influencers to altering the flavor of what you’re cooking when you cook over charcoal. Be sure to use an additive-free lump charcoal, which is charred wood. Conventional briquettes, which are easy to find, may contain wood scraps and sawdust as well as coal dust, sodium nitrate, borax and additives like paraffin or lighter fluid. As for lighter fluid, NO! Lighter fluid can release volatile organic compounds (VOCs) into the air, leave an unpleasant flavor to foods, and pose a serious danger if used improperly. Skip it altogether.

Without question, our 6 TIPS FOR A HEALTHY OUTDOOR COOKING SEASON should help you on your way to a healthy, memorable outdoor cooking season. Likely, the best ever!

Purchase products:

Wood Chips: Grande Sapore®, Minuto® & Piccolo®

Wood Chunks: Double & Single Filet

More Related reading on "What Wood for Smoking" and other great smoking and grilling tips and techniques

More Related reading on “What Wood for Smoking” and other great smoking and grilling tips and techniques

Additional reading:

-10 THINGS TO CONSIDER BEFORE PURCHASING WOOD FOR COOKING, GRILLING & SMOKING

-HOW TO TURN YOUR CHARCOAL GRILL INTO A SMOKER

-THINGS YOU DIDN’T KNOW YOU COULD SMOKE

-WHAT WOOD TO USE FOR SMOKING: A PRIMER

Dr. Smoke- please follow our blog 6 TIPS FOR A HEALTHY OUTDOOR COOKING SEASON!

Dr. Smoke- Food labeling is important for health and food safety. It should apply to all smoked foods!

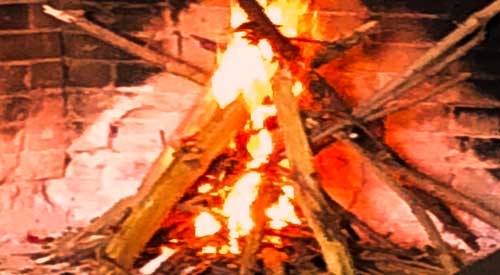
The simple campfire has many uses!

The simple campfire provides more uses beyond just fire cooking!


fire cooking and beyond! Share on X

Listen to the audio of this blog

You’ve likely heard this phrase before whether as a child, adult or at intervals of both. “Fire is meant to be respected.” I’m going to go one step further. Fire should not only be respected, it should be honored and appreciated for all it can offer. I’m going to point out to you just what other uses fire can present to you. Perhaps next time you light a fire whether in your charcoal chimney starter, charcoal grill, fireplace, or even outdoor fire pit, you’ll give some pause to the other uses to keep in your knowledge arsenal for times you may need this information. As I age, I am always in tune with my environment and how I can use it not only for fire cooking but to survive if a situation I can’t control should call for it.

Fire Cooking Use #1: Heat

If you are fortunate as I am to have an outdoor source of fire other than your traditional grill, then you’ve likely found yourself enjoying this first benefit of fire. Heat. But you likely don’t know about the radiant heat quality of fire. With a single fire, only the surfaces facing it are warmed. When it comes to surviving outdoors with heat from a fire, this is when you will want to learn about reflective ability of the fire.

If you have a choice in fire building location when you need it for survival, elect to build one near a large rock or tree stump but add a reflector component on the other side of the fire. This will allow the rock or tree stump to absorb the heat from the fire and then reflect it back. By adding a reflector on the other side of the fire, you will enjoy heat both on your back and front, the ideal for surviving if you must rely on fire for body temperature. Plus, the two reflecting points will force the smoke to go upward allowing you to avoid smoke in the eyes.

Fire Cooking Use #2: Signaling

We all know that fire makes smoke and that smoke acts as a signal. When you want to be found, this is the perfect means for attracting attention. What you need to know is that the terrain plays a part in being seen. If you want to use smoke to signal for help, then seek high points for making one.

Fire Cooking Use #3: Water Sterilization

If you are in a dire situation where you’ve been unable to bring many supplies with you, know that fire can aid your ability to stay alive. You can only survive 3 days without water so finding water is a priority. You can sterilize water found from any source for consumption by boiling it which is a temperature of 212°F. Essentially, 1 liter of water per person will get you through survival of 3-4 days.

Fire Cooking Use #4: Preserving Foods

We tend to rely on someone else in the food production chain to preserve food but you may find a time where you either want to do this for your own family or you have to. Drying, smoking, pickling, and salting are methods of preserving foods from micro-organisms that spoil food. When you smoke meat you dehydrate it and produce a protective coating on the outside that prevents bacteria and condensation from penetrating. This is a means of ensuring you have a food supply that can keep you alive for quite a long time.

Fire Cooking Use #5: Protection

If you’ve ever been camping or glamping in a forest area, then you know that you are never alone. Wildlife dominates in these areas. Fire can be a protector when it comes to keeping these visitors at bay. Always be sure to have a portable fire set up such as a rag tied to the end of stick or similar tool to use as a portable weapon should a forest resident elect to come close to you.

Do you have another survival use for fire? Leave us a comment to share your views. Bringing you informative recipes, techniques, and the science beyond the fire, smoke, and flavor. That’s SmokinLicious®!

SmokinLicious® products recommended:

Wood Chunks- Double & Single Filet

Wood Chips- Grande Sapore®, Minuto® & Piccolo®

Charwood

More related reading on how Smokinlicious® reduces the risks of Microbial bacteria in our wood products
More related reading on fire cooking, smoking & Grilling tips and technique see our directory on previous blogs!

Other blogs like this one:

THE HISTORY OF FIRE COOKING PART I

-OPEN PIT COOKING FIRE BUILDING: PART I

-HOW TO TURN YOUR CHARCOAL GRILL INTO A SMOKER


Dr. Smoke-fire is for more than just cooking!
Dr. Smoke- fire cooking and beyond!

TOP 10 TIPS FOR GRILLING SAFETY

Listen to the audio of this blog

We all love the time of year when we can abandon the indoor kitchen and head out to the grill for open air breathing, relaxing, and some great food. For those of you who are new to outdoor grilling or who may need a refresher, we are giving you our top TIPS FOR GRILLING SAFETY so there’s no chance your summer grilling season is remembered for another reason.

Tip #1

You probably wondered why about 15 years ago, outdoor kitchens became all the rage. The real purpose in having an area designated for outdoor cooking took hold when people realized these structures were highly durable and allowed for measures to be in place to ensure rogue hot coals from charcoal fires or excessive heat from gas grills didn’t ignite the surrounding structures like the house and garage. If you can’t afford a full outdoor kitchen layout, at least follow some of the basic ideas: set the cooking area a distance away from any building and preferably on a fire-proof surface like concrete, that is safely away from trees and grass.

Tip #2

Keep your grill clean. Whether it’s propane, natural gas, electric or charcoal, all grills need periodic cleaning to keep them performing optimally as well as to prevent those surprise grease fires. Any grill can have a grease fire! Clean the drip pan, grease pan, lid, walls and grilling grates. In addition to the safety need, this will give you the longest life out of the grills parts. If you grill a lot in a single season, then clean the equipment more than just at the start and end of the season.

Tip #3

Don’t use lighter fluid. This is a chemical designed to give quick life to briquets, charcoal, and wood. Don’t use it! It adds a prominent chemical taste to your foods and can result in a fire that goes wild. Learn what a chimney starter is, buy one, and use it. It is the safest and easiest method of lighting a fire for a charcoal/wood grill.

Tip #4

Take note of the clothing you choose to wear when you know you’re going to be in control of the grill. No dangling sleeves, strings, or flammable materials should be near the grill. Aprons are a great way to keep clean as well as to keep flowing clothing under control. Just be sure the ties to said apron don’t become a fire starter.

Tip #5

Outdoor cooking is an adult activity. Don’t assign a youngster to watch the grill. Grease fires account for most of the damaging fires resulting from grilling. Plus, it is so easy for youngsters to receive burns from brushing or directly touching the hot grill surfaces. Animals, too, should be kept away.

Tip #6

Always prepare for catastrophic events! That means keep a fire extinguisher handy, sand, or baking soda at the ready. Never attempt to put out a grease fire with water. Remember, when using a fire extinguisher, spray ahead of the fire and then move toward it.

Tip #7

Understand how your grill works. With multi-fuel options in one piece of equipment, you need to know how to close vents, valves to gas, and output drafts. Firing up the grill and having something uncontrollable occur is not the time to learn what those knobs, slides, and dials are for.

Tip #8

If nuts, bolts, or screws loosen up, take the time to secure them back in place, especially if they are on lids, wheels, or fuel areas. Grills need to be sturdy to withstand the constant opening and closing of the lid. Protect the surface the grill is on by investing in a grill mat that is fire retardant. Not only can it prevent the start of a fire, but it will protect your deck or patio material from needing replacement.

Tip #9

When lighting a gas grill, be sure to keep the lid open. Lighting when the lid is down can result in the gas pooling and exploding. This will result in the lid becoming a weapon of its own when it is blown off the grill!

Tip #10

Never move a grill indoors including to a garage! I know. Space is always an issue when you entertain and a grill can take a lot of that valuable space. But there is no way around the fact that these pieces of equipment require outdoor air to prevent accumulation of volatile gases that can make you and everyone around ill or worse. Plus, these units radiate a lot of heat and that heat can spread quickly to other surfaces like the garage door, walls, siding, canopies, lawn chairs – you name it. Always maintain a 3- foot barrier around the grill including above it to ensure no issues.

Have you experienced a disaster while grilling? Tell us what safety tip you wish you had known about before disaster struck. Get tips, techniques, recipes, and the science behind the flame and fire to improve your skills with wood-fired cooking! Follow our TIPS FOR GRILLING SAFETY for a wonderful safe grilling season!

Purchase products:

Wood Chunks- Double & Single Filet

Wood Chips- Grande Sapore®, Minuto®, Piccolo®

More Related reading on this subject

More Related reading on this subject

Additional reading:

-6 TIPS FOR A HEALTHY OUTDOOR COOKING SEASON

-WHY WON’T MY WOOD CHIPS SMOKE??

-WHAT WOOD TO USE FOR SMOKING: A PRIMER

-HOW MUCH WOOD TO ADD WHEN SMOKING


The top Ten TIPS FOR GRILLING SAFETY we hope will make your grilling season safe and tasteful!

The top Ten TIPS FOR GRILLING SAFETY we hope will make your grilling season safe and tasteful!

Outdoor kitchen location tips

Wonderful article on Outdoor kitchen location tips

Wonderful article on Outdoor kitchen location tips

Guest Blog – Brown Jordan Outdoor Kitchens

Outdoor Kitchen Location Tips

by Phil Zaleon

When you are going through the steps of installing an outdoor kitchen, you’ll quickly find that deciding where to set it up is one of the most difficult and impactful decisions of the process. Since you have multiple options, it can be hard to figure out exactly where to put it. We’ve come up with a list of things to consider to help you decide!

Be Conscious of Sun and Shade

Summer is prime time for outdoor kitchen use. So, when planning your outdoor kitchen, bank on warm temperatures and lots of sun, and take reactive measures. Placing your outdoor kitchen under existing shade, or planning to add new sources of shade will provide you and your guest’s comfort year-round.

Natural shade from trees and vines is best because they ventilate easily. As an added bonus vines and trees “transpire,” evaporate moisture to cool themselves, creating their own natural misting system.

There are plenty of man-made shade options as well, such as pergolas, or trellises. The growing popularity of transition rooms provides an even more permanent and durable option for your outdoor kitchen.

Leverage Your Natural Space

Do you have a pool or hot tub in your yard? A beautiful garden? When choosing where to add your outdoor kitchen, take note of any existing structures or features that you want to complement. Also be wary of design overlap. The last thing you want is for your outdoor kitchen covering to inadvertently shade your vegetable garden.

In addition, when planning the placement of your outdoor kitchen, it’s important to consider the relationship between the indoor and outdoor versions, and how they will be used together when cooking or entertaining. If you have a large outdoor space to work with, it may prove prudent to place your outdoor kitchen in closer proximity to your indoor kitchen to create a seamless transition between indoors and outdoors.

Consider the View

Another crucial element to consider when you’re placing your outdoor kitchen is your views and sight lines. You can have the most beautiful outdoor kitchen in the world, but when your guests sit down to eat at the table, if they’re facing a brick wall or the old shed in your backyard, that’s what they’re going to remember. So, be sure to consider the view when you’re trying to find the perfect location for your stainless steel outdoor kitchen.

Another key consideration is the location that will provide the most privacy from neighbors. Screening views with trees and shrubbery will provide privacy while also providing a noise buffer for your close neighbors.

Don’t Forget Utilities

When planning your outdoor kitchen layouts, keep in mind the best practical placement or installation of the necessary gas, water, and electrical supply. Note where your water, gas and electric lines are, and design your kitchen accordingly.

Furthermore, when placing your grill or smoker, think about the natural flow of wind – make sure that smoke from the grill will be carried away from dining and living areas. You should also think about making sure the kitchen area is located a safe distance from doors and entryways to keep foot traffic away from potential hazards.

Additionally, make sure to place all outdoor cooking appliances away from areas where children play or where people play sports. You’ll want to avoid basketballs or soccer balls bouncing over onto a hot grill.

Don’t Shy Away From the Roof

When one thinks “outdoor kitchen,” the tendency is to think of backyards – but that doesn’t have to always be the case. Especially if you have a small or nonexistent lawn space, building your stainless outdoor kitchen on the roof can prove a very viable design option.

If you are choosing this option though, pay special attention to restrictions and codes. They vary by municipality, so check with your town’s building department to find out rules about setbacks, fire safety, and what kind of permits you’ll need to file. We recommend working with a general contractor so you are up to code and all safety requirements are included.

Fit Your Needs

The right spot to place an outdoor kitchen will vary from homeowner to homeowner. You may like the idea of an outdoor cooking area just outside the back door of your house or a freestanding pavilion near your pool area.

At the end of the day, there’s no one “right” spot for your outdoor kitchen. But by using these outdoor kitchen location tips, you’ll ensure you make an excellent choice.

Are you ready to build your dream luxury outdoor kitchen?


Call Brown Jordan Outdoor Kitchens on 203-871-3804 today to get started!

Related Reading:

-Electric Smoker Guy-HOW TO CHOOSE THE BEST ELECTRIC SMOKER

-Does Outdoor Kitchen Stainless Steel Rust

Dr. Smoke- things you should consider on Outdoor kitchen location tips

Dr. Smoke- things you should consider on Outdoor kitchen location tips

Next Page »