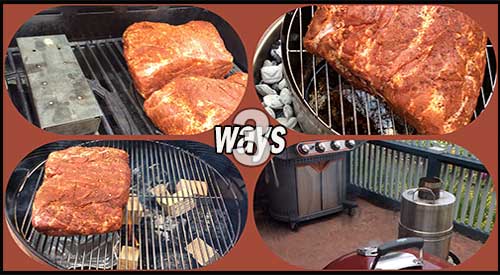
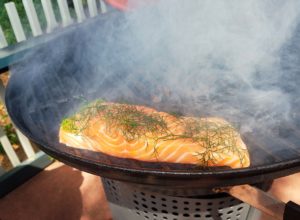
Our three ways of smoking Boston Butt offer great wood smoke flavor!

Our three ways of smoking Boston Butt offers great wood smoke flavor!

3 METHODS OF SMOKING BOSTON BUTT Share on X

Listen to the audio of this blog
This certainly is a clear example of how anyone can produce authentic barbecue on the equipment they have even if it’s not a traditional smoker.

3 Methods of Smoking Boston Butt-

It should come as no surprise that majority of grill owners invest in a gas grill for their outdoor cooking with over 80% of these owners investing in multiple accessories for that grill. Often, many of these grill owners will venture to make an additional purchase of a second type of grill like a charcoal or pellet grill/smoker, in order to be able to cook more barbecue or smoked food options.

My intent is to demonstrate to you that you can produce authentic flavors, colors, textures, and aromas of favorite barbecue proteins with a variety of equipment, all outfitted with hardwood for the authentic wood flavoring.

I’ll be taking Boston butt to a traditional gas grill, a kettle charcoal grill, and a convection-style grill to demonstrate just how easy it is to cook this popular animal protein while giving you a bit of education on how these units are different when hardwood is incorporated.

Set Up Similarities and Differences for Smoking Boston Butt

When it comes to setting up the grills for smoking, there are some obvious differences. First, let me name the equipment brands I’ve included and the intended set up of each for cooking and smoking the Boston Butt cuts, all of which approximate 8 lbs.
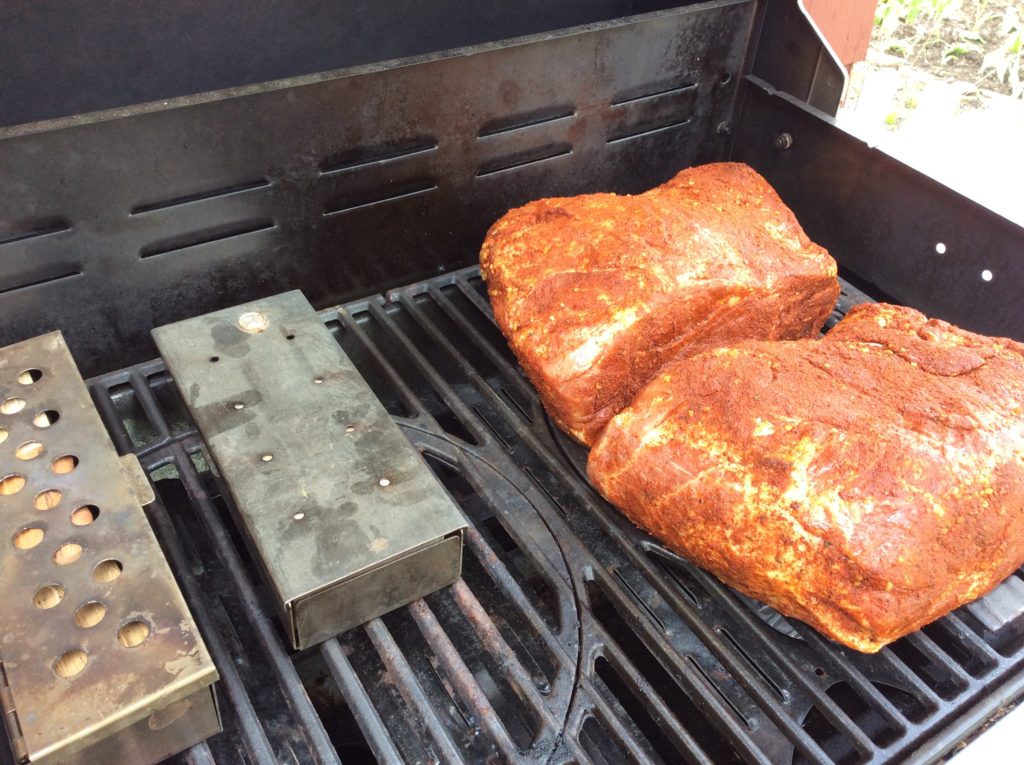
Our Boston Butt (s) on the Stok Gas Grill with accompanying Smoker boxes

The Stôk Quattro 4-Burner Grill:

If you are not familiar with this grill, it is equipped with an insert system to allow you to use a standard grilling grate, a griddle, grill basket, vegetable tray, pizza stone, Dutch oven, Wok, and other inserts that easily pop in and out of the cast iron grates. Despite this feature, you can do traditional smoking using wood chunks without the need for the smoker/infuser insert.

Whenever I smoke on a traditional gas grill, I always set up a two-zone cooking method. This means, on my 4-burner Stôk, I will ignite just two of the burners on one side. You can either place wood chunks directly on the heat shields of the unit or use a metal smoker box. My Boston butt will cook on the unlit side of the grill with a metal smoker box containing 3 wood chunks on the hot side. I’ve also included a second smoker box to make it easier to swap out the first when the wood becomes completed charred. My temperature is 225°F for the actual cooking.
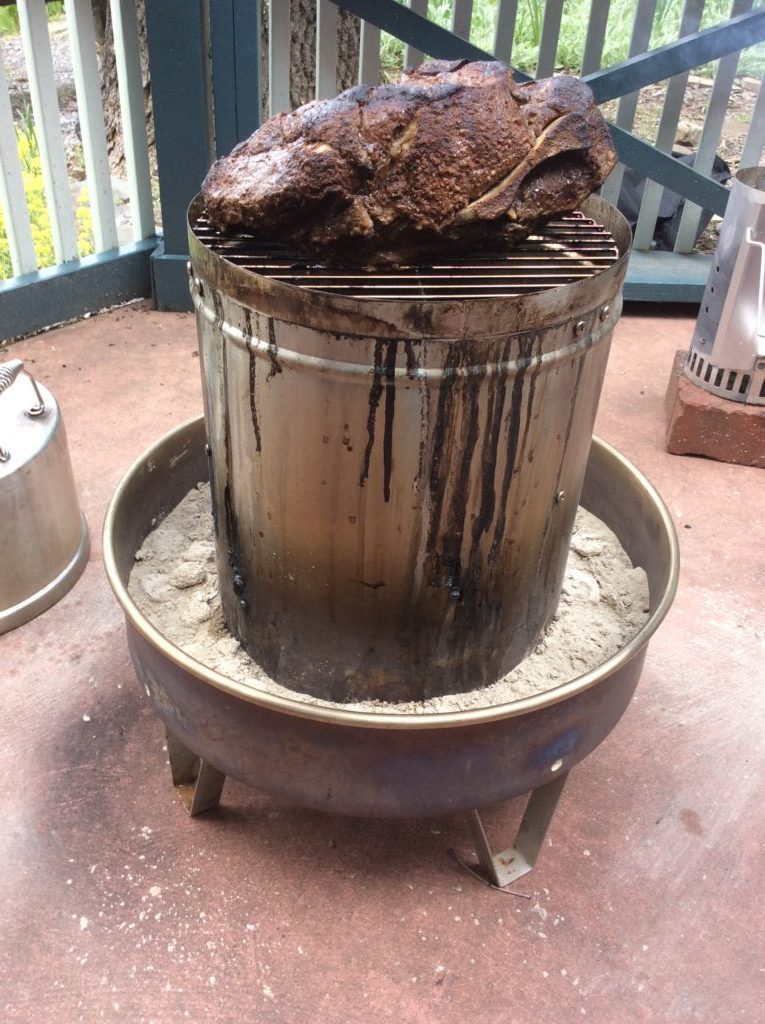
Our Boston Butt on the Orion Cooker with Minuto® wood chips in the inner ring

Orion Cooker:

This is an outdoor convection unit that uses briquets for the heat and Minuto® Wood Chips placed around the drip/water pan for the wood flavoring. This unit will be the fastest to cook the Boston Butt, with an anticipated timing of 4-1/2 hours total. This is a direct cooking method that uses the radiated heat of the stainless-steel body to trap and circulate the heat for faster cooking time.

There is no ability to replenish the wood chips with this unit due to the high heat level. About 15 lbs. of briquet and 4 ounces of Orion Custom Wood Chips is all that is needed to smoke, plus some water in the water/drip pan for a moist outcome.
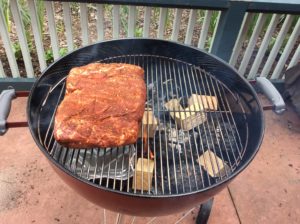
Our Boston Butt on the Weber® kettle Grill with double filet wood chunks

Weber® Kettle 22” Charcoal Grill:

Likely one of the most popular charcoal grills, the Weber® kettle provides for the opportunity to cook with charcoal and hardwood. I’ll be setting up my grill using a two-zone method; charcoal/wood on half the fire area and the meat placed on the indirect side.

Due to the length of time Boston butt takes to cook, you likely will need to replenish the charcoal for maintenance of heat level. I prefer to maintain a temperature around 250° F.

For similarities: both the Weber® and the Stôk grill were set up with a two-zone cooking method. Both included use of the SmokinLicious® double filet wood chunk. The length of cooking time between the charcoal unit and the gas unit are very similar, taking close to 10 hours.

For differences: temperature maintenance is easier with the gas and convection units. The charcoal unit requires much more supervision to ensure that the fuel (charcoal) is replenished prior to the temperature of the grill decreasing significantly. You are also able to check on the meat’s coloring and evenness of cooking with the charcoal and gas units while the convection unit is generally left alone until closer to the recommended cooking times. Though you can check on the doneness of the meat at any point with the convection unit, generally there is no need to do anything but wait.

Regarding cooking variations, let’s discuss color, bark formation, moisture of the meat.

Barbecue By All Methods

With all four of the Boston Butt (s) prepared in the same manner – excess fat trimmed to ¼-inch or less, a dry rub applied on all sides, and marinated for 24 hours – this is a fair comparison of how each grilling and smoking method produces the barbecue results commonly looked for.

Bark:

Without question, bark or the outer crust that develops from exposure to a lower temperature, long cook time, and smoke vapor infusion was greatest on the Boston butt cooked on the Weber® Kettle 22” Charcoal Grill. The gas grill produces the least amount of bark which is dominate on the outer edges and top surface.

Color:

The darkest coloring to the bark and the most obvious smoke ring was on the meat cooked on the charcoal grill. The Orion Cooker produced a brown hue to the meat’s exterior while the meat cooked on the gas grill retained a red hue that was indicative of the dry rub color. Charcoal grills will produce a black hued coloring due to two combustible materials: charcoal or charred wood and hardwood.

Moisture:

The meat that produced the greatest amount of rendered juice was from the charcoal cooking method. Second, the convection grill method followed by the gas grill. However, the greatest internal moisture level was obtained from the indirect cooking method on the gas grill, followed by the charcoal method and lastly the convection method.

Final Notes:

What we’ve set out to accomplish with this multi cook segment is to prove that no matter what equipment you have, you can produce authentic flavor, aroma and texture to Boston butt. This can be invaluable for those times when you may not have a lot of time to supervise the smoker or grill but still want authentic barbecue. Or, when you must make a lot of meat meaning you must use all the equipment options you have available.
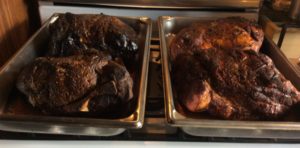
All four Boston Butt (s) one done on charcoal with the Weber, another in the Orion with wood chips and two on the gas grill with wood chunks- the coloring is not much different!

From a taste perspective, our sampling group indicated that the strongest smoked flavor was from the charcoal unit, followed by the convection grill and lastly, the gas grill. Keep this information in mind when you’re cooking for others, as boldness of the smoke flavor can be controlled not only by the amount of time exposed to the smoke vapor, but also with the equipment used for the cooking and the amount and type of hardwood used in the process.

This certainly is a clear example of how anyone can produce authentic barbecue on the equipment they have even if it’s not a traditional smoker.

Making you an informed consumer through valuable articles like this one. Leave us a comment and follow us or subscribe for more great recipes, techniques, tips, and the science behind the flavor. That’s SmokinLicious®.

SmokinLicious® Products used in these techniques:

Wood Chunks- Double & Single Filet

Wood Chips- Minuto®

More related reading on how Smokinlicious® reduces the risks of Microbial bacteria in our wood products
More related reading on smoking Boston Butt & other Grilling tips and technique see our directory on previous blogs!

More blogs you may enjoy:

-Charwood Grilled Salmon Fillets for a Hint of Smoky Flavor

-GRILLED LAMB

-GIVE ME THAT BEEF BRISKET!

-ROSEMARY INFUSED SMOKED BEEF SHANKS FROM THE GRILL

Dr. Smoke- We used three different methods for smoking Boston Butt! All turned out fabulous & tasty!
Dr. Smoke- We used three different methods for smoking Boston Butt! All turned out fabulous & tasty!
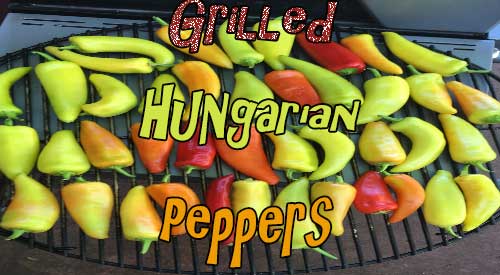
Smokey Hungarian Peppers on our kettle Grill!

Smokey Hungarian Peppers on our kettle Grill!

Let's Do Smokey Hungarian Peppers on the Kettle Grill! Share on X

Listen to the audio of this blog


I love growing Hungarian wax peppers in my garden and then harvesting for recipes and freezing for future recipes. Hungarian wax pepper come in different levels of heat depending on the variety chosen. Mine are a hot variety but work perfectly for mixing with other creamy flavors to produce some great condiments and sauces. I will introduce you to two versions of my Smoked Hungarian Pepper Spread in our recipe blog which will post soon.

(more…)

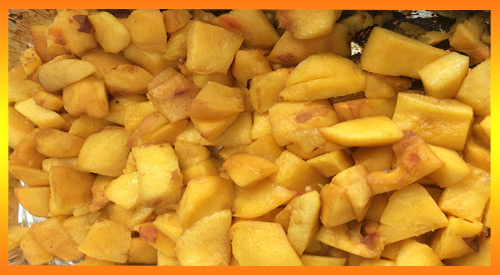
Our Grilled Peaches for the perfect salad addition with sweet onion, Tomatoes, and fresh herbs!

Our Grilled Peaches for the perfect salad addition with sweet onion, Tomatoes, and fresh herbs!

GRILLED PEACH SALAD- THE PERFECT SALAD!


listen to our blog

Listen to our blog

If you’ve been a follower of our recipes and techniques for a while, then you’re aware of our preference to grill, smoke, coal cook, and ember fire in-season produce. Peaches are no exception and with our Grilled Peach Salad, get your taste buds ready for a real treat!

I’ve got my two quarts of fresh peaches and a plan to grill these on the charcoal grill using charwood coals. Then I’ll use my luscious smoked peaches in a salad that features two additional seasonal ingredients – tomato and shallots.

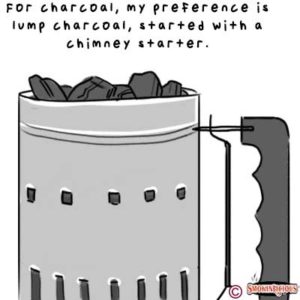
Get your chimney starter of charwood or charcoal and meet me at the grill for this quick technique and grilled peach salad recipe.

Fire Up the Grill for Grilled Peach Salad

Fire up the charwood with a good quality chimney starter!

Firing up the STOK kettle grill!

Whenever you use the charcoal grill, it’s always best to get it lit about 30 minutes ahead of cooking. I’m using a kettle-style grill made by Stôk that has a removable center grate for an assortment of inserts. I won’t be using any inserts for this cook as my peaches for the grilled peach salad recipe will stay in a disposable foil pan for easy cooking and removal.

Start by placing charcoal or charwood in a chimney starter. Place a Firestarter in the charcoal area of the grill and place the filled chimney starter over the starter. Lite the Firestarter and allow to remain in place until all the charwood has ignited and started to reduce to hot coals. While that’s burning, let’s prepare the peaches. Be sure you have a couple of wood chunks available to add to the coals when we are ready to grill. I like to use the single filet wood chunk size from SmokinLicious®.

Tasting Notes: there are differences in charcoal so be sure to use a natural charcoal or charwood product rather than briquets as briquets will produce more heat than you need.

Perfect Peach Bites

With our charcoal grill going, it’s time to start on the peaches. There are a few ways to remove the skin from peaches including placing them in hot water for a few minutes then removing and placing in a bowl of ice water. The skins will just peel off. I’m an old school so I use a sharp paring knife and just remove the skin.

Once the skin is removed, it’s time to cut the peach into bite-size pieces. You can easily cut around the pit and cut those slices into pieces. Place all the pieces in a foil pan in an even layer.

Tasting Notes: Try to purchase peaches that have some firmness to them if you don’t plan to grill them right away. The peaches should have no bruising and have a slight give when touched. Too soft and those peaches won’t hold their shape when exposed to the grill’s heat.


Single Filet wood chunks under the grilling grate

Smoking Process for the Perfect Grilled Peach Salad

With the peaches prepared, time to take them to the grill. Pour the chimney of hot coals into the grill’s charcoal area and add the wood chunks. Add the pan of prepared peaches and placed the lid on the grill. Be sure the outtake vent on the lid is ½ way open. The intake vent at the charcoal area should be ¼ way open. Now allow smoking for 15 minutes prior to checking. Remember, we want to add smoke without reducing the peaches to a puree.

Tasting Notes: Since peaches contain 89% water, they take in the smoke vapor extremely well. Keep that in mind when you select both the charcoal and wood. Remember, oak based charcoal tends to burn hot and has a stronger undertone to fruit.

Final Salad Prep- Grilled Peaches for the perfect salad addition!

While the peaches are absorbing all that great smoke flavor, return to the kitchen and prepare the remaining ingredients for our salad. You’ll need:

  • 1 lb. tomatoes cut into 1/2’” pieces; or if using cherry or grape tomato, halved
  • 3 tablespoons extra virgin olive oil, plus additional for final drizzle
  • 2 tablespoons rice vinegar
  • ½ teaspoon lemon zest
  • 1 tablespoon lemon juice
  • 1 shallot, sliced thin
  • fresh mint leaves torn
  • salt and pepper

the ingredients in the serving bowl and ready to add the dressing

I start by slicing my tomatoes in half, then add a teaspoon of salt to them while sitting in a colander so I can render some of the water. While the tomatoes sit, I start slicing the shallot into thin strips. At this point, you’ll want to check the peaches. They should be close to or ready to remove from the grill. I like to place them in the refrigerator for about 10 minutes to cool them down for the salad. While that’s happening, let’s prepare the vinaigrette.

I prefer to mix all the vinaigrette ingredients in a measuring cup so I can easily pour it to the salad right before serving, to keep the tomato and peach from getting too soggy. Start with the extra virgin olive oil and add the rice vinegar. Next, the lemon zest, lemon juice, salt, and fresh pepper. Whisk it all together and set aside while you combine the salad ingredients.

Tasting Notes: you can substitute cider vinegar for the rice vinegar and any color of tomato will do though I lean toward the reds and purples to give a color contrast from the orange peach.

Smoked peaches go into the serving bowl first, following by the tomatoes, and shallots. Pour the vinaigrette over the salad within an hour of serving and top with the torn mint leaves. A perfect balance of sweet, tart, smoky, and refreshing. An easy method and recipe you can have in 60 minutes. I love peaches so try our grilled peaches for the perfect salad addition for your next dish to pass! You will tantalize the guest taste buds!

SmokinLicious® products used in this blog:

Wood Chunks- Single Filet

Charwood

More Related reading on "What Wood for Smoking" and other great smoking and grilling tips and techniques

More Related reading on “What Wood for Smoking” and other great smoking and grilling tips and techniques


Additional reading:

-PEACHES WOOD FIRED FOR A SMOKY FLAVORFUL GAZPACHO

-WOOD FIRED GRILLED WATERMELON BECOMES A STAR

-WOOD-FIRED APPLES MAKE THE BEST CAKE

Dr. Smoke adds mint, onions, and tomatoes to make the Grilled Peach Salad a perfect treat!

Dr. Smoke adds mint, onions, and tomatoes to make the Grilled Peach Salad a perfect treat!

Let's stop the dry smoked meats effect with our 9 easy steps!

Let’s stop the dry smoked meats effect with our 9 easy steps!

WHY IS MY BARBECUE MEAT DRY?? Share on X


Listen to the audio of this blog


You thought you timed the meat perfectly on your smoker or grill. When it came time to cut it, all you found was a gray, dry former piece of meat staring back at you.

What went wrong?

Don’t fall into your old habits when it comes to outdoor cooking, whether you’re using a traditional wood or electric smoker, charcoal grill or gas grill. Learn some easy tips to keep your foods juicy and enticing this outdoor cooking season by preventing the unwanted occurrence of dry smoked meats.

(more…)

The Water Pan in Smoker explained for grilling and smoking techniquies

The Water Pan in Smoker explained for grilling and smoking techniques!

THE WATER PAN IN SMOKER EXPLAINED FOR GRILLING & SMOKING Share on X

Listen to the audio of this blog


If you’ve purchased a smoker, you’re likely familiar with the term “water pan”. If, however, you’re more of an LP/Gas Grill person, than this term is likely one that escapes your knowledge.

Water pans are a means of introducing valuable moisture into the cooking environment which has immense value when grilling and smoking. Let me explain each of the pros of learning and using a water pan for your outdoor cooking, no matter the type of equipment you’re cooking on.

Water Pan Pro #1

Temperature control. This is the ultimate need when you grill or smoker, especially when you smoke. Maintaining a stable temperature that you’ve predetermined. When the day is scorching hot and the equipment is made of metal, you will experience a challenge with temperature control. Introduce a water pan, and your battle can be won.

A water pan goes above the heat source. If using a charcoal grill or charcoal/wood smoker, this pan would be placed above the coal area. Have an electric unit and you’ll find the pan over the electric heating element. If you want to introduce a water pan on an LP/Gas Grill, this would be placed over the lit burners. Many vertical smokers come with a water pan.

Water Pan Pro #2

Water cannot go above the boiling point which is 212°F. Additionally, evaporative cooling also takes place as the water is exposed to heat.

Water Pan Pro #3

A water pan can become the number one tool when doing direct heat cooking over an open flame. Why? It acts as a repellent for the flame giving your foods a chance to survive without becoming a blackened, dried out, former piece of food.

Water Pan Pro #4

Are you having trouble with hot spots in your equipment? Well, a water pan will even them out. Now, the temperature you desire can essentially be locked in just by using a water pan.

Water Pan Pro #5

Humidity that develops from the use of a water pan keeps the surface of the meat moist, which in turn, attracts smoke vapor, which in turn, produces great flavor. The water vapor mixes with the combustible gases which are emitted from the burning material and add to the overall flavor. Yes, water is a passageway to all things flavorful!

What Goes in the Water Pan

It’s called a water pan for a reason. It is designed to hold water, specifically hot water to keep the cooker from wasting energy on heating cold water put in the pan. Here’s a tip when you fill the water pan: use a teapot to fill the pan while it’s in place so you don’t take the chance of spilling hot water on surfaces or you. Remember, water evaporates while other liquids don’t evaporate.

Don’t Make the Water Pan a Drip Pan

Here’s the thing with a drip pan. Due to its location directly over the heat source, when used on vertical units it often serves double duty as a drip pan. Don’t do that! Here’s why. The rendered fat drippings can produce an oil slick on the surface of the water which will prevent water evaporation.

Make Cleaning a Snap

Here’s a couple of tips when using a water pan. If your unit comes with a water pan, line it in aluminum foil which will allow you to simply pull the foil off and preserve the condition of the original pan.

If you’re using a unit that has no water pan but want to introduce one, simply purchase a disposable foil pan. You will want to purchase one that is compatible in size to the unit your using, that will fit comfortably over the heat source, and that can hold enough water to prevent you from having to make refill trips every 15 minutes.

Purchase products:

Wood Chips- Grande Sapore®, Minuto® & Piccolo®

Wood Chunks- Single & Double Filet

More Related reading on water pan in smoker, see our links for related readings

More Related reading on water pan in smoker, see our links for related readings

Additional reading

-PREVENTING DRY BBQ IN YOUR SMOKER

-CAN HARDWOOD BE TOO DRY FOR COOKING?

-TURNING YOUR CHARCOAL GRILL INTO A SMOKER

-TURN YOUR LP/GAS GRILL INTO A SMOKER

www.barbecue-smoker-recipes.com

Dr. Smoke- The water pan in smoker explained is essential for moist results in grilling and smoking.

Dr. Smoke- The water pan in smoker explained is essential for moist results in grilling and smoking.

Our Readers Are Asking…

What does water pan do in a smoker?

A water pan induces moisture directly into your smoker as an ally for the indirect dispersion of heat. Never use your water pan as a drip pan. Remember- drip pans = a collection unit for residual or run off grease from the cooking process; a water pan = water for moisturizing foods.

the technique of adding wood chips over a charcoal fire for flavor

Adding grill wood chips to charcoal brings added flavor to any cooking category

HOW TO USE CHARCOAL WITH WOOD IN COOKING Share on X

Listen to the audio of this blog


The questions are quite frequent: “Since (the equipment) uses lump charcoal, do you need to add wood for smoke flavor?” “Do wood chips or chunks work best if they are needed or desired?” “Generally, how much lump charcoal does equipment use for 10 hours of smoke?”

Learn Adding Charcoal with Wood

(more…)

Top charcoal grilling tools

Top charcoal grilling tools

TOP Top charcoal grilling tools Share on X

(more…)

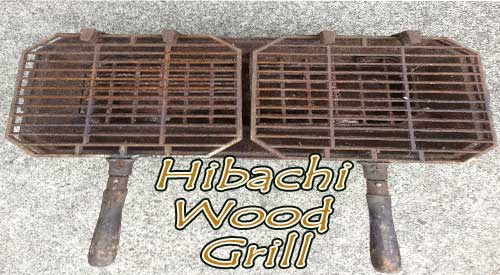
Our Old Hibachi Wood Grill after the spring cleaning

Our Old Hibachi Wood Grill after the spring cleaning

DOING THE HIBACHI WOOD GRILL WAY! Share on X

Everyone starts their grilling career on this convenient, inexpensive, small piece of equipment. But do we do it correctly? Let’s review the basics.


First, this is for grilling over an open fire; it needs high heat to cook. It has a low (height) fire pan and generally no hood or lid. Great high heat cooker/grill – not a smoker.

Lesson #1 Hibachi Wood Grill:-plan what you cook properly!

Now, let’s review how to set up the fire. The region that gave the hibachi its popularity is the Far East which has access to a type of charcoal called “bichiton”. This is a very dense, heavy charcoal made from oak that is direct fired to a high carbonization level. This charcoal produces an extremely high heat; 3-4 times the heat level of an American charcoal!

Can’t locate “bichiton” charcoal or don’t want the expense if you find it? Well, you can use SmokinLious® products to get close to the results. Let’s begin with charcoal – North America produces lump charcoal pieces that are too large for the small Hibachi. So take 2-3 pieces(depending on size), put them in a small paper bag (lunch bag size) and press with your hands to break them into smaller “thumb” size pieces (or you can use a meat mallet). Then pour into the firebox. If the firebox is not full –repeat until you fill it. If you don’t have a small torch available, put some paper under the charcoal, then ignite. Or, you can place the original charcoal pieces in small paper bags, then break the pieces apart, and place the bag in the firebox for lighting.

SmokinLicious® wood chips are crushed from the center of hardwood

Once the charcoal burns down (gray in color), start adding Grande Sapore® wood chips as this will provide for immediate heat and eventually, some flavoring to the food. Once the charcoal/chip combo’s flames settle down, you can begin cooking! Remember, hibachis are traditionally used for thin meats so adjust your cook time to what you’re cooking.

What I like about hibachi cooking is the ease of adding more wood chips when more fuel is needed!

Once you master the fire set up, you will enjoy some wonderful food and some really fun cooking the Hibachi way. Think Korean BBQ! Yum!

(more…)

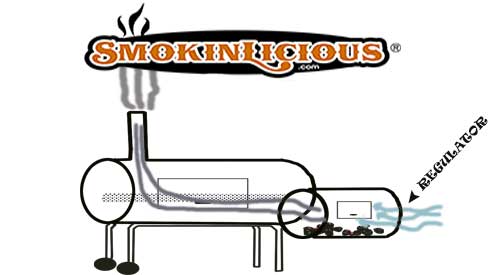
Diagram showing the importance of smoker air flow.

Diagram showing the importance of smoker air flow.

smoker air flow is your temperature control Share on X

Listen to the audio of this blog

SMOKER AIR FLOW IS YOUR TEMPERATURE CONTROL

How do you keep a charcoal grill at 200°F? How do you cool down a charcoal grill? Do you keep the vents open all the time?

When it comes to smoker air flow, here are a few common questions posed for learning all about the importance of air flow in controlling the temperature of a grill or smoker. This can be a challenge specifically for charcoal/wood units as they rely on the human hand to determine when to add fuel as opposed to a gas/LP unit that has continual, regulated flow.

You might assume that the only combustible material used in these units is charcoal or wood but there is another one. Oxygen.

I’m going to provide my top tips on gaining control of temperature by instructing you on smoker air flow or oxygen regulation in specific styles of charcoal/wood burning equipment.

Intake and Outtake of smoker air flow

For many of the charcoal/wood using units, they are built with an intake and an outtake vent. Let’s make sure you understand what these vents are and what the purpose of each is.

Intake Vent: It has one job – bring in oxygen to control the heat of the fire. If you need to raise the temperature of your unit, open the intake vent. Too much heat, close the intake vent which starves the fire for oxygen. Note: if you close the intake vent entirely while keeping the outtake open, you will still starve the fire and put it out.

Here’s the trick – each unit will have a “sweet spot” for the perfect balance of oxygen flow. Find that spot, and you can maintain a temperature easily in your equipment. But, I’m getting a little ahead of myself. Let’s discuss the opposing vent.

Outtake Vent: This goes by different names (chimney, flue, outtake, vent) but has the same purpose regardless of what you call it; vent out the gases from the combustible material and pull in oxygen from the intake vent which is commonly know as draft. Remember a charcoal/wood fire produces gases which need to be vented. If they aren’t properly vented, they will smother the fire.

When learning how to regulate your equipment for the desired temperature setting, always start with the outtake vent fully open. This allows you to manipulate only the intake vent until you reach the desired temperature. That will help you learn where the sweet spot is on your equipment.

When You Never Find the Sweet Spot for Smoker Air Flow

There are times when no matter how you play with the intake vent, you never seem to get the temperature to hold. What now?

Time to look for leaks in your equipment. If an access door or lid are bleeding smoke, then you know where the extra oxygen is coming from. That will affect the draft between the intake and outtake vent and result in fluctuating temperature that cannot be controlled. Best course of action is to try to seal the leaks with food grade silicone or other materials suitable for high heat appliances.

The Shape of the Equipment

In my opinion, the vertical-style equipment models tend to be much easier to get airflow/temperature control. Horizontal units also referred to as off-set smokers and grills, specifically the inexpensive models, tend to have poor design in the vent placements as well as poor insulation that results in heavy leakage.

If you insist on purchasing a horizontal unit, read reviews and ask questions about how the unit is insulated. Get specific with the materials used, quality of the metal parts, etc.

Chef Bert and Tom using a chimney starter for their grilling needs.

Other Tips for Smoker Air Flow & Temperature Control

Always try to light your initial fuel product, whether briquets, lump hardwood charcoal, or charcoal in a chimney starter so you can control the quantity with every cook. Use the chimney to add hot coals to the unit when you need to increase temperature. Although you can have unlit charcoal in your charcoal area so it will ignite as the lit produce makes contact, this isn’t always a guarantee that you won’t produce some temperature variance. The best chance of getting the temperature regulated is by adding hot coals as needed, even if this may be every hour or so.


To summarize, learn to control temperature by using the same quantity and type of material for the fuel, lit it with a chimney starter, only add hot coals to increase the temperature, and always have the exhaust vent open at least ½ way when cooking. Remember the number one thing is Temperature control is all in the air flow and you will have tasty grilling results!

Our Readers Are Asking..

When should I add more wood to my smoker to prevent a bitter flavor?

There are a few possible causes for bitter smoked food outcome and easy to fix:

#1 Outtake vent is to tight – open it a bit more;

#2 Wood chunks are too wet. Don’t pre-soak the chunks. Put them on the charcoal dry;

#3 Using too much wood at a time. It only takes 3–4 chunks to infuse smoke flavor;

#4 Not using an ideal hardwood. Stick to common hardwoods like cherry, maple, oak hickory, pecan, ash, alder, beech. Never use softwoods like pine, spruce, cedar, etc;

#5 Use a water pan to keep a good balance of heat, vapor, and moisture.

SmokinLicious® Products Used in this Blog:

Charwood

Wood Chunks- Double & Single Filet

Wood Chips- Grande Sapore®, Minuto® & Piccolo®

More Related reading about smoker air flow is your temperature control an other cooking subjects.

More Related reading about smoker air flow is your temperature control an other cooking subjects.


Related readings

WHAT YOU SHOULD KNOW ABOUT THE WATER PAN IN GRILLING & SMOKING

-HOW TO PREVENT BARBECUE MEAT FROM BEING TOO DRY??

-WHAT TO DO IF MY WOOD CHIPS WON’T SMOKE??

-WHY CHAR-WOOD IS THE BETTER OPTION OVER CHARCOAL

Dr. Smoke for best results in your grilling and smoking enjoyment follow smoker air flow is your temperature control guide.

Dr. Smoke for best results in your grilling and smoking enjoyment follow smoker air flow is your temperature control guide.

Try our technique on Smokey Sweet Potatoes for a great addition to your BBQ!

Try our technique on Smokey Sweet Potatoes for a great addition to your BBQ!

Try Smokey Sweet Potatoes for your BBQ Share on X

Listen to the audio of this blog


We introduced you to smoked potatoes some time ago giving you an easy method of smoking cubed potatoes . Now, we look at sweet potato, a very popular root vegetable that does particularly well on the grill. This time, we’ll smoke the potatoes whole to allow for versatility for recipes.

Get 5 or 6 sweet potatoes selected, preferably of equal size, and let’s get to the grill! Oh, and don’t forget how great it is to grow you own sweet potatoes. Check out this guide to motivate you!

Choose Your Equipment for Smokey Sweet Potatoes

I’m going to use two pieces of equipment today to demonstrate how easily it is to work with what you own to add a smoke component.

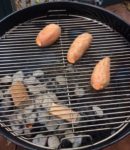
For my gas grill, I’ll be using a smoker box equipped with 3-4 wood chunks in double filet size. For the charcoal grill, I’m incorporating both lump charcoal and briquet for the fuel and adding double filet wood chunks for flavor. My charcoal grill is a traditional kettle grill. Both these units are set up for two-zone cooking which means the fuel is on one side – in the case of the gas grill, burners are lit on one side only, for the charcoal grill, charcoal is banked to one side of the grill, using both lit and unlit coals to sustain the heat level. All cooking will be done on the side that does not have any direct heat.

Our Smokinlicious wood chunks on the coals providing great smokey flavor for these smokey Sweet Potatoes

#woodchunks

With a target cooking temperature of 325-350°F, these sweet potatoes will cook up and get smoky in no time!

Tasting Notes: Preparation of the sweet potatoes prior to smoking is simple. Wash the potatoes well, pat dry, and then trim off the two ends. Using a knife, pierce the ends one time and the sides several times to provide injection areas for the smoke vapor. This will ensure an even smoke flavor.

Smokey Sweet Potatoes- No Work Grilling & Smoking

(more…)

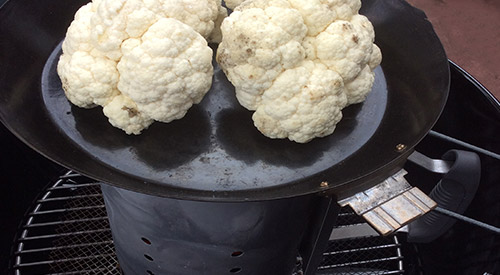
We are cooking on a chimney starter with a grill pan to nicely char our head of Cauliflower for this recipe!

We are cooking on a chimney starter with a grill pan to nicely char our head of Cauliflower for this recipe!

COAL FIRE CAULIFLOWER BY COOKING ON A CHIMNEY STARTER

listen to our blog

listen to our blog


A cousin to broccoli, #cauliflower is one of those vegetables that can be eaten raw or cooked and converted to so many different textures. Best yet, cauliflower is one of those super cancer-fighting foods as it contains sulforaphane known to kill cancer stem cells.

I’ll be taking my head of cauliflower and introducing it to hot coals, first, direct heat using a #chimneystarter for the actual cooking and then directly on the hot coals to give it the perfect “meat” char. No matter what color you enjoy – white, yellow, purple – grab a head and get your chimney starter ready, as I show you how to use a chimney starter as an actual grill.

Cooking on a Chimney Starter: Why a Chimney Starter?

All our hot embers accumulated in the Chimney starter provides an excellent heat source for cooking

There are times when you really don’t need to fire up a full charcoal area of coals on the charcoal grill. I have the perfect solution when you’re doing just a small quantity of a food, like our head of cauliflower. Use your chimney starter

To start, I place a mesh screen on the charcoal grill grate to help retain the small, hot coals for cooking. I have a collection of micro charcoal pieces that work perfectly for this type of cooking.

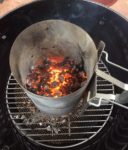
After lighting a Firestarter, I place the charcoal filled chimney starter on top of the Firestarter and allow the coals to burn down to hot embers. Hot embers are what I will be using to cook my fresh cauliflower, first, directly on the chimney starter, then on the mesh screen once I dump the hot embers from the chimney starter.

(more…)

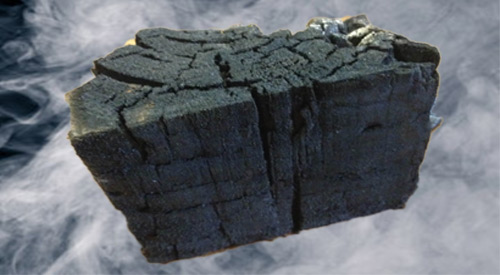
Our Char-wood is produced by Direct firing our North American hardwood blocks until the right amount of Carbonization is achieved!

Our Char-wood is produced by Direct firing our North American hardwood blocks until the right amount of Carbonization is achieved!

WHY CHAR-WOOD IS THE BETTER OPTION OVER CHARCOAL

SUMMARY:

Binchotan charcoal is made from the Japanese direct fire method of making charcoal with Kiln! Japanese charcoal making has been around for centuries and burns longer than lump hardwood charcoal! We have replicated their process and make our Char-wood from our North American hardwood blocks! Carbonization is key to Char!

listen to our blog

listen to our blog


Frankly, the term “charwood” may be a new one for you. Although its function is like charcoal, the benefits clearly outweigh those of charcoal. Let’s examine the key reasons why charwood may be the better option for outdoor cooking over standard charcoal.

Char-wood- Carbonization

Hopefully, if you’ve been engaging in outdoor grilling and/or smoking for some time. You’ve understood the need for a fuel material that burns evenly and hot. You’ve likely also heard the controversy that’s brewed for years about what is the best product to use for the fuel. Products range from briquets, lump hardwood charcoal, specialty wood charcoal, and compressed woods like pellets and compressed wood blocks. The key is to understand that some of these products could contain binding agents as well as accelerants to make for easy lighting.

Carbonization is the conversion of an organic matter into carbon. Carbon is an element that forms when the organic matter is heated to a high level without oxygen, burning off the volatile gases, leaving the pure carbon behind. Although commercial material production, whether briquet, hardwood charcoal, or standard charcoal have different percentages of carbonization in the outcome, most are above 90%. That high level of carbonization is what allows for heat to be produced for outdoor cooking.

Flavor

When you use straight charcoal briquets, you are getting heat only with no flavor as that is a fully carbonized or charred product. Many prefer to use briquets because they are uniform in size and give the same outcome every time they are used. Fill a chimney starter with briquets, and you’ll have the same number of briquets fit in the chimney every time.

When you use lump hardwood charcoal, you will get variation in sizing from small, chip-like pieces to half-log size pieces. Here’s information you need to know. Although the label may read “hardwood”, there is no information on where that hardwood derived from. Often, manufacturers of lump hardwood charcoal produce their product from recycled materials such as old pallets, lumber scraps from flooring, cabinet, and furniture makers. They may take in scraps from lumber mills. When this material is carbonized, it will do so at various levels due to the variation in material sizing.

That means when you cook with it or for that matter when you lite it, expect great variation from use to use due to all the inconsistency in sizing. The inconsistency will produce a lower percentage of carbonized material than briquets. So know you may get some minimal flavor from lump hardwood due to poorly carbonized larger pieces of product. This is the reason there is more ash production with lump hardwood charcoals.

Specialty charcoals, generally made in other countries, are a particularly hard substance, light in weight product, that can be a challenge to lite. Once they are ignited, however, they produce a lot of heat – often more than the standard briquet. Very little ash is produced and there is no flavor from this product.

Char-wood- Benefits

When SmokinLicious® made the decision to manufacture a charwood product, we researched extensively why the Japanese binchotan charcoal, also called white charcoal, was so popular and expensive. We found that though it could be a challenge to lite, it burned extremely hot, clean, leaving little to no ash, produced no smoke and no flavor. We produced a similar set up to the Japanese direct-fire method with our charwood production. Instead of using miniature branches, we use consistently sized wood blocks. Unlike the binchotan, we do not do a complete carbonization. The result is you get the ease of lighting like a lump hardwood charcoal, the flavor of premium hardwood. Plus, the reduced ash production of a briquet, and reduced smoke output than burning wood alone. We see this as the best of all the options out there.

Now, instead of viewing your charcoal as just a heat generator, when you use SmokinLicious® charwood you have one product that can be used as fuel for temperature while the reduced carbonized center portion produces the flavor. A premium product that gives premium results!

What is Japanese charcoal?

Binchotan charcoal is made from the Japanese direct fire method of making charcoal with a kiln that has been around for centuries. Japanese charcoal is very expensive and burns longer than lump hardwood charcoal!

Is charcoal made from wood?

Charcoal briquets and lump charcoal are made from recycled materials such as old pallets, lumber scraps from flooring, cabinet, and furniture makers. Some charcoal products may contain binding agents as well as accelerants to make for easy lighting.

Is wood better than charcoal?

Cooking wood can offer an ease of lighting and flavor to your foods while its fuel performance is more consistent than that of many carbonized charcoal products. Plus, wood produces less ash than lump charcoal or briquettes.

SmokinLicious® products:

Char-Wood

More Related reading on this subject

More Related reading on this subject

Additional reading:

-WHY CHARCOAL IS NOT AN INGREDIENT

-WOOD-FIRED APPLES MAKE THE BEST CAKE

-6 TIPS FOR A HEALTHY OUTDOOR COOKING SEASON

Dr. Smoke- Your will love using our Char-wood!

Dr. Smoke- Your will love using our Char-wood!

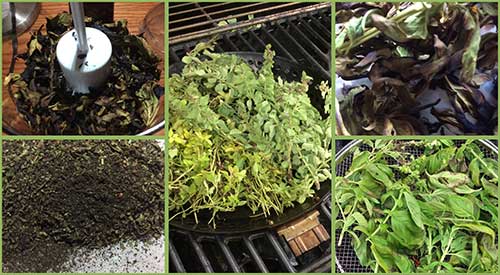
Our preparation of smoked herbs, from picking, smoking and grinding to make smoked herb dust. Adding great flavor to dishes.

Our preparation of smoked herbs, from picking, smoking and grinding to make smoked herb dust. Adding great flavor to dishes.

SMOKED HERBS FLAVORS WITH SMOKED HERB DUST

Listen to the audio of this blog

Don’t make the mistake of thinking fresh herbs are to be used in dishes as, well, fresh only. Although you may have dried your fresh herb harvest before, we are bringing another alternative to you, smoked herbs.

We hot smoke the fresh herbs on the grill then turn them into a dust for use in all types of dishes. The smoking process will bring a depth of flavor that you’ve likely never experienced before. Go to the herb garden and pick your favorite varieties and let’s get making smoked herb dust!

Smoke Vapor Infusion

Fresh herbs on the grill using a grilling cage

One thing about this smoked herb technique is you can do the smoke infusion by a variety of equipment methods.

For those with a gas grill, add wood chunks either directly to the heat shields on one side of the grill or add wood chunks to a metal smoker box that can be placed on the heat shields or the grill grate. For charcoal grill owners, light your charcoal and allow to reduce to hot coals only. Add a piece or two of hardwood chunks or a handful of hardwood chips to the hot coals. If possible, push the hot coals to one side of the grill. For both grill types, you want to use a two-zone cooking method so the herbs don’t catch fire.

For those that don’t own grilling equipment or who simply don’t want to bother lighting up the grill, you can use a handheld food smoker. Simply place micro wood chips in the bowl of the unit, place the herbs in a storage bag with the tubing of the smoker unit, cinch the end of the bag around the tubing, and light the chips. I like to leave the smoke in the bag for maximum smoke vapor infusion.

I used both my gas grill and charcoal grill for the smoke process by placing my herbs in a vegetable basket and grilling with the herbs on the unlit side of the grill. Within the first 5 minutes, you’ll see how the herbs lose moisture and begin the drying stage.

Tasting Notes: I find the handheld food smoker will produce the boldest smoke flavor to the herbs. The intensity of flavor rated from lightest to boldest based on equipment would be a gas grill, electric smoker, pellet smoker, charcoal grill, handheld food smoker.

Grinding Process

smoked herbs in the food processor for reduction into smoked herbs dust

Once the herbs have charred and dried, it’s time to remove them from the grill and bring them to the food processor. I have a mini processor that only has two settings: chop and grind. I prefer to use this appliance to bring the smoked herbs to dust level but a spice grinder works just as well.

First, remove all the herb leaves from the stems and place a small quantity in the food processor bowl. You can remove the leaves by placing the entire herb sprig in a colander and pressing the leaves through to parchment paper. Secure the lid and grind until you get as fine a dust as the appliance will allow. Both the appliance and the herb will determine how fine the herb dust will get. As you will see, basil dust becomes finer than oregano. This technique will work for just about any herb you can grow or locate at the market. Store the herb dust in glass or metal jars for up to a year.

Tasting Notes: Smoked herbs are much stronger in flavor than the standard dried herb. Adjust the amount used in recipes as needed. It is often best to start with less, taste, and then add more as needed.

So Many Uses

finished herb bottles of smoked Basil and Smoked oregano

Experimentation is key when it comes to #herbdust. Most often, herbs will be applied to meats and poultry, perhaps rice and pasta dishes, but there are so many more foods that are good pairings for herb dust. Let’s take parsley as an example. Commonly used with fish and beef, parsley is a great pairing for sweet items as well. This includes banana and cream. It’s important that you look beyond the traditional side dishes and entrees and explore the sweet side of what herbs can offer. By doing so, you’re sure to find endless combinations that will tickle your palate and give you more pleasing menu experiences.

The Culinary Crew wants you to know …

… that the two-zone method is certainly a practice that you will want to master and prioritize in your wood cooking toolkit, especially when grilling and smoking delicate fresh consumables like herbs. Not only will two-zone cooking avoid those acrid tastes associated with flare ups, it will infuse your food items with a nice balance of wood smoke flavoring.

SmokinLicious® products used in this blog:

Wood Chunks- Double & Single Filet

Wood Chips- Minuto & Piccolo

More Related reading on smoked herbs and other great grillable flavoring ideas

More Related reading on smoked #herbs and other great grillable flavoring idea

Additional reading:

-WHY TWO-ZONE COOKING METHOD LET’S YOU WALK AWAY FROM THE GRILL

-STOVE TOP SMOKED CHIVES

-PAN COOK ZUCCHINI ON THE GRILL WITH WOOD FLAVOR

Dr. Smoke- Our process to prepare the smoked herbs is easily done on our gas grill with our double or single filet wood chunks!

Dr. Smoke- Our process to prepare the smoked herbs is easily done on our gas grill with our double or single filet wood chunks!

Savory Smoky-Grilled Potatoes

Savory Smoky-Grilled Potato (es)

listen to our blog

listen to our blog regarding wood chips for smoking


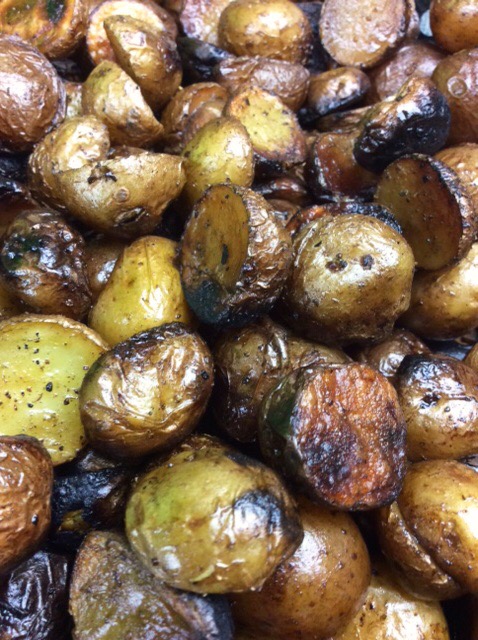
SMOKY-GRILLED POTATO: OUR #1 CROP GETS A NEW FLAVOR TAKE-As the #1 crop in the world, available all year, potatoes are a favorite for a variety of reasons. Get the nutritional benefit of this abundant vegetable by adding flavor in a different way – cooking it over charcoal and hardwood!

Ingredients for Your Smoky-Grilled Potato Dish:

Simple Preparation For a Simple Vegetable

I’m using small red and white potatoes. You’ll need a knife and cutting board, as I like to cut these small potatoes in half to allow for maximum wood fire flavoring. I’m going to use a vegetable grill pan but you can use any heat safe pan whether foil, glass, heat-safe ceramic, or cast iron. Cut each potato in half, and place in the grill pan.

Seasoning and Oil Bring Out the Best

Just 3 simple ingredients are needed before the pan is placed on the grill. Drizzle three tablespoons of oil over the halved potatoes, then add coarse salt and fresh pepper. The oil can be grapeseed, walnut, almond, vegetable, or canola, anything you have and prefer. Mix well to ensure each potato is coated, then let rest to allow the seasonings to penetrate before adding to the hot grill.

Charcoal Grill Set Up

Time to get the grill ready. I’ll be using a combination of charcoal and wood – charcoal as the fuel for heat and wood chunks and chips for flavor. Keeping my intake vents open on the kettle grill, I start a chimney full of charcoal. Just one chimney will be needed for the actual cooking. I lay a small line of unlit coals down both the right and left side of the charcoal grate to keep my temperature stable through the cook. I pour the hot coals in the middle then add two Sugar Maple wood chunks and a handful of Wild Cherry Grande Sapore® wood chips on top of the hot coals. On goes the food grate and then my vegetable pan of halved seasoned potatoes.

The depth of Flavor Through Smoke

Once the wood is set up and the food grate is on, the pan of potatoes is added. Put the grill cover on and adjust the lid outtake vent to 1/3 open position. Now, adjust the lower intake vent to the ½ open position. Let the potatoes cook for about 25 minutes prior to stirring. You’ll see the golden hue from the maple and cherry smoke vapor. Be sure to rotate the potatoes on the bottom to the top so that there is even color and flavor to each piece. The total cook time will be close to an hour but each grill and charcoal will perform differently so be sure to watch closely after the first 35 minutes. Remove when the potatoes can be pierced easily with a toothpick or knife tip.

Smoky-Grilled Potato- Full Flavor With All the Nutrition Intact

With all the nutritional value still intake, these golden, smoky potatoes are ready to eat as is or you can include them in your favorite potato recipes. I’ll be giving a smoky edge to my interpretation of a potato curry in our next recipe feature. Take advantage of this popular comfort vegetable and the ease of using a charcoal/wood grill for cooking and give your meals a memorable flavor enhancement.

The Culinary Crew wants you to know

that potatoes are one of the easiest veggies to grill or smoke! A minimum amount of effort will yield maximum deliciousness. Go ahead and experiment with a variety of your favorite spices or ingredients when grilling or smoking your spuds. Cilantro, curry, garlic or onion powder and even a touch of cayenne pepper can add a taste zip to these great and hardy tubers. There are many varieties of potatoes and they all do well on a grill or in a smoker but, just remember- the fresher the better!

As always, we’d love to hear your thoughts on our feature so start the conversation with a comment!

Related Reading

-HOW TO USE CHARCOAL WITH WOOD IN COOKING

-HOW TO TURN YOUR CHARCOAL GRILL INTO A SMOKER

SMOKED CHEESY POTATOES- WHAT A WONDERFUL TWIST

SmokinLicious® Products in this blog:

Wood Chunks- Double & Single Filet

Wood Chips- Grande Sapore®

Dr. Smoke try this smoky-grilled potato technique!

Dr. Smoke try this smoky-grilled potato technique!

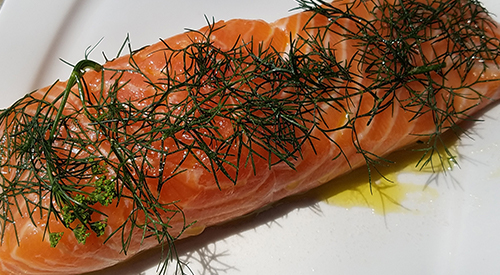
Our gorgeous filet of salmon is awaiting Chef Calle to turn it into Charwood Grilled Salmon on a kettle grill using a two-zone method along with Smokinlicious® wood chips!

Our gorgeous filet of salmon is awaiting Chef Calle to turn it into Charwood Grilled Salmon on a kettle grill using a two-zone method along with Smokinlicious® wood chips!

Charwood Grilled Salmon Fillets for a Hint of Smoky Flavor

By: Chef Calle, Resident Executive Chef


listen to our blog


Chef Calle here and thanks to SmokinLicious®, I’m going to offer an easy and palate-pleasing method to cook and lightly smoke fresh salmon fillets over a Charwood fire that features a small number of smoking chips. With this approach, the smoking chips infuse a delicate smoky flavor to the salmon without overpowering its delicious fresh taste.

Today, I’m using a Stok® Tourist™ grill, clearly one of the best Charwood grilling and smoking units on the market. If you don’t have a Stok®, just about any Charwood grill will work, if its heat chamber has room enough for both the Charwood and wood chips.

Salmon seasoned and awaiting the grill

Charwood Grilled Salmon- Preparation

Preparation is key with salmon and setting up the cooking equipment. So, first prepare the fresh salmon fillets by lightly seasoning with EVOO, salt, pepper and if you have it- fresh dill or fennel. Let them sit and soak up all those great flavorful ingredients for about half an hour or until the salmon reaches room temperature.
Chef’s Tip: Do not use salmon that is past its prime, thinking that the smoke will disguise the slightly off flavor of the fish. Only use the best salmon available.

While the fish is marinating, begin preparations for the actual grilling by first firing up SmokinLicious® all natural Charwood using a hollowed chimney starter. Never use charcoal lighter fluid! Or Charwood, charcoal briquettes, pretreated with petroleum-based starting fluid. In addition to ruining your salmon with a foul aftertaste, it’s safer not to consume the residue or remnants from petrochemical fire starter liquids.

After your embers have taken on a medium to high heat condition (grayish color), place them directly in the center of the grill’s heating chamber. Put the grill grate on over the fired embers and clean it by using either a halved onion or lemon like you would use a sponge but, do it quickly and in short strokes to avoid getting fingers or hands burned.

Smoking the Charwood Grilled Salmon

Next, position small amounts of the smoking chips (a few large handfuls, I’m using SmokinLicious® Grande Sapore) around the outer fringes of the main concentration of burning Charwood. This allows the wood chips to take on two roles- 1) indirectly contributing to the cooking process, and; 2) producing a burst of smoky vapor that flavors the fillets.

Salmon on a two zone grill absorbing all the great smoke flavor

A minute or two after you’ve positioned the smoking wood chips and reattached the grate, place the salmon fillets, skin side down on the grate, directly over the medium embers and cover. Grill and smoke the salmon for about 4 to 6 minutes, uncover and gently turn the fillets over, cover and grill and smoke the skinless side for no longer than 2 to 4 minutes depending on the thickness of the fillets.

Chef’s Tip: Be careful not to overcook. You can gauge the finish of the fillets be being able to flake them with a fork.

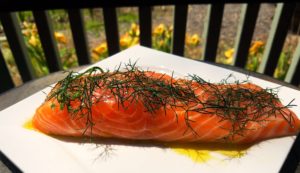
When done, remove the skin by gently peeling away with a fork or just serve skin side down. For a nice finishing touch, brush with a bit more, high-quality EVOO, season with freshly ground salt and pepper to taste. Feel free to garnish with fresh dill, fennel edible flowers or lemon. Hope you enjoyed Chef Calle’s recipe Charwood Grilled Salmon Fillets for a Hint of Smoky Flavor!

Bon Appetit

final plating with all the decorations!

Purchase products:

Charwood

Wood Chips- Grande Sapore®

More Related reading on "What Wood for Smoking" and other great smoking and grilling tips and techniques

More Related reading on “What Wood for Smoking” and other great smoking and grilling tips and techniques

Related reading:

-Charcoal Grilled Asparagus using Charwood

-WHY CHAR-WOOD IS THE BETTER OPTION OVER CHARCOAL

-THE ULTIMATE WOOD-FIRED CLAMS CASINO

-SNAPPER GETS WRAPPED IN CORN HUSK & COAL FIRED


Awesome technique by Chef Calle- so you can do-Charwood Grilled Salmon Fillets for a Hint of Smoky Flavoror your finesse technique for Grilling & Smoking Shallots on the charcoal grill

Awesome technique by Chef Calle- so you can do-Charwood Grilled Salmon Fillets for a Hint of Smoky Flavor

Next Page »