Our outdoor kitchen guest blog is authored by Mike Cahill

Our outdoor kitchen guest blog is authored by Mike Cahil

Listen to the audio of this blog

Mike is part of the Content Marketing team and enjoys applying market insights to provide valuable content on all things real estate. Mike’s dream home would be mid-century modern style near the water.

As days get warmer and summer approaches we’re all looking for more ways to spend time outside. Whether it be biking, running, hiking, or walking we can all agree that being outside is one of the best ways to spend time during the summer. So why not cook outside too? Having an inviting outdoor space that can double as a beautiful kitchen is a great way to be outside and create memories to be cherished for years to come. For that, we reached out to the experts from Yolo to Palm City to provide our readers with a few tips for creating the Ultimate Outdoor Kitchen.

Make it your own Outdoor Kitchen

The trend of outdoor design is experiencing a dramatic shift today. Landscape designers are moving away from traditional masonry-built structures to waterproof cabinets equipped with storage, trash receptacles and even vegetable and herb potting areas providing a whole new experience. Moya Living and Urban Bonfire offer two creative and functional products that bring color and extreme functionality into the design and provide the structure with every ability to create the perfect outdoor kitchen. Whether the homeowner desires a smoker from Kalamazoo, a pizza oven from Lynx, or Versa Powder Cooker from Alfresco, the options are endless in the design creation. Outdoor kitchen design now takes front and center focus when planning a remodeled home and now is simply an extension from the indoor to the outdoor so that every space of the home is utilized. – Annette Reeves

Find a proper grill

The focus of any outdoor kitchen is the grill. At Chicago Outdoor Living we believe a grill’s value shouldn’t be based solely on price. Features such as design, quality of materials, and functionality, combined with price, play an important role in choosing the grill that is right for you. It is also important to be aware of the manufacturer’s warranty. Chicago Outdoor Living carries a variety of high-quality grills to fit everyone’s grilling needs and budget – Chicago Outdoor Living

Grilling burgers on the grill

Our Authors image of cooking burgers

Choose complimentary finishes

Leather finish granite countertops are my go-to countertop surface for outdoor kitchens. It looks matte enough to feel like it belongs outdoors but is cleanable and ages well. – Attainable Form

Utilize misting systems

During sweltering summer days that are hot enough to have you fantasizing about moving to Antarctica, it can be difficult to enjoy your outdoor kitchen while you are feeling sweaty and scorched. With our misting systems that cool the air by up to 30 degrees without getting anyone drenched, you’ll be able to elevate your lifestyle and enjoy your outdoor kitchen in comfort all you want. – Advanced Misting Systems

Incorporate patio heaters

Enjoying your outdoor kitchen can be extremely difficult during winter days that are so cold it feels like you could chip a tooth from shivering. With our outdoor patio heaters that emit radiant heat to keep an area warm, you’ll have your own patio encased in a bubble of warmth, allowing you to enjoy your patio and outdoor kitchen while the neighbors are stuck indoors. – Gas Outdoor Patio Heaters

Storage is key in your Outdoor Kitchen

You can never have enough storage outside. The key is drawers: paper plates, utensils, corn on the cob holders, grill grates…. Keep them at your fingertips and you will be much happier. Drawer cabinets have to be fully enclosed to avoid creatures from crawling in for a vacation. – Cowgirl Q

If you love wood-fired flavors to foods cooked outdoors then be sure to consider wood storage when designing your outdoor kitchen. Pizza ovens, ceramic or clay ovens/smokers, traditional smokers and gas/hybrid grills all allow for the addition of charcoal, charwood, and/or hardwood to bring flavor essence to favorite cuts of protein, vegetables and fruit. Include in your design wood storage that allows for good air circulation to the wood as well as storage placed close to the equipment. Mesh bins or small wood crates work well for smaller pieces of wood that can fit on shelving under the counter or design open shelving in metal, stucco or concrete material that allow larger pieces of wood to remain dry, nonreactive and at the ready. – Smokinlicious

Don’t forget about the island

The best way to start creating your own Ultimate outdoor Kitchen is by getting ideas of different types of islands and kitchens. Researching will help you brainstorm an idea of your own (shape, size, color, components, etc). The next step is to find out where your Island will be placed. After finding a perfect fit, take a few measurements to see how the unit will be laid out. Over the years, KoKoMo has created various Outdoor Kitchen models with all kinds of different designs. A good example is our custom sports bar. This unit is fully stocked with all of our most popular components and accessories. This kitchen has a beautiful white-looking stone that covers the base, with a nice steel-looking tile to go with it. We used a large 15×15 aluminum shade cover with two giant TVs to entertain both sides of the island. – KoKoMo Grills

Keep it comfortable

Outdoor kitchens draw people in, whether it’s your guests gathering to offer help or little ones looking for a snack before the big meal. Make everyone comfortable with our thick, high-density cushions. Bonus tip: all our cushions are covered in water-resistant fabric, making rain and spills the least of your worries. And at the end of the party, if you need a special type of cover for your furniture or grill, we’ve got you covered with custom-made covers! – Classic Accessories

Get a personalized rub kit

Whether you’re grilling or smoking, when you’re cooking outdoors, having your own personalized “rub kit” at the ready is critical. A rub kit should include staples like lemon pepper, garlic pepper, and all-purpose seasoning salt. Round out your kit with your favorite rubs for the big four – beef, chicken, pork and seafood. – Savory Spice Shop

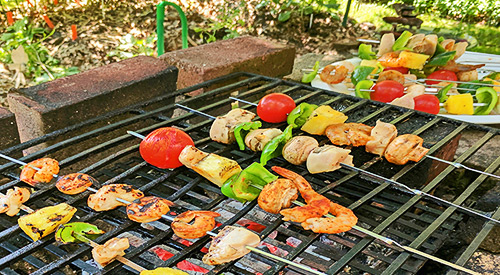
Picture of all the fixings being cut for the grill

We love this image from the author!

Consult with a pro for the Ultimate Outdoor Kitchen

For homeowners who want to build a fully functional outdoor kitchen area in their homes, I always recommend consulting with a designer, in addition to the outdoor kitchen company themselves. One thing I have learned with my experience in the business, is one layout for a kitchen does not necessarily work for every future buyer of the home — so the key is: versatility and simplicity. Most buyers these days are not so focused on decking, they want to see more grass. So artificial grass is a great alternative to decking, plus easy to maintain. Keep your dining area separate, and not built-in, should someone in the future want to change it, or if you entertain and need a different layout for a specific event. – Jenny Okhovat Homes

Originally published on Redfin

More Related reading on smoker More Related reading on Outdoor Kitchen essentials and other design ideas.

More Related reading on smoker More Related reading on Outdoor Kitchen essentials and other design ideas.

Related reading:

-Outdoor kitchen location tips

-Does Outdoor Kitchen Stainless Steel Rust

-6 TIPS FOR A HEALTHY OUTDOOR COOKING SEASON


Dr. Smoke- has an Outdoor Kitchen for grilling, smoking and entertainment, follow these great tips from our guest blogger!

Dr. Smoke- has an Outdoor Kitchen for grilling, smoking and entertainment, follow these great tips from our guest blogger!
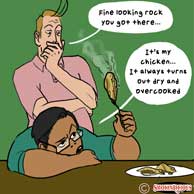
Chef Bert brings Water Pan for Smoker to neighbor Tom!

Chef Bert brings Water Pan for Smoker to neighbor Tom!

Don't Forget the Water Pan For Smoker! Share on X

Listen to the audio of this blog

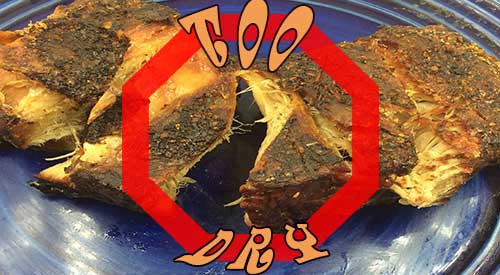
Neighbor Tom has his Chicken too dry almost a rock

Poor Tom! He, like many other grill and smoker enthusiasts out there, never learned the value of a water pan. By providing moisture to the grilling area, you can avoid drying out your meats and poultry and never have someone mistake your food for a rock!

(more…)

logo and grill introducing our COOKWARE THE GRILL

Enjoy our COOKWARE FOR THE GRILL

COOKWARE FOR THE GRILL-THAT WORKS!

Top 5 cookware accessories for your grill Share on X

Listen to the audio of this blog

If you’ve followed my writings for some time now, you’ve likely learned that I believe outdoor equipment is the same if not better than the traditional indoor options. You literally can make anything on the outdoor equipment that you make inside your home.

Knowing this, I have received many questions regarding the type of cookware that I use when grilling and/or smoking on said equipment. Today, I’m going to discuss the preferred cookware materials and the potential issues that can arise if you use a material that is not considered ideal for high heat temperatures.

Material #1: Cast Iron- Cookware for the Grill

This is my first choice and many other cooks, and the only material I use when I coal cook with cookware. Why? It is durable, it is relatively inexpensive, it is unbelievable at heat retention, and you can cook almost anything in it. Literally, it never wears out!

Downside? It is a material that needs to be maintained meaning oiled consistently. It is heavy!

Material #2: Carbon Steel- Cookware for the Grill

Carbon steel is a beast at retaining heat and it can be used on any cooking surface. Although lighter in weight than cast iron it is still heavier than stainless steel. Similar in many attributes to cast iron, it also requires frequent seasoning and the base of the pan will become discolored from the high heat exposure. Plus, it is not dishwasher safe so you need to love this material and be willing to put some work into maintaining it. If you’re lucky enough to find a piece you love, you will make magic in it whether near or in the fire.

Material #3: Stainless Steel Combo

I’m sure every one of us owns at least one piece of stainless steel. This is a very attractive piece of cookware from the aesthetic view. However, on its own, stainless steel is not the best heat conductor. This is the main reason why it often is combined with another material to improve its heat retention properties and keep it light in weight. Suitable pairs you’ll find for stainless steel include copper and aluminum. All three of these materials on their own, are not ideal. Cooper and aluminum heat very quickly which means they can burn very quickly as well, while stainless steel on its own can take forever to heat up. But combine copper and aluminum or aluminum and steel and you have an ideal heat conductor and safe high heat material. Rule of thumb: never use aluminum and copper cookware on their own for high heat cooking.

Material #5: Enameled Cast Iron- Cookware for the Grill

Know as the “pretty” cookware, enameled cast iron is cast iron at the heart-and-soul but with beautiful ceramic enamel outside surfaces. It has fabulous heat conductivity and retention but it is not non-stick which can cause some issues. I find it works really well when I use more of a two-zone cooking set up rather than direct coal or heat cooking.

Material #5: Non-Stick

Teflon is a non-stick, promoted material, that should be avoided. It has no ability to be used for high heat and in fact, excessive heat can melt this material. Also, Teflon is documented to flakes off after extended use, moving these flakes into your foods. At higher temperatures, the material produces toxic fumes that have been proven to be a health risk.

What Are High Heat Levels?

Now we know what materials are optimal for high heat cooking but what are the actual temperatures that can be handled?

Cast iron and stainless-steel combos can tolerate 1500°F, with stainless steel excelling to 2200°F. Although copper has a melting point of 1984°F and aluminum at 1221°F, cast iron, and steel materials in cookware still perform the best.

Now you have the education behind your choice of cookware. My last piece of advice is to always think about how you plan to use the cookware. If you love to nestle in the coals or be as close to the flame as you can, the items that may not look as pretty are likely the best choice. Take our tips in this blog USEFUL COOKWARE OPTIONS FOR YOUR GRILL and expand you cooking/Grilling skills and techniques!

SmokinLicious® products used in this blog:

Wood Chunks: Double & Single Filet

More Related reading on Cookware for the Grill

More Related reading on Cookware for the Grill

Related reading:

-TOP TOOLS NEEDED FOR GAS GRILLING

-TOP TOOLS TO OWN FOR CHARCOAL GRILLING

Dr. Smoke- I hope you enjoyed this blog- Cookware for the Grill!

Dr. Smoke- I hope you enjoyed this blog- Cookware for the Grill!

-THE WOMAN’S GUIDE TO ‘MAN’-ING THE GRILL

Let's stop the dry smoked meats effect with our 9 easy steps!

Let’s stop the dry smoked meats effect with our 9 easy steps!

WHY IS MY BARBECUE MEAT DRY?? Share on X


Listen to the audio of this blog


You thought you timed the meat perfectly on your smoker or grill. When it came time to cut it, all you found was a gray, dry former piece of meat staring back at you.

What went wrong?

Don’t fall into your old habits when it comes to outdoor cooking, whether you’re using a traditional wood or electric smoker, charcoal grill or gas grill. Learn some easy tips to keep your foods juicy and enticing this outdoor cooking season by preventing the unwanted occurrence of dry smoked meats.

(more…)

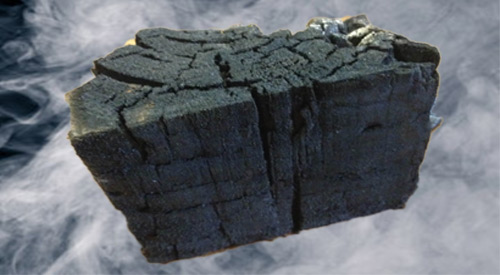
Our Char-wood is produced by Direct firing our North American hardwood blocks until the right amount of Carbonization is achieved!

Our Char-wood is produced by Direct firing our North American hardwood blocks until the right amount of Carbonization is achieved!

WHY CHAR-WOOD IS THE BETTER OPTION OVER CHARCOAL

SUMMARY:

Binchotan charcoal is made from the Japanese direct fire method of making charcoal with Kiln! Japanese charcoal making has been around for centuries and burns longer than lump hardwood charcoal! We have replicated their process and make our Char-wood from our North American hardwood blocks! Carbonization is key to Char!

listen to our blog

listen to our blog


Frankly, the term “charwood” may be a new one for you. Although its function is like charcoal, the benefits clearly outweigh those of charcoal. Let’s examine the key reasons why charwood may be the better option for outdoor cooking over standard charcoal.

Char-wood- Carbonization

Hopefully, if you’ve been engaging in outdoor grilling and/or smoking for some time. You’ve understood the need for a fuel material that burns evenly and hot. You’ve likely also heard the controversy that’s brewed for years about what is the best product to use for the fuel. Products range from briquets, lump hardwood charcoal, specialty wood charcoal, and compressed woods like pellets and compressed wood blocks. The key is to understand that some of these products could contain binding agents as well as accelerants to make for easy lighting.

Carbonization is the conversion of an organic matter into carbon. Carbon is an element that forms when the organic matter is heated to a high level without oxygen, burning off the volatile gases, leaving the pure carbon behind. Although commercial material production, whether briquet, hardwood charcoal, or standard charcoal have different percentages of carbonization in the outcome, most are above 90%. That high level of carbonization is what allows for heat to be produced for outdoor cooking.

Flavor

When you use straight charcoal briquets, you are getting heat only with no flavor as that is a fully carbonized or charred product. Many prefer to use briquets because they are uniform in size and give the same outcome every time they are used. Fill a chimney starter with briquets, and you’ll have the same number of briquets fit in the chimney every time.

When you use lump hardwood charcoal, you will get variation in sizing from small, chip-like pieces to half-log size pieces. Here’s information you need to know. Although the label may read “hardwood”, there is no information on where that hardwood derived from. Often, manufacturers of lump hardwood charcoal produce their product from recycled materials such as old pallets, lumber scraps from flooring, cabinet, and furniture makers. They may take in scraps from lumber mills. When this material is carbonized, it will do so at various levels due to the variation in material sizing.

That means when you cook with it or for that matter when you lite it, expect great variation from use to use due to all the inconsistency in sizing. The inconsistency will produce a lower percentage of carbonized material than briquets. So know you may get some minimal flavor from lump hardwood due to poorly carbonized larger pieces of product. This is the reason there is more ash production with lump hardwood charcoals.

Specialty charcoals, generally made in other countries, are a particularly hard substance, light in weight product, that can be a challenge to lite. Once they are ignited, however, they produce a lot of heat – often more than the standard briquet. Very little ash is produced and there is no flavor from this product.

Char-wood- Benefits

When SmokinLicious® made the decision to manufacture a charwood product, we researched extensively why the Japanese binchotan charcoal, also called white charcoal, was so popular and expensive. We found that though it could be a challenge to lite, it burned extremely hot, clean, leaving little to no ash, produced no smoke and no flavor. We produced a similar set up to the Japanese direct-fire method with our charwood production. Instead of using miniature branches, we use consistently sized wood blocks. Unlike the binchotan, we do not do a complete carbonization. The result is you get the ease of lighting like a lump hardwood charcoal, the flavor of premium hardwood. Plus, the reduced ash production of a briquet, and reduced smoke output than burning wood alone. We see this as the best of all the options out there.

Now, instead of viewing your charcoal as just a heat generator, when you use SmokinLicious® charwood you have one product that can be used as fuel for temperature while the reduced carbonized center portion produces the flavor. A premium product that gives premium results!

What is Japanese charcoal?

Binchotan charcoal is made from the Japanese direct fire method of making charcoal with a kiln that has been around for centuries. Japanese charcoal is very expensive and burns longer than lump hardwood charcoal!

Is charcoal made from wood?

Charcoal briquets and lump charcoal are made from recycled materials such as old pallets, lumber scraps from flooring, cabinet, and furniture makers. Some charcoal products may contain binding agents as well as accelerants to make for easy lighting.

Is wood better than charcoal?

Cooking wood can offer an ease of lighting and flavor to your foods while its fuel performance is more consistent than that of many carbonized charcoal products. Plus, wood produces less ash than lump charcoal or briquettes.

SmokinLicious® products:

Char-Wood

More Related reading on this subject

More Related reading on this subject

Additional reading:

-WHY CHARCOAL IS NOT AN INGREDIENT

-WOOD-FIRED APPLES MAKE THE BEST CAKE

-6 TIPS FOR A HEALTHY OUTDOOR COOKING SEASON

Dr. Smoke- Your will love using our Char-wood!

Dr. Smoke- Your will love using our Char-wood!

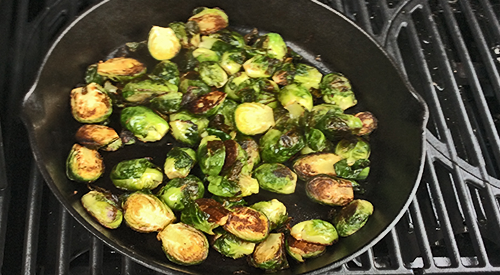
Showing how to infuse cherry wood smoke into brussels sprouts using an iron skillet on the gas grill is simple and easy and adds a smoky touch

Infusing cherry wood smoke into Brussels sprouts using the gas grill is simple and easy and adds a very flavorful touch to this hearty vegetable.

INFUSING WOOD SMOKE INTO BRUSSELS SPROUTS

Listen to the audio of this blog

A favorite of the cabbage family, Brussels sprouts came to the United States via French immigration in the 18th century. They are dominantly grown in California and available June thru January making them a Fall and holiday menu favorite. SmokinLicious® will take the flavors up a notch and add wood smoke into Brussels sprouts for two upcoming recipes. We’ll do this on the gas grill fit with wild cherry wood chunks to bring subtle smokiness to the finish sprouts. First purchase 3 lbs. of Brussels sprouts and get two cherry single filet chunks, and you’re ready to fire up the grill and get smoking.

The Easy Grill Method for Infusing Wood Smoke into Brussels Sprouts

Bringing the flavor of wood smoke into Brussels sprouts is so easy. To start, gather about 3 lbs. of Brussels sprouts, some cooking oil, butter, and a heavy-duty skillet. I prefer a nut oil like walnut or almond. For a skillet I’ll be using cast iron. I’ve trimmed the ends on about half the sprouts and for the other half, I’ve trimmed the ends and cut them in half. That’s it! Fire up the grill and get ready for a quick method of adding great wood-fired flavor.

It only takes a couple of pieces of wood chunk to bring fabulous flavor to the grill. I set up a cast iron pan on one side and place two cherry wood chunks on the heat shields of the far burner. Let the pan heat up for about 5 minutes then pour in a couple of tablespoons of oil and heat. Right before I add the Brussels sprouts, I add a couple of tablespoons of butter. In go the whole Brussels sprouts and the lid comes down. Leave untouched for about 5 minutes before turning.

Flavor Finish

As I have two recipes in mind I’m cooking two batches of Brussels sprouts: one batch whole and one batch halved. After leaving for 5 minutes, I stir them to ensure that all surfaces are infused with wood flavor. I maintain a temperature of 350-375° F which will make this a quick cooking method. The first 5 minutes, the lid is down but once stirred, you can finish the cooking with lid up. Remember, cast iron will retain heat, so you can turn the heat off and let sit for about 5 minutes.

The cooking time for this recipe is approximately 20 minutesAfter stirring a couple of times, both the whole and halved Brussels sprouts are ready in about 20 minutes time. I simply remove them from the heat and bring them in to be added to my favorite recipes.
I have two recipes I’ll be working on: Smoky Brussels Sprout Gratin and Tortellini with Lemon and Smoked Brussels Sprouts. These truly are the most flavorful Brussels sprouts! For those of you thinking about a holiday meal with them, well, the grill will give you that extra oven room you need. Take advantage of the long harvest season and try these mini cabbages on your grill. Check in for our recipes soon so we can get you started on how to use your prized sprouts.

Bringing you new methods of infusing wood fired flavor into seasonal items. Be sure to subscribe and follow us to gain great tips, techniques, recipes and the science behind the fire.

The Culinary Crew wants you to know…

 Chef Bert and Tom discuss how to infuse wood smoke into brussels sprouts.

#chefbertandtom

… that the direct infusion of hardwood-fired smoke to foods, like Brussels Sprouts, is considered a flavor ingredient, much in the same way that spices, minerals and sauces enhance taste. When fired, the components of smoke vapor carry the hardwood’s distinctive flavor profile directly into meats, seafood, fruits or vegetables with pleasing results to the palate.

SmokinLicious Products used in this recipe- wood smoke into brussels sprouts:

Our Single Filet is hand split to the proper size for larger equipment infusing wonderful wood smoke into brussels sprouts.

#singlefilet #woodchunks

Wood Chunks- Single Filet

More Related reading on this subject

More Related reading on this subject

Additional reading:

-WOOD GRILLING AVOCADO

-HOW TO TURN YOUR LP/GAS GRILL INTO A SMOKER

-WHAT’S IN THE SMOKINLICIOUS® WOOD CHUNK BOX?


Dr Smoke- "Soften the taste of your Brussels sprouts by adding smoke flavoring from your gas grill using Smokinlicious® cherry wood chunks."

Dr Smoke- “Soften the taste of your Brussels sprouts by adding smoke flavoring from your gas grill using Smokinlicious® cherry wood chunks.”

We ask the question why people grill and found the response much different than our expectation.

When you ask why people grill we found the answer very interesting!

Listen to the audio of this blog

You may not be aware that every year a trade show is held usually in the month of March that is dedicated to all things related to fireplace, stove, heater, barbecue, and outdoor living appliances and accessories. In addition to the trade show, this organization, known as HPBA or Hearth, Patio & Barbecue Association, conducts various surveys every couple of years. A recent survey was posted asking the question “Why do people grill?”

The top answer to this survey surprised and THRILLED me!

Why People Grill? – Most Recent Statistics

For North America, owning a grill is common. Currently, in the United States, 7 of 10 adults own a grill while in Canada that number increases to 8 of 10. Gas grills remain the most popular (64%) with charcoal units coming in second (44%). When looking at the most popular times of the year to use the grill, holidays, of course, dominate. Memorial Day and 4th of July are the clear winners for firing up the grill but Father’s Day remains a high demand grilling day as well likely due to this holiday falling right before true summer begins on the North American calendar. Of course, Labor Day is not far behind on the list.

This survey will be conducted again in 2019 with updated numbers likely available by the close of the year. I can’t wait to view them to see current trends.

Now to the question of “Why do people grill?”

Why People Grill? – It’s All About Flavor

The number one reason people stated for grilling is for flavor! This got me thinking about this answer.

What exactly made the flavor difference? Is it that the heat of the grill produced changes in the ingredients used? Was it the charring affect from direct fire of the grill which leads to a distinct taste? Or was it the flavor choices used when grilling with wood like wood chips, wood chunks, and charcoal?

I think without adding these follow up questions, it’s very hard to know just what the flavor enhancer is when grilling for these respondents.

For me, there is no question that it is the introduction of smoke to my outdoor cooking experience. Whether I’m cooking on a gas grill that I’ve included a smoker box of wood chunks, a charcoal grill equipped with hardwood charcoal or charwood plus wood chunks, an electric grill I’ve incorporate a micro wood chip product, or my outdoor fireplace that I’ve converted to an open pit fire using hardwood, I let the tantalizing smoke vapor work with the other ingredients of my foods to bring out the best of all the blended flavors.

Smokinlicous Charwood products.
#charwood

Direct fire or indirect cooking, either way the eating experience of foods cooked grilled, smoked, or by embers is unique and is likely the reason why people from around the world continue to seek out these methods of cooking.

Smokinlicious Double filet smoking wood chunks

So I agree with the 72% of North Americans who say they grill for flavor but I’d certainly add that I grill for flavor that is heightened by the addition of the natural plant material known as hardwood which takes my grilling to an umami level that’s hard to beat by any other cooking method.

What is your reason for grilling? Let us know in the comments and don’t forget to follow us on all platforms. Providing tips, techniques, recipes, and the science behind the flame and fire to improve your skills with wood-fired cooking! That’s SmokinLicious®!

SmokinLicious products in this blog:

Charwood

Wood Chunks- Double & Single Filet

Wood Chips- Grande Sapore®, Minuto®, & Piccolo®

More related reading on on Why people Grill see our smoking & Grilling tips and technique see our directory on previous blogs!

More blogs you might enjoy:

BOOST UP THE FLAVOR OF YOUR SMOKER BOX!

GRILLING & SMOKING QUESTIONS/ANSWERS THAT MAY SURPRISE YOU!

TEMPERATURE, MATERIAL AND TIME DETERMINE WHEN ITS CALLED BARBECUE

Dr. Smoke-
Dr. Smoke- The answer to Why people grill was a pleasant surprise to our Smokinlicious® products and the flavour they bring to BBQ foods!

Enjoyed this blog? Please spread the word

Let's explore the primary heat sources for Grilling!

Let’s explore the primary heat sources for Grilling!

Exploring the primary heat sources for Grilling Share on X

Listen to the audio of this blog

PRIMARY HEAT SOURCES FOR GRILLING-

We grill outdoors frequently yet I bet not many of you know the science behind grilling. What happens to food when we grill? How does food cook to a safe level on a grill?

Let’s cover the types of heat sources that cook grilled meats and help you decide the ideal method for cooking your favorite animal proteins.

What Is Meat?

Before I get into the types of heat sources to do the actual grilling, let’s talk about what meat really is. Meat is muscle from various animals. It is made up of 75% water, 20% protein, and 5% carbohydrates and fat. Each cell of a muscle is made of two proteins: actin and myosin.

Now breaking down the proteins of meat, these are made of amino acids which react nicely when salt ions are added. Thus, when salt ions are added, the water-retaining capability of meat increases which results in production of a juicy piece of grilled meat.

Now these proteins in meat are coiled when the meat is raw. Add heat, and these proteins uncoil as the protein molecule bonds are broken.

Note – heat shrinks the muscle fibers which will then squeeze out water allowing the molecules to recombine. Brining or marinating meat will reduce this shrinkage of the fibers.

Primary Heat Sources for Grilling

There are three heat sources for cooking foods: conduction, radiation, and convection. Let’s get an understanding of each one.

Conduction primary heat sources for grilling:

The best example of conductive heat is when meats are placed directly on the grill grates over direct heat. The transfer of the heat energy to the grill grate brands the food item with grill marks. Heat is transferred from the source (burner, lit charcoal or wood, electric element, ceramic plate) to the food which then engages the cooking process. The meat cooks from the outside to the inside due to heat transfer. The surface of the meat gets hotter and transfers to the center which is why people who rely on the meat’s outside coloring will under-cook the meat inside.

Convection primary heat sources for grilling:

Convection heat is transferred with a fluid which can include water (think boiling a food item like potato), oil (think French fries), and air (think your oven or two-zone cooking on a grill). Now, convection cooking only occurs on the exterior of the food while conduction heat cooks the interior.

Radiation primary heat sources for grilling:

My favorite example of radiation heat is cooking marshmallows on a stick held near a campfire. Essentially, this is how charcoal/wood grills cook. You elevate the food over the heat source.

What influences grilling is the length of time and the type of heat. Add in difference between temperature and heat as materials also play a part in the transfer of the heat energy. Water transfers slower than metal.

Radiation produces more heat than convection. You can easily increase the radiation heat on a charcoal grill by increasing the number of charcoal pieces. Gas and pellet grills produce convection heat. Convection heat dissipates easily by air currents. Infrared units known as intense infrared (IR) have marketed that they produce a better sear on meats. What is happening is heat energy is delivered faster than convection heat units but slower than conduction units. You also have the risks that the delivery of this energy via IR could be uneven resulting in black/burnt areas while other areas of the meat are light in color.

Primary Heat Sources for Grilling- Types of Heat on Different Equipment

Let’s look at the heat types for specific equipment so you know how the energy used cooks your meat.

Gas Grills:

Burner produces radiant heat that in turn heats the heat shields above the burners producing radiant and convection heat (note gas grills have permanent vents built in the unit). The grill grates then heat and produce conduction heat to the exterior of the meat which converts all this heat energy to conduction to cook the meat thru the interior.

Note gas grills can be set up with direct cooking (all burners on) and indirect cooking (only half the burners lit). If you cook with the lid up on a gas grill, you allow radiant heat to escape which will cool the top of the meat.

Charcoal/Wood Units:

Radiant heat is produced at the bottom of these units with the grilling grates absorbing the heat energy that produces conduction heat. Heat from below the meat is absorbed and converted to conduction heat to cook the interior. The lids on these units will produce convection heat due to the built-in vent that has a control setting.

Like gas units, charcoal/wood units can be set up direct or indirect cooking method with the foods absorbing indirect convection heat from all sides which then converts to conduction heat to cook the meat’s interior.

Flat Tops/Plancha/Griddles:

Whether gas or charcoal fed, the fuel source produces radiant heat while the solid cooking surface produces conduction heat to the meat. Due to direct contact of the meat to the solid cooking surface, the direct contact side of the meat will brown easily while this no lid unit allows radiant heat to escape causing the top of the meat to cool and not brown.

Infrared Units:

Burners on these units produce radiant heat which then heat energize the ceramic, glass or metal plate. Grilling grates absorb the heat and produce conduction heat where the surface of the meat contacts the grate.

Always remember, on any unit regardless of heat source, thickness of the meat and not poundage will determine cooking time as you must remember that conduction cooking progresses to the interior. You must use a digital thermometer to ensure meat is cooked properly before consuming. Never rely on the outer coloring of the meat or recommended time per pound in a recipe. A digital thermometer is the only way to know.

Making you an informed consumer through valuable articles like this one. Leave us a comment and follow us or subscribe for more great recipes, techniques, tips, and the science behind the flavor and fire. That’s SmokinLicious®

SmokinLicious® Products:

Wood Chunks- Double & Single Filet

Wood Chips- Minuto®

Smoker Logs- Full & Quarter Cut

Charwood

More related reading on the primary heat sources for Grilling & Smoking tips and technique see our directory on previous blogs!

More related reading on the primary heat sources for Grilling & Smoking tips and techniques see our directory on previous blogs!

Other blogs you may like:

-3 METHODS OF SMOKING BOSTON BUTT FOR AUTHENTIC BARBECUE FLAVOR

-TEMPERATURE, MATERIAL AND TIME DETERMINE WHEN ITS CALLED BARBECUE

-PICKING YOUR IDEAL FIRE SETUP FOR COOKING

-WHY TWO-ZONE COOKING METHOD LET’S YOU WALK AWAY FROM THE GRILL

Dr. Smoke- Let's become better chef's and explore the primary heat sources for Grilling!

Dr. Smoke- Let’s become better chefs and explore the primary heat sources for grilling!


This bucolic photo can be yours if you follow our 6 TIPS FOR A HEALTHY OUTDOOR COOKING SEASON

Follow our 6 tips for a healthy outdoor cooking season in 2018!

Tips for Safe Outdoor Cooking- “6 TIPS FOR A HEALTHY SEASON”

listen to our blog


Everyone seems to be so much happier during the seasons that allow for outdoor cooking and entertaining. Whether it’s a planned cooking event or spur of the moment decision, these cooking events turn into an opportunity to relax, kick back and truly enjoy life.

There are steps you should take to ensure that the foods you enjoy outdoors remain safe. What follows are the top tips for safe outdoor cooking that will make for the best outdoor cooking season ever, no matter what you elect to cook.

Tips for Safe Outdoor Cooking

Tip #1

There are times when you want to marinate meats and poultry before cooking on your grill or smoker. Know that foods will only remain safe if you marinate in the refrigerator in a covered container, not with the marinated foods laying out on the kitchen counter. Also, if you plan to incorporate some of the marinades into a sauce, be sure to reserve some before it is applied to the raw foods. If there is marinade leftover from the raw food marination, be sure you boil it before using as anything that has contact with the raw food can carry bacteria.

Tip #2

You can grill a variety of foods on the same equipment but to know when everything is cooked, you will need to have thermometers. It’s best to use a different thermometer, marked by color, for each type of food: beef, pork, chicken, fish. The thermometer should be placed in the thickest part of the meat or poultry to get an accurate internal temperature reading. Here is a guide on temperatures:

  • Beef, Pork, Lamb, & Veal (steaks, roasts, and chops): 145°F/62°C
  • Ground meats & sausage: 160°F/71°C
  • Whole poultry, poultry breasts, & ground poultry: 165°F/74°C
  • Hot dogs: Cook until steaming hot

Remember, thicker cut meats and poultry will need to be placed closer to the fire or heat. Utilize the upper grill grate for those items that are more fragile like thinner fillets of fish, vegetables, fruit, or for heating sauces.

Tip #3

You cannot partially cook meats and poultry by parboiling or microwaving and then placing in the refrigerator for grilling the next day. Although you may think this will lessen the cooking time on the grill, what you’re doing is introducing the potential for everyone to become sick. The reason? Partial cooking does not eliminate all bacteria growth. The reality is, you would be allowing bacteria to continue to grow.

Tip #4

Take the time to properly clean your grill or smoker at the start of the outdoor cooking season. It’s common to close vents on the grill or smoker when you cover it up for the winter season but these aides in stimulating mold growth on the grill grate and/or inside cover and walls. For that reason, it’s important to scrub down the interior of the grill or smoker using a cleaning mixture; 1 part vinegar to 3 parts water or a bleach to water blend if you’re not opposed to the more toxic bleach.

Tip #5

Be sure you start with a hot grill or to cooking temperature smoker. That means, preheat. Preheat your grill 15 to 25 minutes before you start cooking to make sure it reaches the right temperature to ensure all bacteria is killed. Your grill should be 400-450°F for high, 350-400°F for medium-high, 300-350°F for medium and 250-300°F for low heat. By having a properly heated grill, you will guarantee a moist outcome for your meat and poultry.

Tip #6

There are many of us we prefer a good charcoal grill versus gas. It is important that you understand that there are many more influencers to altering the flavor of what you’re cooking when you cook over charcoal. Be sure to use an additive-free lump charcoal, which is charred wood. Conventional briquettes, which are easy to find, may contain wood scraps and sawdust as well as coal dust, sodium nitrate, borax and additives like paraffin or lighter fluid. As for lighter fluid, NO! Lighter fluid can release volatile organic compounds (VOCs) into the air, leave an unpleasant flavor to foods, and pose a serious danger if used improperly. Skip it altogether.

Without question, our 6 TIPS FOR A HEALTHY OUTDOOR COOKING SEASON should help you on your way to a healthy, memorable outdoor cooking season. Likely, the best ever!

Purchase products:

Wood Chips: Grande Sapore®, Minuto® & Piccolo®

Wood Chunks: Double & Single Filet

More Related reading on "What Wood for Smoking" and other great smoking and grilling tips and techniques

More Related reading on “What Wood for Smoking” and other great smoking and grilling tips and techniques

Additional reading:

-10 THINGS TO CONSIDER BEFORE PURCHASING WOOD FOR COOKING, GRILLING & SMOKING

-HOW TO TURN YOUR CHARCOAL GRILL INTO A SMOKER

-THINGS YOU DIDN’T KNOW YOU COULD SMOKE

-WHAT WOOD TO USE FOR SMOKING: A PRIMER

Dr. Smoke- please follow our blog 6 TIPS FOR A HEALTHY OUTDOOR COOKING SEASON!

Dr. Smoke- Food labeling is important for health and food safety. It should apply to all smoked foods!

TOP 10 TIPS FOR GRILLING SAFETY

Listen to the audio of this blog

We all love the time of year when we can abandon the indoor kitchen and head out to the grill for open air breathing, relaxing, and some great food. For those of you who are new to outdoor grilling or who may need a refresher, we are giving you our top TIPS FOR GRILLING SAFETY so there’s no chance your summer grilling season is remembered for another reason.

Tip #1

You probably wondered why about 15 years ago, outdoor kitchens became all the rage. The real purpose in having an area designated for outdoor cooking took hold when people realized these structures were highly durable and allowed for measures to be in place to ensure rogue hot coals from charcoal fires or excessive heat from gas grills didn’t ignite the surrounding structures like the house and garage. If you can’t afford a full outdoor kitchen layout, at least follow some of the basic ideas: set the cooking area a distance away from any building and preferably on a fire-proof surface like concrete, that is safely away from trees and grass.

Tip #2

Keep your grill clean. Whether it’s propane, natural gas, electric or charcoal, all grills need periodic cleaning to keep them performing optimally as well as to prevent those surprise grease fires. Any grill can have a grease fire! Clean the drip pan, grease pan, lid, walls and grilling grates. In addition to the safety need, this will give you the longest life out of the grills parts. If you grill a lot in a single season, then clean the equipment more than just at the start and end of the season.

Tip #3

Don’t use lighter fluid. This is a chemical designed to give quick life to briquets, charcoal, and wood. Don’t use it! It adds a prominent chemical taste to your foods and can result in a fire that goes wild. Learn what a chimney starter is, buy one, and use it. It is the safest and easiest method of lighting a fire for a charcoal/wood grill.

Tip #4

Take note of the clothing you choose to wear when you know you’re going to be in control of the grill. No dangling sleeves, strings, or flammable materials should be near the grill. Aprons are a great way to keep clean as well as to keep flowing clothing under control. Just be sure the ties to said apron don’t become a fire starter.

Tip #5

Outdoor cooking is an adult activity. Don’t assign a youngster to watch the grill. Grease fires account for most of the damaging fires resulting from grilling. Plus, it is so easy for youngsters to receive burns from brushing or directly touching the hot grill surfaces. Animals, too, should be kept away.

Tip #6

Always prepare for catastrophic events! That means keep a fire extinguisher handy, sand, or baking soda at the ready. Never attempt to put out a grease fire with water. Remember, when using a fire extinguisher, spray ahead of the fire and then move toward it.

Tip #7

Understand how your grill works. With multi-fuel options in one piece of equipment, you need to know how to close vents, valves to gas, and output drafts. Firing up the grill and having something uncontrollable occur is not the time to learn what those knobs, slides, and dials are for.

Tip #8

If nuts, bolts, or screws loosen up, take the time to secure them back in place, especially if they are on lids, wheels, or fuel areas. Grills need to be sturdy to withstand the constant opening and closing of the lid. Protect the surface the grill is on by investing in a grill mat that is fire retardant. Not only can it prevent the start of a fire, but it will protect your deck or patio material from needing replacement.

Tip #9

When lighting a gas grill, be sure to keep the lid open. Lighting when the lid is down can result in the gas pooling and exploding. This will result in the lid becoming a weapon of its own when it is blown off the grill!

Tip #10

Never move a grill indoors including to a garage! I know. Space is always an issue when you entertain and a grill can take a lot of that valuable space. But there is no way around the fact that these pieces of equipment require outdoor air to prevent accumulation of volatile gases that can make you and everyone around ill or worse. Plus, these units radiate a lot of heat and that heat can spread quickly to other surfaces like the garage door, walls, siding, canopies, lawn chairs – you name it. Always maintain a 3- foot barrier around the grill including above it to ensure no issues.

Have you experienced a disaster while grilling? Tell us what safety tip you wish you had known about before disaster struck. Get tips, techniques, recipes, and the science behind the flame and fire to improve your skills with wood-fired cooking! Follow our TIPS FOR GRILLING SAFETY for a wonderful safe grilling season!

Purchase products:

Wood Chunks- Double & Single Filet

Wood Chips- Grande Sapore®, Minuto®, Piccolo®

More Related reading on this subject

More Related reading on this subject

Additional reading:

-6 TIPS FOR A HEALTHY OUTDOOR COOKING SEASON

-WHY WON’T MY WOOD CHIPS SMOKE??

-WHAT WOOD TO USE FOR SMOKING: A PRIMER

-HOW MUCH WOOD TO ADD WHEN SMOKING


The top Ten TIPS FOR GRILLING SAFETY we hope will make your grilling season safe and tasteful!

The top Ten TIPS FOR GRILLING SAFETY we hope will make your grilling season safe and tasteful!

our guest blogger is linda colon discuss outdoor kitchen stainless steel

Outdoor Kitchen

Does Stainless Steel Rust

& What Does it Mean for Your Outdoor Kitchen?

listen to our blog


outdoor kitchen photo from Brown Jordan Outdoor Kitchens

Outdoor kitchen photo courtesy of Brown Jordan Outdoor Kitchens

Outdoor Kitchen Units & Appliances:

Does stainless steel rust? This is a common question asked by many.

by Linda Colon

Our Guest blogger discusses Stainless Steel, does stainless steel rust in outdoor appliances. Tips on how to care for stainless steel outdoor kitchen units. She explains active metals and passive metals in stainless steel grill and to avoid hard water, wire brushes, steel pads and only use non-abrasive cleaning tools.

Myth: Stainless steel does not rust.

Myth Busted: Unfortunately, stainless steel is susceptible to rusting.

Here is a little background to help you understand why this myth has created confusion for the metals world.

First, let’s take a look at the difference between active and passive metals. Metals such as iron and steel easily corrode – showing yellow or orange rust – within the natural environment and are called active metals.

The two grades of stainless steel most referenced in relation to outdoor environments are 304 and 316L, also known as marine-grade stainless steel. Their numbers are determined by their alloy composition. Unlike the active metals mentioned above, stainless steel is referred to as passive because it contains other metals including chromium. For a material to be considered stainless steel, at least 10.5% of the make-up must be chromium. Additional alloys typically include nickel, titanium, aluminum, copper, nitrogen, phosphorous, selenium and molybdenum. The key difference between the 304 and the 316L is the addition of molybdenum in the 316L. It is the molybdenum that enhances corrosion resistance in environments rich in salt air and chloride – giving 316L the moniker of “marine grade” stainless steel.

It is also important to note that stainless steel is not stain proof; it’s stainless. As such, regardless of whether you use 304 or 316L exposed stainless-steel cabinetry and appliances requires maintenance. The addition of molybdenum (in marine grade stainless steel) only delays corrosion, it does not stop it.

The chromium contained within stainless steel creates an invisible passive film covering the steel surface and shielding against corrosion. As long as the invisible film – or passive layer – remains intact, the metal remains stainless and corrosion resistant.

However, three things can break down this film:

  1. Mechanical abrasion – steel pads, wire brushes and scrapers will scratch the steel surface.
  2. Water – depending on where you live, your water can be hard or soft. Hard water may leave spots and, when heated, leave deposits behind. These can break down the passive layer leaving the stainless steel to rust. Be sure to remove deposits from food preparation and service.
  3. Chlorides – are found everywhere including in water, food and table salt. Household and industrial cleaners contain some of the worst chlorides!

There are many types of corrosion that affect stainless steel metals. Corrosion mechanisms fall into five different categories; pitting corrosion, crevice corrosion, galvanic corrosion, stress-corrosion Cracking, and general corrosion.

  • Pitting corrosion happens to stainless steel when it is exposed to environments that contain chlorides.
  • Crevice corrosion is triggered when oxygen levels are low in a crevice.
  • Galvanic corrosion happens when dissimilar metals come into contact with another.
  • Stress corrosion cracking is when tensile stresses combine with environmental conditions.
  • General corrosion happens when the stainless steels pH is less than 1.

So, does stainless steel rust?

The answer: Yes, how quickly is determined by the type of stainless steel the outdoor appliances and cabinets are made of.

By keeping the stainless steel surfaces free from food and other debris, following these cleaning tips for outdoor kitchen cabinets will help maintain your cabinets integrity and reduce the risk of rusting and corrosion:

  • Use only alkaline, alkaline-chlorinated or non-chloride cleaners
  • Avoid hydrochloric acid (muriatic acid) on your stainless steel
  • Always use a non-abrasive cleaning tool such as a soft cloth or plastic scouring pad
  • Avoid steel pads, wire brushes, and scrapers
  • Always clean in the direction of the polishing marks by locating the lines or grain and scrub in a motion parallel to them
  • If you do end up using a chlorinated cleaner, be sure to rinse thoroughly and dry it, immediately
  • Air dry your equipment

Remember, our stainless steel equipment is not stain-proof, it is stainless.

For any additional questions or advice on a stainless steel outdoor kitchen project, reach out to our in-house design team at 203-889-9640!

Dr. Smoke- Great Article by Linda Colon!

Dr. Smoke- Great Article by Linda Colon!

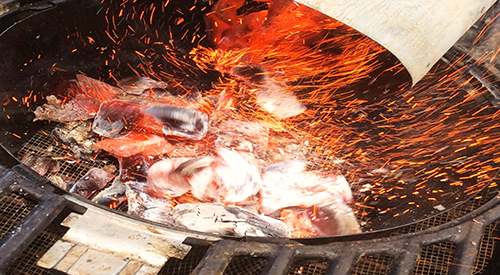
Building the perfect fire for cooking! Our chimney starter full of flaming hot charcoal being poured into our kettle grill.

Building the perfect fire for cooking! Our chimney starter full of flaming hot charcoal being poured into our kettle grill.

Listen to the audio of this blog

In Part I of our series on lighting an outdoor fire for cooking, I addressed fire production for the outdoor fireplace or fire pit cook, known as open fire appliances. In Part II, I’ll address the needs for kettle, drum and box grills’ fire set up.

The Wood-Fired Environment

There are many choices in equipment for working with a wood fire but each has different material components that determines how much work would be involved to cook on the unit. Here is the primary point when you’re selecting equipment for live fire: how will you cook on that equipment?

If your plans are to always do indirect cooking whereby the source of heat (fire, coals) will be on one side and you will cook on the non-heat side (in my opinion, the preferred method for all cooking), then know that most any equipment selected will work. However, the time for the equipment to heat up may play a factor, as the heating time is directly related to the insulation of the grill. Plus the amount of radiant heat it can hold.

If a unit is manufactured from heavy metal, brick, clay, or ceramic housing, then it will perform exceptionally by giving radiant and retained heat. Why is that important? Because producing retained and radiant heat means less fuel consumption and even cooking results.

Our orange Stok kettle grill was used for our demonstration.The Kettle Grill

For thinner material grills like the traditional kettle grill which are very popular, low cost, and preferred

by many, you can compensate for the potential heat loss and improve efficiency by adding fire bricks to the walls and floor of the grill. You will simply start your live fire directly on the fire bricks rather than the charcoal grate. Fire bricks will work well in any grill that could improve on its insulation.

Drum/Barrel Grill

The overall cooking space in a drum/barrel grill is larger than that of a kettle grill. However, just like any metal material, there are different grades so quality can be variable. Same rule applies to these grills: if the insulation is not great, add fire brick to improve the performance.

Box Grills

These units are traditionally made of high heat metal with a deep, metal charcoal pan that includes grid and vents. A grilling grate is suspended above and there often is a lid to the unit.

Fire Set Up

As I’ve stressed before, a good fire needs 3 elements: fuel (wood, charcoal), oxygen (air intake vents), and heat. As with any fire cooking, a small, hot fire is ideal.

Our bark free Double Filet smoker wood chunk is the perfect size for the small kettle grill and box grills.

Double Filet Wood Chunk

To start your fire in one of these pieces of equipment, first open the air intake vents at the base of the charcoal firebox area. This will ensure that oxygen can stimulate the start of the fire. Since this is an enclosed firebox area, the size of the wood pieces may need to be adjusted from what you would commonly use in a fireplace or fire pit/fire ring.

I like to use the log cabin method of starting a fire with this equipment. Lay 2 longer pieces of hardwood parallel to each other with about 3 inches of air space between them. Lay 2 more hardwood pieces on top perpendicular to the first pieces. Place the last 2 in position to match the base woods’ alignment. In the center, add a pile of tinder which can be hardwood chips, pine cones, even newspaper if need. Again, I like to use wood in its natural form as much as possible. Pile some kindling size wood pieces on top of the tinder pile. You can drizzle vegetable oil on top of the kindling and tinder to assist with ignition which proves helpful if you plan to light with a long wooden match. I prefer to lite my fire using a MAP torch.

Don’t Rush It

It is imperative that you allow the fire to go through the full stages of combustion before you introduce foods to the cooking grate. Too much flame and smoke will ruin the foods. The ideal is to wait until the fire burns down to glowing embers. If your equipment has the room in the firebox, rake or shovel some of the hot embers to one side and add just a small quantity of additional hardwood to keep the heat steady. The rest of the hot embers are what will be used to cook with.

Position the foods based on the heat needed for the cooking. Meats will require more of the heat while vegetables and one pot dishes will take the medium to low heat. An infrared thermometer will aide with knowing heat levels in your equipment or you can use the hand test: hold your hand over the coals the distance your foods will be. If you can only hold your hand for a count of 2 seconds before you need to pull it away, that is high heat. 3-4 seconds is medium-high, 5-6 seconds is medium and 7-8 seconds is low heat.

Be sure you visit Part I of this series so you can view the list of recommended tools to have when you wood-fire cook.

I hope you gained some new information on lighting a fire. Whether you plan to cook over/in your kettle, barrel or box grill. Leave us a comment and subscribe so you don’t miss anything concerning wood fired cooking, flavors, and the science behind the fire.

Purchase products:

Wood Chunks- Double & Single Filet

Wood Chips- Grande Sapore®

More Related reading on this subject

More Related reading on this subject

Related reading:

-OPEN PIT COOKING FIRE BUILDING: PART I

-EMBER FIRED FRESH ZUCCHINI

-BEYOND PRICING: THE TOP THINGS TO CONSIDER WHEN PURCHASING COOKING WOOD


Dr Smoke says "The key to any success in grilling and smoking outdoors is building the fire with the proper materials and patience to develop the right base before you attempt to cook the food."

Dr Smoke- “The key to any success in grilling and smoking outdoors is building the fire with the proper materials and patience to develop the right base before you attempt to cook the food.”