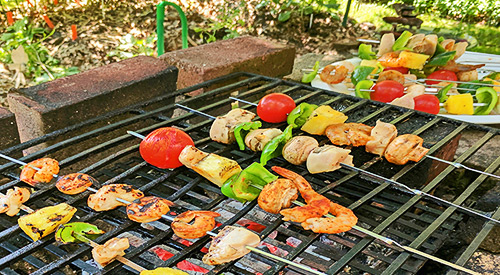
Let's explore the primary heat sources for Grilling!

Let’s explore the primary heat sources for Grilling!

Exploring the primary heat sources for Grilling Share on X

Listen to the audio of this blog

PRIMARY HEAT SOURCES FOR GRILLING-

We grill outdoors frequently yet I bet not many of you know the science behind grilling. What happens to food when we grill? How does food cook to a safe level on a grill?

Let’s cover the types of heat sources that cook grilled meats and help you decide the ideal method for cooking your favorite animal proteins.

What Is Meat?

Before I get into the types of heat sources to do the actual grilling, let’s talk about what meat really is. Meat is muscle from various animals. It is made up of 75% water, 20% protein, and 5% carbohydrates and fat. Each cell of a muscle is made of two proteins: actin and myosin.

Now breaking down the proteins of meat, these are made of amino acids which react nicely when salt ions are added. Thus, when salt ions are added, the water-retaining capability of meat increases which results in production of a juicy piece of grilled meat.

Now these proteins in meat are coiled when the meat is raw. Add heat, and these proteins uncoil as the protein molecule bonds are broken.

Note – heat shrinks the muscle fibers which will then squeeze out water allowing the molecules to recombine. Brining or marinating meat will reduce this shrinkage of the fibers.

Primary Heat Sources for Grilling

There are three heat sources for cooking foods: conduction, radiation, and convection. Let’s get an understanding of each one.

Conduction primary heat sources for grilling:

The best example of conductive heat is when meats are placed directly on the grill grates over direct heat. The transfer of the heat energy to the grill grate brands the food item with grill marks. Heat is transferred from the source (burner, lit charcoal or wood, electric element, ceramic plate) to the food which then engages the cooking process. The meat cooks from the outside to the inside due to heat transfer. The surface of the meat gets hotter and transfers to the center which is why people who rely on the meat’s outside coloring will under-cook the meat inside.

Convection primary heat sources for grilling:

Convection heat is transferred with a fluid which can include water (think boiling a food item like potato), oil (think French fries), and air (think your oven or two-zone cooking on a grill). Now, convection cooking only occurs on the exterior of the food while conduction heat cooks the interior.

Radiation primary heat sources for grilling:

My favorite example of radiation heat is cooking marshmallows on a stick held near a campfire. Essentially, this is how charcoal/wood grills cook. You elevate the food over the heat source.

What influences grilling is the length of time and the type of heat. Add in difference between temperature and heat as materials also play a part in the transfer of the heat energy. Water transfers slower than metal.

Radiation produces more heat than convection. You can easily increase the radiation heat on a charcoal grill by increasing the number of charcoal pieces. Gas and pellet grills produce convection heat. Convection heat dissipates easily by air currents. Infrared units known as intense infrared (IR) have marketed that they produce a better sear on meats. What is happening is heat energy is delivered faster than convection heat units but slower than conduction units. You also have the risks that the delivery of this energy via IR could be uneven resulting in black/burnt areas while other areas of the meat are light in color.

Primary Heat Sources for Grilling- Types of Heat on Different Equipment

Let’s look at the heat types for specific equipment so you know how the energy used cooks your meat.

Gas Grills:

Burner produces radiant heat that in turn heats the heat shields above the burners producing radiant and convection heat (note gas grills have permanent vents built in the unit). The grill grates then heat and produce conduction heat to the exterior of the meat which converts all this heat energy to conduction to cook the meat thru the interior.

Note gas grills can be set up with direct cooking (all burners on) and indirect cooking (only half the burners lit). If you cook with the lid up on a gas grill, you allow radiant heat to escape which will cool the top of the meat.

Charcoal/Wood Units:

Radiant heat is produced at the bottom of these units with the grilling grates absorbing the heat energy that produces conduction heat. Heat from below the meat is absorbed and converted to conduction heat to cook the interior. The lids on these units will produce convection heat due to the built-in vent that has a control setting.

Like gas units, charcoal/wood units can be set up direct or indirect cooking method with the foods absorbing indirect convection heat from all sides which then converts to conduction heat to cook the meat’s interior.

Flat Tops/Plancha/Griddles:

Whether gas or charcoal fed, the fuel source produces radiant heat while the solid cooking surface produces conduction heat to the meat. Due to direct contact of the meat to the solid cooking surface, the direct contact side of the meat will brown easily while this no lid unit allows radiant heat to escape causing the top of the meat to cool and not brown.

Infrared Units:

Burners on these units produce radiant heat which then heat energize the ceramic, glass or metal plate. Grilling grates absorb the heat and produce conduction heat where the surface of the meat contacts the grate.

Always remember, on any unit regardless of heat source, thickness of the meat and not poundage will determine cooking time as you must remember that conduction cooking progresses to the interior. You must use a digital thermometer to ensure meat is cooked properly before consuming. Never rely on the outer coloring of the meat or recommended time per pound in a recipe. A digital thermometer is the only way to know.

Making you an informed consumer through valuable articles like this one. Leave us a comment and follow us or subscribe for more great recipes, techniques, tips, and the science behind the flavor and fire. That’s SmokinLicious®

SmokinLicious® Products:

Wood Chunks- Double & Single Filet

Wood Chips- Minuto®

Smoker Logs- Full & Quarter Cut

Charwood

More related reading on the primary heat sources for Grilling & Smoking tips and technique see our directory on previous blogs!

More related reading on the primary heat sources for Grilling & Smoking tips and techniques see our directory on previous blogs!

Other blogs you may like:

-3 METHODS OF SMOKING BOSTON BUTT FOR AUTHENTIC BARBECUE FLAVOR

-TEMPERATURE, MATERIAL AND TIME DETERMINE WHEN ITS CALLED BARBECUE

-PICKING YOUR IDEAL FIRE SETUP FOR COOKING

-WHY TWO-ZONE COOKING METHOD LET’S YOU WALK AWAY FROM THE GRILL

Dr. Smoke- Let's become better chef's and explore the primary heat sources for Grilling!

Dr. Smoke- Let’s become better chefs and explore the primary heat sources for grilling!

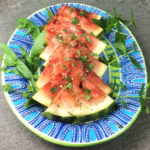
We do a summer favorite WOOD FIRED GRILLED WATERMELON!

We do a summer favorite WOOD FIRED GRILLED WATERMELON!

WOOD FIRED GRILLED WATERMELON BECOMES A STAR

listen to our blog


You may have seen segments on grilling watermelon before which show slices of watermelon on a standard gas grill. Although I agree that the heat generated from the grill will produce a sweet outcome, there is no comparison to doing a grilling technique that incorporates wood for added flavor.

In this segment, I’ll show you how to grill watermelon on a grill of your choice with wood chunks for the unique combination of sweet and char flavors that only comes from grilling with wood.

Grilled Watermelon- Easy Prep

I think this is by far, the easiest preparation for the grill. All you need is a watermelon of your choosing and a grill; gas, electric or charcoal. Just 2-3 wood chunks from SmokinLicious® and about 20 minutes once you have a lit grill, and this method of bringing flavor to the standard watermelon will be complete.

As watermelon contains a lot of water, it is essential that you work with a medium heat setting on your gas grill and hot coals with a moderate flame for the charcoal grill. If using a gas grill, be sure to set up the wood chunks on just one side of the grill and allow the chunks to smolder first so there is plenty of smoke vapor. Since watermelon grills in no time at all, you want to have enough smoke vapor produced to give a great tasty outcome for both a gas grill or charcoal grill method. Electric smokers are self-contained allowing for simple dialing in about 15 minutes worth of smoking time.

our slices ready to be wood fired!

For the watermelon, cut lengthwise in half and cut each half into individual slices about 1-1/2 to 2” thick. Or, you can remove all the rind and grill just the watermelon meat. Keep fire safe tongs at the ready so you can turn the watermelon slices just once as they evaporate some water and sweeten up. DO NOT leave the grill! This fruit requires a careful watch so stay put and you’ll have every piece cooked to perfection.

So Many Uses for Grilled Watermelon

You’ll see how the watermelon darkens in color, get bits of char coloring to the skin, and is less water soluble. That’s the perfect outcome. Now it’s time to think about how to use your wood flavored melon.

Our finished wood fired grilled watermelon

First, you can enjoy it as is. When I serve this naked, I just give one additional flavor such as fresh, chopped mint. But if you’re looking for a lunch or lite dinner entrée, think salad by including some baby arugula, goat cheese and a splash of balsamic vinegar. For a spicy version, sprinkle the wedges with red pepper flakes, a bit of granulated sugar, and lime zest. Wood fired watermelon also works great with other summer favorites like grape and cherry tomato, pepper slices, sugar snow peas, and cucumber. No matter how you choose to serve it, grilled watermelon with wood flavoring is going to top your list of grilled favorites.


Proving that there’s more to wood-fired cooking than just animal proteins, SmokinLicious® brings you great ideas for recipes featuring a wood-fired ingredient. Bringing you tips, techniques, recipes and the science behind the fire and smoke.

Purchase products:

Wood Chunks- Double & Single Filet

More Related reading on "What Wood for Smoking" and other great smoking and grilling tips and techniques

More Related reading on “What Wood for Smoking” and other great smoking and grilling tips and techniques

Additional reading:

-WOOD-FIRED APPLES MAKE THE BEST CAKE

-PEACHES WOOD FIRED FOR A SMOKY FLAVORFUL GAZPACHO

-Smoked Snow Peas With Cucumber Salad


 Dr. Smoke- Wood fired grilled watermelon is my favorite summertime dessert!


Dr. Smoke- Wood fired grilled watermelon is my favorite summertime dessert!


This bucolic photo can be yours if you follow our 6 TIPS FOR A HEALTHY OUTDOOR COOKING SEASON

Follow our 6 tips for a healthy outdoor cooking season in 2018!

Tips for Safe Outdoor Cooking- “6 TIPS FOR A HEALTHY SEASON”

listen to our blog


Everyone seems to be so much happier during the seasons that allow for outdoor cooking and entertaining. Whether it’s a planned cooking event or spur of the moment decision, these cooking events turn into an opportunity to relax, kick back and truly enjoy life.

There are steps you should take to ensure that the foods you enjoy outdoors remain safe. What follows are the top tips for safe outdoor cooking that will make for the best outdoor cooking season ever, no matter what you elect to cook.

Tips for Safe Outdoor Cooking

Tip #1

There are times when you want to marinate meats and poultry before cooking on your grill or smoker. Know that foods will only remain safe if you marinate in the refrigerator in a covered container, not with the marinated foods laying out on the kitchen counter. Also, if you plan to incorporate some of the marinades into a sauce, be sure to reserve some before it is applied to the raw foods. If there is marinade leftover from the raw food marination, be sure you boil it before using as anything that has contact with the raw food can carry bacteria.

Tip #2

You can grill a variety of foods on the same equipment but to know when everything is cooked, you will need to have thermometers. It’s best to use a different thermometer, marked by color, for each type of food: beef, pork, chicken, fish. The thermometer should be placed in the thickest part of the meat or poultry to get an accurate internal temperature reading. Here is a guide on temperatures:

  • Beef, Pork, Lamb, & Veal (steaks, roasts, and chops): 145°F/62°C
  • Ground meats & sausage: 160°F/71°C
  • Whole poultry, poultry breasts, & ground poultry: 165°F/74°C
  • Hot dogs: Cook until steaming hot

Remember, thicker cut meats and poultry will need to be placed closer to the fire or heat. Utilize the upper grill grate for those items that are more fragile like thinner fillets of fish, vegetables, fruit, or for heating sauces.

Tip #3

You cannot partially cook meats and poultry by parboiling or microwaving and then placing in the refrigerator for grilling the next day. Although you may think this will lessen the cooking time on the grill, what you’re doing is introducing the potential for everyone to become sick. The reason? Partial cooking does not eliminate all bacteria growth. The reality is, you would be allowing bacteria to continue to grow.

Tip #4

Take the time to properly clean your grill or smoker at the start of the outdoor cooking season. It’s common to close vents on the grill or smoker when you cover it up for the winter season but these aides in stimulating mold growth on the grill grate and/or inside cover and walls. For that reason, it’s important to scrub down the interior of the grill or smoker using a cleaning mixture; 1 part vinegar to 3 parts water or a bleach to water blend if you’re not opposed to the more toxic bleach.

Tip #5

Be sure you start with a hot grill or to cooking temperature smoker. That means, preheat. Preheat your grill 15 to 25 minutes before you start cooking to make sure it reaches the right temperature to ensure all bacteria is killed. Your grill should be 400-450°F for high, 350-400°F for medium-high, 300-350°F for medium and 250-300°F for low heat. By having a properly heated grill, you will guarantee a moist outcome for your meat and poultry.

Tip #6

There are many of us we prefer a good charcoal grill versus gas. It is important that you understand that there are many more influencers to altering the flavor of what you’re cooking when you cook over charcoal. Be sure to use an additive-free lump charcoal, which is charred wood. Conventional briquettes, which are easy to find, may contain wood scraps and sawdust as well as coal dust, sodium nitrate, borax and additives like paraffin or lighter fluid. As for lighter fluid, NO! Lighter fluid can release volatile organic compounds (VOCs) into the air, leave an unpleasant flavor to foods, and pose a serious danger if used improperly. Skip it altogether.

Without question, our 6 TIPS FOR A HEALTHY OUTDOOR COOKING SEASON should help you on your way to a healthy, memorable outdoor cooking season. Likely, the best ever!

Purchase products:

Wood Chips: Grande Sapore®, Minuto® & Piccolo®

Wood Chunks: Double & Single Filet

More Related reading on "What Wood for Smoking" and other great smoking and grilling tips and techniques

More Related reading on “What Wood for Smoking” and other great smoking and grilling tips and techniques

Additional reading:

-10 THINGS TO CONSIDER BEFORE PURCHASING WOOD FOR COOKING, GRILLING & SMOKING

-HOW TO TURN YOUR CHARCOAL GRILL INTO A SMOKER

-THINGS YOU DIDN’T KNOW YOU COULD SMOKE

-WHAT WOOD TO USE FOR SMOKING: A PRIMER

Dr. Smoke- please follow our blog 6 TIPS FOR A HEALTHY OUTDOOR COOKING SEASON!

Dr. Smoke- Food labeling is important for health and food safety. It should apply to all smoked foods!

Our Discussion of Hardwood vs Softwood for Cooking

Our Discussion of Hardwood vs Softwood for Cooking

Hardwood vs. Softwood For Cooking! Share on X

Listen to the audio of this blog


What is the best wood for smoking?

Well, before you ask that question, you should want to know “What woods are safe to use for smoking?”

Hardwood vs. Softwood for Cooking- Softwoods:

Softwoods or coniferous woods should never be used for cooking because they have elevated sap levels and more air in their cell structure. This causes the wood to burn fast, hot, produce lots of sparks, and produce unpleasant flavors not ideal for flavoring foods. Let’s be clear on what a softwood is: pine, redwood, cedar, fir, spruce, hemlock, larch, cypress. These are all no-no’s!

Hardwood vs. Softwood for Cooking- Hardwoods:

Known as deciduous trees that produce broad leaves, produce a fruit or a nut, and generally go dormant in the winter, hardwoods are the woods to use for cooking and makeup roughly 40 percent of all trees in the United States.

Hardwoods are made up of mostly three materials: cellulose, hemicellulose, and lignin. Cellulose and hemicellulose are the basic material of the wood cells; lignin acts as a kind of cell-bonding glue but it is the primary material need for flavoring in barbecue. Lignin contains phenols or hydroxyl groups which are alcohols. As these compounds work together, they produce a preservative action on the food which is antibacterial in nature. Lignin modifies the surface of the smoked food as the wood burns making the food scrumptious!

Hardwood vs. Softwood for Cooking- The Lignin Compound

Although all woods contain compounds which act as a preservative providing both antioxidants and reduction in bacterial growth, there are compounds that are more toxic to people, including compounds like formaldehyde and acetic acid which provide for an overall pH level in wood. Hotter wood fires produce a higher pH level. A good example is mesquite, which produces twice the level of polycyclic aromatic hydrocarbons, or PAHs, meaning it has a pH level almost three times the level of cooler burning hardwoods like Sugar Maple and Oak. Remember, it’s PAHs that are of concern when you grill or smoke and why foods cooked by these methods can get a bad rap.

Hardwood vs. Softwood for Cooking- Orchard Woods

Don’t forget a point about orchard woods which are a hardwood.

Woods like apple, peach, and pecan are traditionally raised for their fruit and nut production meaning they are commonly sprayed with pesticides in order to ensure a productive tree. Unfortunately, these pesticides are absorbed by the tree and released when burned. That means, you release them into the cooking equipment every time you use them for grilling and smoking.

Ask questions about the wood you want to purchase, read wood packaging and look for hardwoods that are known to be ideal for wood-fired cooking like cherry, alder, ash, hickory, maple, oak, and beech. Great food memories at the grill or smoker are made when you start with the perfect smoking wood! Don’t settle for anything less.

Related reading:


More Related reading on this subject

More Related reading on this subject

PUT CHERRY WOOD SMOKE ON YOUR BBQ!

IS HICKORY THE WOOD TO SMOKE & GRILL WITH?

ALDER WOOD IS THE SAFE BET ON THE SMOKE FLAVOR PROFILE!

WHAT WOOD FOR SMOKING: A PRIMER


SmokinLicious® Products:

Smoker Wood Chunks

Smoking Wood Chips- Grande Sapore®, Minuto & Piccolo

Wood Blocks for Smoking

Smoker Logs- Full & Quarter Cut

Charwood


Dr. Smoke, we discuss <a href="https://www/chefsteps.com/activities/wood-selection-guide">Hardwood vs Softwood for Cooking</a>

Dr. Smoke, we discuss Hardwood vs Softwood for Cooking


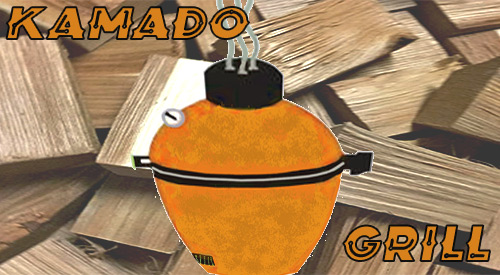
Our Forest Fresh Hardwood is a perfect fit for any ceramic smoker and grill.

Our Forest Fresh Hardwood is a perfect fit for ceramic smokers and grills.

Forest Fresh Hardwood is a perfect fit for ceramic smokers and grills. Share on X

Listen to the audio of this blog


For those that have followed us for years, you know we are proud that almost from the start of our Company, we were committed to providing a guide for equipment to culinary wood product match. We refer to our guide affectionately as Match Your Cooker.

In this article, we are covering our recommendations for ceramic and komado style grilling equipment; these are grills that are made from ceramic, clay, terracotta or crushed lava rock that allow the grill to reach extremely high temperatures – usually at or above 750°F! They are also capable of using charcoal and wood either independently or in combination.

As there are always new equipment lines and models released, our plan is to provide regular updates on this listing. We also encourage you to send us a message when you don’t see a manufacturer or model listed to ensure it is added to the list (email drsmoke@smokinlicious.com).

For now, we introduce you to our wood master’s guide to SmokinLicious® culinary woods for ceramic and komado grills.

Single Filet Wood Chunks for Ceramic Smokers & Grills

The following equipment/models would be suitable for the SmokinLicious® Single Filet Wood Chunks as the charcoal area allows for larger wood pieces:

Big Green Egg models: 2XL, XLarge

Char-Griller Akorn model: ceramic kamado

Grill Dome® models: XL

Kamado Joe Big Joe™ 24”

Komodo Kamado® 32” Big Bad

Louisiana Grills K24

Primo Ceramic Grills models: Jack Daniel’s Edition Oval XL 400, Primo Oval XL 400

Double Filet Wood Chunks for Ceramic Smokers & Grills

The following equipment/models would be suitable for the SmokinLicious® Double Filet Wood Chunks to maximize oxygen flow:

Bayou Classic Ceramic Charcoal Grill

Big Green Egg models: Large, Medium, Small

Blaze 20-inch Cast Aluminum Kamado Grill*

Broil King® Keg models: Keg™ 5000, Keg™ 2000

Cal Flame® Kamado Smoker Grill

Caliber Pro Stainless Steel Kamado Grill*

Char-Griller Akorn: models: Kamado and Kamado Jr.

Char-Broil Kamander® Charcoal Grill

Coyote Asado Ceramic Grill

Gourmet Guru Grill Ceramic Kamado

Grill Dome® models: XL, Large, Small

Hanover® 19-in. Ceramic Kamado Grill

Kamado Joe models: Classic II™ 18”, Big Joe™ 24”, Stand-Alone™, Joe Jr.™

Komodo Kamado® models: 32” Big Bad, 23” Ultimate, 21” Supreme, 19” Hi-Cap Tall, 19” Hi-Cap Table Top, 16” Hi-Cap Table Top

Louisiana Grills models: K13, K18, K22, K24

Monolith Grills BBQ Guru Edition models: Classic, Le Chef

Pit Boss Grills models: K22 Ceramic Charcoal Grill, K24 Ceramic Charcoal Grill

Primo Ceramic Grills models: Primo Oval LG 300, Primo Oval JR 200, Primo Kamado All-In-One

Vision™ Grills models: XL

Grande Sapore® Wood Chips for Ceramic Smokers & Grills

The following equipment/models would be suitable for the SmokinLicious® Grande Sapore® Wood Chips for those who prefer a wood chip product rather than chunks:

Bayou Classic Ceramic Charcoal Grill

Big Green Egg models: MiniMax, Mini

Blaze 20-inch Cast Aluminum Kamado Grill*

Broil King® Keg models: Keg™ 5000, Keg™ 2000

Cal Flame® Kamado Smoker Grill

Caliber Pro Stainless Steel Kamado Grill*

Char-Griller Akorn: models: Kamado and Kamado Jr.

Char-Broil Kamander® Charcoal Grill

Coyote Asado Ceramic Grill

Gourmet Guru Grill Ceramic Kamado

Grill Dome® models: XL, Large, Small

Hanover® 19-in. Ceramic Kamado Grill

Kamado Joe models: Classic II™ 18”, Big Joe™ 24”, Stand-Alone™, Joe Jr.™

Komodo Kamado® models: 32” Big Bad, 23” Ultimate, 21” Supreme, 19” Hi-Cap Tall, 19” Hi-Cap Table Top, 16” Hi-Cap Table Top

Louisiana Grills models: K13, K18, K22, K24

Monolith Grills BBQ Guru Edition models: Classic, Le Chef

Pit Boss Grills models: K22 Ceramic Charcoal Grill, K24 Ceramic Charcoal Grill

Primo Ceramic Grills models: Primo Oval LG 300, Primo Oval JR 200, Primo Kamado All-In-One

Saffire Grill and Smoker**

Vision™ Grills models: XL

Minuto® Wood Chips for Ceramic Smokers & Grills

The following equipment/models would be suitable for the SmokinLicious® Minuto® Wood Chips:

Saffire Grill and Smoker

We hope you view this guide as a helpful resource for selecting the perfect culinary wood for your equipment. As always, our Wood Guide Team is ready to answer your additional questions and further assist you with the perfect grilling and smoking experience!

* Although considered a komado grill, this brand is not made with any ceramic, clay, terracotta, or crushed stone.

** This brand is only designed for use with wood chips and includes a patented smokin’ chip feeder.

SmokinLicious® products used in this blog:

Wood Chunks- Double & Single Filet

Wood Chips- Grande Sapore® & Minuto®

More Related reading on this subject- More Related reading on this subject of cooking & Grilling with wood

Ceramic smokers & grills are very popular. For more reading on how these units can best work with wood as a food flavoring element, check out these articles:

-WOOD BURNING PIZZA OVENS: THE WOOD MASTER’S GUIDE

-TOP TOOLS TO OWN FOR CHARCOAL GRILLING

-THE WATER PAN EXPLAINED FOR GRILLING & SMOKING

Dr. Smoke produces great products for all ceramic smokers and grills.

Dr. Smoke produces great products for all ceramic smokers and grills.


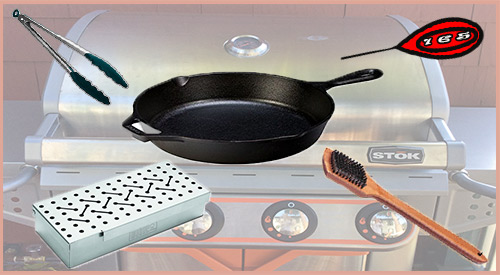
Smokinlicious® recommends "must have" gas grill tools

Smokinlicious® recommends “must have” gas grill tools


GAS GRILL TOOLS

Listen to the audio of this blog


There is no question that LP/Gas grills have changed tremendously over the past 10 years and now include some features standard that for many years, were options. Then there is the development of dual or multi-fuel options on a grill so you can have one unit that performs as a gas grill, charcoal grill, wood grill, and even electric or pellet grill, all in one unit.

Today, I’m focusing on the standard LP/Gas grill, independent of any other fuel source. This guide will focus on the basic tools that will provide for a better grilling experience and make you more efficient at the grill.

GAS GRILL TOOLS THAT YOU MUST HAVE:

Tool #1

I’m starting with a grill brush since most of us have the habit of thinking about cleaning off the grill grates when we start the grill for cooking, not when we finish. This tool is to ensure clean up the residual food bits and grease left from your previous grilled foods.

Now I’m aware of the controversy over the use of metal bristles but most of these brushes are made well. Simple inspection of the brush bristles each time you use it will allow you to identify if the bristles have come loose and have the potential to be transported to your foods. I prefer a brush with metal bristles, with a long handle to keep my arm away from the heat, as often you want to clean the grill when it’s hot. Remember, most of these brushes are under $10 so think about purchasing one a couple times per season to ensure the bristles stay put.

Tool #2

There are times when the grill grates and lid will become super coated in grease and pieces of food. You’ll need to break out the cleaning agents to ensure these surfaces are ready to go for the next grilling event. Two of my favorites are CLR BBQ Grill Cleaner and Mr. Clean MagicEraser. As a non-toxic, non-flammable, biodegradable product, CLR BBQ Grill Cleaner is not something you have to leave on for hours at a time. It quickly breaks through the issues and allows you to wipe clean to an almost new state. Keep in mind, the CLR brand also makes a stainless steel cleaner for the outside as well.

Tool #3

Long-handled tongs. Your standard tong length for the traditional kitchen just won’t work at the grill, as you need to keep some arm distance from the hot grill surfaces. I like the 20-inch length with silicone grips as well as silicone tips, as silicone can tolerate extremely high heat. If you grill multiple food items at the same time, think about purchasing tongs with different colored tips and/or handles as that will ensure use of one color for a specific food so there’s no transfer of flavors.

Tool #4

Like the tongs, a must have is long-handled spatula for those food items that need to be flipped. I prefer one that is made of solid steel and has a bit of a beveling to the edge. Again, the longer the handle the better for keeping away from high heat.

Tool #5

An easy to read, digital thermometer. It is a must when you grill or smoke. Look for one that has a longer probe for when your grilling larger roasts and thicker cuts of meats and poultry. Be sure the readout is easy to see and if you grill a lot at night, get one that has a back-lite to see more clearly. If you cook a lot of different animal proteins at the same time, try to have a thermometer dedicated to each food so you don’t cross-contaminate while bacteria may still be an issue. There are assorted colors available making it easy to dedicate one to red meat, pork, poultry, and fish. Most of the digital thermometers on the market today are under $18 with even more under $10.

Tool #6

If you’ve always been a person that cooks directly on the grill grates and only does the standard fare – hamburgers, sausage, chicken, perhaps ribs – you need to get out of that rut and learn to do more with your grill. Start by investing in one piece of quality cast iron. Able to withstand intense heat, cast iron can take you from the average griller to someone with skill. Now, you can enjoy recipes normally done on the indoor stove outside in the fresh air, with your cast iron skillet. Remember, there’s a whole line of cast iron cookware so as you expand your skills, you can add to your outdoor cookware.

Tool #7

Although I am a fan of the standard steam table disposable foil pan, any size, shape foil pan will do. These are perfect for use as a drip pan to prevent render juices from spiking flames and as water pans for a two-zone cooking set up. I won’t deny, that I also use these to cook in especially fragile items like fruit and specific vegetables. You certainly can invest in a grill pan but clean up becomes a snap with the disposable pan.

Tool #8

Although the smoker box was originally intended for use with wood chips on the grill, I always use small wood chunks in mine. I prefer a box made from high-grade stainless steel and one that has a hinged lid. My smoker box holds three Double Filet Wood Chunks from SmokinLicious® perfectly and provides for extended smoke vapor as compared with wood chips. Used directly on the grill grate or set under the grill grate on the heat shield, it produces smoke for hours. Although you can place wood chunks directly on the heat shields, as I’m known to do myself sometimes, they will become permanently marked from the wood ash and eventually need replacing. The smoker box allows you to avoid this.

There you have it! My TOP TOOLS NEEDED FOR GAS GRILLING for better results and help in extending the life of your investment!

SmokinLicious® products used in this blog:

Wood Chips

Wood Chunks- Double Filet

Charwood

More Related reading on this subject

More Related reading on this subject

Additional reading:

-HOW TO TURN YOUR LP/GAS GRILL INTO A SMOKER

-TOP TOOLS TO OWN FOR CHARCOAL GRILLING

-TOP 10 TIPS FOR GRILLING SAFETY

-WHY IS MY BARBECUE MEAT DRY??

Dr. Smoke recommends gas grill tools that are a must!

Dr. Smoke- Here’s our recommendations for “must have” gas grill tools.

Preliminary Test Kitchen Results

The Smokinlicious® Test Kitchen had an opportunity to use the Technique® Cast Iron Pan and Smoker which many of you purchased via QVC. Here are some preliminary findings by our Culinary Team:

➝Use caution when selecting cuts of meat with this cast iron pan! We had purchased a 10 lb. pork shoulder and struggled to get the cover tightly on the pan. Right now, it appears that cuts less than 8 lbs. would be ideal for cooking/smoking/roasting/grilling.

➝I’m sure we were not the only purchasers to be disappointed to read in the Technique® brochure that you should “not try to smoke in the oven” with this unit. Rest assured, Dr. Smoke will see if there is a means of actually smoking in a conventional oven by using low temperature and Liquid Infused Wood Chips /Smokin’ Dust®.
/Wood Chunks with this smoker unit (more on these findings as they become available).

➝ We cooked both a bone-in pork shoulder and bone-in chicken breast. Both cooks revealed great moisture to the meat. We used the recommended medium heat setting on our gas range but found that the cast iron pan radiates a significant amount of heat. Thus, we recommend reducing the heat setting to a low-medium (“3″ if you have a digital setting) on gas units. We also turned the heat off our cast iron pan approximately 20 minutes prior to completing the cooking time in order to benefit from the pan’s ability to generate further heat on its own. Remember, all meat should rest prior to cutting.

➝ There was considerable “rendering” out of the fat drippings into the drip pan. There is significant staining on the stainless steel drip pan so you may want to consider lining the pan with foil or even parchment paper to reduce metal staining.

Smokin’ Dust® Usage: although the dust will render black in this pan, it did give off a tremendous amount of aroma. We used the Smokin’ Dust® dry, about 2 Tablespoons worth, in the center of the smoking pan. This appears to be the correct amount although we did not feel it produced as much flavor to the meat as a conventional smoker.

Wood Chips: we used Wild Cherry Wood Chips (standard grind) in the smoker pan while cooking a bone-in chicken breast on the gas stovetop. The chips also produced significant aroma in the air but we found that they produce much more flavor to the meat. Keep in mind, our chicken breast was just over 2lbs so it fit easily in the grill pan with the cover tightly on. The fact that more flavor was infused in the chicken could be the result of less air leakage than the pork shoulder and the fact the chicken is much more porous allowing for ease in accepting smoke. We used the Wood Chips pre-soaked for 15 minutes in water, then allowed to drip dry before placing in the smoker pan. We used approximately 1 handful and spread them in the smoking pan to allow the drip pan to fit easily in place. Once our chicken was finished, we noted that the wood chips also blackened during the cooking process, much like the Smokin’ Dust®.

At this stage in our testing of the Technique® Cast Iron Pan and Smoker, we feel it is comparable to other stovetop units that we’ve tested. One important difference is the fact that there is no built in thermometer, so you must check the meat with a handheld or wireless thermometer to ensure you remove the food at the proper cooking temperature. Here are some other points worthy of mention:

➝ this is a heavy cast iron pan and all parts of it become very hot
➝ the pan can use some additional seasoning as there is some food sticking occurring with the grill pan
➝ it does take some effort to clean but if you re-season and continue to use the cast iron pan, I would anticipate this to become less of an issue
➝ there is a significant convection occurrence when cooking which produces a very moist product but as mentioned above, you must time the cooking process to ensure no over-cooking

Stay tuned for additional posting regarding this cookware. Our plans are to try the Smokin’ Dust®.
mixed with liquid as well as to try our Woodscuit ® Flavor-Infused products.

Till then, “Bon-Bar-B-Q!”

Donna G


Dr. Smoke- Technique® Cast Iron Pan & Smoker passes the Smokinlicious® kitchen test!

Dr. Smoke- The Technique® Cast Iron Pan & Smoker passes the Smokinlicious® kitchen test with flying colors when using our sized hardwood smoking chips!

More Related reading on this subject- More Related reading on this subject of cooking & Grilling with wood

For more related reading on stove top smoking, check out these articles:

Stove Top Smoked Riccota Cheese Delight

The Easy Method to Make Cold Smoked Cheese

Yum, Yum! – Infusing Wood Smoke Flavor into Brussels Sprouts


Outdoor kitchen location tips

Wonderful article on Outdoor kitchen location tips

Wonderful article on Outdoor kitchen location tips

Guest Blog – Brown Jordan Outdoor Kitchens

Outdoor Kitchen Location Tips

by Phil Zaleon

When you are going through the steps of installing an outdoor kitchen, you’ll quickly find that deciding where to set it up is one of the most difficult and impactful decisions of the process. Since you have multiple options, it can be hard to figure out exactly where to put it. We’ve come up with a list of things to consider to help you decide!

Be Conscious of Sun and Shade

Summer is prime time for outdoor kitchen use. So, when planning your outdoor kitchen, bank on warm temperatures and lots of sun, and take reactive measures. Placing your outdoor kitchen under existing shade, or planning to add new sources of shade will provide you and your guest’s comfort year-round.

Natural shade from trees and vines is best because they ventilate easily. As an added bonus vines and trees “transpire,” evaporate moisture to cool themselves, creating their own natural misting system.

There are plenty of man-made shade options as well, such as pergolas, or trellises. The growing popularity of transition rooms provides an even more permanent and durable option for your outdoor kitchen.

Leverage Your Natural Space

Do you have a pool or hot tub in your yard? A beautiful garden? When choosing where to add your outdoor kitchen, take note of any existing structures or features that you want to complement. Also be wary of design overlap. The last thing you want is for your outdoor kitchen covering to inadvertently shade your vegetable garden.

In addition, when planning the placement of your outdoor kitchen, it’s important to consider the relationship between the indoor and outdoor versions, and how they will be used together when cooking or entertaining. If you have a large outdoor space to work with, it may prove prudent to place your outdoor kitchen in closer proximity to your indoor kitchen to create a seamless transition between indoors and outdoors.

Consider the View

Another crucial element to consider when you’re placing your outdoor kitchen is your views and sight lines. You can have the most beautiful outdoor kitchen in the world, but when your guests sit down to eat at the table, if they’re facing a brick wall or the old shed in your backyard, that’s what they’re going to remember. So, be sure to consider the view when you’re trying to find the perfect location for your stainless steel outdoor kitchen.

Another key consideration is the location that will provide the most privacy from neighbors. Screening views with trees and shrubbery will provide privacy while also providing a noise buffer for your close neighbors.

Don’t Forget Utilities

When planning your outdoor kitchen layouts, keep in mind the best practical placement or installation of the necessary gas, water, and electrical supply. Note where your water, gas and electric lines are, and design your kitchen accordingly.

Furthermore, when placing your grill or smoker, think about the natural flow of wind – make sure that smoke from the grill will be carried away from dining and living areas. You should also think about making sure the kitchen area is located a safe distance from doors and entryways to keep foot traffic away from potential hazards.

Additionally, make sure to place all outdoor cooking appliances away from areas where children play or where people play sports. You’ll want to avoid basketballs or soccer balls bouncing over onto a hot grill.

Don’t Shy Away From the Roof

When one thinks “outdoor kitchen,” the tendency is to think of backyards – but that doesn’t have to always be the case. Especially if you have a small or nonexistent lawn space, building your stainless outdoor kitchen on the roof can prove a very viable design option.

If you are choosing this option though, pay special attention to restrictions and codes. They vary by municipality, so check with your town’s building department to find out rules about setbacks, fire safety, and what kind of permits you’ll need to file. We recommend working with a general contractor so you are up to code and all safety requirements are included.

Fit Your Needs

The right spot to place an outdoor kitchen will vary from homeowner to homeowner. You may like the idea of an outdoor cooking area just outside the back door of your house or a freestanding pavilion near your pool area.

At the end of the day, there’s no one “right” spot for your outdoor kitchen. But by using these outdoor kitchen location tips, you’ll ensure you make an excellent choice.

Are you ready to build your dream luxury outdoor kitchen?


Call Brown Jordan Outdoor Kitchens on 203-871-3804 today to get started!

Related Reading:

-Electric Smoker Guy-HOW TO CHOOSE THE BEST ELECTRIC SMOKER

-Does Outdoor Kitchen Stainless Steel Rust

Dr. Smoke- things you should consider on Outdoor kitchen location tips

Dr. Smoke- things you should consider on Outdoor kitchen location tips

"You are what you eatII" saying is more true today than it was years ago!

“You are what you eat” is a saying that is truer today than it was years ago!

‘YOU ARE WHAT YOU EAT’ APPLIES TO WOOD COOKING

Summary of You Are What you Eat

Healthy eating recipes, eat smart with Bark free cooking wood, cooking wood as a food ingredient is a clean eating basic. Responsibly sourced wood and only using heartwood Hardwoods avoids what woods are toxic to humans. Please remember you are what you eat when it comes to smoke flavor in food and your sourced wood.

We’ve all heard it, likely from our mothers. You are what you eat. If you truly understand the meaning of the statement, you know that we extract necessary nutrients from the foods we ingest to energize and stabilize our bodies. The nutritional content of what we eat determines the composition of our cell membranes, bone marrow, blood, and hormones. Every day we lose cells which is why the foods we consume are so vital to our body’s health.

Like Any Other Food Choice

If you’ve been a follower of my writings then you are aware of the stress I put on recognizing the wood used to cook foods is just as important an ingredient as the cut of meat, choice of spices, quality of oil, etc. There has been a lot of focus on the origin of food and how important it is to source locally both as a means of supporting local business and to control what you’re putting in your body. From our perspective, you want to know that the wood used for cooking is sourced close to the growing area. This ensures that there is knowledge about how the wood is processed before it gets to you and it assures the freshest product.

Minimal Processing

Just as with the clean food concept which focuses on minimally processed foods and as direct from nature as possible, SmokinLicious® holds to the same approach. Sourcing wood from forest regions (direct from nature) that are in close proximity to our manufacturing facility, provides us with the unique advantage to process into the various cooking products the hardwoods harvested that meet our strict criteria: 100% bark-free (we don’t allow any bark-on product to cross our threshold), 100% heartwood (no outer cores of the tree cross our threshold), harvested hardwood that is less than 6 months of age (ensures this is still a “green” product), chemical-free (no pesticide or growth enhancement techniques employed), and in raw state to allow us to process it into a suitable cooking wood size.

The Risks

If you love foods that are cooked with wood, then you should know a few specifics to keep you on the path to health and long life.

Hardwoods only!

  • Softwoods or coniferous woods should never be used for cooking as they have elevated sap levels and more air in their cell structure. This causes them to burn fast, produce lots of sparks, and unpleasant flavors that are not ideal for flavoring foods. These include pine, redwood, cedar, fir, spruce, hemlock, larch, cypress.

Toxicity Risks:

  • There are many known toxicities in certain species of wood with softwoods containing the highest risk. Other woods have the potential to cause sickness and in some cases death if a person’s system is already compromised. Most of the risks are associated with the cooking process rather than the ingestion of the actual wood-fired food. But know that if a balance of the wood-tar creosote is not found, then the ingestible risks of the food heighten. One of the best means of obtaining a balance is by starting with hardwoods that are considered safe for cooking, are clean, are bark-free, and derive from the inner cores rather than outer of the wood, where more impurities lurk.

Cooking Technique Influence Risk:

  • At some point, I’m sure you’ve read about heterocyclic amines (HCAs) and polycyclic aromatic hydrocarbons (PAHs). These are the chemicals that form when meats, poultry, and fish are cooked using higher temperature methods like grilling. Why does this pose a health risk? Because these chemicals cause changes in DNA and when you change DNA and they are metabolized by specific enzymes in the body, you can increase the risk of cancer associated with these compounds. There is no definitive link between HCA and PAH exposure from cooked meats and cancer in humans. There is no way to differentiate between other exposures to the chemicals from the food exposure.

HCAs are found to only be associated with meat cooked at high temperatures. While PAHs can be found in other smoked foods. Remember, PAHs are also in cigarette smoke and fumes from car exhaust. A recommendation is to remove any charred portions of meat, continuously turning meat over the high heat source, and avoiding direct exposure of meat to the open flame to reduce exposure. Here’s a tip that can also reduce the risk of forming HCAs – marinate your foods for at least 10 minutes.

Purchase products:

Wood Chips: Grande Sapore®, Minuto®, Piccolo®

Wood Chunks: Double & Single Filet

More Related reading on this subject

More Related reading on this subject

Additional reading:

-Food & Smokehouse Processing Double Standard?

-TO BARK OR NOT

-COOKING WITH WOOD YOU SHOULDN’T HAVE TO THINK ABOUT YOUR SAFETY

-HOT TREND MAY NOT BE THE SAFEST BET

Dr Smoke-As we promote a healthy diet enjoying different foods please remember "you are what you eat" !

Dr. Smoke- As we promote a healthy diet enjoying different foods please remember “you are what you eatII” !

THE HISTORY OF FIRE COOKING PART IV

THE HISTORY OF FIRE COOKING PART IV

THE HISTORY OF FIRE COOKING PART IV

listen to our blog


In THE HISTORY OF FIRE COOKING PART IV, we examine how wood fired cooking has evolved around the world, focusing on those countries who still rely solely or in great part on wood fired cooking for sustenance.

Many Still Rely on Fire

The numbers can be staggering when you take a close look. In developing countries, some 2.5 billion people rely on biomass to meet their energy needs for cooking. For many, these resources account for over 90% of the household energy consumption. Biomass includes charcoal (derived from wood), fuel wood, agricultural waste, and animal dung. As area populations increase, the number of people relying on biomass for cooking also grows. By the year 2030, it is estimated that 2.7 billion people will relay on biomass for cooking! The immediate concerns are that biomass will be used without sustaining harvests and that technologies for energy conversion will not be used properly. In fact, 1.3 million people, the majority of whom are women and children, die because of exposure to indoor air pollutants from biomass. Slowly, the goal for switching to modern cooking fuels and/or promoting more efficient and sustainable use of traditional biomass is under way. For now, there are millions who wood fire foods for their family’s nutrition using traditional methods and recipes.

The History of Fire Cooking Part IV- The Many Methods and Meals of Fire Cooking

Without question, the continent of Africa houses most of the countries who are reliant on wood fires for cooking. The top 12 countries using wood fires for cooking are: Guinea-Bissau, Mali, Rwanda, Burundi, Liberia, Madagascar, Sierra Leone, South Sudan, Guinea, Laos, Ethiopia, and Central African Republic. However, there are many other countries that carry generations of wood fired cooking recipes into today, making them a family gathering special occasion. Let’s examine some of those countries and what they cook.

Morocco

Moroccans cook in earthen ovens called tagine, a conical shaped terra-cotta lid that sits on a flat terra cotta bottom. It sits on a base called a majmar, an unglazed brazier full of hot coals that cooks the tagine slowly. In the market place, tagines are lined up with various foods like fish & potatoes, chicken & olives and lemon, or lamb with prunes. They also use small elevated grills in the port areas to cook various fish.

Laos

Although the people of Laos do grill some items, including water beetles, they mostly make soup in large pots set over an open wood fire. This is much like the American style of cowboy cooking. Vegetables, sprouts, and noodles are often added to the broth to make the traditional Laotian daily dish.

Guatemala

Guatemalans use a method of wood cooking known as three stone cooking. A fire is started between 3 fire proof materials, usually stones that are used to support pots placed over the fire. Pepian, the national dish of Guatemala, is a mouth-watering chicken stew made with different types of native chilis, seeds, and vegetables. In addition to hand-crafted tortillas, it takes 3-4 hours to make this recipe traditionally over a fire.

Argentina

Here they call barbecue asado and it is certainly about the meat. Vegetables, calamari, bread, and other foods are introduced to fire and heated either on heavy grates or iron pans.

India

One of the biggest misconceptions is that tandoori is a recipe from India. That couldn’t be further from the truth. Tandoori is a technique of grilling meat over fire in a tandoor, a clay oven. The tandoor is buried. Heat escapes from the top. Tandoori is very hot! Skewered meat or fish is inserted into the tandoor vertically to cook. The traditional bread, Naan, is placed along the sides of the clay vessel.

Korea

Koreans use a very unique method of wood fire cooking while at the same time utilizing the heat from that fire to heat their homes. They are one of the earliest users of radiant heat. Outside the home, a fire proof container is hung over the fire area. A series of flues travel horizontally under the house. Ondol is a layer of flat stone located directly beneath the house floor. A chimney flue is located on the opposite side of the house from the fire source preventing any smoke from entering the actual home. As the smoke travels through the underground flue system, it acts as a preservative to the wood house by preventing insects, mold, and bacteria from developing.

Don’t Think All Wood-Fired Cooking is BBQ

The variety of foods and techniques noted are not considered BBQ but have traditions that originate in every corner of the world. Through trial and error, sourcing material that was available in each country, and incorporating foods and other edible items into recipes to feed families, fire cooking has advanced in some countries, while others still have seen little change.

Now we see the essence of barbecue by other names in other countries. Asado in Argentina, braai in South Africa, lechon in Philippines, mezze in Lebanon, and parrilla in Uruguay. Without question, the days of fire cooking are far from over as our innate nature seeks the flavors only provide by flame and smoke. Hope you enjoyed THE HISTORY OF FIRE COOKING PART IV, the final installment of the fire history series.

Purchase Products:

Wood Chips- Grande Sapore®

Wood Chunks- Double & Single Filet

More Related reading on "What Wood for Smoking" and other great smoking and grilling tips and techniques

More Related reading on “What Wood for Smoking” and other great smoking and grilling tips and techniques

Additional Reading:

-THE HISTORY OF FIRE COOKING PART III

-THE HISTORY OF FIRE COOKING PART II

-OPEN PIT COOKING FIRE BUILDING: PART I

Dr Smoke "Hope you enjoyed the variety of cultures that have roots in wood cooking."

Dr Smoke “Hope you enjoyed the variety of cultures that have roots in wood cooking.”


THE HISTORY OF FIRE COOKING PART III

Fire for cooking

listen to our blog


In Part I, we covered scientific theories on how cooking with fire began approximately 2 million years ago.

Part II, we presented information on how our bodies developed from the introduction of cooking meat. THE HISTORY OF FIRE COOKING PART III, we delve into the early risks of cooking with fire and gender roles.the history of fire cooking part III

The History of Fire Cooking Part III- It May Not Have All Been Good

Although we’ve discussed the benefits of the discovery of fire for cooking, including the higher caloric content needed for survivability, there are other effects to fire cooking that aren’t so positive. This is a relatively new focus in research concerning fire cooking and human evolution.

A USA study suggests that a genetic mutation may be present in modern humans that allows certain toxins, including those found in smoke, to be metabolized at a safe rate. This genetic mutation was not found in other primates like the Neanderthals or hominins. Breathing toxins found in smoke can increase the risk of respiratory infections, suppress one’s immune system, and even cause disruption in the reproductive system. It is possible that by having this genetic mutation, the tolerance to smoke toxins was a needed adaption that gave early humans the ability to survive in this very toxic environment.

Closeness Brings Disease

We also know that fire allowed for not only cooking but warmth, light, and protection. To gain the positives of fire, early humans would gather together in close proximity to one another. A 2016 study suggests that with the advancement of fire’s uses, people remained in huddled groups for long periods of time, suffered persistent coughing resulting from the smoke toxins, and subsequently damaged the lungs. This may be what spurred the spread of tuberculosis which some scientists believe emerged 70,000 years ago. In fact, most scientists believe that fire was regularly used around 400,000 years ago, thus supporting the advent of tuberculosis.

Other scientists believe the use of controlled fire introduced additional airborne diseases. Plus, many opine that the early days of exposure to inhaling smoke from open fires stimulated our discovery of smoking tobacco. Without question, these believers feel that climate changes resulted from the ongoing burning of carbon. For them, biological and environmental changes co-mingle.

Gender Identities

It is amazing that in those early years of fire discovery the establishment of gender roles occurred and seems to have held in general theory. As tools developed and cooking with fire expanded, men did the hunting and women stayed with the fire, maintaining it and cooking previously hunted and foraged foods on/over it.

Although today both males and females hunt, the number of men still outweighs the woman. Despite the number of male chefs outnumbering the women, women still dominate as the primary cook in the home. Yet, males still barbecue and grill in a greater number.

It seems clear that there are other influences on the roles men and women play when it comes to fire cooking around the world. Finally, in Part IV of our series, we’ll explore the variations in method and technique from around the world. Finally, we hope you enjoyed THE HISTORY OF FIRE COOKING PART III blog.

History of woodfired Cooking PartIII

History of wood fired Cooking Part III

Purchase products:

Wood Chunks- Double & Single Filet

More Related reading on "What Wood for Smoking" and other great smoking and grilling tips and techniques

More Related reading on “What Wood for Smoking” and other great smoking and grilling tips and techniques

Additional reading:

-THE HISTORY OF FIRE COOKING PART II

-THE SMOKINLICIOUS® STORY

-GRILL-BUILDING THE PERFECT COOKING FIRE- PART II


Dr Smoke- "Part III of our ongoing series on the history of fire cooking focuses on the early risks and how they shaped today's food practices."

Dr Smoke- “Part III of our ongoing series on the history of fire cooking focuses on the early risks and how they shaped today’s food cooking practices.”

DINING FOR SMILES 6 COURSE DINNER EVENT

DINING FOR SMILES 6 COURSE DINNER EVENT

DINING FOR SMILES 6 COURSE DINNER EVENT

Listen to the audio of this blog

Alliance For Smiles began in 2004 with the mission to repair cleft palate and lip deformities in under-served areas of the world. In fact, over the years, various fund-raising concepts were instituted to offset the costs for highly expensive missions. Most missions are easily over the $300,000 level in donated surgical and treatment protocols.

Why Portville, NY

Chef Carl Vahl, Board of Directors member for Alliance For Smiles, brought attention to his local community of the efforts for this organization by presenting the Dining For Smiles event, an event which featured a six course gourmet dinner for 18 privileged guests. SmokinLicious® had the honor of preparing many of the components of the meal over a wood fire.

When hosting an intimate event like the Dining For Smiles dinner, organization and assignment of duties are key. As such, Chef Vahl utilized the full volunteer staff regardless if the members had experience in a kitchen or not. The event featured a wonderful six course dining experience with the following featured:

  • Tuna Crudo- Course One
  • Butternut Squash Soup- Course Two
  • Seasonal Salad- Course Three
  • Handmade Lobster Ravioli with Brown Butter Sage Sauce- Course Four
  • Wood Fired Lamb & Canadian Salmon served with Jasmine Rice and Wood Fired Brussels Sprouts- Course Five
  • Panna Cotta with Fresh Mango- Course Six

Additionally, wine pairings were presented with each course revealing an assortment of sparkling, rosé, red and white wines.

The Courses

The formal table is set for about to be pampered 18 guests!

As the 18 guests arrived and were seated at one of two tables, the first course is served – a Tuna Crudo featuring Sushi-grade tuna nestled in a Wasabi avocado cream, topped with pickled onion and finished with candied lemon peel. This course was served in a martini glass and accompanied by Prosecco, an Italian sparkling wine considered the Italian champagne.

The second course of the Dining For Smiles dinner featured roasted organic butternut squash with the subtle flavor of White Gords was the serving bowl for the Butternut Squash Soup. The chef prepared the soup and the support team cut the tops on the gords. nutmeg and topped with a crisped sage leave and touch of maple syrup. My favorite part of this dish was its serving bowl – a charred mini white gourd. By retaining the top of the gourd, you can ensure that the soup stays hot until its placed in front of the guest. Each gourd was hand cut and charred to ensure no off flavors transferred from the gourd to the soup. Just a perfect vessel for this scrumptious soup.

Following the first two courses of Tuna Crudo and Butternut Squash Soup, the third course was the salad course featuring mixed greens of green and red leaf lettuce, spinach, and frisee; apple slices; candied walnuts; ember cooked red pepper slices; and a fresh vinaigrette. This course helped to balance the stomach in preparation for the upcoming courses that would be richer and more substantial. Paired with our salad course was a full-bodied chardonnay.

Chef prepared homemade lobster ravioli for the fourth course. This was a decadently rich dish featuring a brown butter sage sauce and fresh grated Parmigiano-Reggiano cheese on top. This course was paired with a beautiful Rosé, with both items being well received. As a matter of fact, I don’t recall a plate coming back to the kitchen that wasn’t completely clean!

Main Course for the DINING FOR SMILES 6 COURSE DINNER EVENT

Halal leg of Lamb seasoned with garlic, rosemary, thyme and roasted over cherry wood for 2 hours then rested before slicing. Served medium rare Now, it’s time for the main course – course number five! First came the proteins. We produced a wood-fired leg of lamb and lamb rib loins cooked over charwood, ash, sugar maple, and wild cherry wood chunks. The wood-fired cooking offered a fabulous color to the meat.

Our Canadian salmon enjoyed cooking over charwood and sugar maple and wild cherry wood chunks. A combination of orange butter, olive oil, and smoke vapor produced that beautiful golden skin. After resting a while, the lamb and salmon were sliced in preparation for full plating.

We start with Jasmine rice topped with wood-fired brussels sprouts and carrot. Next to the plate, a slice of wood-fired lamb and a filet of salmon. Served with a custom mixed wine of Sangiovese and Syrah. Simply a perfect course!

Finally, we’ve reached the end of a fabulous meal – the final course – dessert. Panna cotta with fresh mango, served with a German Reisling,Chef Cal lay’ home made Panna Cotta (italian cooked cream) topped with macedoine fresh Mango the perfect end to a fantastic evening.



A Meal that Stays in Memory

Chef Vahl’s vision for a flavorful, entertaining evening proved to be a realty as these 18 guests can attest to. We are so thankful and honored to have been a part of it.

If you want to donate to the Alliance For Smiles mission, visit www.allianceforsmiles.org and view all the lives that have been touched by the commitment of so many. Always remember to help others in need in any way you or your company can, just as SmokinLicious® was able to do with this Dining For Smiles event!

Glad we could share our DINING FOR SMILES 6 COURSE DINNER EVENT!

Purchase products:

Charwood

Wood Chunks- Double & Single Filet

More Related reading on this subject

More Related reading on this subject

Additional reading:

-DINING FOR SMILES EVENT PREPARATIONS

-WELCOME TO OUR BRAT PARTY-BRATWURST IN THE ORION SMOKER COOKER

-JUST BECAUSE YOUR SMOKING (FOOD THAT IS!) DOESN’T MAKE IT ALL BAD!

Dr Smoke- "This charity event was wonderful to do because it's such a great cause and makes a tremendous difference in people's lives around the world."

Dr Smoke- “This charity event was wonderful to do because it’s such a great cause and makes a tremendous difference in people’s lives around the world.”

The history of fire cooking part I

THE HISTORY OF FIRE COOKING: PART I

Grill fire

the fire

listen to our blogthe history of fire cooking part I


For thousands of years, it was the only way to cook. Many believe that this discovery separated man from the other animals. Fire.

Estimated to have been discovered some 2 million years ago, the discovery of fire and more importantly, the discovery of how to tame fire, resulted in man’s brain development, value of food, changes in our body, and social structure. It gave us survivability. It extended our life by improving daily calories and nutritional needs by allowing us to cook poisonous plants and meats.

So how did fire cooking get discovered? That is the million dollar question. Here are some of the hypotheses out there regarding the discovery of fire for cooking:

The History of Fire Cooking Part I- Nature Provides Ignition

There are some scientists who believe that fire cooking was found by accident. A lightning strike or grass fires that sprung up due to the excessive dry conditions exposed to the hot sun. Many don’t feel man did anything to “discover” fire other than observe the characteristics of fire: it produces abundant heat, light, and when it traps an animal within its flames, it produced a more tender meat, easier to digest food source, and more pleasing aroma to the meat.

Tool Construction

There are others who believe that early humans realized the importance of tools. By sharpening stones to produce spears, cutting tools, etc., these early beings observed spark. Either through intention or perhaps with Mother Nature’s assistance, these sparks caught twigs, brush, fruit, and/or grains on fire. Remember, early human life did not involve a developed brain. A discovery of fire, however, would help advance not only our brains, but our bodies into the erect beings we are today.

The Earliest Cave Cooking

In South Africa’s Northern Cape province, a dwelling known as Wonderwerk Cave, contains the earliest evidence that our ancestors and apelike ancestors were using fire. Compacted dirt showed evidence of ashes, carbonized leaf and twig fragments, and burnt bits of animal bones. Scientists were then able to analyze this material and determine that the fragments were heated between 750 and 1300°F, which is the heat level of a small fire made of twigs and grasses.

If indeed our earlier species learned to harness fire for cooking, this would account for the advancement of our brains and our ability to become erect beings walking on two legs. Cooking on fire allowed for easier chewing and digestion and produced extra calories to fuel our brains. Fire also warded off nighttime predators, allowing for sleep on the ground or in caves rather than in the trees.

It’s All About Energy

Raw food diets have been popularized as a method of losing weight and of being healthier. However, only a fraction of the calories in raw starch and protein are absorbed by the body via the small intestine. As a result, the remainder passes into the large bowel, where it is broken down by the organ’s high population of microbes, which consume the majority for themselves. However, cooked food is mostly digested by the time it enters the colon. For the same amount of calories ingested, the body gets roughly 30 percent more energy from cooked oat, wheat or potato starch as compared to raw, and as much as 78 percent from the protein in an egg. In experiments, animals given cooked food gain more weight than animals fed the same amount of raw food.

Cooking breaks down collagen (connective tissue in meat) & softens the plants’ cell walls to release their storage of starch & fat. The calories to fuel the bigger brains of successive species of hominids came at the expense of the energy-intensive tissue in the gut, which was shrinking at the same time. If you look at early imagery of apes, you’ll see how we morphed into narrow-waisted Homo sapiens.– the history of fire cooking part I

Coming up in The History of Fire Cooking: Part II, learn more about why cooking foods by fire made us who we are today. In conclusion, did we provide you with new information you didn’t know? Additionally, leave us a comment and subscribe as we bring recipes, tips, techniques, and the science behind the fire and smoke.

Purchase products:

Wood Chips- Grande Sapore®

Wood Chunks- Double & Single Filet

More Related reading on "What Wood for Smoking" and other great smoking and grilling tips and techniques

More Related reading on “What Wood for Smoking” and other great smoking and grilling tips and techniques

Additional reading:

-OPEN PIT COOKING FIRE BUILDING: PART I

-GRILL-BUILDING THE PERFECT COOKING FIRE- PART II

-IS WOOD-TAR CREOSOTE THE ‘MONSTER’ TO WOOD-FIRED COOKING

I hope you enjoyed the the history of fire cooking part I

I hope you enjoyed the history of fire cooking part I

Smokinlicious is proud to be a F2C company- meaning a manufacuter to Consumer Sales Organization

Smokinlicious is proud to be a F2C company


SMOKINLICIOUS® IS AN F2C

listen to our blog


In today’s age of selling products and services, there are acronyms that are common to marketing and sales strategies. First, there is B2B which refers to business to business relationships. This means that a product or a service is sold from one business to another. An example of each would be windshield wiper fluid being sold to gas stations and attorney services to large corporations.

B2C is shorthand for business to consumer. This is selling a product or service directly to a customer that is not necessarily a business.

Now, you may automatically assume that SmokinLicious® would fall under both these sales types, and you would be right. But there is another acronym you likely aren’t familiar with: F2C.

F2C- Making a Better Connection

F2C refers to factory to consumer or more specifically, manufacturer to consumer. There are many reasons why this is a plus to both businesses and consumers doing business with a specific manufacturer. Let’s examine the major advantages from the perspective of doing business with SmokinLicious®:

Advantage #1 Details

As the manufacturer of all the products sold under the brand SmokinLicious®, we can provide the specifics on where the hardwood comes from, the age of the wood, the handling of the product, the treatment the wood is exposed to, and the details on packaging. You don’t have to wait on answers to your product questions like with a supplier who is simply a re-seller of the wood. We give answers immediately!

Advantage #2 Intimate Knowledge

When you are committed to manufacturing a specific product, you tend to know that product thoroughly. For SmokinLicious®, that equates to us knowing not only about wood fired cooking techniques like hot smoking, ember cooking, and cold smoking but we know the science behind hardwood; molecular biology of the wood as well as for combustion. We know why smoke gives flavor and how to respect and control it.

Advantage #3 Availability

We aren’t simply selling a product to move it out of inventory. As a manufacturer, we are committed to answering questions whether on email, via phone, or social media platforms. No, we don’t operate the phones 24/7. But we do get back to anyone who contacts us, usually within 24 hours. We are available to everyone!

Advantage #4 Passion

Sometimes I feel the word “passion” is overused but that word really does describe the people who make up the SmokinLicious® Team. We are passionate about cooking with fire and the smoke it produces. We simply love to offer our perspective on cooking with wood. Remember, just because someone sells a specific product doesn’t mean it was a dream of theirs. It simply may be the “thing” to do with no real commitment. Who wants to commit to that type of supplier!

Advantage #5 Skilled

We have a test kitchen/patio and we use it – all the time! That’s the only way you can know all the different applications for the product we manufacture and sell. We possess the skills to guide you on what might be causing bitter flavors, poor color, equipment failures, and so much more. Plus, we offer daily postings on recipes, tips, techniques, and the science behind cooking with fire and smoke.

Advantage #6 Global

We can be everywhere because we know our commodity and the regulations that relate to our products. We don’t cut corners because we are as concerned about our environment and forests as the agricultural agencies around the world. You won’t ever need to worry about having your supply cut off because a regulation or law wasn’t followed.

Advantage #7 Exclusivity

You’re purchasing smoking wood to cook with. That means, food is exposed to the wood’s components. Don’t you want assurance that it’s clean? We only sell hardwoods for cooking and culinary use! That’s it! We don’t take waste product from some other wood process and sell it off under a new label or brand. We don’t buy woods from anyone who can’t document on paper where the smoker wood is from and if exposure to chemicals is possible. SmokinLicious® is exclusively a culinary wood product!

These are just some of the advantages to working directly with and purchasing directly from a manufacturer, or F2C. When you want assurances that any question you have can be answered, that any product need can be met, that your equipment will be protected, then seek a direct manufacturer first and eliminate a middle man that may only be in it for dollars and cents. Or one day you could simply find they’re no longer in business or they no longer can ship product throughout North America or other continents, leaving your Company with a big problem.

Purchase products:

Wood Chips- Grande Sapore®

Wood Chunks- Double and Single Filet

Smoker Logs- Full & Quarter Cuty

More Related reading on "What Wood for Smoking" and other great smoking and grilling tips and techniques

More Related reading on “What Wood for Smoking” and other great smoking and grilling tips and techniques

Additional reading:

-SMOKIN’ DUST®: A SPICE FOR YOUR EQUIPMENT

-WHAT’S IN THE SMOKINLICIOUS® WOOD CHUNK BOX?

-WHEN A FLOP COULD HAVE BEEN A SUCCESS!

Our primary focus is on the consumer of our products. Our culinary team provides support to all chefs!

Our primary focus is on the consumer of our products. Our culinary team provides support to all chefs!

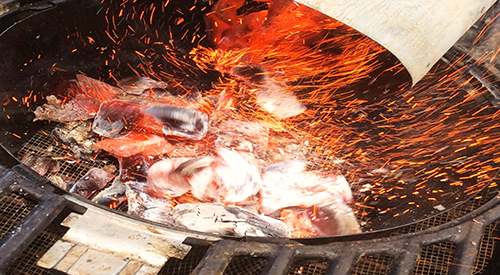
Building the perfect fire for cooking! Our chimney starter full of flaming hot charcoal being poured into our kettle grill.

Building the perfect fire for cooking! Our chimney starter full of flaming hot charcoal being poured into our kettle grill.

Listen to the audio of this blog

In Part I of our series on lighting an outdoor fire for cooking, I addressed fire production for the outdoor fireplace or fire pit cook, known as open fire appliances. In Part II, I’ll address the needs for kettle, drum and box grills’ fire set up.

The Wood-Fired Environment

There are many choices in equipment for working with a wood fire but each has different material components that determines how much work would be involved to cook on the unit. Here is the primary point when you’re selecting equipment for live fire: how will you cook on that equipment?

If your plans are to always do indirect cooking whereby the source of heat (fire, coals) will be on one side and you will cook on the non-heat side (in my opinion, the preferred method for all cooking), then know that most any equipment selected will work. However, the time for the equipment to heat up may play a factor, as the heating time is directly related to the insulation of the grill. Plus the amount of radiant heat it can hold.

If a unit is manufactured from heavy metal, brick, clay, or ceramic housing, then it will perform exceptionally by giving radiant and retained heat. Why is that important? Because producing retained and radiant heat means less fuel consumption and even cooking results.

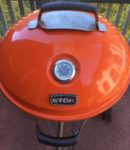
Our orange Stok kettle grill was used for our demonstration.The Kettle Grill

For thinner material grills like the traditional kettle grill which are very popular, low cost, and preferred

by many, you can compensate for the potential heat loss and improve efficiency by adding fire bricks to the walls and floor of the grill. You will simply start your live fire directly on the fire bricks rather than the charcoal grate. Fire bricks will work well in any grill that could improve on its insulation.

Drum/Barrel Grill

The overall cooking space in a drum/barrel grill is larger than that of a kettle grill. However, just like any metal material, there are different grades so quality can be variable. Same rule applies to these grills: if the insulation is not great, add fire brick to improve the performance.

Box Grills

These units are traditionally made of high heat metal with a deep, metal charcoal pan that includes grid and vents. A grilling grate is suspended above and there often is a lid to the unit.

Fire Set Up

As I’ve stressed before, a good fire needs 3 elements: fuel (wood, charcoal), oxygen (air intake vents), and heat. As with any fire cooking, a small, hot fire is ideal.

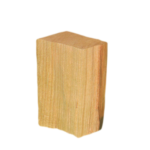
Our bark free Double Filet smoker wood chunk is the perfect size for the small kettle grill and box grills.

Double Filet Wood Chunk

To start your fire in one of these pieces of equipment, first open the air intake vents at the base of the charcoal firebox area. This will ensure that oxygen can stimulate the start of the fire. Since this is an enclosed firebox area, the size of the wood pieces may need to be adjusted from what you would commonly use in a fireplace or fire pit/fire ring.

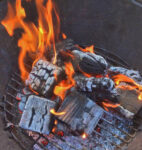
I like to use the log cabin method of starting a fire with this equipment. Lay 2 longer pieces of hardwood parallel to each other with about 3 inches of air space between them. Lay 2 more hardwood pieces on top perpendicular to the first pieces. Place the last 2 in position to match the base woods’ alignment. In the center, add a pile of tinder which can be hardwood chips, pine cones, even newspaper if need. Again, I like to use wood in its natural form as much as possible. Pile some kindling size wood pieces on top of the tinder pile. You can drizzle vegetable oil on top of the kindling and tinder to assist with ignition which proves helpful if you plan to light with a long wooden match. I prefer to lite my fire using a MAP torch.

Don’t Rush It

It is imperative that you allow the fire to go through the full stages of combustion before you introduce foods to the cooking grate. Too much flame and smoke will ruin the foods. The ideal is to wait until the fire burns down to glowing embers. If your equipment has the room in the firebox, rake or shovel some of the hot embers to one side and add just a small quantity of additional hardwood to keep the heat steady. The rest of the hot embers are what will be used to cook with.

Position the foods based on the heat needed for the cooking. Meats will require more of the heat while vegetables and one pot dishes will take the medium to low heat. An infrared thermometer will aide with knowing heat levels in your equipment or you can use the hand test: hold your hand over the coals the distance your foods will be. If you can only hold your hand for a count of 2 seconds before you need to pull it away, that is high heat. 3-4 seconds is medium-high, 5-6 seconds is medium and 7-8 seconds is low heat.

Be sure you visit Part I of this series so you can view the list of recommended tools to have when you wood-fire cook.

I hope you gained some new information on lighting a fire. Whether you plan to cook over/in your kettle, barrel or box grill. Leave us a comment and subscribe so you don’t miss anything concerning wood fired cooking, flavors, and the science behind the fire.

Purchase products:

Wood Chunks- Double & Single Filet

Wood Chips- Grande Sapore®

More Related reading on this subject

More Related reading on this subject

Related reading:

-OPEN PIT COOKING FIRE BUILDING: PART I

-EMBER FIRED FRESH ZUCCHINI

-BEYOND PRICING: THE TOP THINGS TO CONSIDER WHEN PURCHASING COOKING WOOD


Dr Smoke says "The key to any success in grilling and smoking outdoors is building the fire with the proper materials and patience to develop the right base before you attempt to cook the food."

Dr Smoke- “The key to any success in grilling and smoking outdoors is building the fire with the proper materials and patience to develop the right base before you attempt to cook the food.”

« Previous PageNext Page »