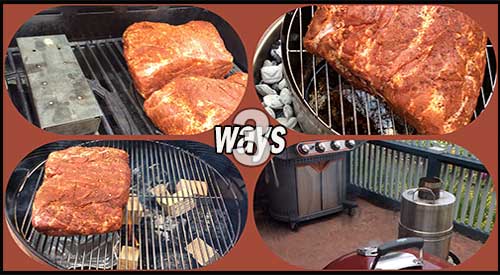
Our three ways of smoking Boston Butt offer great wood smoke flavor!

Our three ways of smoking Boston Butt offers great wood smoke flavor!

3 METHODS OF SMOKING BOSTON BUTT Share on X

Listen to the audio of this blog
This certainly is a clear example of how anyone can produce authentic barbecue on the equipment they have even if it’s not a traditional smoker.

3 Methods of Smoking Boston Butt-

It should come as no surprise that majority of grill owners invest in a gas grill for their outdoor cooking with over 80% of these owners investing in multiple accessories for that grill. Often, many of these grill owners will venture to make an additional purchase of a second type of grill like a charcoal or pellet grill/smoker, in order to be able to cook more barbecue or smoked food options.

My intent is to demonstrate to you that you can produce authentic flavors, colors, textures, and aromas of favorite barbecue proteins with a variety of equipment, all outfitted with hardwood for the authentic wood flavoring.

I’ll be taking Boston butt to a traditional gas grill, a kettle charcoal grill, and a convection-style grill to demonstrate just how easy it is to cook this popular animal protein while giving you a bit of education on how these units are different when hardwood is incorporated.

Set Up Similarities and Differences for Smoking Boston Butt

When it comes to setting up the grills for smoking, there are some obvious differences. First, let me name the equipment brands I’ve included and the intended set up of each for cooking and smoking the Boston Butt cuts, all of which approximate 8 lbs.
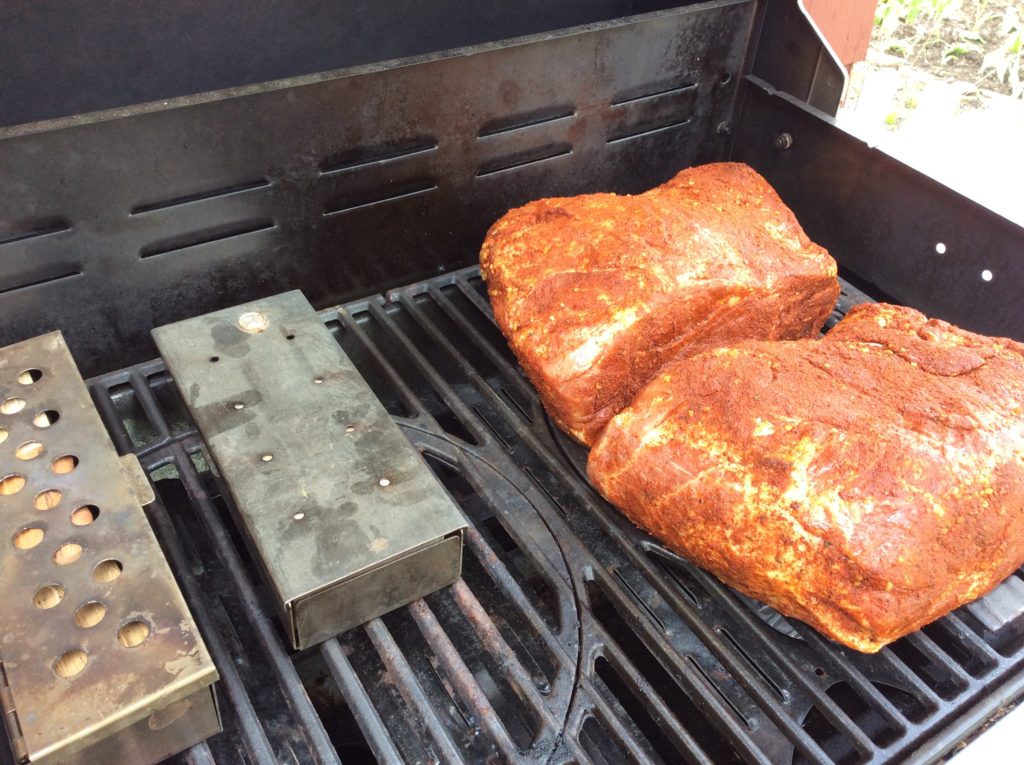
Our Boston Butt (s) on the Stok Gas Grill with accompanying Smoker boxes

The Stôk Quattro 4-Burner Grill:

If you are not familiar with this grill, it is equipped with an insert system to allow you to use a standard grilling grate, a griddle, grill basket, vegetable tray, pizza stone, Dutch oven, Wok, and other inserts that easily pop in and out of the cast iron grates. Despite this feature, you can do traditional smoking using wood chunks without the need for the smoker/infuser insert.

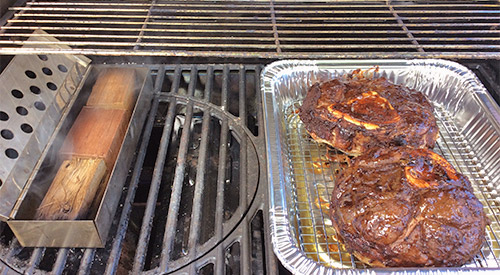
Whenever I smoke on a traditional gas grill, I always set up a two-zone cooking method. This means, on my 4-burner Stôk, I will ignite just two of the burners on one side. You can either place wood chunks directly on the heat shields of the unit or use a metal smoker box. My Boston butt will cook on the unlit side of the grill with a metal smoker box containing 3 wood chunks on the hot side. I’ve also included a second smoker box to make it easier to swap out the first when the wood becomes completed charred. My temperature is 225°F for the actual cooking.
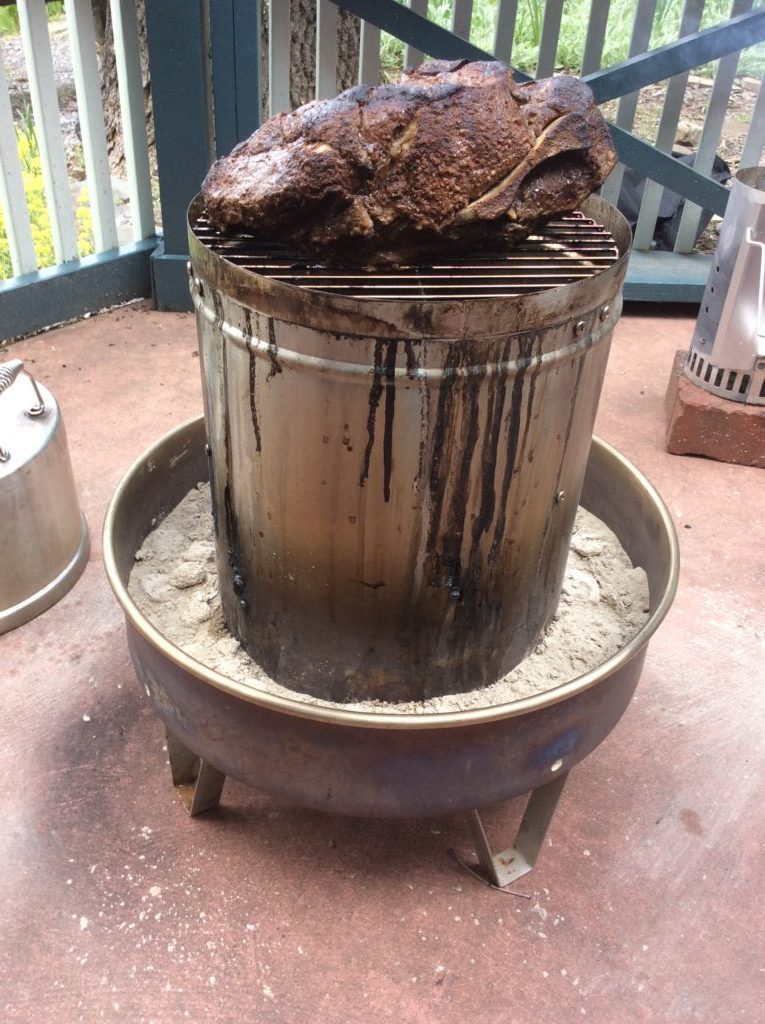
Our Boston Butt on the Orion Cooker with Minuto® wood chips in the inner ring

Orion Cooker:

This is an outdoor convection unit that uses briquets for the heat and Minuto® Wood Chips placed around the drip/water pan for the wood flavoring. This unit will be the fastest to cook the Boston Butt, with an anticipated timing of 4-1/2 hours total. This is a direct cooking method that uses the radiated heat of the stainless-steel body to trap and circulate the heat for faster cooking time.

There is no ability to replenish the wood chips with this unit due to the high heat level. About 15 lbs. of briquet and 4 ounces of Orion Custom Wood Chips is all that is needed to smoke, plus some water in the water/drip pan for a moist outcome.
Our Boston Butt on the Weber® kettle Grill with double filet wood chunks

Weber® Kettle 22” Charcoal Grill:

Likely one of the most popular charcoal grills, the Weber® kettle provides for the opportunity to cook with charcoal and hardwood. I’ll be setting up my grill using a two-zone method; charcoal/wood on half the fire area and the meat placed on the indirect side.

Due to the length of time Boston butt takes to cook, you likely will need to replenish the charcoal for maintenance of heat level. I prefer to maintain a temperature around 250° F.

For similarities: both the Weber® and the Stôk grill were set up with a two-zone cooking method. Both included use of the SmokinLicious® double filet wood chunk. The length of cooking time between the charcoal unit and the gas unit are very similar, taking close to 10 hours.

For differences: temperature maintenance is easier with the gas and convection units. The charcoal unit requires much more supervision to ensure that the fuel (charcoal) is replenished prior to the temperature of the grill decreasing significantly. You are also able to check on the meat’s coloring and evenness of cooking with the charcoal and gas units while the convection unit is generally left alone until closer to the recommended cooking times. Though you can check on the doneness of the meat at any point with the convection unit, generally there is no need to do anything but wait.

Regarding cooking variations, let’s discuss color, bark formation, moisture of the meat.

Barbecue By All Methods

With all four of the Boston Butt (s) prepared in the same manner – excess fat trimmed to ¼-inch or less, a dry rub applied on all sides, and marinated for 24 hours – this is a fair comparison of how each grilling and smoking method produces the barbecue results commonly looked for.

Bark:

Without question, bark or the outer crust that develops from exposure to a lower temperature, long cook time, and smoke vapor infusion was greatest on the Boston butt cooked on the Weber® Kettle 22” Charcoal Grill. The gas grill produces the least amount of bark which is dominate on the outer edges and top surface.

Color:

The darkest coloring to the bark and the most obvious smoke ring was on the meat cooked on the charcoal grill. The Orion Cooker produced a brown hue to the meat’s exterior while the meat cooked on the gas grill retained a red hue that was indicative of the dry rub color. Charcoal grills will produce a black hued coloring due to two combustible materials: charcoal or charred wood and hardwood.

Moisture:

The meat that produced the greatest amount of rendered juice was from the charcoal cooking method. Second, the convection grill method followed by the gas grill. However, the greatest internal moisture level was obtained from the indirect cooking method on the gas grill, followed by the charcoal method and lastly the convection method.

Final Notes:

What we’ve set out to accomplish with this multi cook segment is to prove that no matter what equipment you have, you can produce authentic flavor, aroma and texture to Boston butt. This can be invaluable for those times when you may not have a lot of time to supervise the smoker or grill but still want authentic barbecue. Or, when you must make a lot of meat meaning you must use all the equipment options you have available.
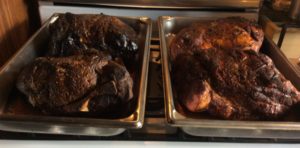
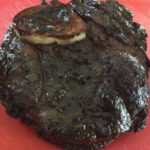
All four Boston Butt (s) one done on charcoal with the Weber, another in the Orion with wood chips and two on the gas grill with wood chunks- the coloring is not much different!

From a taste perspective, our sampling group indicated that the strongest smoked flavor was from the charcoal unit, followed by the convection grill and lastly, the gas grill. Keep this information in mind when you’re cooking for others, as boldness of the smoke flavor can be controlled not only by the amount of time exposed to the smoke vapor, but also with the equipment used for the cooking and the amount and type of hardwood used in the process.

This certainly is a clear example of how anyone can produce authentic barbecue on the equipment they have even if it’s not a traditional smoker.

Making you an informed consumer through valuable articles like this one. Leave us a comment and follow us or subscribe for more great recipes, techniques, tips, and the science behind the flavor. That’s SmokinLicious®.

SmokinLicious® Products used in these techniques:

Wood Chunks- Double & Single Filet

Wood Chips- Minuto®

More related reading on how Smokinlicious® reduces the risks of Microbial bacteria in our wood products
More related reading on smoking Boston Butt & other Grilling tips and technique see our directory on previous blogs!

More blogs you may enjoy:

-Charwood Grilled Salmon Fillets for a Hint of Smoky Flavor

-GRILLED LAMB

-GIVE ME THAT BEEF BRISKET!

-ROSEMARY INFUSED SMOKED BEEF SHANKS FROM THE GRILL

Dr. Smoke- We used three different methods for smoking Boston Butt! All turned out fabulous & tasty!
Dr. Smoke- We used three different methods for smoking Boston Butt! All turned out fabulous & tasty!

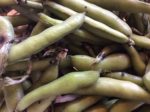
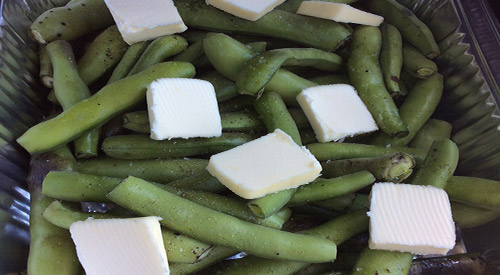
Fresh Fava Beans with Butter ready to become Grilled Fava Bean with a smoky flare!

Fresh Fava Beans with Butter ready to become Grilled Fava Bean with a smoky flare!

ODE TO GRILLED FAVA BEANS

listen to our blog


I love when the ideal weather comes around when at the same time there are so many options for fresh produce either at the Farmer’s Market or local grocery store. I tend to lean toward my grill and smoker for most of my cooking when the weather turns hot and steamy.

Beans are one of those vegetables that are spectacular on the grill but they get even better when you add a few wood chunks. I’ll show you how to prepare Fava Beans for the grill and give you my easy, fool-proof technique for incorporating wood chunks for flavor.

Grilled Fava Beans- The Grill Set Up

Before preparing the Fava beans, get the gas grill heated by turning on only half the grills’ burners which will be the side that radiates out the heat and holds the smoker box. For the smoker box, I’m using a stainless-steel model that has a hinged lid. I place 3 double filet wood chunks from SmokinLicious® in the box in a combination of woods. I’m using hickory, white oak and sugar maple to give me a great smoke balance to the beans. This will ensure I don’t overpower with the smoke vapor. By placing the smoker box with chunks on the grill grate as it preheats, it will be smoking by the time you have the beans ready.

Simple Bean Prep for Grilled Fava Beans

There is little to do with the Fava beans before they go on the grill. Wash them to start to make sure all the dirt and debris is removed. Pat dry with a paper towel and then move them to the cutting board. Remove any leaves and cut just the stem end to remove the stem. Place in a disposable foil pan, spread out evenly, and add roughly 6 tablespoons of butter to the beans, as well as salt and fresh ground pepper. That’s it. Leave the bean pods intact as they are going to act like a miniature steamer to cook the beans and ensure they don’t become over smoked.

The Grill Act

With the grill heated and the wood chunks smoking in the smoker box, place the pan of beans on the unlit side of the grill and close the cover. Check that your grill temperature steadies out at about 375°F. If lower, simply increase the heat setting on the active burners. Too high, decrease the heat setting. Leave the beans untouched for about 30 minutes. Return to the grill, stir the beans and check the wood chunks. If the chunks are still emitting smoke, close the grill lid and leave for an additional 10 minutes or so, or until fork tender. Remove the pan from the grill and allow to cool for about 10 minutes.

Grilled Fava Beans- Buttery, Smoky Finish

finished Fava beans with the smoky appearance to the outside podsAfter the beans have cooled enough to be handled, take each pod and push the beans out one end into a bowl. You may keep the empty pods to use for making broth or for puree in a sauce or smoothie. These Fava beans are now ready for you to enjoy as is or use in your favorite recipe. Now, I’m taking my Fava beans and making a dip with goat cheese, lemon and tarragon.


Purchase products:

Wood Chunks- Double Filet

More Related reading on "What Wood for Smoking" and other great smoking and grilling tips and techniques

More Related reading on “What Wood for Smoking” and other great smoking and grilling tips and techniques

Additional reading:

-STEPPING UP RADISH SALAD WITH A WOOD-FIRED FLARE

-WOOD GRILLING AVOCADO

-INFUSING WOOD SMOKE INTO BRUSSELS SPROUTS

You Can take your fresh Fava Beans and put them on the Grill with wood chunks to do a "Grilled Fava Beans" for your favorite dip or condiment!

You Can take your fresh Fava Beans and put them on the Grill with wood chunks to do a “Grilled Fava Beans” for your favorite dip or condiment!

Let's stop the dry smoked meats effect with our 9 easy steps!

Let’s stop the dry smoked meats effect with our 9 easy steps!

WHY IS MY BARBECUE MEAT DRY?? Share on X


Listen to the audio of this blog


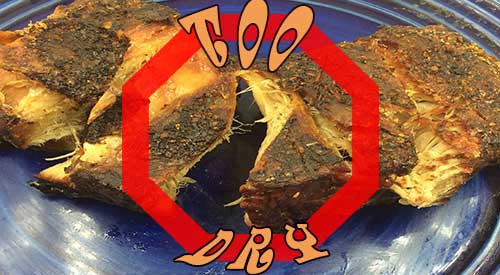
You thought you timed the meat perfectly on your smoker or grill. When it came time to cut it, all you found was a gray, dry former piece of meat staring back at you.

What went wrong?

Don’t fall into your old habits when it comes to outdoor cooking, whether you’re using a traditional wood or electric smoker, charcoal grill or gas grill. Learn some easy tips to keep your foods juicy and enticing this outdoor cooking season by preventing the unwanted occurrence of dry smoked meats.

(more…)

our food scale demonstrates Grande Sapore® and Double Filet wood chunks as a guide to adding wood flavoring with our Smokinlicious® products.

Our food scale demonstrates guidance on adding wood for food smoking.

One of the most common questions asked when it comes to smoking foods on a gas grill, traditional charcoal grill or smoker is, how much wood do I need? Likely the second most common question is where does the wood go? Share on X

Listen to the audio of this blog


Let’s break this down by equipment and method of smoking so you have a good place to start in answering the above questions.

(more…)

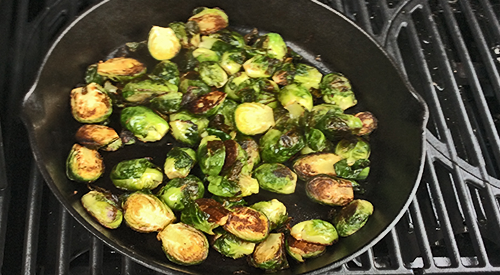
Showing how to infuse cherry wood smoke into brussels sprouts using an iron skillet on the gas grill is simple and easy and adds a smoky touch

Infusing cherry wood smoke into Brussels sprouts using the gas grill is simple and easy and adds a very flavorful touch to this hearty vegetable.

INFUSING WOOD SMOKE INTO BRUSSELS SPROUTS

Listen to the audio of this blog

A favorite of the cabbage family, Brussels sprouts came to the United States via French immigration in the 18th century. They are dominantly grown in California and available June thru January making them a Fall and holiday menu favorite. SmokinLicious® will take the flavors up a notch and add wood smoke into Brussels sprouts for two upcoming recipes. We’ll do this on the gas grill fit with wild cherry wood chunks to bring subtle smokiness to the finish sprouts. First purchase 3 lbs. of Brussels sprouts and get two cherry single filet chunks, and you’re ready to fire up the grill and get smoking.

The Easy Grill Method for Infusing Wood Smoke into Brussels Sprouts

Bringing the flavor of wood smoke into Brussels sprouts is so easy. To start, gather about 3 lbs. of Brussels sprouts, some cooking oil, butter, and a heavy-duty skillet. I prefer a nut oil like walnut or almond. For a skillet I’ll be using cast iron. I’ve trimmed the ends on about half the sprouts and for the other half, I’ve trimmed the ends and cut them in half. That’s it! Fire up the grill and get ready for a quick method of adding great wood-fired flavor.

It only takes a couple of pieces of wood chunk to bring fabulous flavor to the grill. I set up a cast iron pan on one side and place two cherry wood chunks on the heat shields of the far burner. Let the pan heat up for about 5 minutes then pour in a couple of tablespoons of oil and heat. Right before I add the Brussels sprouts, I add a couple of tablespoons of butter. In go the whole Brussels sprouts and the lid comes down. Leave untouched for about 5 minutes before turning.

Flavor Finish

As I have two recipes in mind I’m cooking two batches of Brussels sprouts: one batch whole and one batch halved. After leaving for 5 minutes, I stir them to ensure that all surfaces are infused with wood flavor. I maintain a temperature of 350-375° F which will make this a quick cooking method. The first 5 minutes, the lid is down but once stirred, you can finish the cooking with lid up. Remember, cast iron will retain heat, so you can turn the heat off and let sit for about 5 minutes.

The cooking time for this recipe is approximately 20 minutesAfter stirring a couple of times, both the whole and halved Brussels sprouts are ready in about 20 minutes time. I simply remove them from the heat and bring them in to be added to my favorite recipes.
I have two recipes I’ll be working on: Smoky Brussels Sprout Gratin and Tortellini with Lemon and Smoked Brussels Sprouts. These truly are the most flavorful Brussels sprouts! For those of you thinking about a holiday meal with them, well, the grill will give you that extra oven room you need. Take advantage of the long harvest season and try these mini cabbages on your grill. Check in for our recipes soon so we can get you started on how to use your prized sprouts.

Bringing you new methods of infusing wood fired flavor into seasonal items. Be sure to subscribe and follow us to gain great tips, techniques, recipes and the science behind the fire.

The Culinary Crew wants you to know…

 Chef Bert and Tom discuss how to infuse wood smoke into brussels sprouts.

#chefbertandtom

… that the direct infusion of hardwood-fired smoke to foods, like Brussels Sprouts, is considered a flavor ingredient, much in the same way that spices, minerals and sauces enhance taste. When fired, the components of smoke vapor carry the hardwood’s distinctive flavor profile directly into meats, seafood, fruits or vegetables with pleasing results to the palate.

SmokinLicious Products used in this recipe- wood smoke into brussels sprouts:

Our Single Filet is hand split to the proper size for larger equipment infusing wonderful wood smoke into brussels sprouts.

#singlefilet #woodchunks

Wood Chunks- Single Filet

More Related reading on this subject

More Related reading on this subject

Additional reading:

-WOOD GRILLING AVOCADO

-HOW TO TURN YOUR LP/GAS GRILL INTO A SMOKER

-WHAT’S IN THE SMOKINLICIOUS® WOOD CHUNK BOX?


Dr Smoke- "Soften the taste of your Brussels sprouts by adding smoke flavoring from your gas grill using Smokinlicious® cherry wood chunks."

Dr Smoke- “Soften the taste of your Brussels sprouts by adding smoke flavoring from your gas grill using Smokinlicious® cherry wood chunks.”

We ask the question why people grill and found the response much different than our expectation.

When you ask why people grill we found the answer very interesting!

Listen to the audio of this blog

You may not be aware that every year a trade show is held usually in the month of March that is dedicated to all things related to fireplace, stove, heater, barbecue, and outdoor living appliances and accessories. In addition to the trade show, this organization, known as HPBA or Hearth, Patio & Barbecue Association, conducts various surveys every couple of years. A recent survey was posted asking the question “Why do people grill?”

The top answer to this survey surprised and THRILLED me!

Why People Grill? – Most Recent Statistics

For North America, owning a grill is common. Currently, in the United States, 7 of 10 adults own a grill while in Canada that number increases to 8 of 10. Gas grills remain the most popular (64%) with charcoal units coming in second (44%). When looking at the most popular times of the year to use the grill, holidays, of course, dominate. Memorial Day and 4th of July are the clear winners for firing up the grill but Father’s Day remains a high demand grilling day as well likely due to this holiday falling right before true summer begins on the North American calendar. Of course, Labor Day is not far behind on the list.

This survey will be conducted again in 2019 with updated numbers likely available by the close of the year. I can’t wait to view them to see current trends.

Now to the question of “Why do people grill?”

Why People Grill? – It’s All About Flavor

The number one reason people stated for grilling is for flavor! This got me thinking about this answer.

What exactly made the flavor difference? Is it that the heat of the grill produced changes in the ingredients used? Was it the charring affect from direct fire of the grill which leads to a distinct taste? Or was it the flavor choices used when grilling with wood like wood chips, wood chunks, and charcoal?

I think without adding these follow up questions, it’s very hard to know just what the flavor enhancer is when grilling for these respondents.

For me, there is no question that it is the introduction of smoke to my outdoor cooking experience. Whether I’m cooking on a gas grill that I’ve included a smoker box of wood chunks, a charcoal grill equipped with hardwood charcoal or charwood plus wood chunks, an electric grill I’ve incorporate a micro wood chip product, or my outdoor fireplace that I’ve converted to an open pit fire using hardwood, I let the tantalizing smoke vapor work with the other ingredients of my foods to bring out the best of all the blended flavors.

Smokinlicous Charwood products.
#charwood

Direct fire or indirect cooking, either way the eating experience of foods cooked grilled, smoked, or by embers is unique and is likely the reason why people from around the world continue to seek out these methods of cooking.

Smokinlicious Double filet smoking wood chunks

So I agree with the 72% of North Americans who say they grill for flavor but I’d certainly add that I grill for flavor that is heightened by the addition of the natural plant material known as hardwood which takes my grilling to an umami level that’s hard to beat by any other cooking method.

What is your reason for grilling? Let us know in the comments and don’t forget to follow us on all platforms. Providing tips, techniques, recipes, and the science behind the flame and fire to improve your skills with wood-fired cooking! That’s SmokinLicious®!

SmokinLicious products in this blog:

Charwood

Wood Chunks- Double & Single Filet

Wood Chips- Grande Sapore®, Minuto®, & Piccolo®

More related reading on on Why people Grill see our smoking & Grilling tips and technique see our directory on previous blogs!

More blogs you might enjoy:

BOOST UP THE FLAVOR OF YOUR SMOKER BOX!

GRILLING & SMOKING QUESTIONS/ANSWERS THAT MAY SURPRISE YOU!

TEMPERATURE, MATERIAL AND TIME DETERMINE WHEN ITS CALLED BARBECUE

Dr. Smoke-
Dr. Smoke- The answer to Why people grill was a pleasant surprise to our Smokinlicious® products and the flavour they bring to BBQ foods!

Enjoyed this blog? Please spread the word

Grilling our Smoked Beef Shanks on the Gas grill with Double filet wood chunks in our smoker box!

Grilling our Smoked Beef Shanks on the Gas grill with Double filet wood chunks in our smoker box!

OVER THE TOP GRILLED & SMOKED BEEF SHANKS

listen to our blog


I’m going to make a confession. I rarely select steak to grill anymore. The reason – there are just too many other options that I simply prefer. Like beef riblets, short ribs, and shank. Oh, the bone-in shank! That is my favorite.

I’m going to give you a wet rub recipe and a grilling technique you can do on the grill of your choice, though I’ll be picking the easy gas grill. Get to the butcher and select some premium bone-in beef shanks then visit SmokinLicious® online for some wood chunks. Then get ready for the best grilled & smoked beef shanks you’ve ever had!

our wet rub mixture in the mortise ready for application

Smoked Beef Shanks- A Great Wet Rub

I tend to lean toward some Asian-inspired ingredients for my rubs, especially those that are a wet rub. While working on the rub, be sure you’ve started your grill so it will be ready to go when the meat is rubbed. Remember, we are using a two-zone set up for the grill so burners lit only on one side of the gas grill with the wood chunks placed on the heat shield or in a smoker box placed over the lit burners like I’ve done. Or, for the charcoal/wood grill, hot coals banked to one side of the grill.

For this wet rub, you’ll need equal parts of the following ingredients:

  • Ground ginger
  • Whole allspice – about 30
  • Garlic powder
  • Cinnamon
  • Cocoa powder
  • Sesame oil
  • Worcestershire sauce
  • Hoisin sauce
  • Honey

Start by combining the dry ingredients, followed by the wet and combine with mortar and pestle until a paste is made. Then coat the beef shanks on both sides and the edges with the wet rub. Our wet rub applied to raw beef shanks before the grillI line a disposable foil pan with a roasting rack, then place the shanks on the rack.
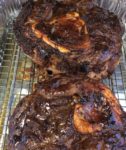


Tasting Notes: don’t be afraid to use a store-bought rub and simply add oil and/or garlic/spice pastes. There is nothing off limits when it comes to producing a rub.

Smoking

our cooked beef shanks

Time to open the pre-heated grill and start the cooking of the shanks. The wood chunks should be smoking well at this point so add the shank pan to the unlit side of the grill. Leave untouched for at least 40 minutes. Return to check the internal temperature. Flip the shanks and rotate the foil pan. Leave until the meat registers 140-145° F.

Tasting Notes: select the hardwood you like or use a combination of hardwoods like I did with my shanks – maple, hickory and white oak.

Smoked Beef Shanks- Serve ’em Up

When done, I simply slice against the grain for beautiful, flavorful beef that has a controlled infusion of smoke. Here’s a tip: be sure you enjoy the marrow in the bones! It is very rich so if you elect not to eat it when the meat is done, use it with onions and shallots to make a confit, or use it with a rich pasta dish to make the flavor of the richness even more stunning. Or, combine the marrow with an acidic dish like an arugula salad with lemon and capers. And don’t forget to save the bones to make our smoked beef broth. Two zone cooking makes it so easy to control the smoke infusion and produce perfection in any item grilled.

What’s your favorite beef cut to grill and smoke? Bringing innovation to wood-fired cooking with recipes, techniques and the science behind the fire, smoke, and flavor. That’s SmokinLicious®.

Purchase products:

Wood Chunks- Double and Single Filet

More Related reading on "What Wood for Smoking" and other great smoking and grilling tips and techniques

More Related reading on “What Wood for Smoking” and other great smoking and grilling tips and techniques

Additional reading:

-SMOKED BEEF SHORT RIBS

-WHY IS MY BARBECUE MEAT DRY??

-GIVE ME THAT BEEF BRISKET!

DR smoke OVER THE TOP GRILLED & SMOKED BEEF SHANKS ON THE GAS GRILL

DR smoke OVER THE TOP GRILLED & SMOKED BEEF SHANKS ON THE GAS GRILL

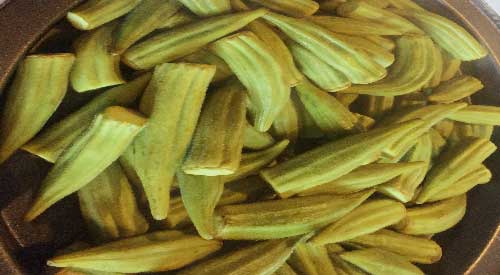
Our Fresh Okra ready and on the stove top smoker pan to become our Smoked Okra

Our Fresh Okra ready and on the stove top smoker pan to become our Smoked Okra

Smoked Okra- Veggies like a Smoky flavor Too! Share on X

Listen to the audio of this blog

It’s time to bring a smoky flavor to one of my favorite though limited in availability, vegetables – smoked okra! Known as a super healthy food but one that sometimes confuses people on how to cook and eat it, I’m going to bring you an easy method of tenderizing and infusing okra with a pleasant smoky flavor that doesn’t stimulate the sticky juice known to lurk inside.

Though I’m going to use a stove top smoker for my infusion, you can easily adapt this method to the gas grill, charcoal grill or electric smoker using a vegetable basket or tray. Seek out some vibrant green, firm okra and let’s get started on a new way to cook and flavor this healthy vegetable.

Smoker Set Up for Smoked Okra

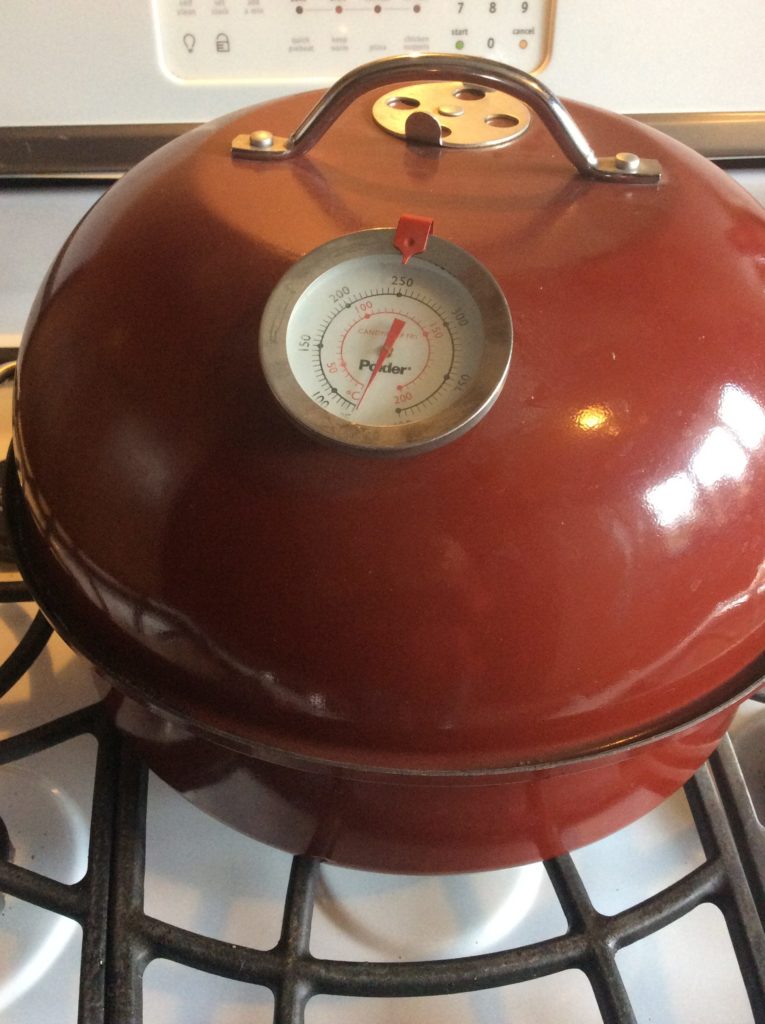
The nordic ware stove top smoker we used
#smokedokra

I’m using my Nordic Ware Stove Top Kettle Smoker for this hot smoking method. To start, I place the smoker base on the unlit burner and add about ¼ cup of Minuto® Wood Chips – I’m using a #6 in Sugar Maple – from SmokinLicious®. I place the drip pan on top of the wood chips and then ensure the food insert pan is clean and dry. For vegetables, I usually use a medium heat setting on my stove – I have a gas stove top. This will register between 200-250°F on the kettle smoker’s temperature gauge. Next, I’ll do a simple preparation to the okra and we’ll be ready to turn on the heat to the stove top unit.

Tasting Notes: For the charcoal grill set up, use a two-zone cooking method – charcoal and wood lit on one half of the grill while the vegetable tray or basket containing the okra will go on the unlit side of the grill. Do the same set up on the gas grill. For the electric smoker, be sure to use a lower heat setting – around 180°F.

Smoked Okra- Trim and Smoke

Nothing could be simpler than the preparation for okra. You’ll want to ensure that the outside is clean and dry so a simple water wash is good with a pat dry. I like to remove the stem top to allow penetration of the smoke vapor into the center of the pod.

our prepared fresh okra on the smoker pan
#okra

Place about one pound of fresh okra with the stem tops trimmed into the smoker’s food tray. Try making an even layer of pods so the smoke vapor can flavor the pods evenly. Cover the kettle smoker with the lid and turn the burner on to a medium setting. I use my stove’s vent on high to keep the aroma down somewhat.

Allow the okra pods to tenderize and smoke for about 20 minutes before checking. You just want them to be tender (not falling apart), to where a knife can still cut them into pieces. Once done, remove the pods to a bowl and use these in recipes calling for okra or you can serve as is with a favorite sauce.

(more…)