Open Pit cooking fire We built by using Smokinlicious ash wood to develop great coals for our ember cooking of Peppers

Build an open pit cooking fire for grilling and ember cooking! Is easier than you may think follow our steps below!

OPEN PIT COOKING- BUILDING THE PERFECT FIRE

SmokinLicious® receives a lot of questions about wood-fired cooking and one of the most repetitive concerns the building of the fire for cooking. We’ve developed this series to address how to build the fire by equipment and technique. For Part I, we cover the open pit cooking fire.

Get Organized- Open Pit Cooking

The first step is to know where you will build the fire. Are you planning on using an outdoor fireplace, a fire pit, or will you construct a temporary fire location?

When using an existing fireplace located outdoors, you must ensure that the firebox is clean of previous ash and wood. The same is true for a open pit cooking fire pit. If you will set up a temporary location for the fire, consider what you will use for materials to secure the area. It is never recommended to use your patio, paved driveway or lawn because a hot fire is sure to damage them or, at the very least, mar their appearance (thin charcoal black coating the surface). Using large stones, interlocking bricks, or a metal fire ring work great at securing the area to contain your fire.

Once you’ve decided on the location, you’ll need to collect some supplies to make the cooking safe and fun.

▪ material to contain the fire like stones, bricks or a cast iron/wrought iron ring. You can use an outdoor fireplace or open pit cooking fire pit whether permanent or portable

▪ water, shovel, dirt, and/or fire extinguisher to deal with potential fire spread or wayward embers

▪Smokinlicious® smoking wood chips for quick lighting

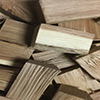
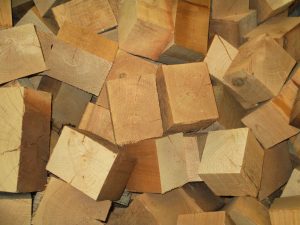
picture of Smokinlicious Double filet wood chunks make a perfect source for developing the perfect cooking firesmall twigs or small pieces of hardwood to create a tepee around the wood chips (we like our Smokinlicious® smoking double or single filet chunks)

▪ larger hardwood pieces to create a 2nd tepee around the first (Smokinlicious®1/4 cut logs work great for that)

▪ rolled newspaper or fire starters

▪ have additional hardwood for producing more coals for cooking as needed

▪ a coal rake, fireplace tongs for moving and relocating wood pieces, spray bottle of water to tame flames near food, instant read thermometer (you can also use a traditional wrought-iron log holder to make the fire – the hot coals will fall through and then you rake them to the cooking side)

The Perfect Fire for Open Pit Cooking

Always take note of the day’s temperature, wind conditions/direction, and conditions of your wood (dry or wet, fresh cut or aged) before you start. You want to be sure you set up and start the fire where the wind direction won’t cause smoke to enter house windows or the dining area. Keep those locations upwind.
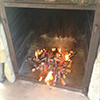
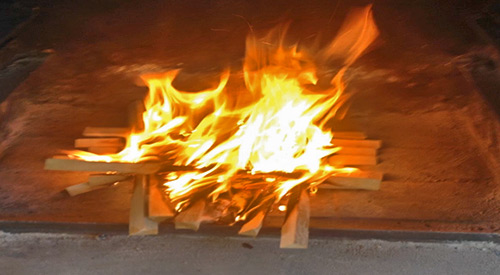
stack the wood into a teepee shape to maintain the flame and burning processIn your fire safe area, pile up a few handfuls of hardwood chips (you can use newspaper but I like to try to stay with wood in its natural state). Make a small tepee around the wood chips using small wood pieces (our single filet wood chunks work great) or twigs. Make a second tepee of larger wood pieces around the first one. You’ll see that you’re graduating from small wood pieces to larger as you build but you’re also ensuring good oxygen pockets to help feed the fire to the next level. This is what ensures even combustion and even coals. Now, light the wood chips at the center and allow everything to ignite. Don’t add any additional wood until you see the outside wood ablaze.

Fire for Fuel, Coals for Open Pit Cooking

The purpose of your shovel other than as protector of wayward fire, is to take those hot coals and move them to the cooking area. Remember, the fire area is not where you are going to cook. That location is nearby but not with the flames. You should never cook over direct flame as it will overcarbonize the foods and result in bitter tastes.

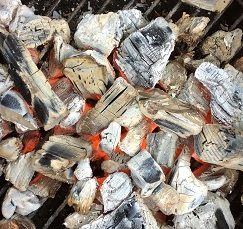
Ideally, you want to cook over coals that have a white colored ash over them. Now, here’s how to determine temperature of those coals: hold your hand over the coals the distance your foods will be. If you can only hold your hand for a count of 2 seconds before you need to pull it away, that is high heat. 3-4 seconds is medium-high, 5-6 seconds is medium and 7-8 seconds is low heat.

Bring on the Food!
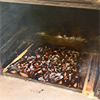
We have burnt down the ash single fillet into a bed of hot coals. Ash wood is a perfect coaling wood to useOnce your coals are at the perfect temperature for the foods you want to cook, it’s all about cooking! Remember, you can set up different heat areas to cook different foods. That’s what makes the experience with wood cooking, specifically with coals, so exhilarating.

We hope this article was full information you didn’t know. Leave us a comment and subscribe so you don’t miss anything concerning wood fired cooking, flavors, and the science behind the fire.

More Related reading on "What Wood for Smoking" and other great smoking and grilling tips and techniques

More Related reading on “What Wood for Smoking” and other great smoking and grilling tips and techniques

Interested in reading more? Try:

-Top 10 Vegetables to Cook in Hot Embers

-THE TOP 8 MISTAKES TO AVOID WHEN COOKING & GRILLING WITH WOOD

Purchase products:

Wood Chunks- Double and Single Filet

Wood Chips- Grande Sapore®

Smoker Logs

Dr Smoke- "Spending time on fire preparation for open pit cooking will enhance your cooking results."

Dr Smoke- “Spending time on fire preparation for open pit cooking will enhance your cooking results.”
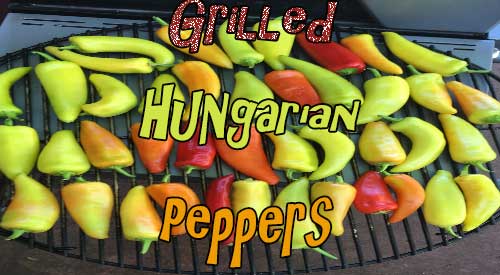
Smokey Hungarian Peppers on our kettle Grill!

Smokey Hungarian Peppers on our kettle Grill!

Let's Do Smokey Hungarian Peppers on the Kettle Grill! Share on X

Listen to the audio of this blog


I love growing Hungarian wax peppers in my garden and then harvesting for recipes and freezing for future recipes. Hungarian wax pepper come in different levels of heat depending on the variety chosen. Mine are a hot variety but work perfectly for mixing with other creamy flavors to produce some great condiments and sauces. I will introduce you to two versions of my Smoked Hungarian Pepper Spread in our recipe blog which will post soon.

(more…)

Our coals showing their hot glow and ready for direct wood ember cooking!

Our coals showing their hot glow and ready for direct wood ember cooking!

THE GLOW OF WOOD EMBER COOKING!

So what exactly is wood ember cooking and why is it suddenly gaining attention as a method of cooking? Well, first, it’s most certainly not a new cooking concept. Cooking over a fire and hot coals have been around for thousands of years. Recently, some Chefs and well-known restaurants have taken to returning to this method of cooking because they know where great flavor can come from and they know how to manage the heat from hot wood embers.

An ember is a glowing, hot coal made of greatly heated wood, coal or other carbon-based material that remain after a fire. The heat radiated from hot embers can be as hot as the fire which created them. You can see this first hand, by placing new wood pieces on hot embers and watching a full fire develop. An ember is usually formed when a fire has only partially burnt a piece of fuel and there is still usable chemical energy in that piece of fuel. It continues to stay hot and does not lose its thermal energy quickly because combustion is still happening at a low level. The small yellow, orange, and red lights are often seen among the embers are actually combustions. There just is not enough combustion happening at one time to create a flame. Once the embers are completely ‘burned through’, they are not carbon as is commonly believed (carbon burns, and is not normally left behind), but rather various other oxidized minerals like calcium and phosphorus. At that point, they are commonly called ashes. But why cook on the embers versus over a live fire? Because embers radiate a more constant form of heat, as opposed to an open fire which is constantly changing along with the heat it radiates (think water trapped within the wood and you’ll understand why there is heat fluctuation).

Ember cooking techniques include placing thickly skinned food items directly into the embers (i.e. garlic, onion, peppers, eggplant, steaks, etc.), placing a cast iron skillet into the embers that can hold any food items from vegetables, meats, poultry, fish – really anything. The results produced from this method are super moist, super flavorful, and the aromas are exceptional.

Peppers being cooked over wood embers

Sweet Peppers over direct wood ember cooking


Dr. Smoke- You don't need a flashy grill, a simple fireplace with enough room, just like Asado, you can do direct wood ember cooking.

Dr. Smoke- You don’t need a flashy grill, a simple fireplace with enough room, just like Asado, you can do direct wood ember cooking


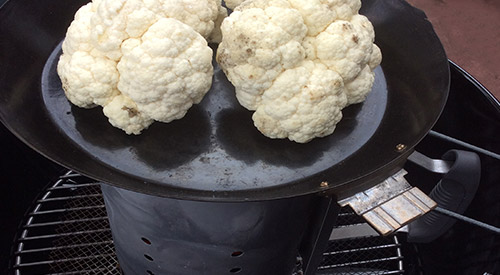
We are cooking on a chimney starter with a grill pan to nicely char our head of Cauliflower for this recipe!

We are cooking on a chimney starter with a grill pan to nicely char our head of Cauliflower for this recipe!

COAL FIRE CAULIFLOWER BY COOKING ON A CHIMNEY STARTER

listen to our blog

listen to our blog


A cousin to broccoli, #cauliflower is one of those vegetables that can be eaten raw or cooked and converted to so many different textures. Best yet, cauliflower is one of those super cancer-fighting foods as it contains sulforaphane known to kill cancer stem cells.

I’ll be taking my head of cauliflower and introducing it to hot coals, first, direct heat using a #chimneystarter for the actual cooking and then directly on the hot coals to give it the perfect “meat” char. No matter what color you enjoy – white, yellow, purple – grab a head and get your chimney starter ready, as I show you how to use a chimney starter as an actual grill.

Cooking on a Chimney Starter: Why a Chimney Starter?

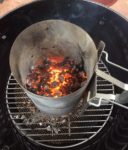
All our hot embers accumulated in the Chimney starter provides an excellent heat source for cooking

There are times when you really don’t need to fire up a full charcoal area of coals on the charcoal grill. I have the perfect solution when you’re doing just a small quantity of a food, like our head of cauliflower. Use your chimney starter

To start, I place a mesh screen on the charcoal grill grate to help retain the small, hot coals for cooking. I have a collection of micro charcoal pieces that work perfectly for this type of cooking.

After lighting a Firestarter, I place the charcoal filled chimney starter on top of the Firestarter and allow the coals to burn down to hot embers. Hot embers are what I will be using to cook my fresh cauliflower, first, directly on the chimney starter, then on the mesh screen once I dump the hot embers from the chimney starter.

(more…)

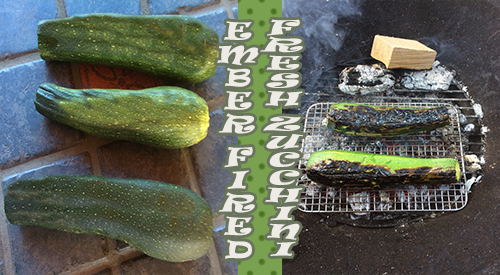
Zucchini is a great vegetable to not only grill but ember cook. It has the density to hold up over the high heat. Add a distinct char taste to this abundant vegetable either as a side dish or an ingredient by making ember fired fresh zucchini.

Zucchini is a great vegetable to not only grill but ember cook. It has the density to hold up over the high heat. Add a distinct char taste to this abundant vegetable either as a side dish or an ingredient by making ember fired fresh zucchini.

EMBER FIRED ZUCCHINI

How to cook your zucchini on hot coals.

Listen to the audio of this blog

I love thick-skinned vegetables that come in season during Summer. They are the perfect items to light a fire and make some hot coals to ember fire flavor into them.

We’re getting ready to coal roast one of my favorite vegetables – zucchini! This is so simple to do and produces an extraordinary flavor for zucchini to be eaten on its own or to be used in your favorite recipe. Clean out the fire pit, charcoal grill or outdoor fireplace and prepare to roastember fired fresh zucchini” directly on the hot coals.

Building A Small Fire

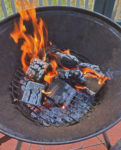
Starting the fire to burn down the wood into coalsKnow this from the start – You do not need a large fire! A small fire is best to accomplish your cooking in about an hour’s time. For my fire, I am using ten SmokinLicious Single Filet Wood Chunks in Ash with a couple of pieces of charwood that were left over from a previous cook. Why Ash hardwood? Because it is hands down, the best hardwood to produce an even bed of coals which is what you want when you coal roast.
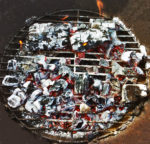
I stack the wood so there is quite a bit of air space between the pieces. This ensures I have good oxygen flow to produce combustion quickly. My technique is to stand the wood pieces on their end and make a circle. I try to have a couple of pieces in the center kind of tipped on to each other. Remember, you want to produce hot embers quickly so it only requires a little wood and a lot of oxygen to burn things down. I light my wood using a small butane torch. Leave the torch in place until I’m sure the wood has ignited. I keep the lid off my charcoal grill so I can push the combustion process through completion and get those ash covered, hot embers.

Red Means Hot

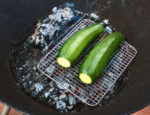
Red Hot coals is the goal before adding the zucchiniYou will know when the coals or embers are ready for cooking when you have uniform coals and they are glowing red from the bottom and gray on top. I keep a couple of larger coals banked to the side to maintain heat and for reserved hot coals. Just in case I need to rake more to the cooking side. I like to nestle a high heat metal cooking rack on the hot coals and then place my whole zucchini on the rack. This allows for little ash to accumulate on the skin. Remember, those coals are very hot so the zucchini will take less than 20 minutes to tenderize and char.
Turn For Full Char

Zucchini on the grilling rack over the hot fire coalsWith the zucchini and coal rack in place, I give the embers about 8 minutes to char and cook the first side of the zucchini. After that time, I gently turn the zucchini so that each side gets an even char. Once the first 8 minutes are done, there will be less time needed for each of the other sides as the zucchini will hold heat. I’ve added one additional wood piece to my banked fire just to be sure I have enough heat in the coal area. I will not put the lid on the unit during the entire cooking process as this is open fire cooking. My total coal cooking time is approximately 16 minutes.

Perfection In Smoke & Char on Ember Fired Fresh Zucchini

Dr. Smoke's clock for the cooking time requiredAfter placing my ember fired fresh zucchini on hot coals for about 16 minutes total, turning several times to get an even char, this spectacular vegetable is ready for eating. You will see, there is very little coal bed left following this technique so remember, if you are cooking more than a couple of zucchini, you will need a larger coal bed.
For those of you thinking that the black, charred skin will be bitter and not appealing to eat, think again. Most of the char will rub right off but the flavor will be infused throughout the ember fired fresh zucchini. I’ve sliced mine about ¼-inch thick as I plan to make a galette of ricotta, garlic oil, and basil.

The Culinary Crew wants you to know

… that ember roasting is ideal to boost up the bland, delicately flavored zucchini and will add a rich, wood-fired taste dimension to any dish featuring this exquisite summer squash. So, be prepared to enjoy a rich, char-smoked variation of your ratatouille, quesadillas, stuffed zucchini or soups from ember cooked zucchini!

Check in soon for our post on that recipe. Did you love this wood-fired technique? Leave a comment and subscribe as we continue to bring you new ideas, tips, techniques and recipes for all things wood-fired, smoked, and charred!

You may also enjoy reading:

-Top 10 Vegetables to Cook in Hot Embers

-EMBER FIRED ZUCCHINI & RICOTTA GALETTE

-SUCCULENT WOOD FIRED STUFFED TOMATO WITH HERB RICE

-Ember cooked Sweet Peppers

SmokinLicious® products:

Wood Chunks- Single Filet

Charwood

ember cooked vegetables can be done in a cask iron plan, fire box and even in a Hibachi! Try this unique cooking method to add a flare and unique tastes to your outdoor grilling and cooking!

ember cooked vegetables can be done in a cask iron plan, fire box and even in a Hibachi! Try this unique cooking method to add a flare and unique tastes to your outdoor grilling and cooking!

TOP 10 EMBER COOKED VEGETABLES

listen to our blog

listen to our blog regarding wood chips for smoking

I want to be perfectly clear – this is not cooking over hot flame or direct flame. This is cooking after the wood and/or charcoal has burned down in to very hot coals; when the coals develop a white-gray ash coating. THIS is the time for coal or hot ember cooked vegetables.

The Rules of Hot Ember and Ash Cooking

The essence of using all that the wood can give for cooking. That it was ember or coal cooking is. I want to be sure there is no misunderstanding on what is needed to do this type of cooking safely and effectively.

Rule #1: If going with all wood for the coals, only use hardwood and clean hardwood at that. You’re going to lay foods into this material so I believe it should be clean and mold free with moisture level 15-20%. If higher, it will simply take longer to get to the coal stage.

Rule #2: Again, if using all hardwood, try to limit the bark or go bark-free if possible to reduce the potential for mold spores that can be released into the air.

Rule #3: Have everything ready before you start. You’ll need an ash-coal hoe, fire gloves, and small coal shovel at the ready. I would also have tongs for those times when you don’t bury your foods completely in the coals but rather lay them which requires turning of the vegetables.

Rule #4: Equipment wise, you can use a charcoal grill that has fire brick added for insulation, a clean fireplace (I prefer an outdoor unit), a clean fire pit, or an open pit built in a safe area with brick or gravel as the base to protect the fire from spreading.

Ember Cooked Vegetables- Hot Embers Birthed in One Hour

On average, it will take about an hour to move a small fire from flame to hot ember. Depending on whether you elect to use charcoal or wood will determine the amount of time the fire needs to burn down – an all charcoal fire will be 30-45 minutes; all hardwood fire about 45-60 minutes. Remember, charcoal produces heat and little smoke, whereas hardwood, produces heat, smoke and specific aromatics and flavorings in that smoke. At the hot ember-coal level, both have equal carbonization and act similar for this method of cooking.

Using approximately 8 lbs. of charcoal or 10 lbs. of hardwood, or any combination of the two, light a fire in the equipment of your choice. Let the fire completely burn down until only hot coals remain. Rake the coals to produce a thick even bed. Then select your favorite vegetables from the ones listed below, and you’re on your way! Always keep a small fire going for additional hot coals if doing large amounts of vegetables.

Ember Cooked Vegetables- They Love Hot Coals

Here are the top 10 vegetables to hot ember cook for fantastic flavor:

Asparagus Broccoli Cauliflower Eggplant

Garlic Leeks Gourds (squash, pumpkin)

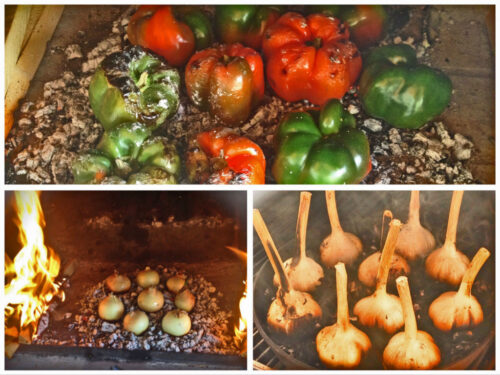
Onion Peppers Potato

If you want minimal monitoring to the actual cooking process, then place the selected vegetables into the bed of coals and then shovel hot coals and ash over the top so that the entire vegetable surface is covered in embers. Leave untouched until tenderized, which will be 45-60 minutes depending on the vegetable selected. Otherwise, you can set vegetables within the coal bed and turn them during the cooking process to ensure even char.

The Culinary Team wants you to know …

that cooking food with wood, whether it be directly on embers or more of the traditional way- above the heat source on grates, needn’t be an all meat, all protein cooking episode. As our blog explains many vegetables can and should be the “main event” for your wood-fired cooking events. Dense or thick-skinned fruits are great too! So, be it veggies or fruits, ember cooked or grilled conventionally, your taste buds will be treated to rich, unparalleled flavors. Give ‘em a try!

Leave a comment or suggestion as we’d love to hear from you so we can bring the information you’re looking for. And don’t forget, follow us and subscribe so you don’t miss a thing!­­

For related reading:

More Related reading on "What Wood for Smoking" and other great smoking and grilling tips and techniques

More Related reading on “What Wood for Smoking” and other great smoking and grilling tips and techniques

-THAT EMBER GLOW!

-EMBER FIRED ASPARAGUS ON THE HIBACHI

-EMBER COOKED SWEET PEPPERS

-EMBER COOKING/ROASTING GARLIC IN AN IRON SKILLET

SmokinLicious products in this blog:

Wood Chips- Grande Sapore®


Dr Smoke- "Try ember cooking; it is a great way to entertain your guests and enhance your grilling skills."ect treat!

Dr Smoke- “Try ember cooking; it is a great way to entertain your guests and enhance your grilling skills.”

Chef Calle's finesse technique of Grilling & Smoking Shallots on the charcoal grill using Charwood for the smoky wood flavor

Chef Calle’s finesse technique of Grilling & Smoking Shallots on the charcoal grill using Charwood for the smoky wood flavor

Grilling & Smoking Shallots with a Finesse Technique

By: Chef Calle, Resident Executive Chef

Image of Chef Calle


listen to our blog


For all my BBQ cooking friends who have been under the assumption that grilling is only for protein food groups, (beef, pork, fish etc.) boy do I have a taste revelation that could transform you into a disciple of the vegetable sections at local farmers marketsChar Grilled and Smoked Shallots!

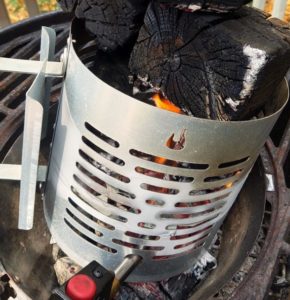
Using chimney starter to ignite charwoodProcess for Grilling & Smoking Shallots

The process is fairly straightforward but doesn’t get the impression that this food item is something that you can flop on the grill grate and walk away from for an extended period of time. Finesse is the cooking standard that must be applied to enjoy the maximum flavor result rendered from this sweet cousin of the onion family.

You can tell by my strong friendship with the folks at SmokinLicious®, that I’m a big advocate of grilling with a hardwood fire. It allows for uniform cooking temperatures while simultaneously infuses food items with a natural wood smoke flavor.

So, as we begin, go about preparing your grill with only the best hardwood cooking wood and remember- never, ever start your fire with a chemically based liquid starting fluid. Use a chimney starter!

While your grill preheats to a medium temperature, prepare the whole shallots by cutting off the tips and drizzling them with skins on using the high-quality EVOO and a touch of Kosher salt. You can even season with fresh thyme or sage and let marinate for a few minutes.

Grilling & Smoking Shallots- Technique

Grilled shallots are a great side dish or garnish to prepare alongside your protein or immediately after you have removed your meat to let it rest.

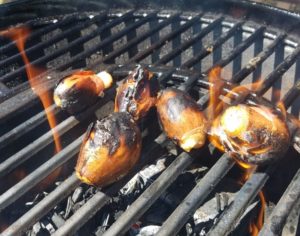
Charring shallots on grill grate

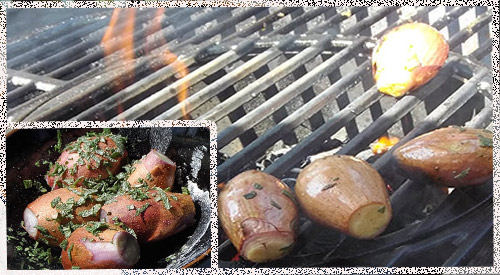
Place the shallots on the grate directly over the outer fringes of the embers, ideally between the smoking wood chips and outer ring of embers. Do not place them directly over the center most concentration of the embers. If you want a slightly stronger smoky flavor, cover. If not, leave uncovered.

Here’s where the finesse part comes in- over the next 3-10 minutes, (depending on the heat and size of the shallots) watch over the shallots like a hawk watches over hatchlings in a nest. Turn often, get a good char on all sides but, for Heaven’s sake – don’t allow them to ignite into a raging conflagration! If this happens, you will lose much of the smoky sweetness and be left with a bitter tasting, burnt onion. You can best determine a great finish when the outer skins are charred nicely while the centers have a soft, moist feel when gently squeezed with cooking tongs or fingers.

Remove from the grill, let them cool a bit. Once cooled for 2-5 minutes lightly squeeze the charred outer skin and out will come the sweet and delicious interior.

After you experience the fabulous smoky flavor of your grilled shallots, I’m sure you’ll have a greater appreciation for all the food flavor benefits that can be had from your backyard grill!

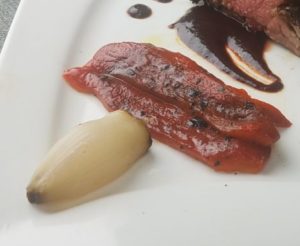
Finished dish with tasty grilled shallots

Purchase Products:

Wood Chips- Grande Sapore®

More Related reading on "What Wood for Smoking" and other great smoking and grilling tips and techniques

More Related reading on “What Wood for Smoking” and other great smoking and grilling tips and techniques

Related reading:

-Charwood Grilled Salmon Fillets for a Hint of Smoky Flavor

-TOP 10 VEGETABLES TO HOT EMBER COOK

-Roasted/Toasted Onions over Embers

http://www.foodnetwork.com


Dr. Thank you Chef Calle for your finesse technique for Grilling & Smoking Shallots on the charcoal grill

Dr. Thank you Chef Calle for your finesse technique for Grilling & Smoking Shallots on the charcoal grill


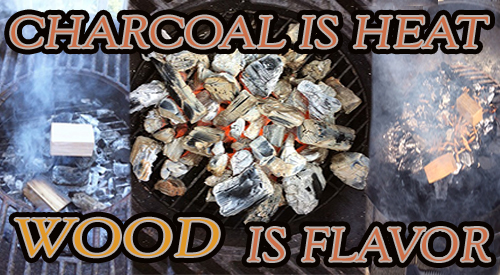
Charcoal that produces properly is a fuel and provides heat! Wood adds flavor!

Charcoal that is produce properly is a fuel and provides heat! Wood adds flavor!


To our blog kiwifruit gets smoky


WHY CHARCOAL IS NOT AN INGREDIENT

There are so many methods of getting a message out rapidly given the speed of technology and the many platforms for posting opinions and marketing strategies today. In doing research for a publication, I came across a statement made by a charcoal company that made me a bit … confused.

An Ingredient Not A Fuel

This company claimed that their product was an ingredient, not a fuel!

Not a fuel? That statement is in direct conflict to what charcoal manufacture was designed for – heat.

I realize that when used with 100% accuracy, charcoal will produce no smoke and a consistent heat. We all know that the 100% accuracy is the kicker – pretty much no one is proficient at producing full ignition of the charcoal with stable air intake to maintain the high heat level the product was designed for. What usually occurs is that we start out with full ignition but given the need for longer cooks, we add charcoal and thus, start to fluctuate the oxygen feed. Only during those fluctuations does the production of smoke occur with charcoal.

Non-Carbonized Wood IS Flavor

Charcoal production is the act of carbonizing wood which means all the volatiles of the wood is burned off until what is left is pure carbon or at least a high percentage of carbon. There is no refuting that it burns cleaner, hotter, and more evenly than wood only.

Here are where differences occur though when it comes to types of charcoal.

Lump charcoal is made from various scrap wood sources like furniture manufacture, a wood packaging manufacturer, the flooring manufacturer, and building material scraps. Due to the high level of variation in these pieces, most often there is not 100% carbonization of the lump charcoal production. That’s why you can get some smoke and flavor from that product; when combustion of a non-charred piece occurs, you’ll stimulate organic compounds that produce flavor. Keep in mind, because scrap wood is used you can get other debris in the purchased bag as often this is scooped up from a site and transferred to a production facility, with the scoop gathering anything that may be in the area.

Traditional charcoal manufacture also known as briquets is also made from scrap wood, sawdust and wood chip product. It is known that some manufacturers include a percentage of softwood but for the most part, the product is derived from hardwood. Briquets do have binders added and there are some types that have accelerants added to make them extremely quick to lite. Personally, I can detect those additives and feel they do change the overall flavor when cooking foods over them but you can make that determination for yourself.

Controlled flavor only comes from wood and the best and safest flavors, from hardwood. Charcoal is a fuel, it is for heat, and the only flavor it produces is when meat/poultry drippings fall directly on the hot coals and vaporize, stimulating flavors. Never are flavors stimulated from the briquet or charcoal.

So, Who Is The Ingredient?

If the definition of an ingredient is a substance that contributes or makes up a mixture, then truly hardwood, regardless if it cooking wood form is in chips, chunks, logs, dust or charwood, is an ingredient in wood-fired cooking recipes as it gives off its distinct organic flavor compounds that make up the cell structures. Heat is NOT an ingredient and that is what charcoal is: HEAT! A claim to be an ingredient just holds no truth.

Did you find this post informative? Leave a comment or suggestion as we’d love to hear from you so we can bring the information you’re looking for. And don’t forget, follow us and subscribe so you don’t miss a thing!

Other related reading:

related reading on this subject

related reading on our blog for smoking with wood.

HOW TO TURN YOUR CHARCOAL GRILL INTO A SMOKER

HOW TO USE CHARCOAL WITH WOOD IN COOKING

Products discussed in this Blog:

Wood Chips- Grande Sapore®

Wood Chunks- Single & Double Filet

Charwood

Dr. Smoke Charcoal needs to be supplemented by Smokinlicious wood products!

Dr. Smoke Charcoal needs to be supplemented by Smokinlicious wood products!

DON’T PUT CULINARY QUALITY WOOD LAST!

Case Notes: A restaurant is preparing to open in a new location and made the decision to invest in an Italian made pizza oven that has an option for wood-fired cooking. This equipment would take 6 months to manufacture and deliver to the USA, which gave the owners time to complete renovations on their new building in preparation for the free-standing oven’s installation. During that time, menu development and plating options were reviewed and decided upon.

The one planning need that was left to the last minute – locating the supplier for the cooking hardwood and determining appropriate sizing for the new equipment! WHY???

It always surprises me that restaurateurs are willing to spend $50,000 and up for commercial equipment that does a specific function or technique, yet they don’t spend the time before that purchase ensuring they can obtain the quality accessory needs to get every benefit from that investment.

Here’s the best part: often these equipment lines tote that they can do all sorts of functions including wood-fired cooking techniques. The truth – they aren’t really promoting that function of their equipment line! They simply want to sell you the equipment and have you use standard fuel options like electric and gas. How did I come to this conclusion? By the content of the user’s manual.

Many do not reference:

  • size of wood product needed for the equipment
  • how to light the product
  • how much of the product to use
  • where to locate a supplier of the cooking wood
  • pictorials of the steps to do the technique
  • provide a troubleshooting guide.

Do you really want to spend $50,000, $60,000, $100,000 and be left to fend for yourself with that investment?

Take the appropriate steps when considering additions to or replacements in your equipment line. Research not only the equipment but what is needed to do the smoke infusion technique with that equipment. Yes, wood chips are readily available even though there is a high level of variation between products. But other products are not so easy to find like wood pieces larger than wood chips but smaller than split firewood logs.

In addition, wood-fired techniques can also require additional “tools” to be available in the kitchen that may not have been standard inventory before.

Such things as:

  • fire retardant gloves
  • fire grade tools like long-handled tongs and a wood poker
  • a MAP canister/torch for lighting the fire
  • an infrared thermometer for reading temperatures within the cooking chamber
  • an ash receptacle.

Prioritize the needs of a wood-fired equipment addition by first reviewing the best option in equipment for your business’ need and second, assessing all the requirements of the wood to be successful in bringing this technique to your kitchen!


Dr. Smoke- only manufacturers Culinary Quality wood- Nothing else!!

Dr. Smoke- only manufacturers Culinary Quality wood- Nothing else!!


Follow us on Instagram, Twitter, Facebook, Pinterest, YouTube, Flipboard, Google+, Reddit, Medium, Blogger, BuzzFeed