The ways to use wood chunks on gas grill!

The ways to use wood chunks on gas grill!

Try wood chunks on gas grill for a natural taste! Share on X

Listen to the audio of this blog

This is the year! You made a promise to yourself, family and friends that this outdoor cooking season, you were going to bring more flavor to meals cooked on the grill by incorporating smoking wood and grilling wood. All you need to know is, what are the options for setting up the grill for this type of cooking without purchasing a smoker?


We have the answer and lots of options to utilize your existing equipment!

LP/Gas Grills of All Types

There is a great deal of variation in LP/Gas Grilling equipment in terms of grilling surface space, the number of burners, BTU rating, etc. Know up front, that this will play into how frequently you need to replenish grilling or smoking wood or even to monitor the foods being smoked on the grill. Essentially, these tips will work on any brand/model that you may own.

How To Add Wood Chunks on Gas Grill

Heat diffusers are commonly found on newer models of grills. They are made of high heat tolerant metal and cover the actual burners of the unit. Their purpose is to ensure even heat distribution throughout the grill so both radiant and conductive heat is maximized.

Wood Chunks On The Diffusers

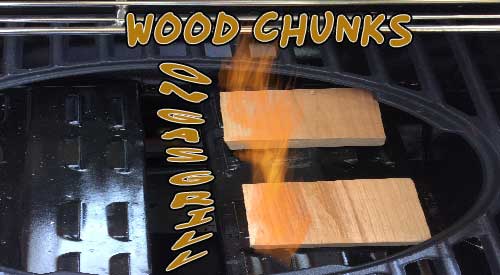
If you have a grill model that has heat diffusers (remember, they may go by other names like flavorizer bars, flame tamers, heat plates, burner shields, and heat distributors) then you’re ready to use smoking wood chunks on your unit! Yes, I said smoking chunks. This is by far the easiest method of getting the true smoke flavor to the foods being cooked. Plus, you can set up an indirect method of cooking using smoking chunks.

You will need 3-4 wood chunks sized to fit over your heat diffusers and under the grill grate when setting in place. A 2x2x3-inch size fits most units and these should have some measurable moisture level; at least 20% moisture is ideal meaning you won’t need to presoak the wood. If you have an old grill model before heat diffusers were standard, you can still use smoking wood chunks by placing them in a smoker box. These boxes will generally fit 3-4 chunks of the size referenced above but be sure to use a good quality box. My preference is cast iron. Insert the chunks into the smoker box and leave the lid off!

(more…)

our food scale demonstrates Grande Sapore® and Double Filet wood chunks as a guide to adding wood flavoring with our Smokinlicious® products.

Our food scale demonstrates guidance on adding wood for food smoking.

One of the most common questions asked when it comes to smoking foods on a gas grill, traditional charcoal grill or smoker is, how much wood do I need? Likely the second most common question is where does the wood go? Share on X

Listen to the audio of this blog


Let’s break this down by equipment and method of smoking so you have a good place to start in answering the above questions.

(more…)

Learn how to turn your charcoal grill into a smoker with the right hardwood chunks and chips!

Learn how to turn your charcoal grill into a smoker with the right hardwood chunks and chips!

LEARN HOW TO TURN YOUR CHARCOAL GRILL INTO A SMOKER Share on X

Listen to the audio of this blog

Let’s be honest. When you bought that charcoal grill you were likely thinking that you could both grill and smoke without needing to add anything. Soon, you realized, that just wasn’t the case. Now, you’re contemplating whether you need to purchase a smoker. Well, hold on the shopping trip until you read this. We can help you turn your charcoal grill into a smoker!

You can turn your charcoal grill into a smoker with these simple steps!

(more…)

We discuss the pros and cons of using aluminum foil for food smoking- in particular your BBQ and how it can affect the outcome.

We discuss the pros and cons of using aluminum foil for food smoking- in particular your BBQ and how it can affect the outcome.

USING ALUMINUM FOIL FOR FOOD SMOKING: PROS & CONS Share on X

Listen to the audio of this blog


“Does using aluminum foil for food smoking still allow the wood flavor to penetrate?”

(more…)

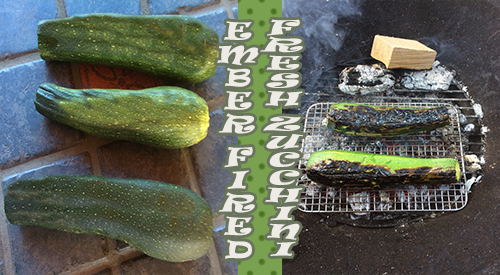
Zucchini is a great vegetable to not only grill but ember cook. It has the density to hold up over the high heat. Add a distinct char taste to this abundant vegetable either as a side dish or an ingredient by making ember fired fresh zucchini.

Zucchini is a great vegetable to not only grill but ember cook. It has the density to hold up over the high heat. Add a distinct char taste to this abundant vegetable either as a side dish or an ingredient by making ember fired fresh zucchini.

EMBER FIRED ZUCCHINI

How to cook your zucchini on hot coals.

Listen to the audio of this blog

I love thick-skinned vegetables that come in season during Summer. They are the perfect items to light a fire and make some hot coals to ember fire flavor into them.

We’re getting ready to coal roast one of my favorite vegetables – zucchini! This is so simple to do and produces an extraordinary flavor for zucchini to be eaten on its own or to be used in your favorite recipe. Clean out the fire pit, charcoal grill or outdoor fireplace and prepare to roastember fired fresh zucchini” directly on the hot coals.

Building A Small Fire

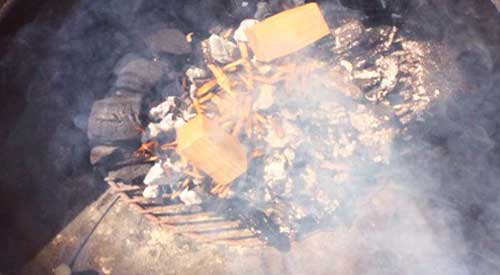
Starting the fire to burn down the wood into coalsKnow this from the start – You do not need a large fire! A small fire is best to accomplish your cooking in about an hour’s time. For my fire, I am using ten SmokinLicious Single Filet Wood Chunks in Ash with a couple of pieces of charwood that were left over from a previous cook. Why Ash hardwood? Because it is hands down, the best hardwood to produce an even bed of coals which is what you want when you coal roast.

I stack the wood so there is quite a bit of air space between the pieces. This ensures I have good oxygen flow to produce combustion quickly. My technique is to stand the wood pieces on their end and make a circle. I try to have a couple of pieces in the center kind of tipped on to each other. Remember, you want to produce hot embers quickly so it only requires a little wood and a lot of oxygen to burn things down. I light my wood using a small butane torch. Leave the torch in place until I’m sure the wood has ignited. I keep the lid off my charcoal grill so I can push the combustion process through completion and get those ash covered, hot embers.

Red Means Hot

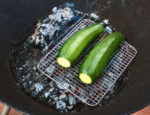
Red Hot coals is the goal before adding the zucchiniYou will know when the coals or embers are ready for cooking when you have uniform coals and they are glowing red from the bottom and gray on top. I keep a couple of larger coals banked to the side to maintain heat and for reserved hot coals. Just in case I need to rake more to the cooking side. I like to nestle a high heat metal cooking rack on the hot coals and then place my whole zucchini on the rack. This allows for little ash to accumulate on the skin. Remember, those coals are very hot so the zucchini will take less than 20 minutes to tenderize and char.

Turn For Full Char

Zucchini on the grilling rack over the hot fire coalsWith the zucchini and coal rack in place, I give the embers about 8 minutes to char and cook the first side of the zucchini. After that time, I gently turn the zucchini so that each side gets an even char. Once the first 8 minutes are done, there will be less time needed for each of the other sides as the zucchini will hold heat. I’ve added one additional wood piece to my banked fire just to be sure I have enough heat in the coal area. I will not put the lid on the unit during the entire cooking process as this is open fire cooking. My total coal cooking time is approximately 16 minutes.

Perfection In Smoke & Char on Ember Fired Fresh Zucchini

Dr. Smoke's clock for the cooking time requiredAfter placing my ember fired fresh zucchini on hot coals for about 16 minutes total, turning several times to get an even char, this spectacular vegetable is ready for eating. You will see, there is very little coal bed left following this technique so remember, if you are cooking more than a couple of zucchini, you will need a larger coal bed.

For those of you thinking that the black, charred skin will be bitter and not appealing to eat, think again. Most of the char will rub right off but the flavor will be infused throughout the ember fired fresh zucchini. I’ve sliced mine about ¼-inch thick as I plan to make a galette of ricotta, garlic oil, and basil.

The Culinary Crew wants you to know

… that ember roasting is ideal to boost up the bland, delicately flavored zucchini and will add a rich, wood-fired taste dimension to any dish featuring this exquisite summer squash. So, be prepared to enjoy a rich, char-smoked variation of your ratatouille, quesadillas, stuffed zucchini or soups from ember cooked zucchini!

Check in soon for our post on that recipe. Did you love this wood-fired technique? Leave a comment and subscribe as we continue to bring you new ideas, tips, techniques and recipes for all things wood-fired, smoked, and charred!

You may also enjoy reading:

-Top 10 Vegetables to Cook in Hot Embers

-EMBER FIRED ZUCCHINI & RICOTTA GALETTE

-SUCCULENT WOOD FIRED STUFFED TOMATO WITH HERB RICE

-Ember cooked Sweet Peppers

SmokinLicious® products:

Wood Chunks- Single Filet

Charwood

ember cooked vegetables can be done in a cask iron plan, fire box and even in a Hibachi! Try this unique cooking method to add a flare and unique tastes to your outdoor grilling and cooking!

ember cooked vegetables can be done in a cask iron plan, fire box and even in a Hibachi! Try this unique cooking method to add a flare and unique tastes to your outdoor grilling and cooking!

TOP 10 EMBER COOKED VEGETABLES

listen to our blog

listen to our blog regarding wood chips for smoking

I want to be perfectly clear – this is not cooking over hot flame or direct flame. This is cooking after the wood and/or charcoal has burned down in to very hot coals; when the coals develop a white-gray ash coating. THIS is the time for coal or hot ember cooked vegetables.

The Rules of Hot Ember and Ash Cooking

The essence of using all that the wood can give for cooking. That it was ember or coal cooking is. I want to be sure there is no misunderstanding on what is needed to do this type of cooking safely and effectively.

Rule #1: If going with all wood for the coals, only use hardwood and clean hardwood at that. You’re going to lay foods into this material so I believe it should be clean and mold free with moisture level 15-20%. If higher, it will simply take longer to get to the coal stage.

Rule #2: Again, if using all hardwood, try to limit the bark or go bark-free if possible to reduce the potential for mold spores that can be released into the air.

Rule #3: Have everything ready before you start. You’ll need an ash-coal hoe, fire gloves, and small coal shovel at the ready. I would also have tongs for those times when you don’t bury your foods completely in the coals but rather lay them which requires turning of the vegetables.

Rule #4: Equipment wise, you can use a charcoal grill that has fire brick added for insulation, a clean fireplace (I prefer an outdoor unit), a clean fire pit, or an open pit built in a safe area with brick or gravel as the base to protect the fire from spreading.

Ember Cooked Vegetables- Hot Embers Birthed in One Hour

On average, it will take about an hour to move a small fire from flame to hot ember. Depending on whether you elect to use charcoal or wood will determine the amount of time the fire needs to burn down – an all charcoal fire will be 30-45 minutes; all hardwood fire about 45-60 minutes. Remember, charcoal produces heat and little smoke, whereas hardwood, produces heat, smoke and specific aromatics and flavorings in that smoke. At the hot ember-coal level, both have equal carbonization and act similar for this method of cooking.

Using approximately 8 lbs. of charcoal or 10 lbs. of hardwood, or any combination of the two, light a fire in the equipment of your choice. Let the fire completely burn down until only hot coals remain. Rake the coals to produce a thick even bed. Then select your favorite vegetables from the ones listed below, and you’re on your way! Always keep a small fire going for additional hot coals if doing large amounts of vegetables.

Ember Cooked Vegetables- They Love Hot Coals

Here are the top 10 vegetables to hot ember cook for fantastic flavor:

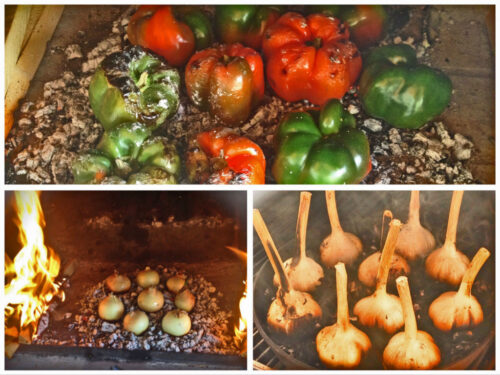
Asparagus Broccoli Cauliflower Eggplant

Garlic Leeks Gourds (squash, pumpkin)

Onion Peppers Potato

If you want minimal monitoring to the actual cooking process, then place the selected vegetables into the bed of coals and then shovel hot coals and ash over the top so that the entire vegetable surface is covered in embers. Leave untouched until tenderized, which will be 45-60 minutes depending on the vegetable selected. Otherwise, you can set vegetables within the coal bed and turn them during the cooking process to ensure even char.

The Culinary Team wants you to know …

that cooking food with wood, whether it be directly on embers or more of the traditional way- above the heat source on grates, needn’t be an all meat, all protein cooking episode. As our blog explains many vegetables can and should be the “main event” for your wood-fired cooking events. Dense or thick-skinned fruits are great too! So, be it veggies or fruits, ember cooked or grilled conventionally, your taste buds will be treated to rich, unparalleled flavors. Give ‘em a try!

Leave a comment or suggestion as we’d love to hear from you so we can bring the information you’re looking for. And don’t forget, follow us and subscribe so you don’t miss a thing!­­

For related reading:

More Related reading on "What Wood for Smoking" and other great smoking and grilling tips and techniques

More Related reading on “What Wood for Smoking” and other great smoking and grilling tips and techniques

-THAT EMBER GLOW!

-EMBER FIRED ASPARAGUS ON THE HIBACHI

-EMBER COOKED SWEET PEPPERS

-EMBER COOKING/ROASTING GARLIC IN AN IRON SKILLET

SmokinLicious products in this blog:

Wood Chips- Grande Sapore®


Dr Smoke- "Try ember cooking; it is a great way to entertain your guests and enhance your grilling skills."ect treat!

Dr Smoke- “Try ember cooking; it is a great way to entertain your guests and enhance your grilling skills.”

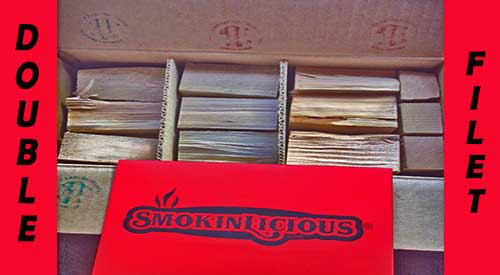
Our double filet box of pristine, NO BARK, hardwood wood chunk for smoking ready for the next customer!

Our double filet box of pristine, NO BARK, hardwood wood chunk for smoking ready for the next customer!

WHAT’S IN THE SMOKINLICIOUS® WOOD CHUNK FOR SMOKING BOX? Share on X

To our blog kiwifruit gets smoky

These two questions have been quite common for the 12+ years we’ve been in business. What does a cubic foot box of wood weigh? How many pieces do you estimate are in a cubic foot box of wood?

Due to the regulations imposed by The National Conference on Weights and Measures -Uniform Regulation for the Method of Sale of Commodities, we cannot specify weight on a wood product, even though we are a cooking wood. Instead, when asked about weight, we only provide an estimate clearly stating that wood is not sold by weight due to the variation in moisture level and density of the wood selected.

I can, however, tell you the details that a recent first-time customer posted to an online forum that had me elated!

The Specifics You’ve Asked About Wood Chunk for Smoking

This customer took a lot of time and effort to get to the details about our wood; the packaging and the weight not just of the carton, but of specific select pieces. This customer purchased the Serious Smoker Double Filet Wood Chunk which is our cubic foot carton product with the smallest chunk sizing. We offer an option to select up to 3 wood choices for this carton size, with this customer selecting our 3 most popular hardwoods: Hickory, Sugar Maple, and Wild Cherry.

First, let’s look at this customer’s overall purchase.

Wood Chunk for Smoking- It’s In The Numbers

The packaged hardwood weighed in a 32.5 lbs. A total of 139 pieces of wood were packaged. Of that total, 48 pieces were Wild Cherry, 44 pieces Sugar Maple, and 47 pieces Hickory.

Individual Weights

This customer owns equipment that references specific weight of wood needed to smoke optimally. In this case, just 2-4 ounces of wood is ideal.

Although weights for each of the 139 pieces of wood were not obtained, sufficient sampling was done. Here is what was reported:

  • the lowest weight of a Wild Cherry chunk (remember, these are all double filet) was 1.5 ounces and the highest was 4.1 ounces
  • lowest weight of a Sugar Maple chunk was 2 ounces and the highest at 5.7 ounces
  • lowest weight of a Hickory chunk was 2.8 ounces and the highest at 6.4 ounces

For this equipment user, there was an estimate that 139 pieces of hardwood would provide for some 100 smoking events!

What I loved the most about this report is that it correlates specifically to the density of these 3 hardwoods. Hickory has the highest density of the 3 kinds of wood selected and this is reflected by the weight of the individual pieces sampled. Sugar Maple would be next in density followed by the Wild Cherry, all proven with the reported weights.

What Did You Learn?

Unquestionably, there is a lot of wood chunk pieces in a cubic foot carton! Which means you want to ensure you can use that much wood in a reasonable amount of time to maximize the freshness factor and peak level for function as a smoking wood. Individual pieces will vary in weight even if the dimensions of the pieces are relatively the same. That is the nature of a water-rich material – the water weight influences the overall piece weight.

We are indebted to this customer for taking the time to inform us all of his findings since, by law, SmokinLicious® can’t offer this detail.

We hope you liked this post. We’d love to hear from you so subscribe, comment and follow us on all social media platforms. Keep those suggestions coming for the future information you crave.

More Related reading on "What Wood for Smoking" and other great smoking and grilling tips and techniques

More Related reading on “What Wood for Smoking” and other great smoking and grilling tips and techniques

Additional reading:

HOW MUCH WOOD TO ADD WHEN SMOKING

BOOST UP THE FLAVOR OF YOUR SMOKER BOX!

THE ART OF CUSTOMIZING YOUR COOKING EXPERIENCE

Our Products Discussed in this Blog:

Wood Chunks- Double Filet

Dr Smoke- "Thank you to this great customer for analyzing our box."

Dr. Smoke- “Thank you to this great customer for analyzing our box- wood chunk for smoking.”

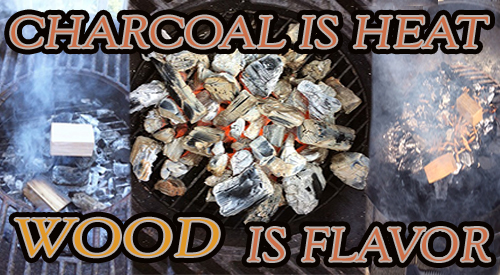
Charcoal that produces properly is a fuel and provides heat! Wood adds flavor!

Charcoal that is produce properly is a fuel and provides heat! Wood adds flavor!


To our blog kiwifruit gets smoky


WHY CHARCOAL IS NOT AN INGREDIENT

There are so many methods of getting a message out rapidly given the speed of technology and the many platforms for posting opinions and marketing strategies today. In doing research for a publication, I came across a statement made by a charcoal company that made me a bit … confused.

An Ingredient Not A Fuel

This company claimed that their product was an ingredient, not a fuel!

Not a fuel? That statement is in direct conflict to what charcoal manufacture was designed for – heat.

I realize that when used with 100% accuracy, charcoal will produce no smoke and a consistent heat. We all know that the 100% accuracy is the kicker – pretty much no one is proficient at producing full ignition of the charcoal with stable air intake to maintain the high heat level the product was designed for. What usually occurs is that we start out with full ignition but given the need for longer cooks, we add charcoal and thus, start to fluctuate the oxygen feed. Only during those fluctuations does the production of smoke occur with charcoal.

Non-Carbonized Wood IS Flavor

Charcoal production is the act of carbonizing wood which means all the volatiles of the wood is burned off until what is left is pure carbon or at least a high percentage of carbon. There is no refuting that it burns cleaner, hotter, and more evenly than wood only.

Here are where differences occur though when it comes to types of charcoal.

Lump charcoal is made from various scrap wood sources like furniture manufacture, a wood packaging manufacturer, the flooring manufacturer, and building material scraps. Due to the high level of variation in these pieces, most often there is not 100% carbonization of the lump charcoal production. That’s why you can get some smoke and flavor from that product; when combustion of a non-charred piece occurs, you’ll stimulate organic compounds that produce flavor. Keep in mind, because scrap wood is used you can get other debris in the purchased bag as often this is scooped up from a site and transferred to a production facility, with the scoop gathering anything that may be in the area.

Traditional charcoal manufacture also known as briquets is also made from scrap wood, sawdust and wood chip product. It is known that some manufacturers include a percentage of softwood but for the most part, the product is derived from hardwood. Briquets do have binders added and there are some types that have accelerants added to make them extremely quick to lite. Personally, I can detect those additives and feel they do change the overall flavor when cooking foods over them but you can make that determination for yourself.

Controlled flavor only comes from wood and the best and safest flavors, from hardwood. Charcoal is a fuel, it is for heat, and the only flavor it produces is when meat/poultry drippings fall directly on the hot coals and vaporize, stimulating flavors. Never are flavors stimulated from the briquet or charcoal.

So, Who Is The Ingredient?

If the definition of an ingredient is a substance that contributes or makes up a mixture, then truly hardwood, regardless if it cooking wood form is in chips, chunks, logs, dust or charwood, is an ingredient in wood-fired cooking recipes as it gives off its distinct organic flavor compounds that make up the cell structures. Heat is NOT an ingredient and that is what charcoal is: HEAT! A claim to be an ingredient just holds no truth.

Did you find this post informative? Leave a comment or suggestion as we’d love to hear from you so we can bring the information you’re looking for. And don’t forget, follow us and subscribe so you don’t miss a thing!

Other related reading:

related reading on this subject

related reading on our blog for smoking with wood.

HOW TO TURN YOUR CHARCOAL GRILL INTO A SMOKER

HOW TO USE CHARCOAL WITH WOOD IN COOKING

Products discussed in this Blog:

Wood Chips- Grande Sapore®

Wood Chunks- Single & Double Filet

Charwood

Dr. Smoke Charcoal needs to be supplemented by Smokinlicious wood products!

Dr. Smoke Charcoal needs to be supplemented by Smokinlicious wood products!

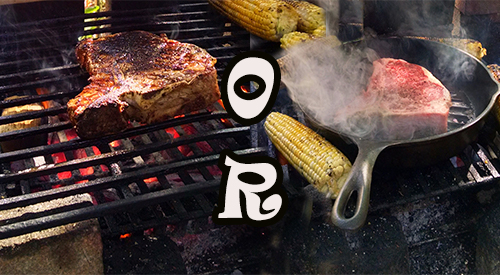
Cooking steak on the grill or in the grill pan is a universal question. Read more below to understand some of the techniques for cooking the perfect steak.

Cooking steak on the grill or in the grill pan is a universal question. Read more below to understand some of the techniques for cooking the perfect steak.

A GUIDE FOR COOKING THE PERFECT STEAK

Being able to successfully cook a steak is a skill that most people aspire to have. Pay attention to these details and you’ll see that it’s not that difficult to pull off.

To begin, you need to understand the basics of the different cuts of beef and how to choose the right one. From there, we’ll get into how to cook it to your desired level of doneness.

Choosing a Steak

Examining the butcher shop cases can be overwhelming. There are so many different cuts available—big steaks, skinny steaks, huge roasts, small roasts, and more. If your goal is to cook a good steak at home, I recommend sticking with the rib-eye, T-bone, New York strip, or Filet Mignon. These are the most expensive cuts, but in steaks, you get what you pay for and these are the most tender when grilled or pan-fried. The differences in tenderness come from the cow having stability muscles (think the lower back), which are less powerful and thus tender, and load-bearing muscles, which are tough. Price is directly correlated to these qualities. A tender steak will cost a lot more than a tough steak (though with the right treatment, you can successfully turn a tough cut like brisket into a tender, flavorful meal).

If the sheer volume of beef cuts still overwhelms you, check out our easy-to-read guide to steaks and their tenderness, price, and ideal preparation.

The seasoning requirements differ based on the cut. A tougher steak requires more seasoning because your eating experience is mostly about tasting the seasoning, rather than enjoying the tenderness of the cut. For example, you can get away with simple salt and pepper on a perfectly cooked filet mignon, while a flank steak used for fajitas should have some sort of spicy rub all over.

Tips for Cooking the Perfect Steak

So, you’ve purchased steaks that fall on the tender side and you’re ready to cook them. First, let them rest at room temperature for about 30 minutes to take the chill off. This results in more even cooking. Pro tip: If you are cooking for someone who likes a well-done steak and you like yours rare, leave yours in the fridge until the absolute last minute; your steak will cook less than your guest’s in a similar amount of time.

If you’ll be cooking on the stovetop, a cast iron or stainless-steel pan will work best. Nonstick coating can’t handle the high heat required for cooking a steak. Before you place the skillet over high heat, lightly season the steaks with a mild rub or just salt and pepper. While the skillet is warming, pour in a few tablespoons of peanut, canola, or other high-smoke-point oil. When the oil is shimmering and the pan is hot, place the steaks in the pan and loosely cover it with foil to prevent oil from splattering. Now is also the time to turn on any kitchen fans, as this will generate some smoke. If your steak is less than 1 inch thick, you can plan on cooking it in the pan the entire time. If your steak is thicker than an inch, do the searing on the stovetop and then move the entire pan to a preheated, 400-degree oven to finish cooking it without overly charring it.

When the steak hits the hot pan, start your timer. In general, 2 to 5 minutes per side is sufficient for medium doneness on a hot skillet. This range is flexible because, among other variables, everyone’s heat is slightly different, as is the steak’s starting temperature (depending, for example, on when you pull it from the fridge). For a thickness of an inch or less, I like to sear for about 3 minutes on each side, after which you should let it rest. If you have a thicker steak, you would put it in the preheated oven after the two 3-minute turns and let it cook for another 2 to 5 minutes until you achieve the desired doneness.

When you are finished cooking the steak, add a tablespoon of salted butter on top and a fresh herb – thyme works well – to get that expensive steakhouse-style flavor pop.

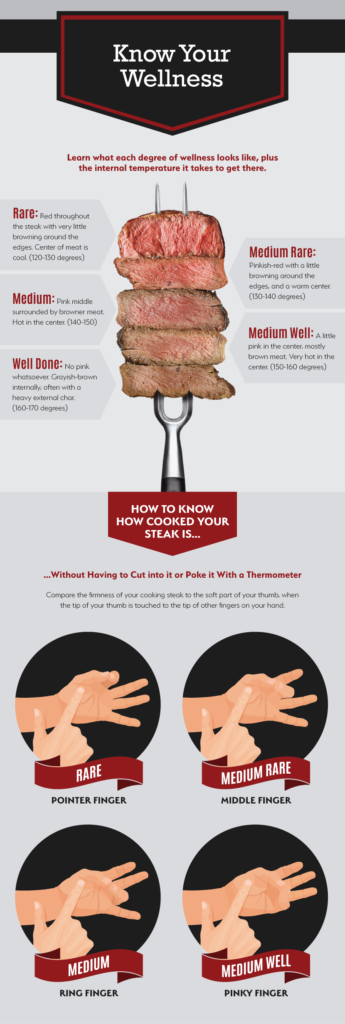
You have two methods for determining doneness. One is to use an accurate digital cooking thermometer. If you are aiming for a rare steak, you’ll need to pull it off the heat when the internal temperature is between 120 and 130 degrees F. On the opposite end of the spectrum, if you want a well-done steak, you should pull it off the heat when the internal temperature is between 160 and 170 degrees. The illustration below shows varying levels of doneness. The steaks will continue to cook slightly while resting, so take that into account as well.

Is this all a bit much to remember? Bookmark our illustrated guide to steak doneness and keep those temperatures in mind next time you’re trying to achieve the perfect level of doneness.

Don’t have a fancy digital cooking thermometer? No problem—you can use your hand! By positioning your thumb and fingers in various ways, you can mimic what a steak should feel like at various levels of doneness. The tenderness of a steak will roughly correlate to the feeling of the thick part of your palm, below the thumb, when your thumb sequentially touches the index, middle, ring, and pinky finger. Touch that part of your hand with the index finger of your other hand while moving your fingers from index to pinky, and you’ll feel that part of your palm getting firmer. If this seems daunting at first, simply use both methods. Get used to using a thermometer and at the same time touch the steak and see what it feels like. Don’t understand what we mean? Check out this guide to using your fingers to check a steak for doneness.

Is this all a bit much to remember? Bookmark our illustrated guide to steak doneness and keep those temperatures in mind next time you’re trying to achieve the perfect level of doneness. Also practice touching the meat, as we show below, and learn to feel your way to the perfect steak using your touch and chef’s intuition.
Grilling Tips for Cooking the Perfect Steak

Would you rather cook your steaks on the grill? You can easily apply most of the above methods to a hot grill, cooking the steaks directly on the grate. The same searing times apply, and if you have a steak that is thicker than 1 inch, simply finish cooking it over indirect heat (so in an area with no charcoal or with the gas burner turned off). You should get the same great results, but with the added bonus of grilled, smoky flavor.

To sum up, successfully preparing a steak is all about cut selection and cooking time. If you stick with a tender cut of beef and cook on high heat, then you can confidently start with the 2 to 5 minutes of sear time on each side and then finish it off in the oven.

Remember to hit it with a little bit of butter and a fresh herb, and you’ll find that you can easily prepare a fancy steakhouse-quality dinner at home.


Author: John Thomas

Source: eReplacementParts Blog


Dr. Smoke- hope you enjoyed our guest blog on cooking the perfect steak!
Dr. Smoke- hope you enjoyed our guest blog on cooking the perfect steak!


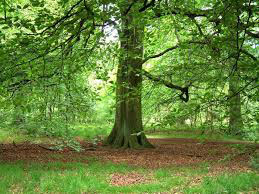
The grand ole tree beech hardwood adds a very European flavor to smoked foods, especially sausage style products.

The grand ole tree beech hardwood adds a very European flavor to smoked foods, especially sausage style products.

Listen to the audio of this blog

With 10-13 Beech varieties available throughout the world, this is a hardwood tree that can age to some 300 years. Visually, they are quite impressive often with distinct “root feet” and gray, smooth bark. The scientific name is Fagus Grandifolia but in North America, we know this as American Beech.

(more…)