TOP 10 TIPS FOR GRILLING SAFETY

Listen to the audio of this blog

We all love the time of year when we can abandon the indoor kitchen and head out to the grill for open air breathing, relaxing, and some great food. For those of you who are new to outdoor grilling or who may need a refresher, we are giving you our top TIPS FOR GRILLING SAFETY so there’s no chance your summer grilling season is remembered for another reason.

Tip #1

You probably wondered why about 15 years ago, outdoor kitchens became all the rage. The real purpose in having an area designated for outdoor cooking took hold when people realized these structures were highly durable and allowed for measures to be in place to ensure rogue hot coals from charcoal fires or excessive heat from gas grills didn’t ignite the surrounding structures like the house and garage. If you can’t afford a full outdoor kitchen layout, at least follow some of the basic ideas: set the cooking area a distance away from any building and preferably on a fire-proof surface like concrete, that is safely away from trees and grass.

Tip #2

Keep your grill clean. Whether it’s propane, natural gas, electric or charcoal, all grills need periodic cleaning to keep them performing optimally as well as to prevent those surprise grease fires. Any grill can have a grease fire! Clean the drip pan, grease pan, lid, walls and grilling grates. In addition to the safety need, this will give you the longest life out of the grills parts. If you grill a lot in a single season, then clean the equipment more than just at the start and end of the season.

Tip #3

Don’t use lighter fluid. This is a chemical designed to give quick life to briquets, charcoal, and wood. Don’t use it! It adds a prominent chemical taste to your foods and can result in a fire that goes wild. Learn what a chimney starter is, buy one, and use it. It is the safest and easiest method of lighting a fire for a charcoal/wood grill.

Tip #4

Take note of the clothing you choose to wear when you know you’re going to be in control of the grill. No dangling sleeves, strings, or flammable materials should be near the grill. Aprons are a great way to keep clean as well as to keep flowing clothing under control. Just be sure the ties to said apron don’t become a fire starter.

Tip #5

Outdoor cooking is an adult activity. Don’t assign a youngster to watch the grill. Grease fires account for most of the damaging fires resulting from grilling. Plus, it is so easy for youngsters to receive burns from brushing or directly touching the hot grill surfaces. Animals, too, should be kept away.

Tip #6

Always prepare for catastrophic events! That means keep a fire extinguisher handy, sand, or baking soda at the ready. Never attempt to put out a grease fire with water. Remember, when using a fire extinguisher, spray ahead of the fire and then move toward it.

Tip #7

Understand how your grill works. With multi-fuel options in one piece of equipment, you need to know how to close vents, valves to gas, and output drafts. Firing up the grill and having something uncontrollable occur is not the time to learn what those knobs, slides, and dials are for.

Tip #8

If nuts, bolts, or screws loosen up, take the time to secure them back in place, especially if they are on lids, wheels, or fuel areas. Grills need to be sturdy to withstand the constant opening and closing of the lid. Protect the surface the grill is on by investing in a grill mat that is fire retardant. Not only can it prevent the start of a fire, but it will protect your deck or patio material from needing replacement.

Tip #9

When lighting a gas grill, be sure to keep the lid open. Lighting when the lid is down can result in the gas pooling and exploding. This will result in the lid becoming a weapon of its own when it is blown off the grill!

Tip #10

Never move a grill indoors including to a garage! I know. Space is always an issue when you entertain and a grill can take a lot of that valuable space. But there is no way around the fact that these pieces of equipment require outdoor air to prevent accumulation of volatile gases that can make you and everyone around ill or worse. Plus, these units radiate a lot of heat and that heat can spread quickly to other surfaces like the garage door, walls, siding, canopies, lawn chairs – you name it. Always maintain a 3- foot barrier around the grill including above it to ensure no issues.

Have you experienced a disaster while grilling? Tell us what safety tip you wish you had known about before disaster struck. Get tips, techniques, recipes, and the science behind the flame and fire to improve your skills with wood-fired cooking! Follow our TIPS FOR GRILLING SAFETY for a wonderful safe grilling season!

Purchase products:

Wood Chunks- Double & Single Filet

Wood Chips- Grande Sapore®, Minuto®, Piccolo®

More Related reading on this subject

More Related reading on this subject

Additional reading:

-6 TIPS FOR A HEALTHY OUTDOOR COOKING SEASON

-WHY WON’T MY WOOD CHIPS SMOKE??

-WHAT WOOD TO USE FOR SMOKING: A PRIMER

-HOW MUCH WOOD TO ADD WHEN SMOKING


The top Ten TIPS FOR GRILLING SAFETY we hope will make your grilling season safe and tasteful!

The top Ten TIPS FOR GRILLING SAFETY we hope will make your grilling season safe and tasteful!

Electric Smoker Guy is our guest blogger discussion how to select the best electric smoker

Electric Smoker Guy is our guest blogger

Electric-Smoker Guy Guest blogger

HOW TO CHOOSE THE BEST ELECTRIC SMOKER

Summary:

Tips from the Electric-Smoker Guy about electric smokers, reviews and how to choose the best unit. Read this and his blog to guide you in looking for a good quality smoker, purchasing electric smokers, analog smokers or digital smokers!

Listen to the audio of this blog


You don’t have to be an expert to prepare a perfectly smoked meat if you have the best electric-smoker by your side. Now, you have to be aware that you can’t just come into the store and ask for the best electric-smoker because that doesn’t exist.

The best unit for me and for you doesn’t have to be the same model and that is why it is important to know what to look for. You don’t have to be modest, there are many electric units on the market which means that you can adjust almost every part of the smoker to your needs.

If you don’t know where to start, let me guide you through the process of picking one for you.

#1 Choose the Capacity of an “Electric-Smoker”

The size of the smoker is the most important feature you can adjust because there is no need for buying a big electric smoker if you are smoking only for your family. If you want to smoke for your family and friends, go with the medium smoker and if you want to smoke for a large group of people, then I would suggest you take a look at the commercial-grade electric models.

#2 Choose the Place for Your “Electric-Smoker”

An electric smoker has to be outside and you can’t smoke in the kitchen if you don’t have a special ventilation, which most homes don’t. Choose a place for it and see if it can stay there all the time. That place should be protected from the wind, the rain and under a roof. If you don’t have that place, buy a smoker with wheels so you can take it out of the garage to smoke it and store it again when you are done.

#3 Choose the Features for Your “Electric-Smoker”

schematic of an electric smoker

If this is your first smoker, choose the one that has a window on the doors so you can see the smoking process. That is very important, especially for rookies who aren’t sure what smoking does to the meat and how long it takes for the meat to be done. If you are constantly opening the door of the smoker you will lose smoke and the heat. That will prolongate the smoking process a lot. The window on the door should be from tempered glass to withstand the heat and it mustn’t be easy to break.

#4 Choose the Controller

The electric smoker can be analog and digital. The analog smoker shows you the temperature on a temperature gauge and it is not so easy to control it. The electric units, on the other side, are easier to control. You have to set the time and the temperature you want and the smoker will maintain the same temperature through the entire smoking process.

As you can see, smoking is not just picking the first smoker you see in the store and buying it. If you buy a good quality smoker you will be able to control the heat and the smoke better when using smoking wood chips, chunks, logs or dust and that will result in a good smoked meat. If you choose the best electric smoker you won’t have to do anything, the smoker will do most of the hard work. But, if you want to learn more about these electric units you can visit the site about them called the Electric-Smoker Guy:

More Related reading on electric smoker and others

More Related reading on this subject

Additional reading:

-ELECTRIC SMOKERS: WHEN IS A WOOD CHIP DEAD?

-HOW MUCH WOOD TO ADD WHEN SMOKING

-SALT FREE SPICE RUBS- HEALTHY CHOICES

-Does Outdoor Kitchen Stainless Steel Rust

Dr. Smoke loves guest blogs

Dr. Smoke-Read more from the Electric Smoker Guy on choosing the best electric smoker!

Our recap of Smoking-Grilling Wood Selling Terms

The listing of wood selling terms

WOOD SELLING TERMS DEMYSTIFIED

listen to our blog


Package labeling. It is the key to drawing attention to a product, to reduce interest in other similar products, and to make someone buy a specific product. Let’s be honest. Not everything printed on a label necessarily provides ALL the information. Use certain words and an “implied” thought will occur.

When it comes to packaging wood for smoking and grilling purposes, there are a lot of terms floating out there that certainly can be deceiving. Let’s see if I can provide clarity on what specific terms and wording mean when it comes to purchasing wood for cooking, smoking, and grilling. SMOKING-GRILLING WOOD SELLING TERMS

WOOD SELLING TERMS:

100% Natural

The intended meaning of 100% natural implies that it has not been touched by human hands. As such, with wood, this would refer to the fact that a tree is a plant designed by nature and other than cutting the tree down, it is not modified in any way.

However, we do know that trees, like flowers, can be manipulated when it comes to their genetics. Genetically modified trees are quite common in the growth of orchard woods, especially those seeking to develop dwarf varieties or specific blossom colors or hybrids. Keep in mind, genetically modified trees will have a reduction in the lignin compound which is responsible for the flavor the wood gives when it burns and gives off smoke vapor.

Currently, it is not legal to genetically modify forest trees but there is a lot of allowances when it comes to plantation and orchard/nursery trees, which often have chemicals applied to make up for the weak lignin which makes the wood susceptible to decay and pest infestation.

Kiln-Dried

Wood that is dried in a closed chamber in which the temperature and relative humidity of the circulated air can be controlled is called “kiln drying”. There are three types of Kiln Drying methods: low-temperature drying which is below 130° F, conventional electric dehumidification drying, and conventional steam-heated drying which have temperatures up to 180° F.

For the most part, when a smoking or grilling wood product lists “kiln-dried” on the packaging, it does not state the type of method being employed. Also, many that use this term do so without providing any information on what compliance record keeping is in place to attest that they are doing what they say.

There is one company who states that they adhere to the protocol designed by the United States Department of Agriculture (USDA) but quote a core temperature and length in minutes of the heating process that is not the standard written by the USDA. Their compliance agreement is provided by the state in which the business is located, which may have a different standard in place than the USDA.

Air-Dried

The process of drying green wood by exposure to prevailing natural atmospheric conditions outdoors or in an unheated shed is known as air drying. There are three dominate Air Drying methods: open yard, shed, and forced-air shed. The first is not held in high regard as the wood is exposed to all the elements making it the longest method of depleting moisture content from the wood. The second has the addition of a roof covering to maintain a precipitation-free environment, while the third option is mostly used by traditional lumber companies as it produces quicker results meaning products can be sold quicker.

Here’s the issue when you see “Air-Dried” on package labeling of grilling and smoking woods: you don’t know what method is used and no one is saying how long the wood was air-dried for. You don’t know how old the wood is, what method of air drying was employed, how long it took to “dry” it, and you likely won’t know what moisture content is left in the wood. Remember, dry out a piece of wood too far, and it is simply firewood designed for heat output only.

Naturally Cured

This is another term that floats out on the packaging that implies it is different from air drying techniques. It is not different.

Naturally curing wood means the wood is stacked in a manner that allows air to flow around the wood pieces usually in an outdoor setting. It may be left exposed, covered with a tarp or have a roof structure overhead. Naturally curing wood for fireplace use is recommend for 365 days but there is no benchmark for the timing used to dry the wood for the use of smoking or grilling. Some suppliers will use moisture levels of 20-30% as their benchmark but 10% is a large variable in moisture when it comes to wood.

Here is the biggest challenge with a natural curing method: dry the wood too quickly and you will find cracks, splitting, honeycombing, and/or warping. Dry too slowly and the wood will stain and suffer decay. Remember, decay attracts pests as that is what they feed on. SMOKING-GRILLING WOOD SELLING TERMS

Selecting

I won’t lie to you – there are a lot of choices out there for wood. How do you go about selecting from the limited information on the packaging?

Some decisions you’ll have to make on your own: do you want to cook with bark or do you find that bark indeed fluctuates the temperature of your equipment too much? Do you want to use a kiln-dried product even if you don’t know what temperature and for how long that product was heated? Would you want to use a product that hasn’t had any heat application applied to it meaning there may be pests, larvae, mold, and spores that haven’t been eliminated by a heat process? Do you want to use a product from a supplier that provides no information on the moisture of the wood? Do you want to go with a “natural”, “air dried” product that may have been exposed to anything that could access the wood: animal feces and urine, insects, chemical contaminants from the ground or another source?

In the end, I think the selection can be easy by simply looking at the wood for purity and cleanliness, looking at the packaging for evidence of air exchange meaning its likely not completely dried out and looking at the packaging information for claims that don’t seem to match the product that is packaged inside.

Most of all, you should be able to gain valuable information from any supplier’s website on the wood they are selling to you. If not, be cautious that they may not know anything about the manufacturing process of the wood and/or what is needed in wood to qualify it as cooking ingredient. We hope that our discussion of smoking & Grilling Wood Selling Terms adds clarity to your selection process.


Purchase products:

Wood Chunks- Double & Single Filet

Wood Chips- Grande Sapore®, Minuto®, Piccolo®

More Related reading on "What Wood for Smoking" and other great smoking and grilling tips and techniques

More Related reading on “What Wood for Smoking” and other great smoking and grilling tips and techniques

Additional reading:

-COOKING WITH WOOD YOU SHOULDN’T HAVE TO THINK ABOUT YOUR SAFETY

-Is It Fresh? Here’s Why You Need to Know

-WHAT WOOD TO USE FOR SMOKING: A PRIMER

-HOT TREND MAY NOT BE THE SAFEST BET

SMOKING-GRILLING WOOD SELLING TERMS

Dr. Smoke- SMOKING-GRILLING WOOD SELLING TERMS

Dr. Smoke- SMOKING-GRILLING WOOD SELLING TERMS


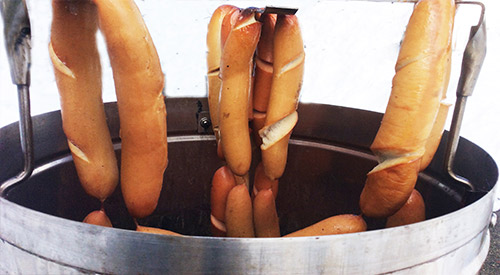
Bratwurst in the Orion Smoker Cooker nicely cooked plump and Juicy

Bratwurst in the Orion Smoker Cooker nicely cooked plump and juicy!

WELCOME TO OUR BRAT PARTY-BRATWURST IN THE ORION

SMOKER/COOKER

listen to our blog


I believe that wood fired foods can be enjoyed 365 days of the year regardless of the temperature/conditions outside. To ease the challenges of wood cooking outdoors when the conditions may not be optimal, I look to my equipment options and make a selection that ensures the cooking is quick and as easy as possible.

I want to have bratwurst party! Unfortunately, I’ve chosen a -2° day to do just that. No problem! I simply rely on my Orion Cooker to provide a fast, high heat method of cooking with my SmokinLicious® Minuto® Wood Chips.

Bratwurst in the Orion Smoker Cooker- There’s Nothing To It!

Preparing your bratwurst for the Orion Cooker couldn’t get any simpler than making a few cross cuts in the skins to ensure they don’t burst while cooking.

The reason bratwurst is so popular for entertaining and for summer days is just how quick it is to prepare. When you smoke a casing containing product, you want to ensure that the juices don’t cause a pressure build up and result in your brats exploding all over the smoker. I make 3 shallow knife cuts in each brat to ensure they can plump up without exploding out of their casing. These German brats are made with a combination of pork and veal and have an all-natural casing meaning the casing is made from the intestine of an animal. I specifically purchased brats that were on an uninterrupted casing line so I could hang my brats on the Orion Cooker rib hooks to ensure smoke vapor envelopes each link completely, just like commercial smokehouses do.

Before smoking my German bratwurst, I’ve prepared the Orion Cooker by adding SmokinLicious® Minuto® Wood Chips in Wild Cherry to inside of the cooker. The wood chips are placed in the space between the cooker’s wall and the drip pan. I’ve lite a chimney starter full of briquettes which when grayed over will be poured into the fuel pan. 12 briquettes are also lit in the smaller fuel pan at that top of the unit. I’ve loaded my strings of bratwurst to the rib hooks of the unit. Next, place the lid on and let these cook and smoke for 45 minutes untouched.

Done Before You Know It-BRATWURST IN THE ORION SMOKER COOKER

Here’s why I love cooking with the Orion Cooker. On a -2° winter day, I can still use the convection heat from the Orion Cooker to finish the German bratwurst in just 45 minutes. In fact, I don’t use a full fuel tray of briquettes for this smoke. Just one chimney starter full of coals plus about 15 unlit briquettes placed on top of the lit coals. Great smoke flavor is added using Minuto® Wood Chips in wild cherry from SmokinLicious®. I’ve hung over 24 brat links on the three rib hooks of this unit so I can feed plenty of hungry people.

Fix It Your Way

Now comes the best part! Fixing your bratwurst the way you love it. Put out a variety of toppings to stimulate creativity at the brat table. I’ve included raw chopped onion, sweet pickle relish, sauerkraut, hot Hungarian pepper rings, BBQ sauce, beer brat mustard, kimchi, horseradish sauce, just to name a few choices. Whether you slice your brat down the middle or leave it whole, anything goes. German bratwurst done over SmokinLicious® wild cherry wood chips and hung on the hooks of the Orion Cooker, for that old school, smokehouse flavor. Bratwurst in the Orion Smoker Cooker!

Purchase products:

Wood Chips- Minuto®

More Related reading on "What Wood for Smoking" and other great smoking and grilling tips and techniques

More Related reading on “What Wood for Smoking” and other great smoking and grilling tips and techniques

Additional reading:

-GIVING AN EDGE TO SMOKY COCKTAIL SAUCE

-SMOKED BEEF SHORT RIBS


Dr Smoke "If you're looking for something different to cook on your Orion, brats are perfect and yummy!"

Dr Smoke “If you’re looking for something different to cook on your Orion, brats are perfect and yummy!”

Alto-Shaam® logo

Alto-Shaam®

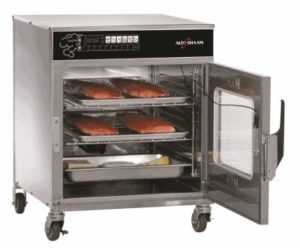
Alto-Shaam® oven with open door viewing the cooking trays

Guest Blog Post

listen to our blog

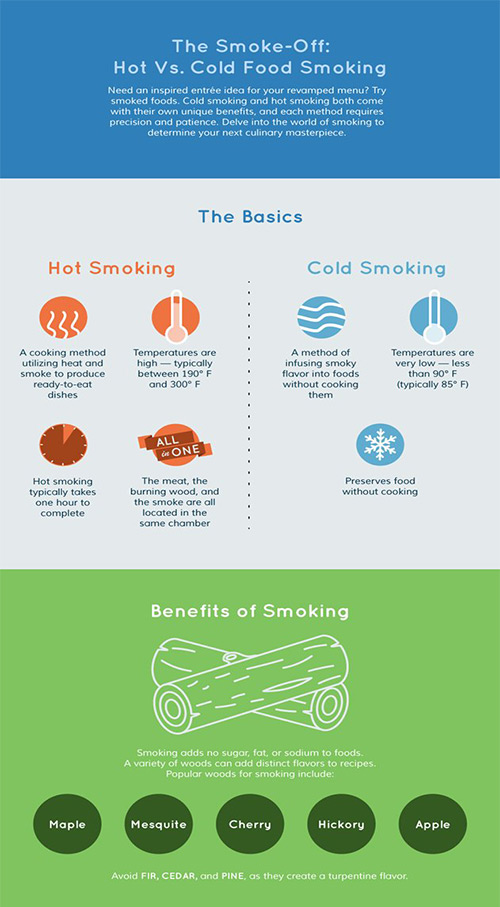
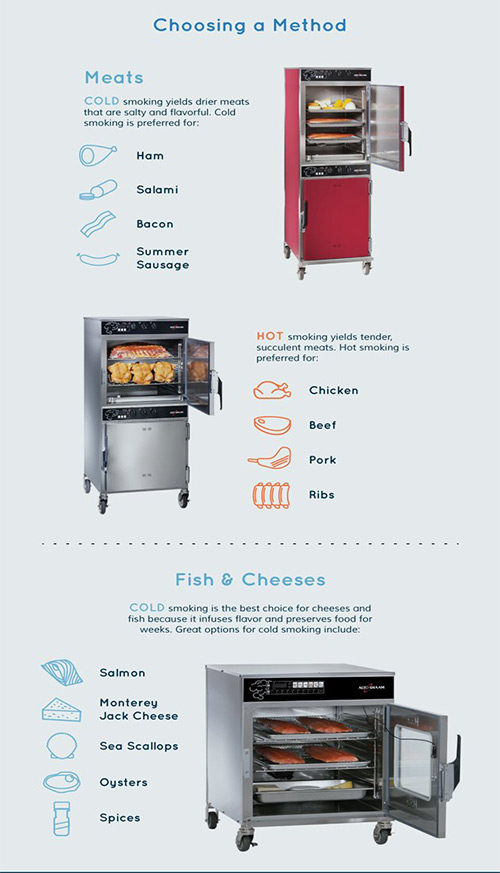
Smoked foods can lend an inspired touch to the menu of almost any restaurant, regardless of the type of cuisine it serves. Today, it’s easier than ever to smoke food quickly and efficiently whether in a restaurant setting or at home. The first step is to choose a hot or cold smoker. Both types of smoking devices come with their own benefits, and each is ideally suited for different types of food. Both hot and cold smoking can be used to infuse foods with different flavors; and both can be used to preserve otherwise perishable foods. The infographic below can help you decide whether hot smoking, cold smoking, or a combination of the two is right for you

Discussion of hot vs. cold smoking techniques

Chosing a method for meats, poultry, fish and cheeses

Choosing a smoker

Sources

Alto-Shaam®

Originally posted this on January 11, 2017 on their web site. The Alto-Shaam® Social Marketing Team made a request to have us post this to our Blog. We felt the content was a great value to our readers/followers! Please note that the wood chips outlined in this article are limited to only those that Alto-Shaam® has available. SmokinLicious® produces 8 species of smoker wood chips compatible to the Alto-Shaam® equipment. (Note: we do not produce Mesquite or Apple).

Purchase products:

Wood Chips- Grande Sapore®

Dr Smoke- "We like the Alto-Shaam equipment especially when cooking/smoking with wood chips."

Dr Smoke- “We like the Alto-Shaam equipment especially when cooking/smoking with wood chips.”

The grand ole tree beech hardwood adds a very European flavor to smoked foods, especially sausage style products.

The grand ole tree beech hardwood adds a very European flavor to smoked foods, especially sausage style products.

Listen to the audio of this blog

With 10-13 Beech varieties available throughout the world, this is a hardwood tree that can age to some 300 years. Visually, they are quite impressive often with distinct “root feet” and gray, smooth bark. The scientific name is Fagus Grandifolia but in North America, we know this as American Beech.

(more…)

Attention Women Chefs: The Woman's guide to manning the grill!

Attention Women Chefs: The Woman’s guide to manning the grill!

Listen to the audio of this blog


Part one of the Audio:

Part two of the Audio:

It’s long been the equipment associated with the guys. Perhaps it’s due to the primal start of cooking over the live fire which initially was a man’s skill. Hunt the animal and cook it on fire and hot coals.

Recently, the trend has begun to turn around in favor of more women chefs cooking components of a meal on the grill. In fact, it’s not just the traditional LP/gas grill but charcoal grills as well, as women chefs take their new recipe and technique finds out of the traditional indoor kitchen and to the outdoors.

Just Because It’s Outside Doesn’t Change The Purpose

There is no question that outdoor grilling equipment has evolved into something of a fantasy. We now have choices beyond the standard LP, natural gas, charcoal, and electric grills. Many brands are now featuring dual fuel cooking, meaning they may have gas or electric assist but use wood and/or charcoal for heat and flavor!

What does this mean for the ladies who want to do the more outdoor cooking on the grill?

Versatility! It is so easy to cook an entire meal on the grill without it taking several hours or more.

Accessorize!

The key to ensuring that an entire meal can be cooked on the grill is to have the right tools and that includes some accessory items. Let’s look at each recommended item and answer the question why it’s important to the woman’s full meal grill event.

#1 Grill Grate Accessories:

First up, the grill pan, grill basket or grill topper. These are perfect for vegetables and fruits making it so easy to ensure that the food doesn’t stick to the grill grates and that every piece gets cooked evenly. Plus, since many grills are now sold with a side burner, you can always steam or parboil tougher vegetables first, then transfer to the grill pan/basket/topper. Or, use that side burner to make rice for a healthy starch side. Don’t have a side burner on your grill or are using a charcoal grill? Then buy a butane burner! These are so inexpensive yet give you another cooking option to get everything ready at the same time.

#2 Easy Charcoal Lighting:

If you don’t know what a chimney starter is, time to learn. The charcoal chimney starter is the best way to light a charcoal fire. Although these traditionally use newspaper at the bottom (for ignition) and load charcoal chunks (can be briquettes or lump) into the body of the unit, I take a simple method of lighting my chimney. I load with my favorite charcoal and use a butane torch under the unit to light – no newspaper needed. This allows me to leave the butane on auto fire for a few minutes to ensure the lower coals are lit. Simply pull the torch out, shake the chimney while wearing fire gloves, and return to a heat safe surface until the top coals turn white-gray. Oh, and you can always light the chimney off that side burner too!

#3 Purchase 2 Thermometers

Stop guessing at when things are done! You need to invest in 2 quality thermometers; one for the grill/smoker and one instant-read for the food. Be sure the thermometers you invest in can take a reading in 5 seconds or less, have at least a 4-inch probe for thicker cuts of meat, and have cables that are durable (if you don’t go with a wireless), especially for equipment thermometers that are placed through venting holes or under lids.

#4 Silicone

Anything made from silicone will become a lifesaver at the grill. Silicone pot handles covers, spatulas, heat resistant tongs – you get the idea. This material can handle the high heat of grills so stock up on those items you’ll need and use the most. Suggestions? Tongs, pot handle covers, spatulas, spoons, mat.

Diversify!

Grilling does not necessarily mean you must put all foods on the grill grates. Use high heat cookware to help you out. Think cast iron or high heat clay and enamels meant for the grill. These are perfect for starting one-pot wonders like legumes, pasta dishes, even sauces. With a roomy enough grill, you can fit many different items – grill pan/basket, Dutch oven, and rib racks. Don’t forget most grills come equipped with a lower and upper grill rack so more fragile items that need less heat can go to the top. Here are some tips on food to cooking equipment match:

Tip #1: Cast Iron and Charcoal

Cast iron is, without question, the best material for cooking directly in the coals. Here’s a tip – if you have an outdoor fireplace or even a fire pit that uses wood, you can do this method of cooking by placing your cast iron skillet or Dutch oven directly in the coals. Keep in mind, I said coals, not flame. Coals have a very high BTU rating and can cook foods within cast iron as if they are in the oven. Just be sure to pack the hot coals around the cast iron after placing the pan in the coal bed. Perfect items to try: vegetable medley, roasted potato, curry dishes, au gratin dishes.

Tip #2: Cast Iron and LP/Gas Grill

Just like having the side burner on a grill, cast iron on the grill is like having an extra pot on the stove. Cast iron comes in lots of sizes and cookware type: saucepan, skillet, Dutch oven. Anything you would traditionally make in cookware on the stove can be done on the grill. The key is to ensure that you have this on a section of the grill that isn’t set to “high”, as cast iron holds heat.

Tip #3: The Upper Grill Rack

Though small in overall size, the upper grill rack is designed for those fragile items or for items that require simple warming. Think melting butter for vegetables, heating sauces, warming bread and rolls. Use it! It can be of great value to keep you from needing anything indoors.

Tip #4: The Rotisserie

If you have a grill with a rotisserie, use it! Keep in mind, as that item turns on that rod, the meat or poultry renders some fantastic juices. Catch them! Put a high heat pan under the food item with some great vegetables and use the drippings to add superb flavor to the cooking process.

Women Chefs- “Flavor It Up!”

Now, let’s be clear! Unless you’ve invested in a dual fuel or hybrid grill, one that allows you to use charcoal and/or smoking wood, most standard LP grills are just that: grills not smokers. If you don’t have a hybrid but want to get some smoking woods flavoring to your foods, then start thinking of adding charcoal and wood chunks! Yes, you heard me right. Wood Chunks vs. woodchips which was the product of choice for years with LP grills.

Why Smoking Wood Chunks?

Most grills today are designed with covers for the gas burners to diffuse the heat more evenly. They go by a lot of names: heat distributors, flame tamers, heat plates, burner shields, flavorizer bars. The addition to the traditional LP grill is the reason why you can use smoking wood chunks. Simply place a few small wood chunks under the grill grate right on top of the heat diffuser. Be sure you only put chunks on a burner you will ignite. Replace the grill grate and you’re ready to go! And, yes, you will get real wood smoke vapor to flavor whatever you’re cooking on the grill. I promise!

Final Points Especially for Our Women Chefs

“Manning” the grill is no different than planning a meal in your conventional kitchen. Pick out the components of the meal and decide what needs to cook were on the grill: directly on the grate, on the rotisserie, in cast iron, on the coals. If doing a meat, be sure to marinate 6 hours or best, overnight, to ensure a moist outcome and to reduce cooking time.

Have everything prepped including the grilling tools you will need and this is a walk in the park for all women chefs planning daily meals for the family. The best part, you can enjoy more of those great warm days and not sweat in the confines of the hot summer kitchen!

More Related reading on this subject-

For our women chefs, check out these articles for more reading on grilling and food smoking tips & techniques:

-HOW TO USE CHARCOAL WITH WOOD IN COOKING

-HOW TO TURN YOUR CHARCOAL GRILL INTO A SMOKER

-HOW MUCH WOOD TO ADD WHEN SMOKING

Purchase products:

Wood Chunks- Double & Single Filet


Dr. Smoke- women chefs are grilling and smoking food more and more.

Dr. Smoke- “More and more, women chefs are taking up the art and science of grilling and smoking food! We’ve developed this specially prepared guide to offer helpful tips to the ladies!”


Picking the proper cooking wood can only lead to success versus a flop- for the wood fired grill

Menu board found in most restaurants- highlighting wood-fired grill

WHEN A FLOP COULD HAVE BEEN A SUCCESS WITH THE WOOD-FIRED GRILL!

Listen to the audio of this blog

There is no question that being in the franchise restaurant business is a challenge especially given that there is a national menu dictated by the brand you partnered with. I am amazed at the risks brands will take when it comes to making a major capital investment in marketing strategies, equipment upgrades, and personnel training for single concepts. Case in point: the obsession with wood-fired grilling to get customers in or coming back!

(more…)

Forest scene of alder wood the perfect wood for a very slight touch of smoke

Alder wood the safe bet for cooking wood- little in flavor!

ALDER WOOD THE SAFE BET!

Alder

I’m often asked if there is any hardwood that is a safe bet to use with any food item and equipment. One that won’t be too strong if over applied or hurt the equipment if too much wood is used. Well, as you’ve heard me mentioned before, we don’t provide descriptors of the woods we manufacture as we believe there are too many variables that affect the overall flavor of the hardwood. Instead, we offer a rating of our woods based on how bold they are. On the low end of that rating scale? Alder wood the safe bet.

Family of Trees- Alder Wood the Safe Bet

First, let me state that Alder is part of the Birch family of hardwood. It is a genus that is a flowering plant. Around the world, there are 35 species of both the tree and shrub form. Yes, that is correct. Alder is not always a tree but can be a tall growing shrub. In New York State, we have roughly 13 varieties with our Alder referred to as Eastern Alder. On the density side, this is a lighter hardwood and thus, it does not hold moisture long. This makes this hardwood ideal for very specific cooking applications.

Alder is very light in its stimulating flavor compounds. I’m sure you’ve read that Alder is ideal for fish but there are missed opportunities if you don’t go beyond the fish category. Given there are so many options to infuse smoke vapor, this can be a great wood choice when using a handheld food smoker or even a stove stop smoker or cold smoke generator. Contemplating chocolate, cheese, or fruits? Alder can be a perfect match.

Caution- Alder Wood the Safe Bet

Here’s my one caution. If you are planning to incorporate bolder ingredients with your food item, then alder may not be the first choice. Lots of bacon, chili or cayenne pepper – these will mask the flavor of the Alder wood. Instead opt for foods that have lighter ingredients like herbs, citrus, dairy components.

As mentioned, Alder or Birch will start with a moisture level that is higher but due to the composition of its cell structures, the water will evaporate faster in the hardwood. Using it on an LP grill or in a charcoal unit may require quicker replenishment than another denser hardwood so extra supply is always recommended.

Blending- Alder Wood the Safe Bet

Don’t forget, blending Alder with another hardwood works well too so if you do want a spicier kick to your ingredients, feel free to add Alder with a bolder wood like hickory, beech or oak.

The best part is always in the experimentation so have fun working with this hardwood that I call the safety net – it won’t let you fall flat if you select it for your smoke infusion.

Dr. Smoke Alder wood the safe bet when it comes to wood smoking with a lite taste

Dr. Smoke Alder wood the safe bet when it comes to wood smoking with a lite taste


See our other wood species blogs:

PUT A CHERRY ON IT!

Smokinlicious pristine wood blocks is a great back drop to the 10 things to consider when purchasing cooking wood

Smokinlicious® wood blocks are a pristine backdrop for the 10 things to consider when purchasing wood for cooking!!

Listen to the audio of this blog

Many of you who reside in the Southern and Western States have the advantage of being able to engage in wood-fired cooking pretty much whenever you want, regardless of the calendar. You may do so on an LP grill, a charcoal grill, charcoal/wood smoker, or electric grill or smoker. Those of us living in the North and to the East – though we could continue cooking outdoors all year – usually elect to restrict our outdoor cooking methods until temperatures climb above 55°F!

Soon, it will be an even playing field when it comes to enjoying the outdoors for all of us so what better way to get prepared than to start thinking about replenishing supplies for our outdoor living and cooking.

Today, I’m going to give you a guide on the top 10 things to consider when purchasing wood for cooking, grilling or smoking in general.

#1 Is the wood native to the USA?

If the wood comes from outside the United States, it doesn’t necessarily make it a bad choice but you do need to understand that importing wood products into the USA is highly regulated. Mostly, the wood needs to be certified that it has been treated in some way to ensure no insects are hitching a ride in! Remember, that treatment could be with chemicals or by heat only, so be sure you check the label. This product may turn out to only be ideal for hot temperature cooking like searing and grilling due to the dryness of the wood, or if chemicals were used, it shouldn’t be used at all.

#2 Is the wood 100% hardwood?

It is imperative that any wood you use to cook with, wood chips, wood chunks, logs or dust be only hardwood. Look for labeling that attest to the fact that only hardwood was used as some companies will use a mix of softwood and hardwood or include press woods.

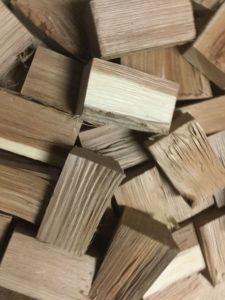
The Pristine, Clean, Bark Free Double Fillet SmokinLicious Wood Chunks Displayed

SmokinLicious® Double Fillet Chunks

#3 How does the company get the wood?

Many of the companies who supply wood chips for cooking have another manufacturing process that produces a scrap or waste product. Not Smokinlicious®! Often, those leftovers are used in this secondary business of BBQ woods, smoking woods, or cooking woods, to name a few of the labeling names. Check packaging for the source or origin location of the wood and if that company name matches the one on the front of the packaging label.

#4 Are you getting the wood named on the label?

This seems like a no brainer but honestly, wood is no different than olive oil or cheese. You may not be getting 100% of the wood species listed on the label just as we’re finding extra virgin olive oils may not be extra virgin or grated cheese isn’t 100% cheese! If you find packaging that simply states “hardwood” or “mixed hardwoods” then you don’t know what you’re getting. Be sure to read the entire label and check for a reference to 100% of a species.

#5 Is the brand name the actual manufacturer of the wood or just the distributor?

It is very common for brands to be in a business that they don’t participate in from a manufacturing point. Check the small print on the label to see if the manufacturer of the product is listed or if the label simply states who the product is distributed by. Distributors don’t have a lot of history on the product in the box or bag.

#6 Does the seller make claim to a certain cooking method for the wood?

This is key to ensuring you don’t end up with a disaster. If the packaging clearly states the product is for grilling, then don’t try to use it in your smoker or stove top smoking pan. Compatibility of a cooking wood to equipment should factor in the moisture level of the wood. Too dry, and it will just catch fire. Too wet and you won’t be able to grill with it.

#7 Are there any terms such as “naturally cured” or kiln dried on the label?

The terms generally mean that the wood has been air dried for an extended period, much like you do with firewood before using it in your fireplace, or the wood has been exposed to low temperature drying in an enclosed area. Either method means the wood will usually have a moisture level of 4-13% which will not make it ideal for hot smoking techniques. Again, these woods are best for high heat level cooking as dry wood produces a lot of heat. Woods with a moisture level ~20% are ideal for hot smoking.

#8 Does the wood have bark?

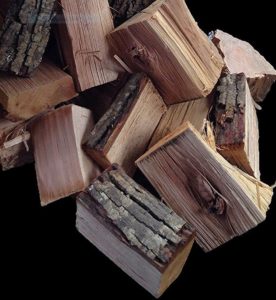
Photo shows the nasty bark on products sold by our competitors

Our competitors’ bark on product

Bark is the protector of the tree and so it is like a sponge, absorbing anything that isn’t healthy to the tree. When bark-on wood is exposed to heat, you will get a lot of separation or weakness to the cell structure of the bark. This can loosen during exposure to heat and burn separately causing flare ups in temperature control, sparks, and leave a coating on your equipment. If you have an option, go bark-free!

#9 Does the packaging label reference cooking or merely say “firewood”?

If you planning on going camping and setting up an elevate cooking grate over the fire, or using a Dutch oven for cowboy-style of cooking, then I don’t have a problem with using split firewood for the cooking part. This is in the great outdoors where there is a lot of area to handle the smoke vapor. But if you are using any kind of equipment that has a contained firebox area, please use something other than firewood to cook with. You simply don’t know where the wood has been or what it may contain so cooking within a confined chamber is not the ideal. Firewood can have a lot of resin, sap, and spark.

#10 Does the brand sell the product by weight?

Wood is a commodity that has a lot of variance when it comes to weight due to differences in density, moisture level, and variety of the species. It is the reason why wood cannot be sold by weight legally. Look at the packaging and be sure there is a reference to cubic inches, cubic feet, liters, centimeters, etc. Anything but weight.

There you have it! A guide for your upcoming outdoor cooking season using a variety of cooking/grilling woods like wood chips, chunks, logs or dust. Take a bit of time to check the packaging and examine all the information on a website before making your decision. Most importantly ask yourself: Do I want to eat anything cooked over this?

Dr. Smoke- Before purchasing wood for cooking, it's important to know the many factors!

Dr. Smoke- Before purchasing wood for cooking, it’s important to know the many factors!


More Related reading on purchasing wood for cooking:

More Related reading on purchasing wood for cooking:


Wood Chips Grande Sapore

Wood Chunks- Double or Single Filet

Smoker Logs- Full & Quarter Cut

Smoking Dust- Spice for Your Equipment

DON’T PUT CULINARY QUALITY WOOD LAST!

Case Notes: A restaurant is preparing to open in a new location and made the decision to invest in an Italian made pizza oven that has an option for wood-fired cooking. This equipment would take 6 months to manufacture and deliver to the USA, which gave the owners time to complete renovations on their new building in preparation for the free-standing oven’s installation. During that time, menu development and plating options were reviewed and decided upon.

The one planning need that was left to the last minute – locating the supplier for the cooking hardwood and determining appropriate sizing for the new equipment! WHY???

It always surprises me that restaurateurs are willing to spend $50,000 and up for commercial equipment that does a specific function or technique, yet they don’t spend the time before that purchase ensuring they can obtain the quality accessory needs to get every benefit from that investment.

Here’s the best part: often these equipment lines tote that they can do all sorts of functions including wood-fired cooking techniques. The truth – they aren’t really promoting that function of their equipment line! They simply want to sell you the equipment and have you use standard fuel options like electric and gas. How did I come to this conclusion? By the content of the user’s manual.

Many do not reference:

  • size of wood product needed for the equipment
  • how to light the product
  • how much of the product to use
  • where to locate a supplier of the cooking wood
  • pictorials of the steps to do the technique
  • provide a troubleshooting guide.

Do you really want to spend $50,000, $60,000, $100,000 and be left to fend for yourself with that investment?

Take the appropriate steps when considering additions to or replacements in your equipment line. Research not only the equipment but what is needed to do the smoke infusion technique with that equipment. Yes, wood chips are readily available even though there is a high level of variation between products. But other products are not so easy to find like wood pieces larger than wood chips but smaller than split firewood logs.

In addition, wood-fired techniques can also require additional “tools” to be available in the kitchen that may not have been standard inventory before.

Such things as:

  • fire retardant gloves
  • fire grade tools like long-handled tongs and a wood poker
  • a MAP canister/torch for lighting the fire
  • an infrared thermometer for reading temperatures within the cooking chamber
  • an ash receptacle.

Prioritize the needs of a wood-fired equipment addition by first reviewing the best option in equipment for your business’ need and second, assessing all the requirements of the wood to be successful in bringing this technique to your kitchen!


Dr. Smoke- only manufacturers Culinary Quality wood- Nothing else!!

Dr. Smoke- only manufacturers Culinary Quality wood- Nothing else!!


Follow us on Instagram, Twitter, Facebook, Pinterest, YouTube, Flipboard, Google+, Reddit, Medium, Blogger, BuzzFeed


Smokinlicious® wood Blocks are perfect for a J&R Equipment

Smokinlicious® wood Blocks are perfect for a J&R Equipment

A PERFECT MARRIAGE FOR J&R EQUIPMENT

One key factor that is often not considered when the decision is made to purchase commercial-grade equipment like J&R Equipment is the cooking wood product that the unit derives its flavor from. Don’t be fooled by the statement that “any wood will be fine”, as there IS a difference! In fact, only hardwood should be used as a cooking wood, never softwoods, but even some hardwoods are not ideal for wood-fired cooking and flavor. Some bark is toxic, other woods are too high in resin, and others don’t possess a balance of flavonoids to make them pleasant to the palate.

You take the time to research equipment before making that purchase, isn’t it time you give the same consideration to the cooking wood product you need?

Our video featured here highlights the study, testing, and care we take to ensure a perfect marriage of cooking wood to equipment. Get the full potential from your J&R Equipment investment by using only hardwoods DESIGNED for cooking! Be informed, don’t hesitate to ask questions, and find the best source for the investment you’ve made and will continue to make. Remember, the success you pine for in your menu is directly dependent on the skills of both your kitchen staff AND equipment.


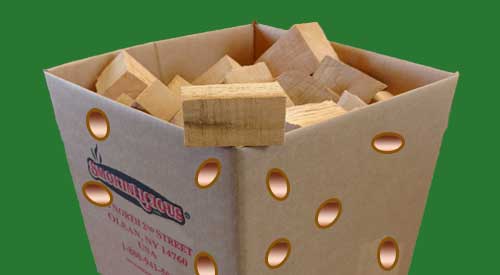
Smoker wood storage summer or as the winter months approach, you should pop some holes in the box to circulated the air!

Smoker wood storage summer or as the winter months approach, you should pop some holes in the box to circulated the air!

Smoker wood storage for chips or chunks Share on X

Listen to the audio of this blog

SmokinLicious® has the luxury of manufacturing every wood product we offer for sale. That means, our moisture rich wood is ready to use immediately. We certainly are not firewood as we work only with the heartwood of the hardwood trees and need proper storage to maintain our clean, fresh state. Plus, we want you to have a pleasant outcome to smoking your foods which is a direct result of the moisture level.

It’s Serious Business- Smoker Wood Storage!

We take wood storage seriously! Which is why when you purchase our products, you’ll receive a card educating you on the best storage containers and conditions. Simply put, any container that encourages air flow is ideal. We have found that some plastic containers can actual cause mold spores which is why materials made from wood, cardboard or metal are preferred. If you should encounter wood that has begun to develop evidence of mold, you may follow these steps to sanitize the wood for cooking:

1. Dilute 1 part white vinegar to 3 parts water (or 1.5 ounces of white vinegar to 3 gallons of water). Be sure the wood is completely submerged in the vinegar mixture.


2. Let the wood soak in the solution for a minimum of 2 minutes.


3. Remove the wood from the vinegar mixture and allow to air dry.


4. Store the wood as recommended above.


Prevent Sunburn

Just like your skin, wood can get too much sun and become sunburned, especially given we are bark-free product. It is best to select a location for storage that is away from direct sunlight. A cool, dry location is ideal. If you select a garage or basement area, be sure you don’t place any cardboard container directly on the cement surface or moisture will be drawn in through the carton to the wood and could result in appearance and aroma changes. If you do see the outside of the wood turn a bit gray, that likely is the result of some sun exposure.

Temperature and Humidity for Smoker Wood Storage

As a last point, keep temperature and humidity in mind when you select a storage location. Since our hardwoods are native to New York State, they are accustom to certain conditions including 4 seasons. Wood can be stressed especially when traveling in a truck to your location. Be sure to follow our directive sticker on the carton advising to get the carton open immediately upon delivery. Air is crucial to your wood remaining in the great condition it is in when we packaged it.

For those wanting to know if refrigeration is an option, our study shows refrigeration certainly doesn’t hurt the wood but you do need to rotate any unused wood periodically to prevent mold potential. Freezing the wood is not suggested. When you plan to use the wood for wood-fired cooking, be sure to remove the wood from a cold location and allow to come to room temperature in order to prevent a lengthy time waiting for combustion to take hold which is what produces smoke vapor.

More Related reading on this subject- More Related reading on this subject of cooking & Grilling with wood

More Related reading on smoker More


Products

Dr. Smoke- Smoker Wood Storage is an important part of your grilling practices! Follow our advice to get the most out of your wood purchase

Dr. Smoke- Smoker Wood Storage is an important part of your grilling practices! Follow our advice to get the most out of your wood purchase


In Harvest Recipe for September: Smoked Fingerling Potatoes

As a new feature to our blog and recipe section, we will be highlighting a seasonal product in a smoking or natural wood-fired grilled recipe, to help you take advantage of the wonderful seasonal offerings we have for fruits and vegetables. For the most part, we will be following the harvest schedule in the Northeast but may occasionally make reference to a different region’s harvest schedule. This feature will help introduce you to all the flavorful charms and tasty benefits of smoking freshly harvested foods!

For September, we our highlighting potatoes! One of my favorite variety of potatoes is Fingerlings. Feel free to modify the recipe below for smoked fingerling potatoes to your preferred ingredients.

Smoked Fingerling Potatoes with Pancetta and Dill

Ingredients:

2 lbs. fingerling potatoes*, scrubbed and cut into ½-inch lengths

1/4 cup olive oil

½ lb. thick sliced pancetta*, cut into 1/3-inch cubes, cooked

salt and fresh ground pepper

1 onion, thinly sliced

1/4 cup finely chopped dill or 2-1/2 Tablespoons of prepared dill

* may substitute any variety of potato and regular bacon for the pancetta

Wood Recommendations:

Wild Cherry and Ash hardwoods (cherry for a tart flavor and Ash for its moisture infusion)

Tear a large piece of foil to make a pouch or use a disposable cake foil pan. If using a disposable pan, also cut a foil sheet that covers the pan.

Place the pre-cut fingerling potatoes, cooked pancetta, sliced onion, and dill in the foil pan or pouch. Add salt and fresh pepper to preference. Toss all ingredients together then drizzle the 1/4 cup of olive oil over the ingredients. Mix thoroughly.

Place foil pan or pouch on pre-lite charcoal grill, with woods placed directly under the mixture. Allow to cook/smoke until potatoes become tender (about 2-1/2 hours at 200 degrees). Serve your smoked fingerling potatoes warm.


Second Test Kitchen Results

The Smokinlicious®Test Kitchen conducted an additional test using the Technique® Cast Iron Skillet and Smoker which many of you purchased from QVC as the Special of the Day. This time, we used our flavor-infused wood product called the Woodscuit ® on the stovetop.

What We Cooked: Boneless Pork Tenderloin

How We Cooked: on the stovetop using medium-low heat on the gas range

What Wood We Used: Bourbon Flavored Woodscuit ® – 3 pieces

Length of Cook Time: 2-1/2 hours

Findings: Again, as our previous test cooks have demonstrated, the Technique® Cast Iron Skillet and Smoker provides for a very moist product. This time, we lined our drip pan in foil to decrease the amount of elbow-grease needed to clean up. Since our Woodscuit ® product has a moisture content of ~45 percent, these wood pieces did not display the charred look like the woods used in the previous test cooks (both the Wood Chips and Smokin’ Dust® were black by the end of the cooking time). However, once the tenderloin was finished, our panel of tasters did not find any significant smoke flavor to the end product. For those pieces that had been more to the center of the cast iron skillet, the tasters noted slightly more smoke flavor but overall, there was no distinguishable smoke flavor infused in the food.

Currently, our Test Kitchen has found that the Wood Chips used on the stovetop, provide for the greatest flavor infusion of the wood used. As always, we will continue to test this cast iron skillet with a plan to see if adding water to the smoke pan with the wood product, helps to keep the flavor infusion going.

Stay tuned!

Fingerling Potatoes are Next

Dr. Smoke- Cast iron skillet cooking and smoking is easy, affordable & offers great flavor results!

Dr. Smoke- Cast iron skillet cooking and smoking is easy, affordable & offers great flavor results! When using the Technique® Cast Iron Skillet, coupled our quality cooking wood, you can’t go wrong!

More Related reading on stove top smoking featuring a cast iron skillet:

For more reading on the Technique® Cast Iron Skillet & Smoker and how you can do stove top smoking from your own kitchen, check out these articles:

A Guide to Cooking the Perfect Steak

Infusing Wood Flavor to Brussels Sprouts Using a Cast Iron Skillet

The Kitchen Find – Easy, Convenient & Affordable Stove Top Smoking!

« Previous PageNext Page »