Can hardwood be too dry for wood smoke vapor? We discuss this topic

Can hardwood be too dry for wood smoke vapor? Our thoughts for you!

Listen to the audio of this blog


Here are the misnomers:

Wet = Smolder

Wet = Smoke

Dry = Fast Cook

Let’s make one thing perfectly clear – all wood, whether hardwood or softwood, contains water! As a comparative, when wood is dried to ~20% moisture content (MC), it weighs 40-50% less than un-dried wood. This is the direct reason why the National Conference on Weights and Measures – Uniform Regulation for the Method of Sale of Commodities does not allow for the sale of wood products by weight. It would not be a level playing field for those of us selling this commodity.

So, we know that wood has too much water when a tree is first cut down and obviously will need to dry to some degree before being used for cooking. Why do you ask? Without reducing the water in the wood when burned/combusted, the wood will produce an acrid aroma and smoke vapor which, in turn, will produce off flavors, colors, and textures in foods cooked over wet woods that are consumed.

Can Hardwood Be Too Dry? – You might ask, does it matter how the wood is dried?

Absolutely! There are various ways wood products can be dried with the decision on a drying process usually dictated by what the wood will be used for. Just because you purchase wood chips, wood chunks, logs or even smoking dust for cooking, does not mean that product started out for that intended purpose. Often wood is used first for a primary business like furniture manufacturing, hardwood flooring, or cabinet making. It’s only the secondary wood that is re-purposed for cooking use with a focus on BBQ.

Let’s examine the most likely methods of drying woods for this scenario.

  • Kiln Drying: Lumber or other wood items that have been dried in a closed chamber in which the temperature and relative humidity of the circulated air can be controlled. There are 3 types of kiln drying methods: low-temperature drying which is below 130° F, conventional electric de-humidification drying, and conventional steam-heated drying which have temperatures up to 180° F. Of the 3, the conventional steam-heated drying system is preferred due to its computerized programming but the high cost of this system makes it less attractive to most businesses.
  • Air Dried: The process of drying green lumber or other wood products by exposure to prevailing natural atmospheric conditions outdoors or in an unheated shed. There are 3 dominate air drying methods: open yard, shed, and forced-air shed. The first is not held in high regard as the wood is exposed to all the elements making it the longest method of depleting moisture content. The second, similar to the first, has the addition of a roof covering to maintain a precipitation-free environment. The third option is most used although the use of electric fans increases the cost from the other two options, it produces quicker results meaning products can be sold quicker. Remember, the primary purpose of the wood is not necessarily cooking so quicker is better to get it to the primary business’ production.
  • Warehouse Pre-drying: A very popular method of drying lumber despite higher capital and energy costs, this system can run consistent drying parameters almost 24 hours per day.

Now, knowing many wood producers sell their products first under the guise of another business before packaging secondary or waste wood for cooking, you need to understand where the MC needs to be in order to work for the furniture making, flooring manufacturer, or cabinetry business. These are items that require lower MC and that level across the United States and Canada has an average between 4-13% MC!

Can you imagine putting a piece of wood on a grill’s diffuser or on hot coals when it only has a moisture content of 4%? What do you think will happen to such a dry piece of wood? POOF! It’s gone!

SmokinLicious® developed a method of decreasing moisture content in our hardwoods using a controlled heat method with a re-hydration parameter. Our sole/primary business is producing wood-fired cooking woods- wood chips, wood chunks, logs, smoking dust and our newest product- Charwood! That’s it! We have no reason to reach for moisture content in the single digits and for cooking purposes, you would NEVER want this! The ideal moisture content for cooking is in the 20% range (this is dependent on wood species, however).

We ALWAYS provide you with a moisture content of the hardwoods you purchase from us, so you can be educated about the conditions of the wood for the type of wood-fired cooking you want to do. That is just one of the reasons why SmokinLicious® is a superior product for superior outcome in wood-fired cooking! We will explore for you the science behind the fire and topics to can hardwood be too dry to produce smoke vapor!

More Related reading on the cooking wood question of Can hardwood be too dry?

More Related reading on the cooking wood question of Can hardwood be too dry?


How to Store Wood Chips

How Seasonal Factors Influence Cooking Wood Storage

Dr. Smoke exploring all the aspects of wood cooking and the importance of moisture content in our blog CAN HARDWOOD BE TOO DRY
Dr. Smoke exploring all the aspects of wood cooking and the importance of moisture content in our blog CAN HARDWOOD BE TOO DRY
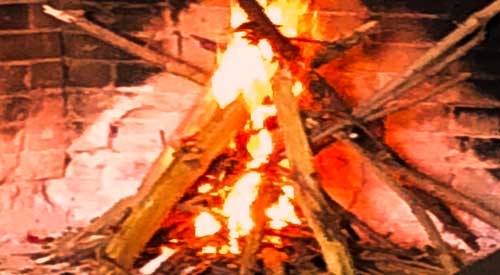
Picking the ideal fire set up for cooking depends on circumstances- this is the cabin Style

Picking the ideal fire set up for cooking depends on circumstances- this is the cabin Style

YOUR IDEAL FIRE SETUP FOR COOKING Share on X


We are so lucky to have so many options for cooking our foods, not to mention the option to not cook at all! This got me thinking about the fact that we do rely on our outdoor equipment and cookware when it comes to outdoor cooking. Even if you’re a person who has experience campfire cooking, you likely do this style of cooking with one type of fire setup .

Let’s look at some of the options for setting up an outdoor fire that don’t include purchased equipment, just the natural elements found outdoors – rock, tinder, kindling, and logs/wood. As I always like to remind you, though you may not use this information immediately, you should read it and keep a reference handy for when a situation may arise that you need it, such as a natural disaster, power grid emergency or other such catastrophic event.

Fire Setup #1: Trench Fire

(more…)

The simple campfire has many uses!

The simple campfire provides more uses beyond just fire cooking!


fire cooking and beyond! Share on X

Listen to the audio of this blog

You’ve likely heard this phrase before whether as a child, adult or at intervals of both. “Fire is meant to be respected.” I’m going to go one step further. Fire should not only be respected, it should be honored and appreciated for all it can offer. I’m going to point out to you just what other uses fire can present to you. Perhaps next time you light a fire whether in your charcoal chimney starter, charcoal grill, fireplace, or even outdoor fire pit, you’ll give some pause to the other uses to keep in your knowledge arsenal for times you may need this information. As I age, I am always in tune with my environment and how I can use it not only for fire cooking but to survive if a situation I can’t control should call for it.

Fire Cooking Use #1: Heat

If you are fortunate as I am to have an outdoor source of fire other than your traditional grill, then you’ve likely found yourself enjoying this first benefit of fire. Heat. But you likely don’t know about the radiant heat quality of fire. With a single fire, only the surfaces facing it are warmed. When it comes to surviving outdoors with heat from a fire, this is when you will want to learn about reflective ability of the fire.

If you have a choice in fire building location when you need it for survival, elect to build one near a large rock or tree stump but add a reflector component on the other side of the fire. This will allow the rock or tree stump to absorb the heat from the fire and then reflect it back. By adding a reflector on the other side of the fire, you will enjoy heat both on your back and front, the ideal for surviving if you must rely on fire for body temperature. Plus, the two reflecting points will force the smoke to go upward allowing you to avoid smoke in the eyes.

Fire Cooking Use #2: Signaling

We all know that fire makes smoke and that smoke acts as a signal. When you want to be found, this is the perfect means for attracting attention. What you need to know is that the terrain plays a part in being seen. If you want to use smoke to signal for help, then seek high points for making one.

Fire Cooking Use #3: Water Sterilization

If you are in a dire situation where you’ve been unable to bring many supplies with you, know that fire can aid your ability to stay alive. You can only survive 3 days without water so finding water is a priority. You can sterilize water found from any source for consumption by boiling it which is a temperature of 212°F. Essentially, 1 liter of water per person will get you through survival of 3-4 days.

Fire Cooking Use #4: Preserving Foods

We tend to rely on someone else in the food production chain to preserve food but you may find a time where you either want to do this for your own family or you have to. Drying, smoking, pickling, and salting are methods of preserving foods from micro-organisms that spoil food. When you smoke meat you dehydrate it and produce a protective coating on the outside that prevents bacteria and condensation from penetrating. This is a means of ensuring you have a food supply that can keep you alive for quite a long time.

Fire Cooking Use #5: Protection

If you’ve ever been camping or glamping in a forest area, then you know that you are never alone. Wildlife dominates in these areas. Fire can be a protector when it comes to keeping these visitors at bay. Always be sure to have a portable fire set up such as a rag tied to the end of stick or similar tool to use as a portable weapon should a forest resident elect to come close to you.

Do you have another survival use for fire? Leave us a comment to share your views. Bringing you informative recipes, techniques, and the science beyond the fire, smoke, and flavor. That’s SmokinLicious®!

SmokinLicious® products recommended:

Wood Chunks- Double & Single Filet

Wood Chips- Grande Sapore®, Minuto® & Piccolo®

Charwood

More related reading on how Smokinlicious® reduces the risks of Microbial bacteria in our wood products
More related reading on fire cooking, smoking & Grilling tips and technique see our directory on previous blogs!

Other blogs like this one:

THE HISTORY OF FIRE COOKING PART I

-OPEN PIT COOKING FIRE BUILDING: PART I

-HOW TO TURN YOUR CHARCOAL GRILL INTO A SMOKER


Dr. Smoke-fire is for more than just cooking!
Dr. Smoke- fire cooking and beyond!
Wood Lignin is what produces the great flavor in Barbecue

Wood Lignin is what produces the great flavor in Barbecue

Choosing wood species for their lignin can help your BBQ! Share on X

Listen to the audio of this blog

Let me start this article by first reminding you that wood contains hundreds of compounds that honestly, we don’t know everything about. For this reason, I am only speaking today regarding those known compounds and what they contribute to foods cooked by wood fire. Specifically, I’ll be looking at lignin which is the only large-scale biomass source that has aromatic functionality. In English, this is what gives wood-fired foods the distinct flavor and aroma.

Often, you read about specific flavors and aromas as they apply to meats but today, I want to delve into the compounds that are most prevalent by wood species and what they offer to food.

Lignin- A Refresher

Lignin is one of the primary compounds responsible for cell construction in a tree and makes up 15-30% of wood cells. It has a primary role in conducting water to feed the tree’s cells and when burned, yields a tremendous amount of energy. Plus, lignin produces rigidity in cell walls which prevents rot.

As a polymer or large molecule composed of many repeated subunits that bond together, it is the only one that is not composed of carbohydrate (sugar) monomers. Because lignin is a polymer, there are many possible bonding patterns between the individual units, thus, we don’t have full knowledge of all the possibilities.

What we do know is lignin contains phenols or hydroxyl groups which are alcohols. As these compounds work together, they produce a preservative action on the food which is antibacterial in nature. The surface of the smoked food is modified with resulting flavors and aromas which are associated with barbecued foods. Let’s take a closer look at these smoke vapor flavors.

Profiles of Smoke Compounds Share on X

If you recall our publication on wood-tar creosote we tapped into the science of wood-tar creosote and its purpose as a preservative as well as producer of flavor, color, and aroma to barbecued foods. In that article, we just barely mentioned the compounds responsible for the flavors. Let’s provide you with the main compound list and what the odor and flavor descriptors are.

Phenol: this compound provides the sharp, robust aromas and the astringent, sharp aftertaste to wood fired foods.

Dimethylphenol: another compound that has a sharp, robust odor that also has a sweet aromatic undertone. Flavors are sweet, charred, and astringent.

Isoeugenol: this is the compound associated with vanilla aromatics in addition to sweet and fruity. Flavor descriptors include sweet, smoked-ham notes, hydrolyzed vegetable protein-like, with clove-like undertones.

4-Methylguaiacol: another compound that includes vanilla-like, fruity, cinnamon-ish, and smoky odors, with flavors of caramel, vanilla, sweet, and pleasant notes.

o-Cresol: odors are smoked sausage like with robust, sharp undertones. This one on its own can produce more unpleasant smoky flavors.

Guaiacol: Smoky, sharp, aromatic aromas with flavors that are spicy, sharp, sweet and dry. This is the yellowish aromatic oil that forms from creosote.

Syringol: Sausage-like aromatic that is sharp and sweet, with a spicy note. These flavors include whiskey notes with smoky-char taste.

Lignin Levels in North American Hardwoods

I’m going to report the lignin levels of common North American hardwoods derived from the Klason lignin method, which values the residue remaining after solubilizing the carbohydrate with strong mineral acid. What follows are percentages of oven-dried woods with temperatures ranging from 68°F/20°C to 248°F/120°C.

Acer saccharum Marsh./Sugar Maple = 22%

Alnus rubra Bong./Red Alder = 24%

Betula alleghanienstis Britton/Yellow Birch = 21%

Carya glaubra (Mill.)/Sweet Pignut Hickory = 24%

Carya ovata (Mill.) K. Koch/Shagbark Hickory = 21%

Fagus grandifolia Ehrh./American Beech = 22%

Fraxinus Americana L./White Ash = 26%

Populus tremoides Michx./ Quaking Aspen = 19%

Prunus serotine Ehrh./Black Cherry = 21%

Quercus alba L./White Oak = 27%

Quercus prinus L./Chestnut Oak = 24%

Quercus rubra L./Northern Red Oak = 24%

Quercus stellate Wangenh./ Post Oak = 24%

What do all these percentages mean when it comes to your barbecue? You can assume that the higher numbers mean there are larger numbers of compounds at work to flavor your foods. It’s obvious that woods like hickory and oak have great percentages of phenol, guaiacol, and dimethylphenol, since these woods tend to produce the boldest flavors. Those hardwoods like cherry, alder, and maple have the compounds of methylguaiacol and isoeugenol coming forward in the flavors which results in sweeter and more toned coloring to meats. Another factor that must be kept in mind when examining lignin is the heat level the wood is exposed to. Cook at a higher temperature and these compounds can become muddier as combustion occurs more rapidly producing ash accumulation that can change flavors and aromas quickly. All factor in to the resulting flavor, color and aroma of barbecued foods, whether animal protein, vegetable, fruit, or other. This just further supports that wood-fired cooking is an art that requires a balanced hand that understands the importance of controlling as many factors as possible, primary of which is cooking temperature and airflow to bring out the highest percentage of beneficial compounds the wood can offer.

What is your favorite hardwood or mixture of hardwoods to cook with? Leave us a comment to share your views. Bringing you informative recipes, techniques, and the science beyond the fire, smoke, and flavor. That’s SmokinLicious®!

SmokinLicious® products:

Wood Chunks- Double & Single Filet

Wood Chips- Grande Sapore®, Minuto® & Piccolo®

More related reading on how Smokinlicious® reduces the risks of Microbial bacteria in our wood products
More related reading on smoking & Grilling tips and technique see our directory on previous blogs!

More information on the composition of wood:

-6 REASONS WHY CEDAR WOOD SHOULD NOT BE YOUR TOP CHOICE FOR COOKING

-TO BARK OR NOT

-Lab Report on Moisture and storage of wood

-10 THINGS TO CONSIDER BEFORE PURCHASING WOOD FOR COOKING, GRILLING & SMOKING

Dr. Smoke-
Dr. Smoke- the amount of wood lignin and taste is the “art” of Barbecue


Maintaining a safe Kitchen

Maintaining a safe Kitchen

Maintaining a Safe Kitchen should be your primary attention! Share on X

Guest Blogger Kylee Harris
Guest Blogger Kylee Harris on safe kitchen
Listen to the audio of this blog
Introducing Kylee Harris as our Guest Blogger

Foodborne illnesses and allergies are common problems that affect many Americans. The CDC estimates that Americans acquire roughly 9.4 million food related illnesses each year, and more than 19 million people were diagnosed with allergies in 2017 alone. Between one and three percent of beef may contain toxic strains of E. coli, which sicken as many as 265,000 Americans each year. Fortunately, the high temperatures involved with smoking meats can help protect your family from E. coli infection. Since the kitchen is a haven for germs and irritants that can make you and your family sick, knowing how to maintain a safe kitchen with a sanitary environment can make the difference between a healthy family and one who becomes ill frequently.

Eliminating Mold for a Safe Kitchen

Although mold doesn’t grow quite as readily in the kitchen as it might in the bathroom, without proper attention, your kitchen can become an ideal home for types of mold that could be aggravating or even causing allergies in the younger members of your family. The heat and humidity that is the result of cooking in a kitchen provides an optimum environment for mold. Kitchen sink leaks may also lead to the development of mold if left undetected as well as garbage cans and disposals. Turning on kitchen fans and opening windows in the kitchen and in the whole house will lower the level of humidity in the kitchen while also allowing fresh air to enter. If you live in a humid climate, purchasing a dehumidifier will be the best bet for preventing humidity related mold growth. Checking for leaks regularly, as well as keeping your kitchen environment clean, including the regular sanitation of cupboards and drawers will also help to eliminate mold growth in the kitchen.

Safe Kitchen- Preventing Food borne Illnesses

Another common way that an unclean kitchen can lead to illness is through foodborne illnesses, due to incorrect preparation or spoiled food. Proper handling of foods, particularly raw meat, can prevent your family from making that list. Smoking meat and other delicious foods can have rewarding results, but if food is not handled properly, unfortunate consequences may result. Washing hands for 20 seconds with warm, soapy water both before and after preparing food is the first line of defense against foodborne illness. Washing hands immediately after coming into contact with raw meat, as well as any surfaces the meat might have touched with hot, soapy water will help you have peace of mind that your meal will not make you sick. Proper food handling, like cooking meat to the correct temperature, will allow you to fully enjoy a delicious steak, possibly smoked with hickory chips.

Making sure to create a clean and safe environment, free from mold, germs and various contaminants, will allow your family to maintain the high levels of health we all strive for. Be sure to always follow proper food safety guidelines, and check for mold regularly, as not doing so could negatively affect your family.

More related reading on how Smokinlicious® reduces the risks of Microbial bacteria in our wood products
More related reading on smoking & Grilling tips and technique see our directory on previous blogs!

More blogs like this one:

-Outdoor kitchen location tips

-Does Outdoor Kitchen Stainless Steel Rust

THE WOMAN’S GUIDE TO ‘MAN’-ING THE GRILL

Dr. Smoke- Food Safety begins with a safe Kitchen with a sanitary environment
Dr. Smoke- food Safety begins with a sanitary Kitchen
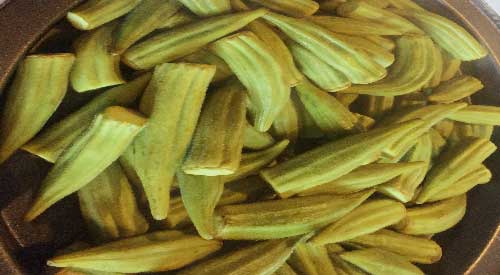
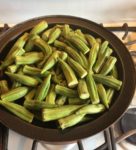
Our Fresh Okra ready and on the stove top smoker pan to become our Smoked Okra

Our Fresh Okra ready and on the stove top smoker pan to become our Smoked Okra

Smoked Okra- Veggies like a Smoky flavor Too! Share on X

Listen to the audio of this blog

It’s time to bring a smoky flavor to one of my favorite though limited in availability, vegetables – smoked okra! Known as a super healthy food but one that sometimes confuses people on how to cook and eat it, I’m going to bring you an easy method of tenderizing and infusing okra with a pleasant smoky flavor that doesn’t stimulate the sticky juice known to lurk inside.

Though I’m going to use a stove top smoker for my infusion, you can easily adapt this method to the gas grill, charcoal grill or electric smoker using a vegetable basket or tray. Seek out some vibrant green, firm okra and let’s get started on a new way to cook and flavor this healthy vegetable.

Smoker Set Up for Smoked Okra

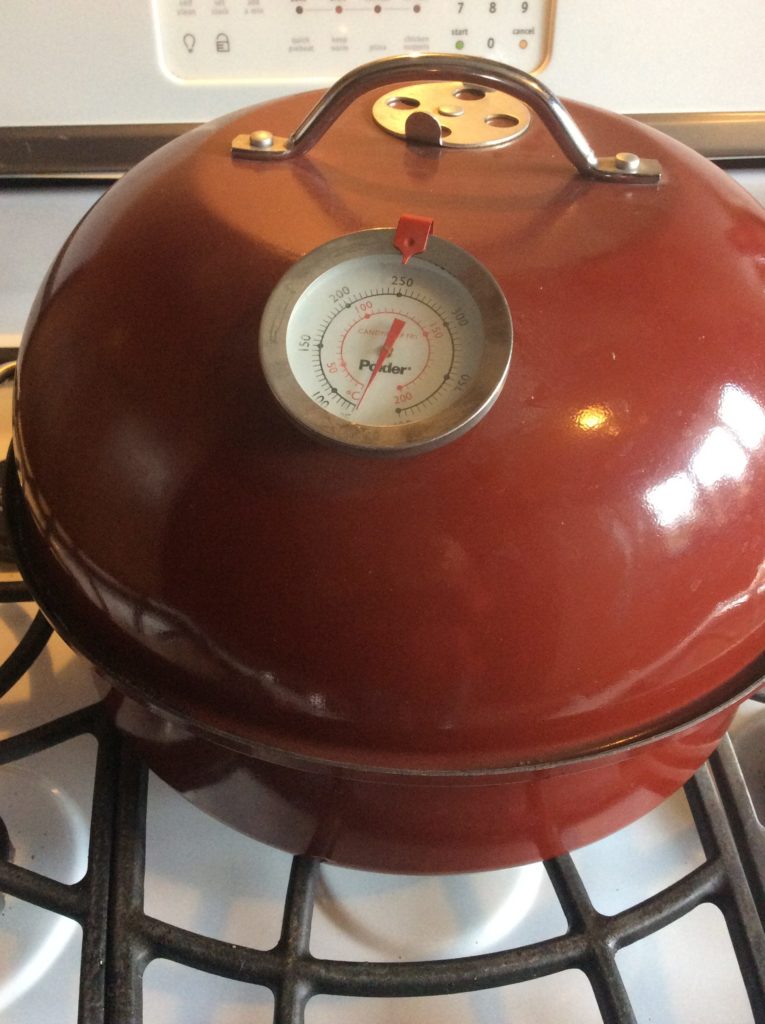
The nordic ware stove top smoker we used
#smokedokra

I’m using my Nordic Ware Stove Top Kettle Smoker for this hot smoking method. To start, I place the smoker base on the unlit burner and add about ¼ cup of Minuto® Wood Chips – I’m using a #6 in Sugar Maple – from SmokinLicious®. I place the drip pan on top of the wood chips and then ensure the food insert pan is clean and dry. For vegetables, I usually use a medium heat setting on my stove – I have a gas stove top. This will register between 200-250°F on the kettle smoker’s temperature gauge. Next, I’ll do a simple preparation to the okra and we’ll be ready to turn on the heat to the stove top unit.

Tasting Notes: For the charcoal grill set up, use a two-zone cooking method – charcoal and wood lit on one half of the grill while the vegetable tray or basket containing the okra will go on the unlit side of the grill. Do the same set up on the gas grill. For the electric smoker, be sure to use a lower heat setting – around 180°F.

Smoked Okra- Trim and Smoke

Nothing could be simpler than the preparation for okra. You’ll want to ensure that the outside is clean and dry so a simple water wash is good with a pat dry. I like to remove the stem top to allow penetration of the smoke vapor into the center of the pod.

our prepared fresh okra on the smoker pan
#okra

Place about one pound of fresh okra with the stem tops trimmed into the smoker’s food tray. Try making an even layer of pods so the smoke vapor can flavor the pods evenly. Cover the kettle smoker with the lid and turn the burner on to a medium setting. I use my stove’s vent on high to keep the aroma down somewhat.

Allow the okra pods to tenderize and smoke for about 20 minutes before checking. You just want them to be tender (not falling apart), to where a knife can still cut them into pieces. Once done, remove the pods to a bowl and use these in recipes calling for okra or you can serve as is with a favorite sauce.

(more…)

Your BBQ shoes for safety is as important as comfort!

Your BBQ shoes for safety is as important as comfort!

“Wear heat resistant footwear!” how to protect your feet around hot embers!

Listen to the audio of this blog


I remember a particular year, I believe it was 2007, when my Culinary Events Crew traveled to 29 of the 50 states in the US and 4 provinces of Canada. I felt like I never slept in my own bed and constantly was repacking the suitcase with clothing suitable for the area we would be traveling to.

That was the year I lost my favorite lace up/zipper ankle boots to the fire.

Not literally burning in a fire but from repeated exposure to hot, stray coals that are common when you engage in wood fired cooking. I was constantly stepping on these stray embers and this consistency lead to me putting more than one hole in my favorite boots.

It was a lesson well learned and one I want to pass on to you to bring home the point for heat resistant footwear!

Don’t Be Surprised

Just as your educated that the standard oven mitt won’t cut it when your dealing with excessive heat levels in metal equipment commonly used for wood fired cooking, the same holds true for your footwear. When working around chimney starters that spit and shoot hot sparks of scalding coals and water pans that hold 212°F water, flip flops are not the ideal choice in footwear. Unlike the professional kitchen where Chef’s clogs are the ideal to prevent slips and falls on the constantly wet floors as well as to keep your tootsies comfortable when on your feet 15 hours a day, cooking with fire takes some thought for heat resistant footwear practicality.

That led me to look at options in footwear designed for safety, specifically fire safety.

We are testing the indestructible shoe for hot ember resistance on the soles
indestructible shoes

Indestructible® Shoes- Heat Resistant Footwear

We run a factory operation at SmokinLicious®, which means we have strict policy when it comes to personal protective equipment or PPE. That includes policy on heat resistant footwear that also specifies the need for steel toed footwear.

Over the course of a decade, safety footwear has seen a metamorphosis in style, comfort level, and level of protection. Gone are the days of limited color options and welcome the new days of vibrant patterns and even height options on the boot cuff. I was particularly intrigued with a relatively new shoe on the market called the Indestructible® Shoes.

Not only are the shoes stylish, but they offer features many other work shoes can’t match. Like the steel toed cap that cannot be penetrated by nails, saw blades, and weight (see the very impressive videos on these tests). With a shockproof midsole, these are also a work shoe that can be worn for hours.

But given that we work around a lot of extremely hot fires that emit stray coals, we wanted to ensure that the anti-slip rubber soles would not only protect you from slips but also from the penetrating heat of hot coals and embers. That led us to conduct our own tolerance testing for the right heat resistant footwear.

The Test for Heat Resistant Footwear

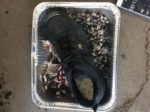
After firing up the charwood production oven and running a full day of production, we removed hot embers from the oven that had a heat temperature of nearly 1000°F. Our controlled testing included establishing a coal bed within an aluminum foil pan since aluminum is a great medium for radiating heat. We also elected to test the shoe without weight bearing so note that we cannot speak on this parameter, merely the shoes’ outer sole tested on high heat without weighted pressure from a wearer.

There were three levels of testing: 30 seconds, 60 seconds, and 90 seconds which in our opinion, simulated the length of time a person would stand stationary at a high fire or cooker. Following each test, the shoe was placed in snow with an ambient temperature of 30°F. We also alternated shoes between tests to ensure no carryover temperature of significance factored in to the stability of each test level.

Temperature of the hot embers is 963 F
963 degrees F of heat
shoe on the hot embers
Shoe on the hot embers
measuring the time resting on the hot embers
Time for resting on the hot embers- 30, 60, 90 seconds
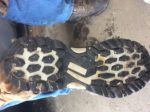
Sole inspection post resting on hot embers
shoe sole resting in the snow to provide the cool down for our experiment
Shoe sole resting in the snow to provide the cool down for our experiment
Temperature of sole post cool down

Results- Heat Resistant Footwear

At all three test levels, the Indestructible® Shoes performed brilliantly. Although there is an obvious odor of the heated rubber, it is not considered excessively dangerous. Keep in mind, the thermodynamics of heating rubber results in the rubber shrinking not expanding with heat like other materials. This is due to the molecules of the rubber becoming disordered unlike when they are at a normal temperature which results in the molecules becoming less disordered (i.e. entropy/isothermal).

There was minimal discoloration to the lightest coloring of the rubber sole which is a reaction of the rubber’s cells and the carbon in the combusted material.

Overall the Indestructible® Shoes proved to be a great option for those who work with live fire and hot coals for cooking. Between the steel-toe and the thick rubber outer sole, as well the shock-proof inner sole, these are an option in footwear for the barbecue and live-fire cooking enthusiast, whether amateur or professional, in protective heat resistant footwear that is comfortable, long-wearing and fashionable.

You can find the Indestructible® Shoes at: https://indestructibleshoes.com/

What is your favorite footwear when you barbecue? Leave us a comment to share your views. Bringing you informative recipes, techniques, and the science beyond the fire, smoke, and flavor. That’s SmokinLicious®!

More related reading on how Smokinlicious® reduces the risks of Microbial bacteria in our wood products

More related reading on how Smokinlicious® is committed to reducing risks in all aspects of wood cooking including and beyond pitching for heat resistant footwear.

Related reading:

-Outdoor kitchen location tips

-Does Outdoor Kitchen Stainless Steel Rust

-10 TIPS FOR GRILLING SAFETY

-COOKING WITH WOOD YOU SHOULDN’T HAVE TO THINK ABOUT YOUR SAFETY

Dr. Smoke- testing BBQ shoes for your safety!

Dr. Smoke- testing heat resistant footwear for your safety!

Dr. Smoke- testing BBQ shoes for your safety!

Our Discussion of Hardwood vs Softwood for Cooking

Our Discussion of Hardwood vs Softwood for Cooking

Hardwood vs. Softwood For Cooking! Share on X

Listen to the audio of this blog


What is the best wood for smoking?

Well, before you ask that question, you should want to know “What woods are safe to use for smoking?”

Hardwood vs. Softwood for Cooking- Softwoods:

Softwoods or coniferous woods should never be used for cooking because they have elevated sap levels and more air in their cell structure. This causes the wood to burn fast, hot, produce lots of sparks, and produce unpleasant flavors not ideal for flavoring foods. Let’s be clear on what a softwood is: pine, redwood, cedar, fir, spruce, hemlock, larch, cypress. These are all no-no’s!

Hardwood vs. Softwood for Cooking- Hardwoods:

Known as deciduous trees that produce broad leaves, produce a fruit or a nut, and generally go dormant in the winter, hardwoods are the woods to use for cooking and makeup roughly 40 percent of all trees in the United States.

Hardwoods are made up of mostly three materials: cellulose, hemicellulose, and lignin. Cellulose and hemicellulose are the basic material of the wood cells; lignin acts as a kind of cell-bonding glue but it is the primary material need for flavoring in barbecue. Lignin contains phenols or hydroxyl groups which are alcohols. As these compounds work together, they produce a preservative action on the food which is antibacterial in nature. Lignin modifies the surface of the smoked food as the wood burns making the food scrumptious!

Hardwood vs. Softwood for Cooking- The Lignin Compound

Although all woods contain compounds which act as a preservative providing both antioxidants and reduction in bacterial growth, there are compounds that are more toxic to people, including compounds like formaldehyde and acetic acid which provide for an overall pH level in wood. Hotter wood fires produce a higher pH level. A good example is mesquite, which produces twice the level of polycyclic aromatic hydrocarbons, or PAHs, meaning it has a pH level almost three times the level of cooler burning hardwoods like Sugar Maple and Oak. Remember, it’s PAHs that are of concern when you grill or smoke and why foods cooked by these methods can get a bad rap.

Hardwood vs. Softwood for Cooking- Orchard Woods

Don’t forget a point about orchard woods which are a hardwood.

Woods like apple, peach, and pecan are traditionally raised for their fruit and nut production meaning they are commonly sprayed with pesticides in order to ensure a productive tree. Unfortunately, these pesticides are absorbed by the tree and released when burned. That means, you release them into the cooking equipment every time you use them for grilling and smoking.

Ask questions about the wood you want to purchase, read wood packaging and look for hardwoods that are known to be ideal for wood-fired cooking like cherry, alder, ash, hickory, maple, oak, and beech. Great food memories at the grill or smoker are made when you start with the perfect smoking wood! Don’t settle for anything less.

Related reading:


More Related reading on this subject

More Related reading on this subject

PUT CHERRY WOOD SMOKE ON YOUR BBQ!

IS HICKORY THE WOOD TO SMOKE & GRILL WITH?

ALDER WOOD IS THE SAFE BET ON THE SMOKE FLAVOR PROFILE!

WHAT WOOD FOR SMOKING: A PRIMER


SmokinLicious® Products:

Smoker Wood Chunks

Smoking Wood Chips- Grande Sapore®, Minuto & Piccolo

Wood Blocks for Smoking

Smoker Logs- Full & Quarter Cut

Charwood


Dr. Smoke, we discuss <a href="https://www/chefsteps.com/activities/wood-selection-guide">Hardwood vs Softwood for Cooking</a>

Dr. Smoke, we discuss Hardwood vs Softwood for Cooking


This 18th century smokehouse reminds us that the art of smoking food with wood is part of our heritage.

This 18th Century historic smokehouse reminds us that the art of preserving food with wood is part of our heritage.

Exploring this Historic Smokehouse in New Jersey Share on X

Listen to the audio of this blog

I had an opportunity to visit an original historic smokehouse in Hopewell, NJ that is beyond impressive. Knowing that this structure likely dates to the late 1700’s, I was most impressed with how the structure maintained itself over the years and how this piece of history has remained functionally intact.

Let me provide a brief history on these fascinating structures as well as share some images of the Hopewell, NJ structure.

A Necessity to Farm Life

If you were a farm in New Jersey like many New England states, a smokehouse was a necessity. Pigs were commonly raised during the 17th century and butchered in the month of December in order to be able to slaughter and preserve the meat through use of a smokehouse also called smoak house or meat house.

From earliest times, a smokehouse was a small enclosed shelter, where a fire could be kept smoldering for weeks, which slowly released its smoke to the hanging meat that was hung to keep it safe from vermin and thieves.

Smoke has long been known to contain compounds that act as preservatives. Phenol and other phenolic compounds in wood smoke are both antioxidants which slow rancidification of animal fats, and antimicrobials, which slow bacterial growth. Antimicrobials in wood smoke include formaldehyde, acetic acid, and other organic acids, which give wood smoke a low pH.

Although the process of smoking the meat could take days of preparation, generally the fresh cuts of meat were packed in tubs of coarse salt for about six weeks while the salt drew most of the water from the flesh. Then the salted meats were hung in the smokehouse that contained a small fire which smoldered for one to two weeks. The result was dried, long-lasting, smoke-flavored meat that would age in these historic smokehouses for up to two years before being consumed.

The Hopewell Historic Smokehouse

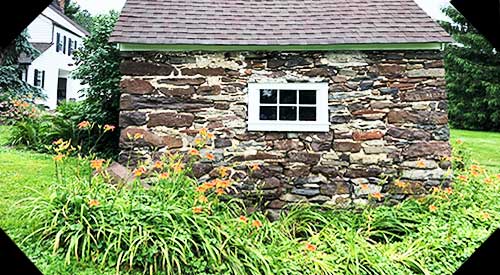
With its original mortar and stone, this Hopewell, NJ smokehouse is a real gem!

The only door into the smokehouse, made wide for loading and unloading

Estimated to date in the late 1700’s, this was used for both storing and smoking meats, as evidence by the original steel hanging system. You can clearly see the venting chamber which acts as the outtake while circular holes present air intake. These were so well made that despite minor ground shifting, they are still as strong as ever.

The chimney stack for venting
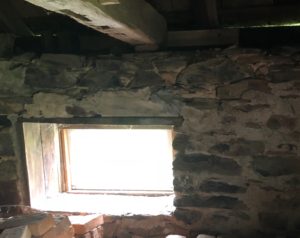
look at the amount of light from the window built into this smokehouse

This structure contains stacks of original bricks which were found in the house and subsequently moved to this location. The house still contains the original, super large stone fireplace that served as the wood fire cooking area and heat generator for the home.

the side view with window providing work light

Without question, these early smokehouses are an opportunity to view just what living was like before refrigeration and other luxuries of our current society. I’m constantly keeping me eyes toward the fields and yards of historic areas in search of these hidden gems that started us on our hunger for smoked foods.

Is there a historic smokehouse near you? Leave us a comment to share your views. Bringing you informative recipes, techniques, and the science beyond the fire, smoke, and flavor. That’s SmokinLicious®!

SmokinLicious® products:

Wood Chunks- Double & Single Filet

Wood Chips- Grande Sapore®, Minuto® & Piccolo®

More related reading on how Smokinlicious® reduces the risks of Microbial bacteria in our wood products
More related reading on smoking & Grilling tips and technique see our directory on previous blogs!

Additional reading:

-WHY MICROBIAL BACTERIA RISK IN YOUR SMOKEHOUSE IS WINNING

-Food & Smokehouse Processing Double Standard?

-WOOD SUPPLIER- ARE YOU GETTING WHAT YOU PAID FOR?

Dr. Smoke- Great day exploring the history of smoking when there were actual structures!
We need to keep out Microbial Bacteria from the food chain!

We need to keep out Microbial Bacteria from the food chain!

Prevent microbial bacteria in the food system. Share on X

Listen to the audio of this blog

With the Centers for Disease Control and Prevention reporting some 48,000 cases of food borne illness events each year, resulting in some 128,000 hospitalizations and 3,000 deaths, food borne illness outbreaks often generated from microbial bacteria is a serious concern. This is an added stress to manufacturing facilities that produce smoked food products as they must adhere to multiple regulations regarding the raw food product, smoke process and final smoked food product. The last thing a facility needs is to worry about the wood material used in the smoking process but that should be a priority for these facilities. Why?

Escherichia coli, Listeria monocytogenes, Salmonella enteritidis, Saccharomyces cerevisiae, Lactobacillus plantarum, Pseudomonas fluorescens, and Aspergillus flavus have all been shown to survive on plastic material meaning that if a supplier utilizes the standard GMA pallet commonly found in the grocery industry, these microbial bacteria or viruses survive and can flourish increasing the risk that they can be introduced to new food product placed on these recycled plastic pallets.

Microbial Bacteria- Hosts of Contamination

With the recent outbreaks affecting romaine lettuce (from E. coli) and beef (from salmonella), attention is being drawn to other potential hosts for the transfer of the bacteria. We know the common hosts: unsanitary conditions at a farm or packaging facility, food handlers failing to employ personal hygiene standards prior to working with food, food exposed to climate conditions that stimulate the bacteria development. One potential host that has not been fully publicized is the packaging materials used to transport. Unfortunately, it is the lack of enforcement in this area that puts the smokehouse industry at further risk.

Raw Material Transport

Many smokehouse operations purchase wood product for the smoke infusion from companies that supply the wood chip in paper bags that are then stacked on wooden or plastic GMA pallets. Although some of these suppliers may be able to attest that the wood chips have been kiln dried or heat treated to a certain temperature, none confirm to a heat level that would kill all the bacteria previously listed. Specifically, listeria, which requires a temperature of 74 °C/165.2 °F to be killed, is a key concern in smokehouse operations that include meat, poultry and fish products.

The risk is elevated by the potential for these bags to be penetrated by a stray nail from a wood pallet or sharp edge of a plastic pallet. If the pallet contains the bacteria, it is a host that can transmit to anything it has contact with.

Decreasing Your Risk of Microbial Bacteria

In previous testing of wood pallets, one or more of salmonella, E. coli, and listeria were found to be present in as much as 6.8 million spores/gram which is classified as an extremely high count. Given that domestically, there is no requirement for wood pallets to be heat treated for movement between states, the contamination can be passed to multiple locations with food when the pallet remains in the transportation system.

Although there have been efforts to change the transport of food by road and rail through the Food Safety Modernization Act (FSMA), to date nothing has been regulated on the packaging materials that the food is placed on.

One encouraging finding is that cardboard materials, if correctly stored, reduce the potential for cross-contamination of food due to a quicker viability loss by spoilage and pathogenic microorganisms compared to the plastic packaging. For this reason, SmokinLicious® only packages our smokehouse wood chip products in cardboard packaging that is then placed on a pallet that has been heat treated to an internal core temperature of 75°C/167°F and holds this minimum temperature for 75 minutes. We adhere to a higher heat treatment standard as the health and safety of everyone using our culinary products is of highest importance. We believe that hardwood used for cooking should be regulated independently and adhere to stricter standards than those currently in place for the general wood industry. Until that regulation is written and enforced, SmokinLicious® will self-regulate our product to this level.

At SmokinLicious®, we believe in Quality and Safety over profit! Isn’t it time your smokehouse joins us and takes a proactive stand against microbial bacteria like listeria, salmonella, and E. coli and help in the fight to rid our foods of life-threatening bacteria.

What is your biggest concern in your smokehouse food operation? Leave us a comment to share your views. Bringing you informative recipes, techniques, and the science beyond the fire, smoke, and flavor. That’s SmokinLicious®!

SmokinLicious products:

Wood Chunks- Double & Single Filet

More related reading on how Smokinlicious® reduces the risks of Microbial bacteria in our wood products

More related reading on smoking & Grilling tips and technique see our directory on previous blogs!


Wood Chips- Grande Sapore®, Minuto® & Piccolo®

Additional reading:

-6 REASONS WHY CEDAR WOOD SHOULD NOT BE YOUR TOP CHOICE FOR COOKING

-THE TOP 8 MISTAKES TO AVOID WHEN COOKING & GRILLING WITH WOOD

IS WOOD-TAR CREOSOTE THE ‘MONSTER’ TO WOOD-FIRED COOKING

Dr. Smoke- we do our part thru heat treatment to reduce microbial bacteria risks!

Himalayan Salt Blocks used for grilling

Himalayan Salt Blocks used for grilling! – #himalayansaltblock

Himalayan Salt Blocks: Benefits, Uses, and Tips

Jeffrey Lewis (Bio)

Hey there, friends! I’m Jeffrey. I’m a blogger at Ittefaq Salt. Thank you for joining me, as I share different aspects of my life. I’m so thrilled you stopped by! I love to create a beautiful, thriving life around me and helping others to do the same. I love writing about nature, health, food and nutrition-related topics.

You must be aware of the importance of salt for our body. It is required for the proper functioning of many body functions. But have you ever heard about using Himalayan salt blocks for cooking? Well, this is becoming a trend among those who want to add a wow factor to their cooking. The idea of cooking on these salt blocks is itself very fascinating. But there are more benefits that you can get from these incredible salt blocks as well.

Keep on reading to know more about these amazing salt blocks.

What Are Himalayan Salt Blocks?

As the name suggests, these are the big Himalayan salt slabs that are hand mined from Khewra salt mines in Pakistan. These are hand carved into different sizes and thickness. Click here to know more about these salt blocks.

These salt blocks are made of pink hued Himalayan salt crystals that are locked up in mountains for over 250 million years. This salt is unrefined, unprocessed and free from contaminations. This is to be the purest salt due to the extreme pressure that it has experienced over a long period of time.

Himalayan salt provides a number of health related benefits due to which it is being widely used as an alternative to regular table salt. It contains 84 minerals that fulfill our body’s mineral requirement. It is said to be helpful in maintaining the body’s pH level, regulating blood pressure and reducing water retention.

So, these Himalayan salt blocks have all the goodness of this salt.

Benefits:

  • These salt blocks are heat resistant and can hold temperature for a long time which makes them really useful. These are good for both high and low temperature and can be used for cooking and chilling the food.
  • Cooking on a salt block means you are adding flavor along with 84 minerals of Himalayan salt to your food.
  • Salt blocks have moisture retention and low absorbency properties which make them anti-bacterial. Because of this, these blocks are an amazing choice for serving and presenting food.

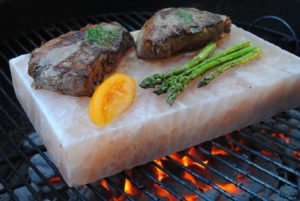
Seafood resting on top of salt block

#saltblocks

Uses:

Himalayan salt blocks are so versatile in their usage due to their tendency of temperature. These blocks are hand carved into different sizes so that they can be used for various purposes.

  • You can cook and grill different kinds of food on these blocks such as meat, vegetables etc. This will make your grilling more fun and exciting. It not only gives a very subtle saltiness to your food but also imparts minerals to the food.
  • Salt blocks can also be used for curing of some food items such as salmon fish. It will increase the shelf life of the fish.
  • Due to its ability to hold temperature for a long time it can also be used for chilling the food.
  • Another amazing use of this block is to use it for serving a variety of foods. It will make the food more presentable.

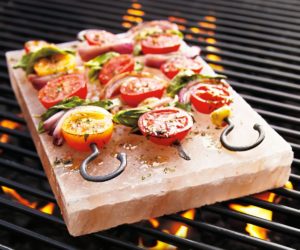
salt block on grill with food on top

#Himalayansalt

Tips for Using Salt Blocks:

  • First of all, you need to choose the salt block that has right size and thickness according to your need.
  • Salt block needs to be tempered before using it for the first time. For this, you need to heat it slowly at a low temperature in an oven, then increase the temperature gradually until you reach 500°C. After that, cool it down to room temperature. This process will improve the cooking surface and strength.
  • If you want to use it for cooking, you always need to pre-heat it. It will make cooking and grilling easy.
  • It is also very easy to maintain and clean a salt block. After using it, cool it down and wipe with any damp cloth. Then let it air dry and store in a cool and dry place.

Himalayan salt blocks are not just pretty with their pink hues but also add flavor and nutritional value to the food along with so many other uses. These all natural blocks are a must have cooking tool in any kitchen to add uniqueness and creativity to the cooking. These will not only add to the beauty of your kitchen but also a unique and creative way to cook the food. So, next time if you want to impress your guests, grill and serve food on these blocks.

Smoked Cocktails are the best way to bring in the smoky flavors during the cold wintry nights! Or to just add a pre-taste to your upcoming BBQ!

Smoked Cocktails are the best way to bring in the smoky flavors during the cold wintry nights! Or to just add a pre-taste to your upcoming BBQ! Learn the easy steps

HOW TO MAKE THE BEST SMOKED COCKTAILS Share on X

Listen to the audio of this blog

An easy way to give your guests or yourself for that matter, a change from the old cocktail is to smoke the entire drink or a component of the cocktail. I’m going to provide you with some examples of how to take any cocktail recipe and advance its flavor to something spectacular. Once you see how simple it is to build a balanced cocktail with smoke infusion as one component, you’ll be ready to upgrade your cocktail recipes to include smoked cocktails as your hidden talent.

SMOKED COCKTAILS- What to Smoke

The easiest method to achieve the smoked cocktail is to smoke the finished drink. However, depending on what cocktail ingredients your using, this may result in a drink that is too strong. Generally, speaking, a sweeter drink can tolerate more smoke vapor.

Here are some options for you to consider when contemplating a smoked cocktail: you can smoke the entire drink, you can smoke one ingredient of the drink, or you can smoke the water to make the ice for the drink. One of my rules is the more ingredients in the cocktail, the more likely you can smoke the entire drink.

For ingredients, any one or a combination of ingredients can be smoked. Simple syrup, cream, citrus, etc. are all good options. Keep in mind that smoke is attracted the most to cold items so if you want an intense smoked cocktail, chill the ingredient first prior to smoking.

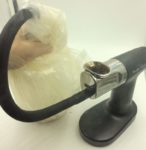
Tasting Notes: Keep in mind, when you cold smoke using a handheld food smoker, the intensity of the smoke can be high. Due to the immediate ignition of the micro chips, the smoke production is great. You can control the level of smoke by only trapping a small quantity of smoke for a lighter infusion versus allowing the container to fill completely with smoke vapor.

The breville handheld smoker

#handheldsmoker

SMOKED COCKTAILS- Balancing Smoke with Other Flavors

Whether the cocktail contains fruit, hard liquor, or cream, you can make a flavorful and desired cocktail. For a drink like the Jack Frost which contains lots of sweet juice and cream of coconut, smoking the entire drink provides great balance. For a drink like the Harvest Sparkle, smoking the simple syrup works well. Our Cranberry Bourbon cocktail goes hardy whether served hot or cold when we cold smoke the whiskey. And the Winter Wonderland enjoys a smoky layer to the cream of coconut for a luscious take on this four-ingredient cocktail. Never forget, when in a pinch, consider simply smoking the water to make the ice cubes for a no-fail option on the smoked cocktail, that will remain subtle for most any guest who is served.

Do you have a favorite smoked cocktail? Leave us a comment to let us know and subscribe to our channel to get all the tips, techniques, and recipes we bring your way. Always eager to share our expertise on all things wood fired, that’s SmokinLicious®!

SmokinLicious products used in this blog:

Wood Chips- Piccolo®

More Related reading

More related reading on smoked cocktails and specific drink recipes in our recipe blog!

Additional reading:

-SMOKY BOURBON CRANBERRY COCKTAIL

-ELEVATE YOUR KIWI CAIPIROSKA

-THE SMOKED PEAR BELLINI COCKTAIL

-STRAWBERRIES GET SMOKY FOR AN AQUA FRESCA COCKTAIL

Dr. Smoke-

Dr. Smoke- It is easy to make smoked cocktails with a handheld food smoker!

You are what you eat. We discuss the double standards of smokehouse processing emphasizing high quality ingredients but less than quality smoking methodology.

You are what you eat. We discuss the double standards of smokehouse processing emphasizing high quality ingredients but less than quality smoking methodology.

Food & Smokehouse Processing Double Standard?

listen to our blog


Self-disclosure here. I work for a USA cooking and smoking wood company that has earned recognition for its commitment to manufacturing quality products specifically suited for many culinary professions, trades and interests. Even though not required to do so, the company treats its entire product line as food additives. This is an important point for my following observations.

I’ve always been especially impressed how reputable food processors and manufacturers accept, follow and even exceed many of the numerous public regulations in place to provide consumers with safe and healthy food products. For the most part our nation’s food industry operates from a philosophy that maximizes consumer protection by prioritizing food safety. Clearly, we’d be in a world of hurt if it didn’t! In relation what I’ve come to understand with food involved with some smokehouse processing operations, I’m really confused.

Smokehouse Processing? Here’s my dilemma- A Double Standard?

Recently, I tuned into a very popular realty television program which showcases “dirty” jobs- I think you know the name. Maybe you’ve even seen it. Like most other episodes, this show highlighted a series of tough job tasks, performed by hardworking employees. This episode dealt with all food processing elements of a very high quality, perishable specialty deli meat item- Lebanon bologna.

It’s impressing that the company, for over 100 years, goes to great heights in sourcing only the best ingredients. Its processing methods seemed to be top notch. Except a few of the techniques shown in the latter stages of the show highlighting smokehouse operations. At first it was disturbing to see that the main source of smoking wood is wood slabs with bark on considered to be “mill waste material.” If that wasn’t enough, I couldn’t believe when a worker demonstrated their process of generating smoke in the smokehouses. Step #1- douse a rag with kerosene, light it and kick it in to the burn pit of the smokehouse. To me, the very defining aspect of this company’s high-quality food product, smoked bologna, has been denigrated with a cheap, uncleaned and potentially harmful fuel source and an ignition process that is archaic and potentially harmful.

For the life of me, I can’t truly understand why a company that has been in business since 1902 and is apparently known in large markets for having the very best ingredients to make its consumable food products would revert to a smoking operation that involves waste wood being ignited with nearly the same petrochemicals that fuel the likes of a diesel locomotive? Given the residuals of burnt petrochemicals, I’m not sure I’d ever want to eat any of their smoked deli meats.

You Are What You Eat

So, I guess the adage of you are what you eat apparently doesn’t have the same meaning with this company. It appears their smoking method hasn’t evolved much beyond the same dirty way done 100 years ago, before health risks came to the forefront. When considering that smoking methods are a big part of their overall food products, I can’t help but think that a double standard is in place with the consumer to suffer.

Purchase Products:

Smoker Logs

More Related reading on "What Wood for Smoking" and other great smoking and grilling tips and techniques

More Related reading on “What Wood for Smoking” and other great smoking and grilling tips and techniques

Additional reading:

-WOOD SUPPLIER- ARE YOU GETTING WHAT YOU PAID FOR?

-BEYOND PRICING: THE TOP THINGS TO CONSIDER WHEN PURCHASING COOKING WOOD

-TO BARK OR NOT

Dr. Smoke- <em>"Consistency is important with food processing and smokehouse operations."</em>

Dr. Smoke- “Consistency is important with food processing and smokehouse operations.”perfect steak!

SO YOU WANT TO MAKE YOUR OWN DRY RUBS Share on X
Listen to the audio of this blog

I love the idea of making your own dry rubs for a variety of reasons, but primarily to allow the cook to control the amount of salt and sugar, two ingredients that are in high ratios for many jarred rubs.

This guide is intended to provide tips to achieve a balance of flavors in the ingredients selected. I’m also going to provide listings of ideal ingredients for specific proteins to help stimulate your creative juices.

Dry Rubs Made Easy- Percentage of Water

Before we begin with the actual ingredients for dry rubs , let’s discuss the composition of meat and poultry and why you need to be aware of water content.

Although you may not think of water this way, water is a chemical and it is the dominate one in meat, followed by protein and then fat. For a less active, mature, “fat” animal, water can be 45% of the composition but for a younger, leaner animal it can be as much as 72% moisture. Remember, fat cannot hold water. Texture, color and flavor are affected by the amount of water in the muscle tissue. Water that is retained during forces of pressure and temperature is referred to as “bound water” while water that is lost is called “free water”. You can change the capacity of the muscle to hold the water by disrupting the muscle structure. Examples would be grinding, freezing, chopping, thawing, and salting meat.

Dry Rubs- Salt and Sugar

Hopefully, you are aware of the ingredient rule that states the first few ingredients listed on a nutritional label are the highest percentages of that item. That means, when you see salt and sugar listed in the top three ingredients, note that those dominate the rub .

Research has shown that higher salt content works very well with cuts of beef, fish, and wild game. Pork tends to do well with rubs that contain higher sugar levels. However, I tend to avoid putting salt into my rubs, preferring to add by hand when the food is ready.

Let’s breakdown the types of salt and sugar so you know how to incorporate them.

Table or Refined Salt: a fine grade salt that is made by dissolving in water which removes everything but sodium chloride. These usually have an additive to prevent them from caking in dispensers and may also contain an iodine additive.

Kosher Salt: a coarse grain that may have an anticaking additive, it is slower to dissolve on food surfaces.

Sea Salt: most are refined producing just over 99% sodium chloride but the grain size can vary from brand to brand.

Pickling Salt: contains no iodine or anticaking additive and dissolves well in water making it ideal for brine recipes

Seasoned Salts: a refined salt that contains a flavor ingredient such as garlic, onion, celery

Curing Salts: these should never be used as an ingredient in a rub as they are designed to preserve meats, which means they include nitrite and possibly nitrate.

White Sugar: this is a highly refined cane or beet sugar that can scorch at higher temperatures

Brown Sugar: this is white sugar combined with molasses so it tends to add more flavor

Dry Rubs- Pepper

It’s important to have some level of heat in your rub to balance the sweet and savory ingredients but you need to have a tempered hand to ensure that you don’t add to much. Let’s look at the pepper options:

White Pepper: considered the gentle pepper, it’s light in color and flavor with just a warm heat undertone.

Black Pepper: this can be fine or coarse and has much higher heat level than white and some cayenne peppers.

Cayenne: although I’m listing this separately due to its popularity, cayenne is a chile powder known as ground red pepper, the heat level is front of the line which means you need to add small quantities and taste before adding more.

Chile Pepper: these are the peppers that have a wide variety of heat levels. Common names include: Ancho, Chipotle, Pasilla, New Mexican, Guajillo, Habanero, Jalapeno, Bhut Jolokia, Aji Amarillo.

Dry Rubs Transition- Spices and Herbs

(more…)

Our not so smokey Smoked Turkey is from cooking this on the gas grill, not on a smoker. We selected this photo because of the great color- not dark like a traditional smoker can impart!

Our not so smokey Smoked Turkey is from cooking this on the gas grill, not on a smoker. We selected this photo because of the great color- not dark like a traditional smoker can impart!

THE NOT-SO-SMOKEY SMOKED TURKEY Share on X

Listen to the audio of this blog

Listen to our blog #smokinlicious- smoked turkey

Turkey is one of those items that is generally made for a special event – Thanksgiving, Christmas, New Year – and not associated with everyday cooking. I’m here to tell you that it’s easy to enjoy turkey any time of year when you use a gas grill for the cooking and smoke infusion. All you need is a turkey (preferably one under 15 lbs.), 6 wood chunks, a water pan with hot water, and your favorite gas grill.

Smoked Turkey- Turkey 101 Prep

Preparing the Turkey

#freshturkey

I’m fortunate to have a local fresh turkey farm, Sprague’s Turkey Farm in Portville, NY, close by so I’ve ordered one that is under 14 lbs. Before preparing the turkey for marinating overnight, I first need to remove the parts that are commonly found inside the turkey. This includes the neck, heart, liver, and gizzard which is part of the turkey’s digestive tract. These parts do make for great stock so if you can, save them to add to a stockpot down the road.

Once the organs and neck are removed, it’s important to wash the entire turkey under running water. After a thorough wash, pat dry with some paper towels and place in a shallow pan for the rub application.

Herb and Spice Rub

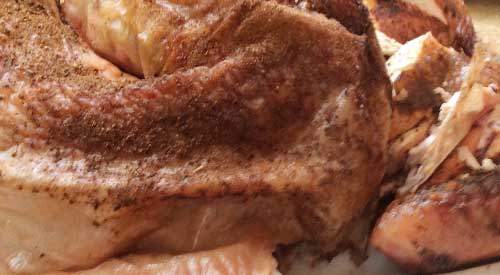
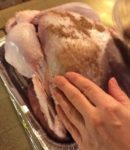
Gently placing the rub on the outside of the Turkey

#turkeyrub

After washing and patting dry the turkey, I trim the excess skin from the neck area and then begin applying the rub. I’ve combined an assortment of herbs and spices for my rub as I tend to like a potent mix of ingredients to balance the fresh meat and smoke. My rub includes: allspice, clove, basil, cumin, cardamom, coriander, cinnamon, celery salt, garlic and onion powder, oregano, orange and lemon peel, paprika, and ancho chili powder. I make sure to cover the entire surface of the bird. I add a few drops of avocado oil and then apply additional rub. This will be refrigerated overnight to allow the flavors to marry and penetrate to the meat.

Tasting Notes: Feel free to incorporate different herbs and spices in your rub as there are no rules when it comes to combinations.

Smoked Turkey- Smoking on the Gas Grill

Placing the Turkey on the grill

#twozonecooking

As you can see in some of the photos, this was a cold day at the grill, with a temperature below 25°F. I prepare my LP/Gas grill by first removing one of the grill grates, exposing two of my burner shields. To one of the shields I place 3 double filet wood chunks from SmokinLicious®. Now I lite only two burners; the one with the wood chunks and the one directly next to that. I set these burners to medium heat to start. Just before I’m ready to grill, I check the temperature readout and adjust my heat setting until I hit my target temperature of 325°F.

Time to add the rubbed turkey to the unlit side of the grill and my water pan right next to the bird. I insert a thermometer and close the lid. Basically, for the next couple of hours, I just need to monitor that the water pan has enough hot water in it and the bird gets spritz with water to keep the skin moist.

Tasting Notes: Although I’ve placed my water pan to the side of my turkey, between the lit and unlit sides of the grill, you can use this as a drip pan and place this directly under the turkey. I elected not to do this today due to my low outdoor temperature.

Time to Serve Your Smoked Turkey!

Our not so smokey smoked turkey on the table for all the guests to enjoy

#turkey

If you’ve maintained the steady temperature of 325°F and hot water in the drip pan, you won’t need to stay with the grill during most of the turkey’s cooking time. My skin has crisped up thanks to maintaining moisture both on the bird’s skin and in the cooker with my water pan. I remove the turkey and take it to the kitchen where I cover it for about 30 minutes prior to carving. It’s super tender, moist, with a crunch to the skin. The best part is that the smoke is subtle and does not over power the fresh meat.

That’s why the two-zone method of smoking is perfect when your feeding a variety of tastes. Those that tend to avoid smoked foods will find this full of flavor that is well balanced due to our rub and consistent cooking temperature. My turkey of 13-1/2 pounds took just about 4 hours to finish with very little effort on my part, even with a 22°F outdoor temperature and wind chill. The best part is my oven was free to cook a bunch of side dishes so everything was timed perfectly for the table.

What’s your favorite preparation for turkey? Bringing innovation to wood fired cooking with recipes, techniques and the science behind the fire, smoke, and flavor. That’s SmokinLicious®.

SmokinLicious® products used in this blog:

Wood Chunks- Double Filet

More Related reading

More related reading on Smoked Turkey and the different methods of preparation1

Additional reading:

-WHY TWO-ZONE COOKING METHOD LET’S YOU WALK AWAY FROM THE GRILL

-SMOKE A TURKEY- LEARN HOW

-SMOKED HAM ON THE GAS GRILL

-CORNISH GAME HEN MEETS SMOKE IN THE ORION COOKER

Dr. Smoke- Everyone forgets about the extra oven almost everyone has- the lp/gas grill! So this year we prepared smoked turkey using the gas grill with wood chunks providing the smoke!

Dr. Smoke- Everyone forgets about the extra oven almost everyone has- the lp/gas grill! So this year we prepared smoked turkey using the gas grill with wood chunks providing the smoke!


« Previous PageNext Page »